
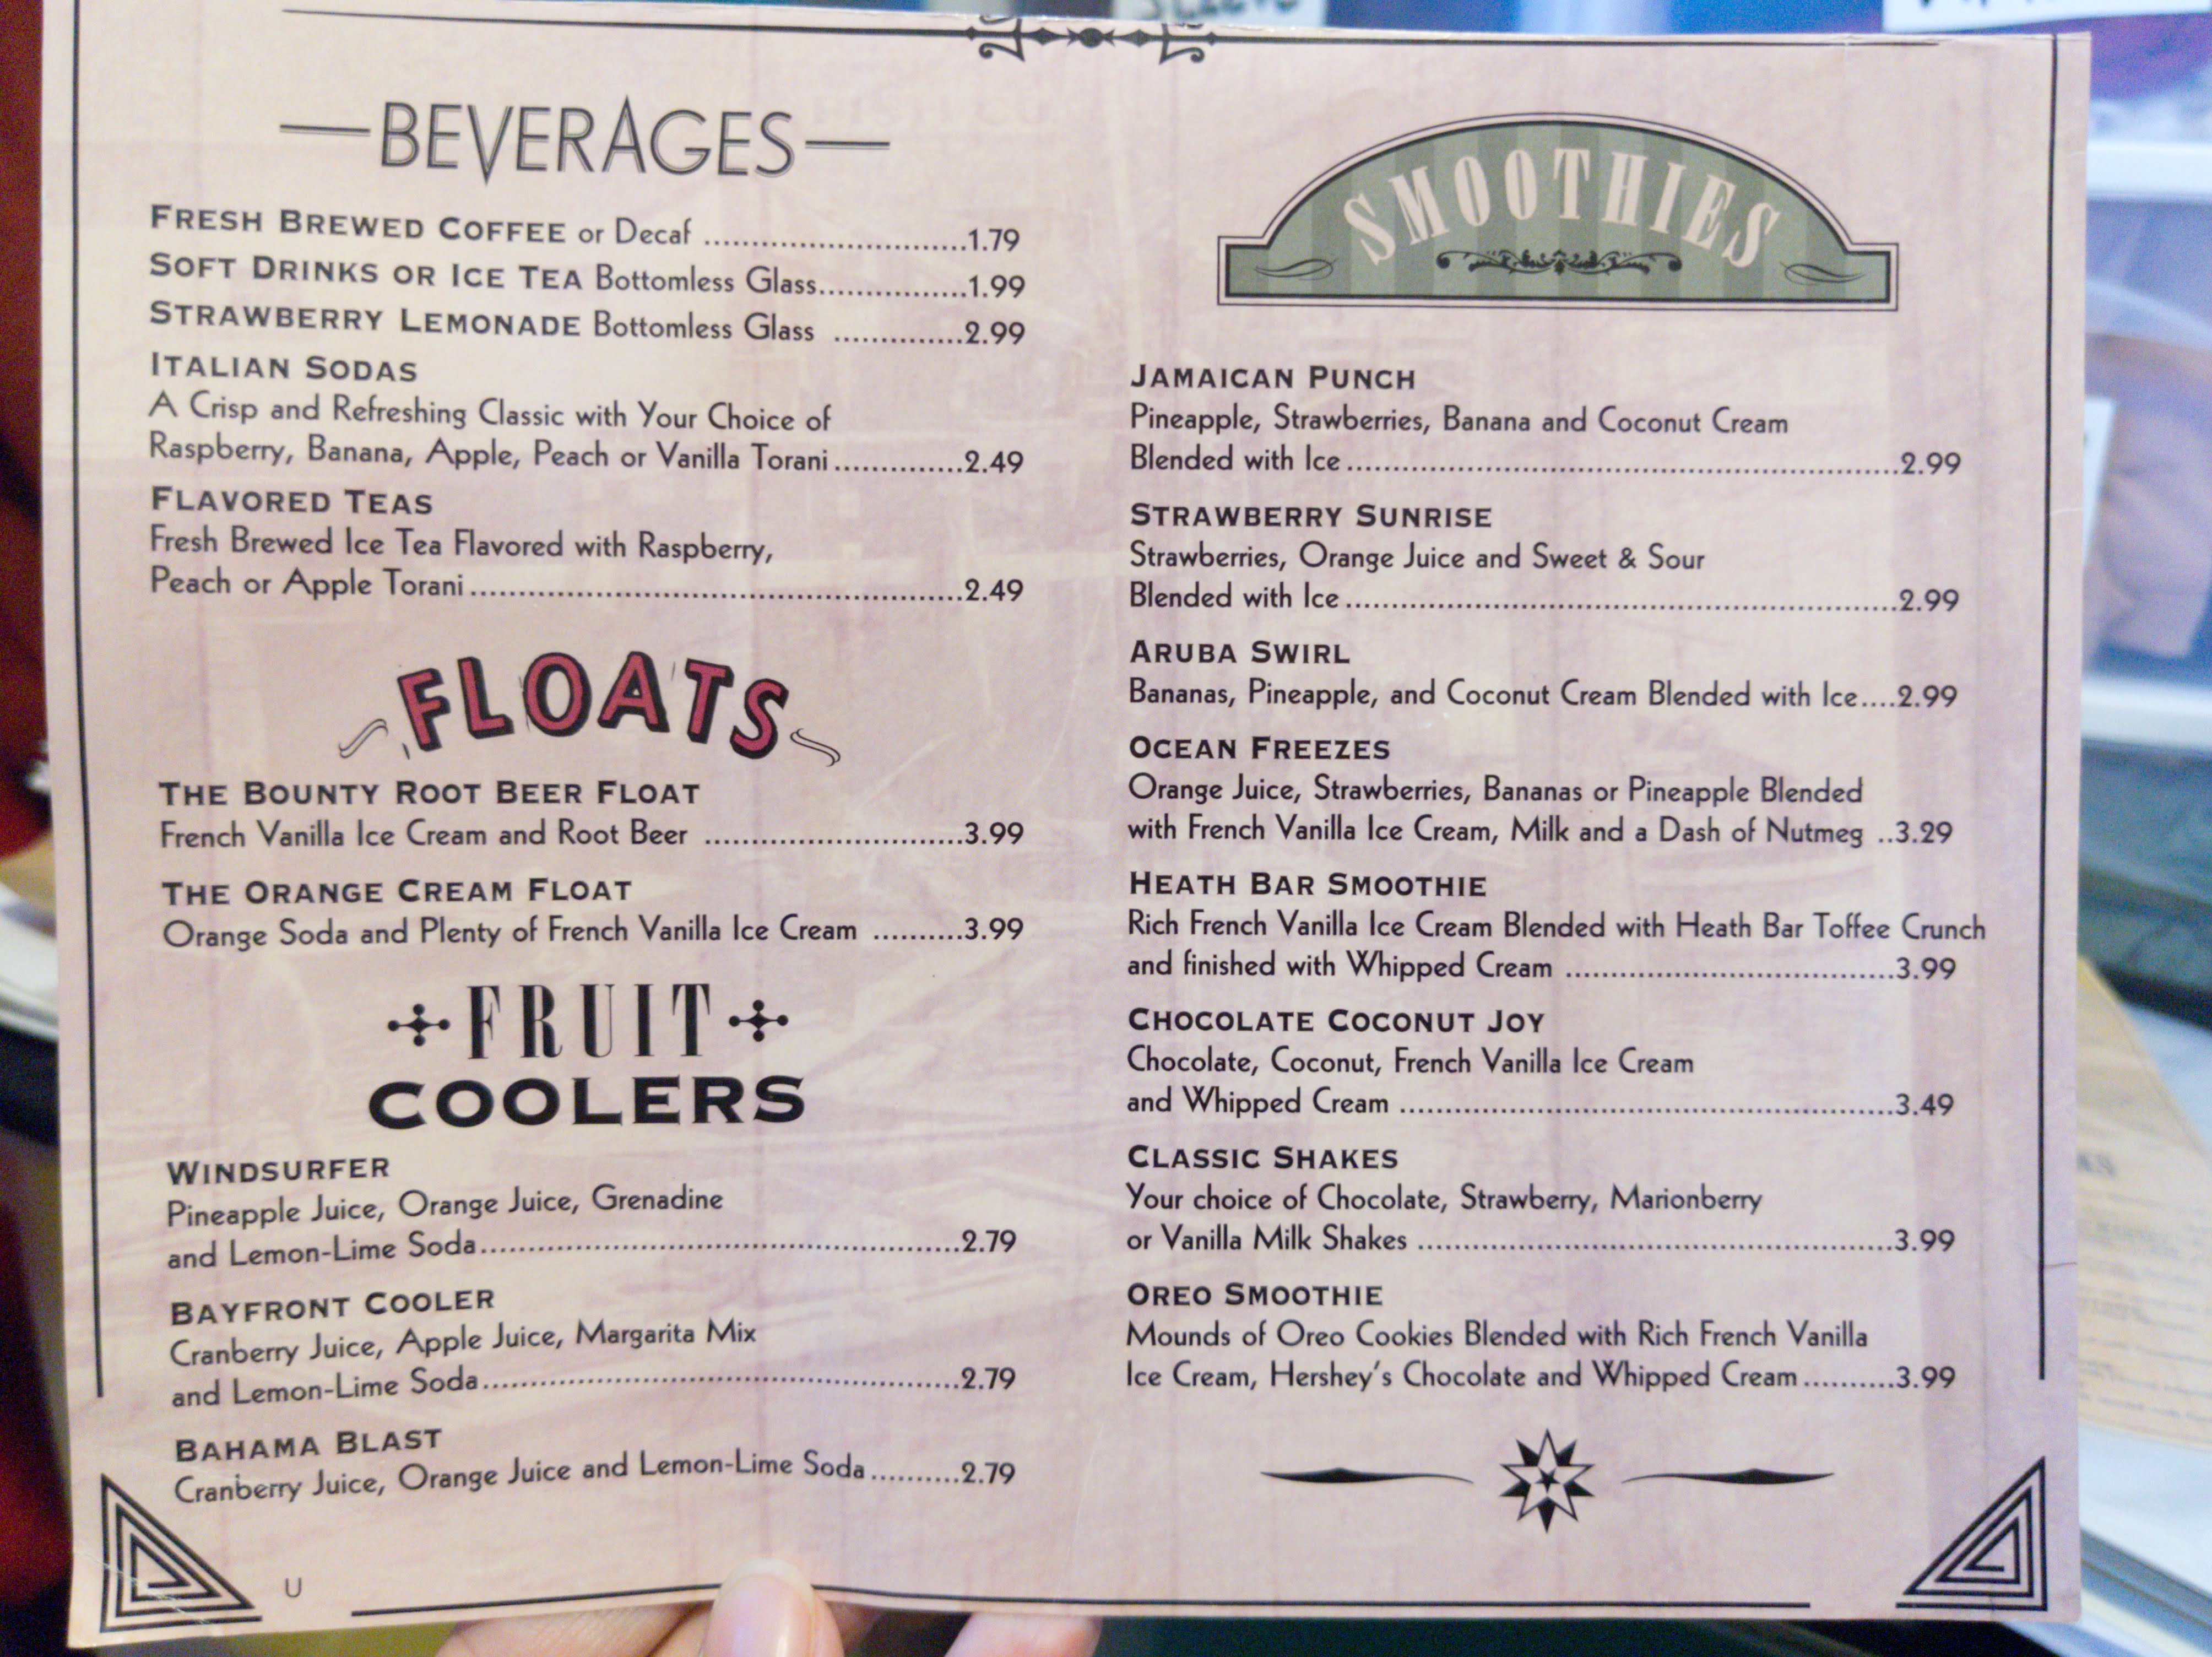
Welcome to your New Showit Blog! This is your very first blog post. You can edit or delete it by logging into your WordPress Dashboard. Additional details about blogging with Showit can be found here.
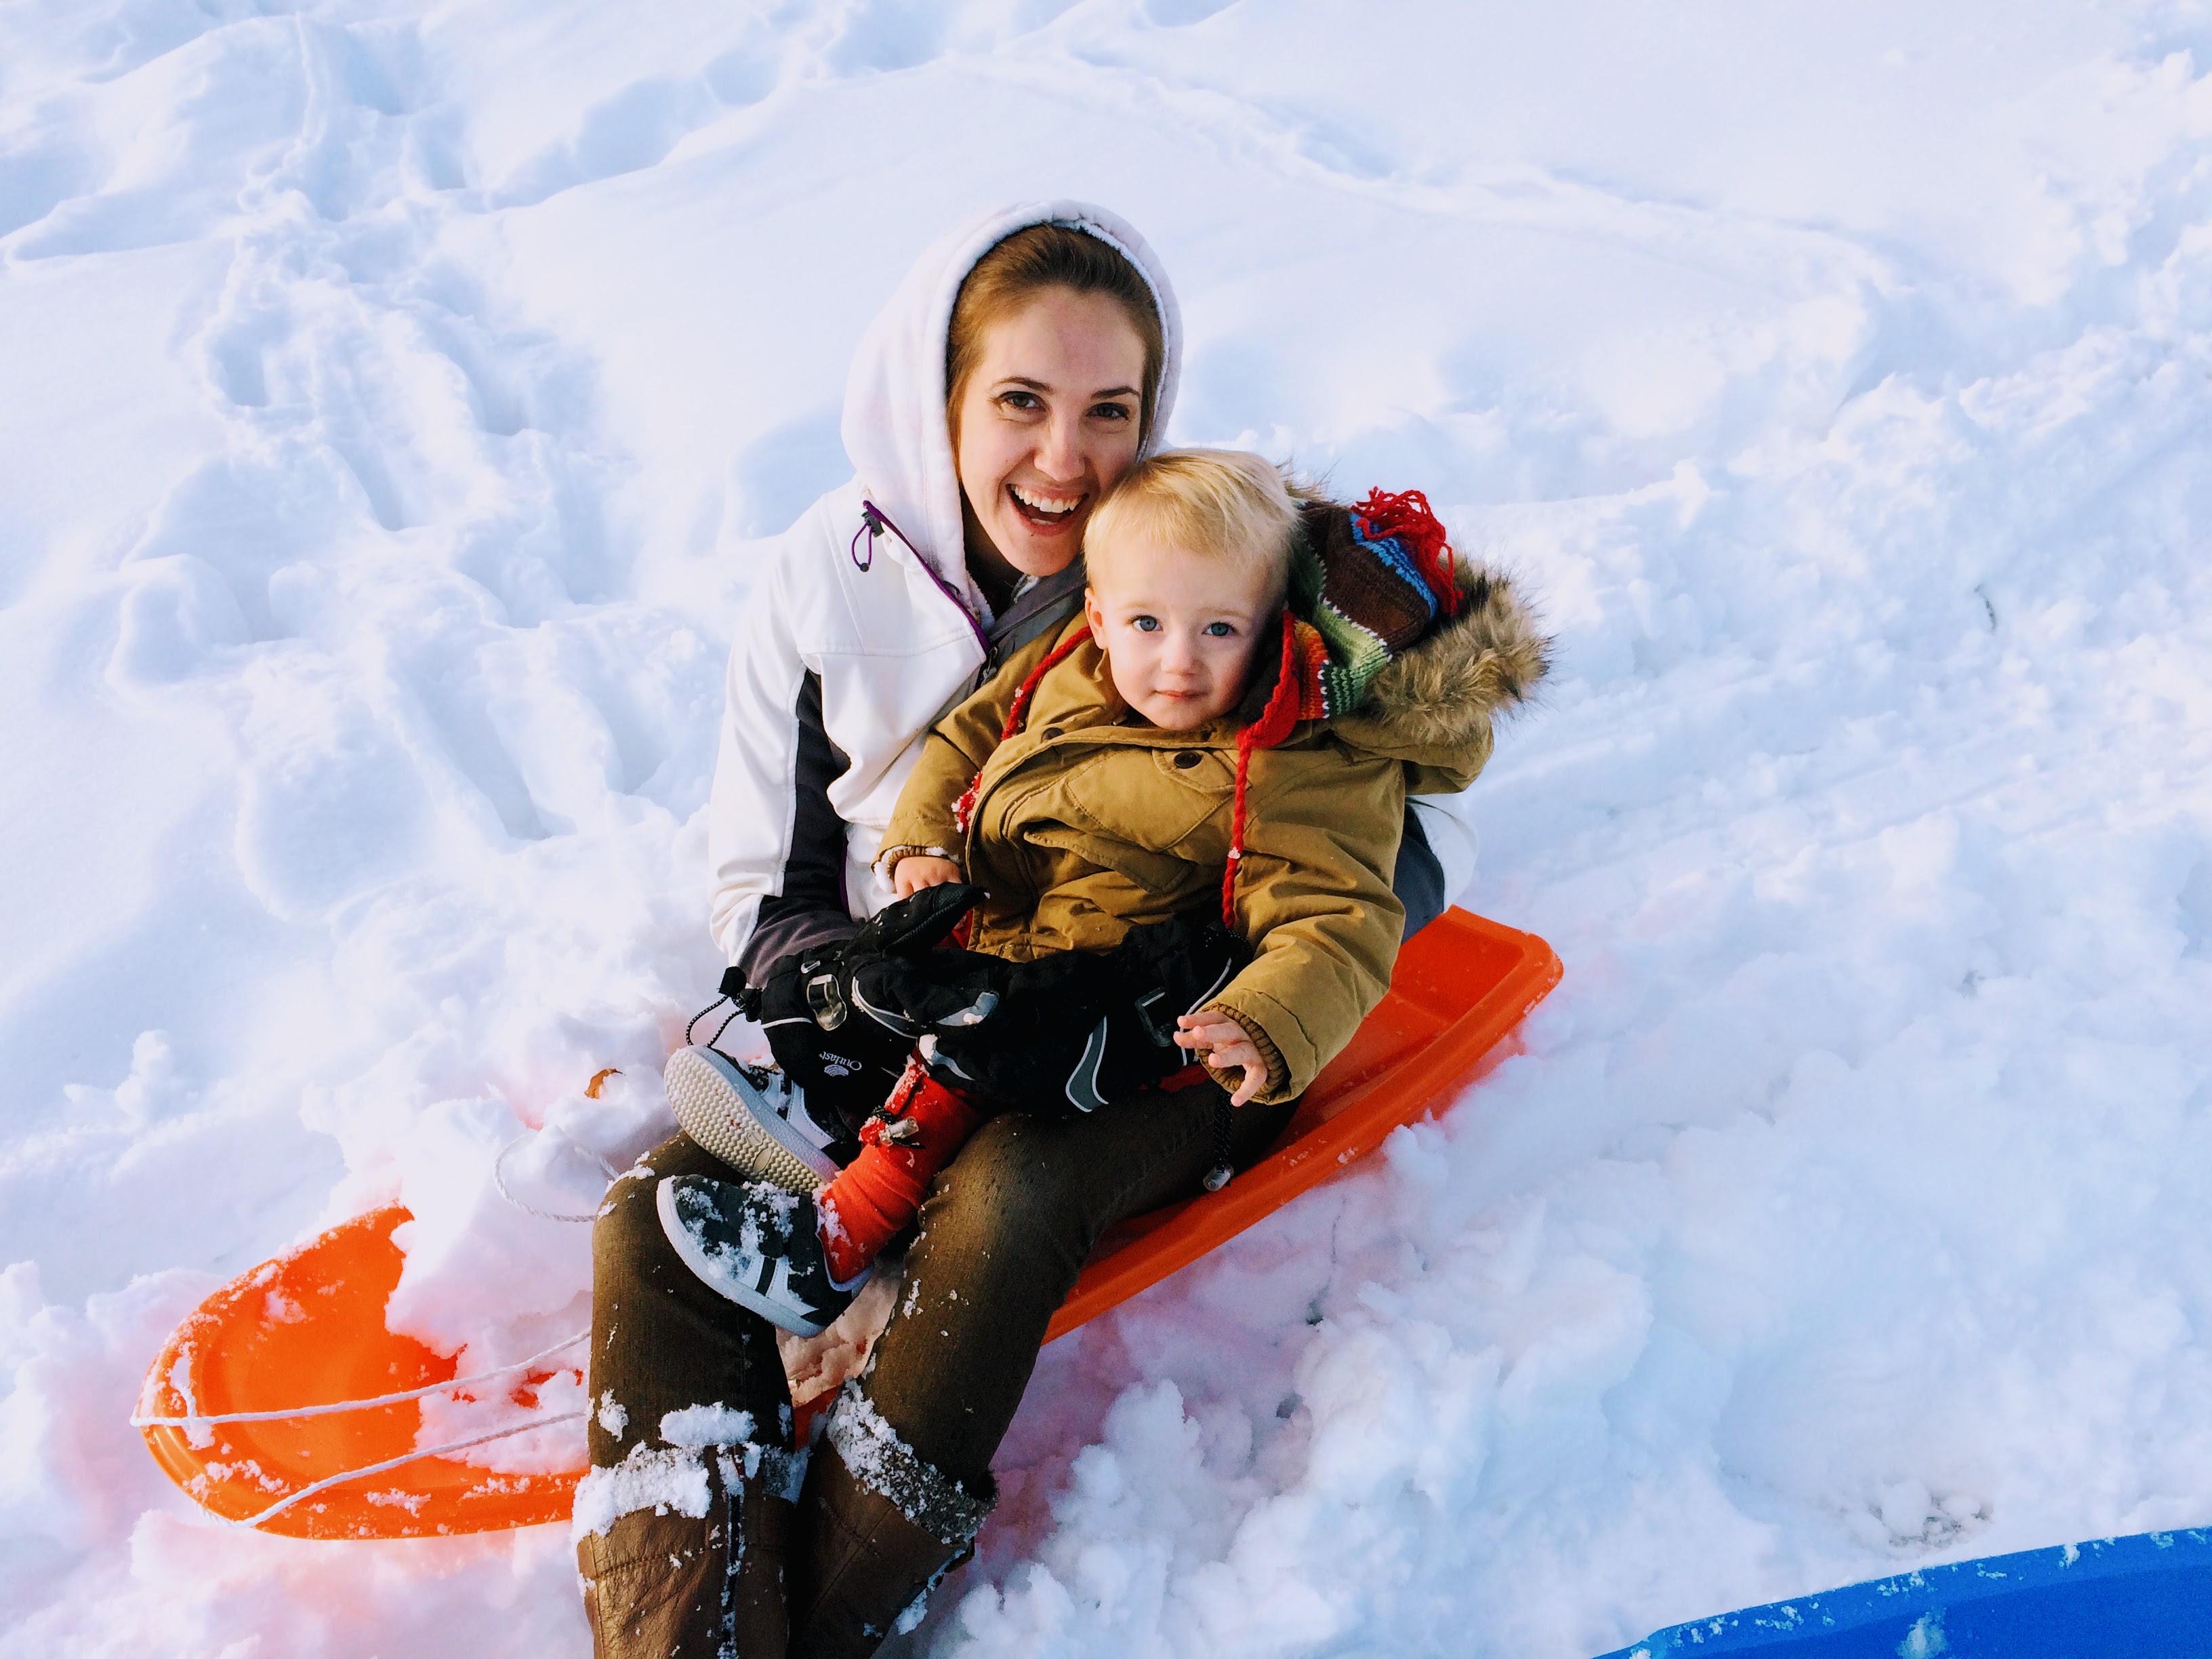
Where we live, we are soon expected to get about 3 feet of snow. It hasn’t really snowed that much since my sophomore year of High School! And I am stoked for a lot of fun in the snow. But let’s be honest, snow days can be really long if not planned out a little. The prep, the “find the missing mitten”, the clean up of drippy muddy mess when the kids all come tromping with their gear back in.
Here are some ways to prep for a successful day in the snow with the least number of tears possible.
- Lay out the gear ready to go.
- I’ve found that if we don’t get a little organized in the start before the eager ravenous for snow adventure crowd suddenly can’t find that glove…. the whole day gets set off on the wrong foot. So whether it is a ski day, sledding, etc, it just helps to lay as much as possible out so my energy and positivity doesn’t get drained in the first 30 minutes of the day. And it is SO easy to forget the little things like hand warmers which really do go a long way.
- Set up a shed and drip dry zone
- While we may bundle the crew tightly, it is just inevitable that you may spend 15 minutes getting the 3 year old ready for 10 minutes out in the snow, only to do that again and again throughout the day. So with those extra trips in and out, we lay down several beach towels as our shed zones to help avoid slip zones and mud getting tracked in.

- Pull out the crock pot soup
- Whether it is a freezer meal I have been meaning to use or a simply go to soup to put in the crock pot in the morning, I too want to play in the snow with my kids instead of slaving away in the kitchen.
- Prepare what “Snow Activities” you will do
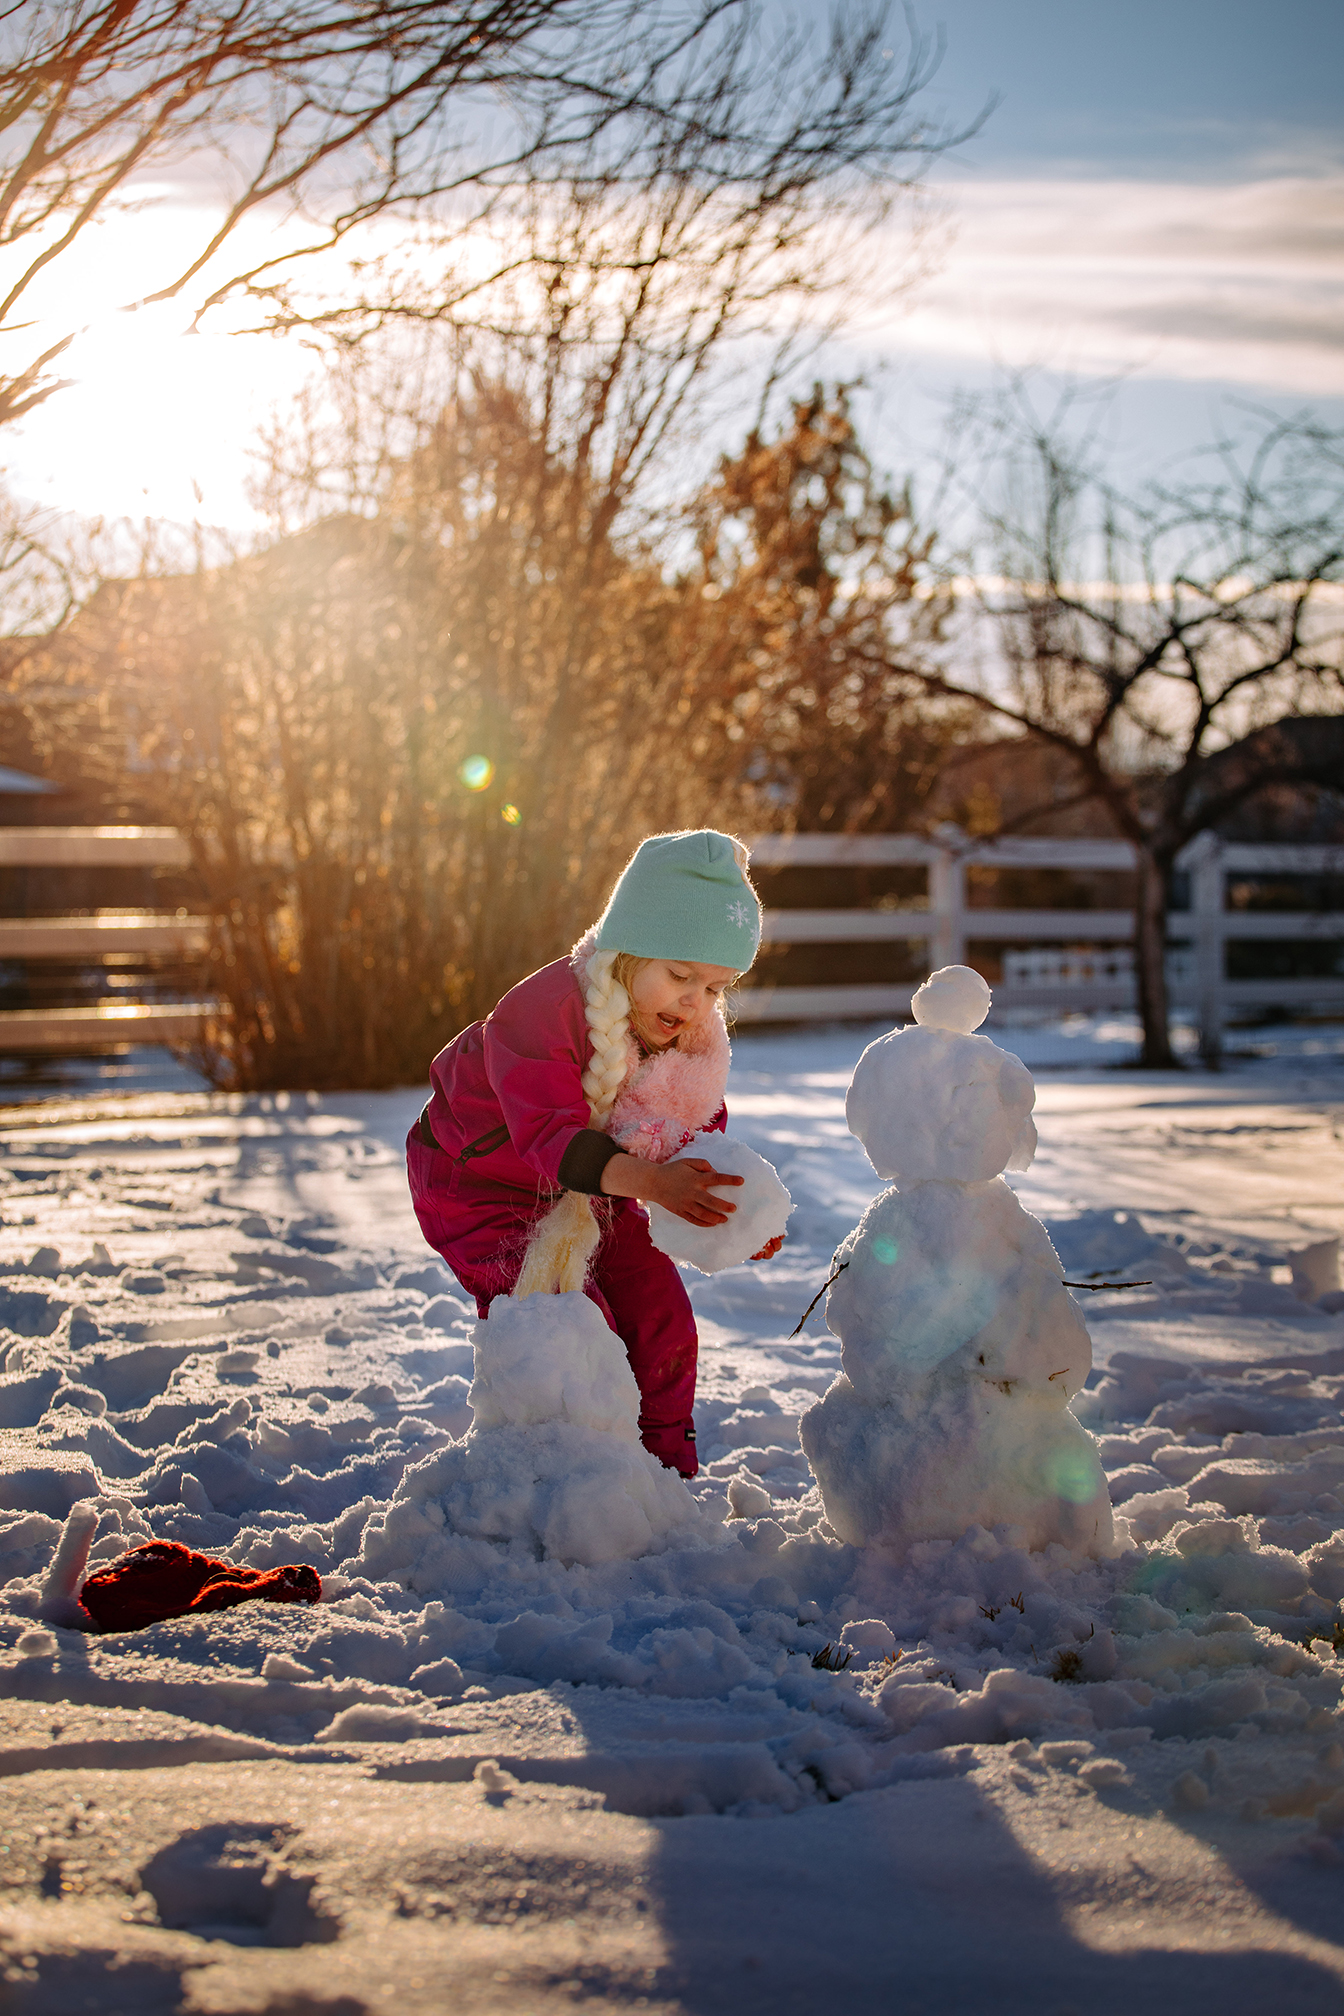
- This Christmas my sister gifted one of my kids a “Snow Man” kit, cutest thing. You can turn your snowman into a clown with all kinds of funny faces including the traditional top hat. Only thing missing was a fun scarf. Cute one from felt or pull aside a smaller unused one. Infinity scarves stay on well or simply tie the scarf so it won’t blow off in the wind. If building a full snowman seems too daunting with the quality of snow, make a mini one! I love this one on the cover of Our Photographers Magazine. You can always use beads or just little pebbles for the eyes and mouth. We made these little accessories out of felt for this mini snowman family. I will share in another post the fun scavenger hunt we did for our babies announcement in another post. This little family was at the end with the big news.
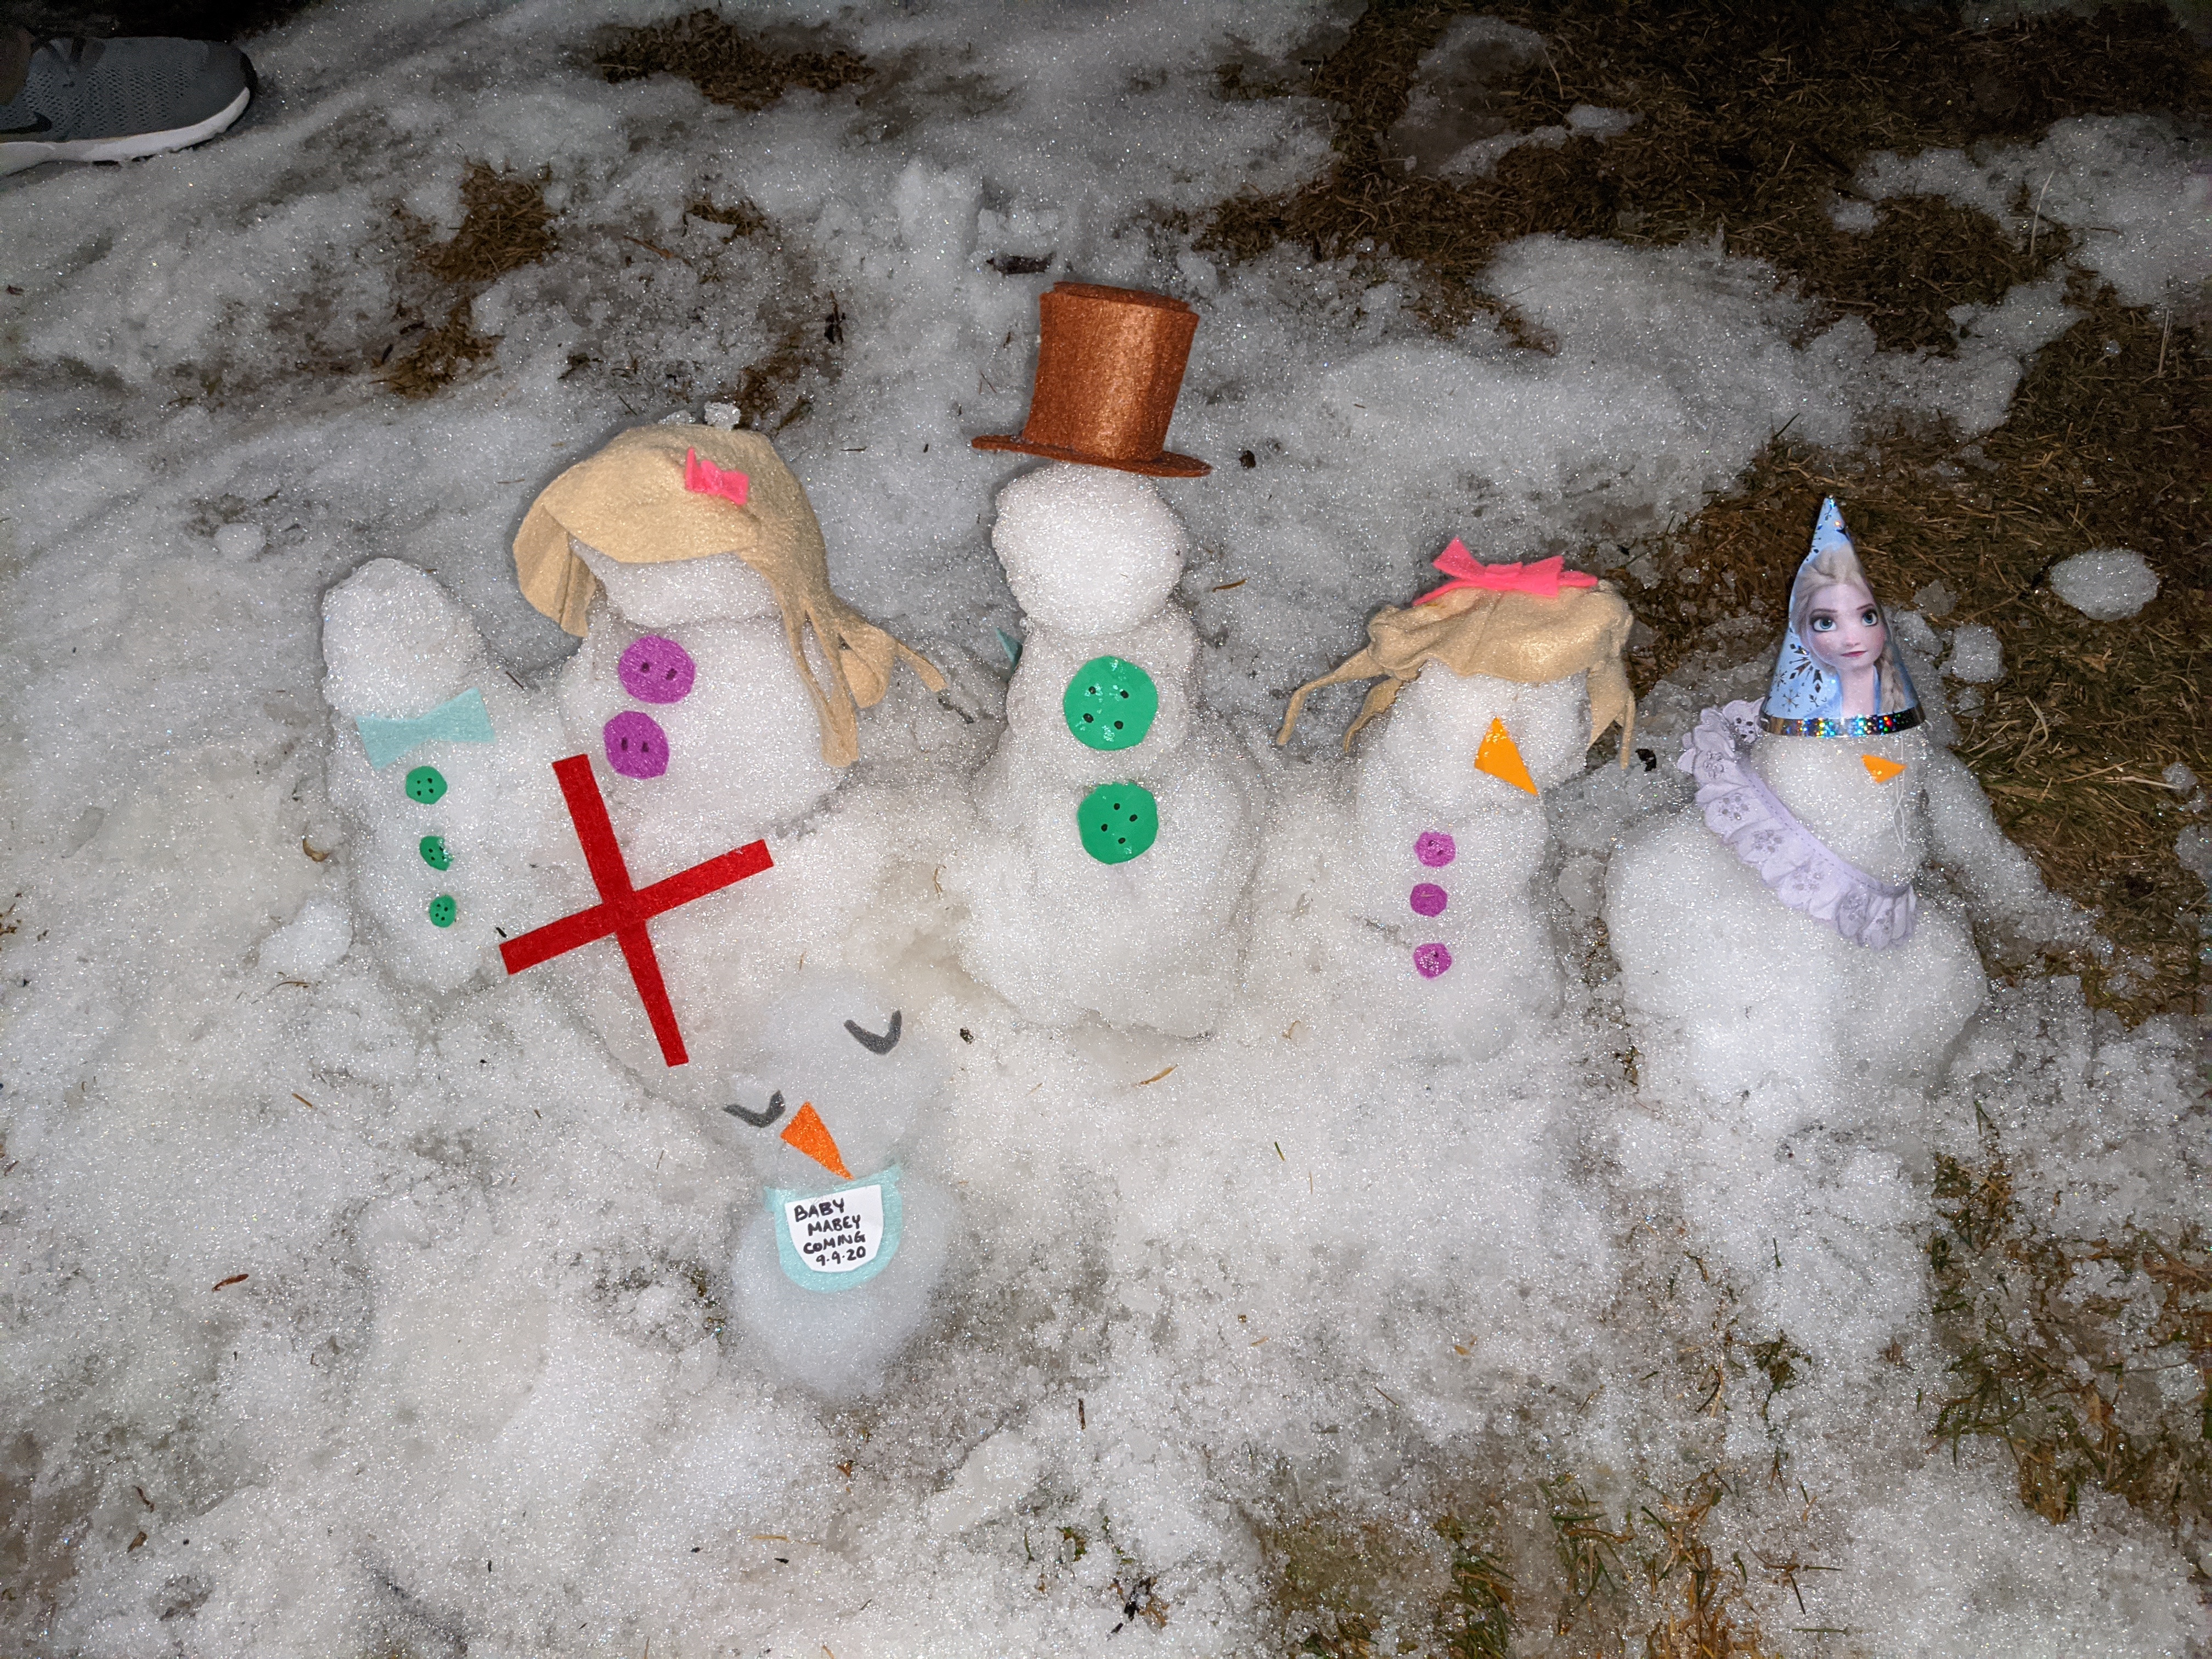
With this smaller size of snow men, you can use medium sized buttons or pull aside doll clothes to dress them. American Girl doll sized clothes are about the right size for mini snowmen.
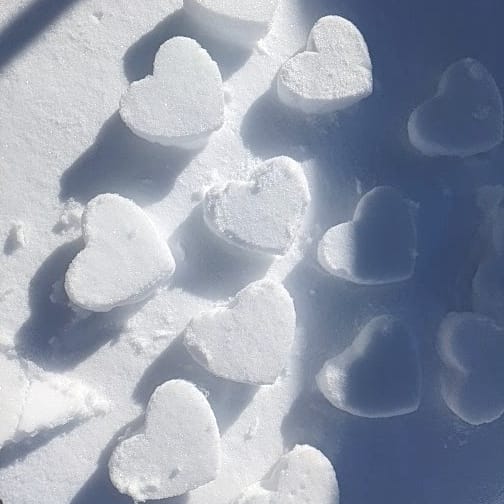
- Another fun activity we had a blast with is making snow treats. Just educate the littles about what is “clean” snow and which isn’t. And to stay away from the yellow snow! Ewww! To make snow treats… simply A. Use cookie cutters to cut out basic shapes, such as a heart over hardened topped snow or B. Add some jello gelatin (with a spray bottle) to help solidify the treat, then use the cookie cutters to make the shape and place on a tray in the freezer until ready to play. We like to add drizzled sweetened condensed milk, chocolate syrup or snow cone flavoring and fruit to our creations. Or if you drizzle on cream you can let the kids “melt” their creations in their hot cocoa to cool it off.
- We pull out the camping shovels to build snow caves, unbury the sleds out of the garage and anything else that might be used for snow fun. Sand toys for the beach can play a fun simply role in playing in the snow for the little ones. If there is not enough snow to make a full igloo, make one for the toys. Simply pack it down heavy then start digging a hole with a large spoon or garden shovel.
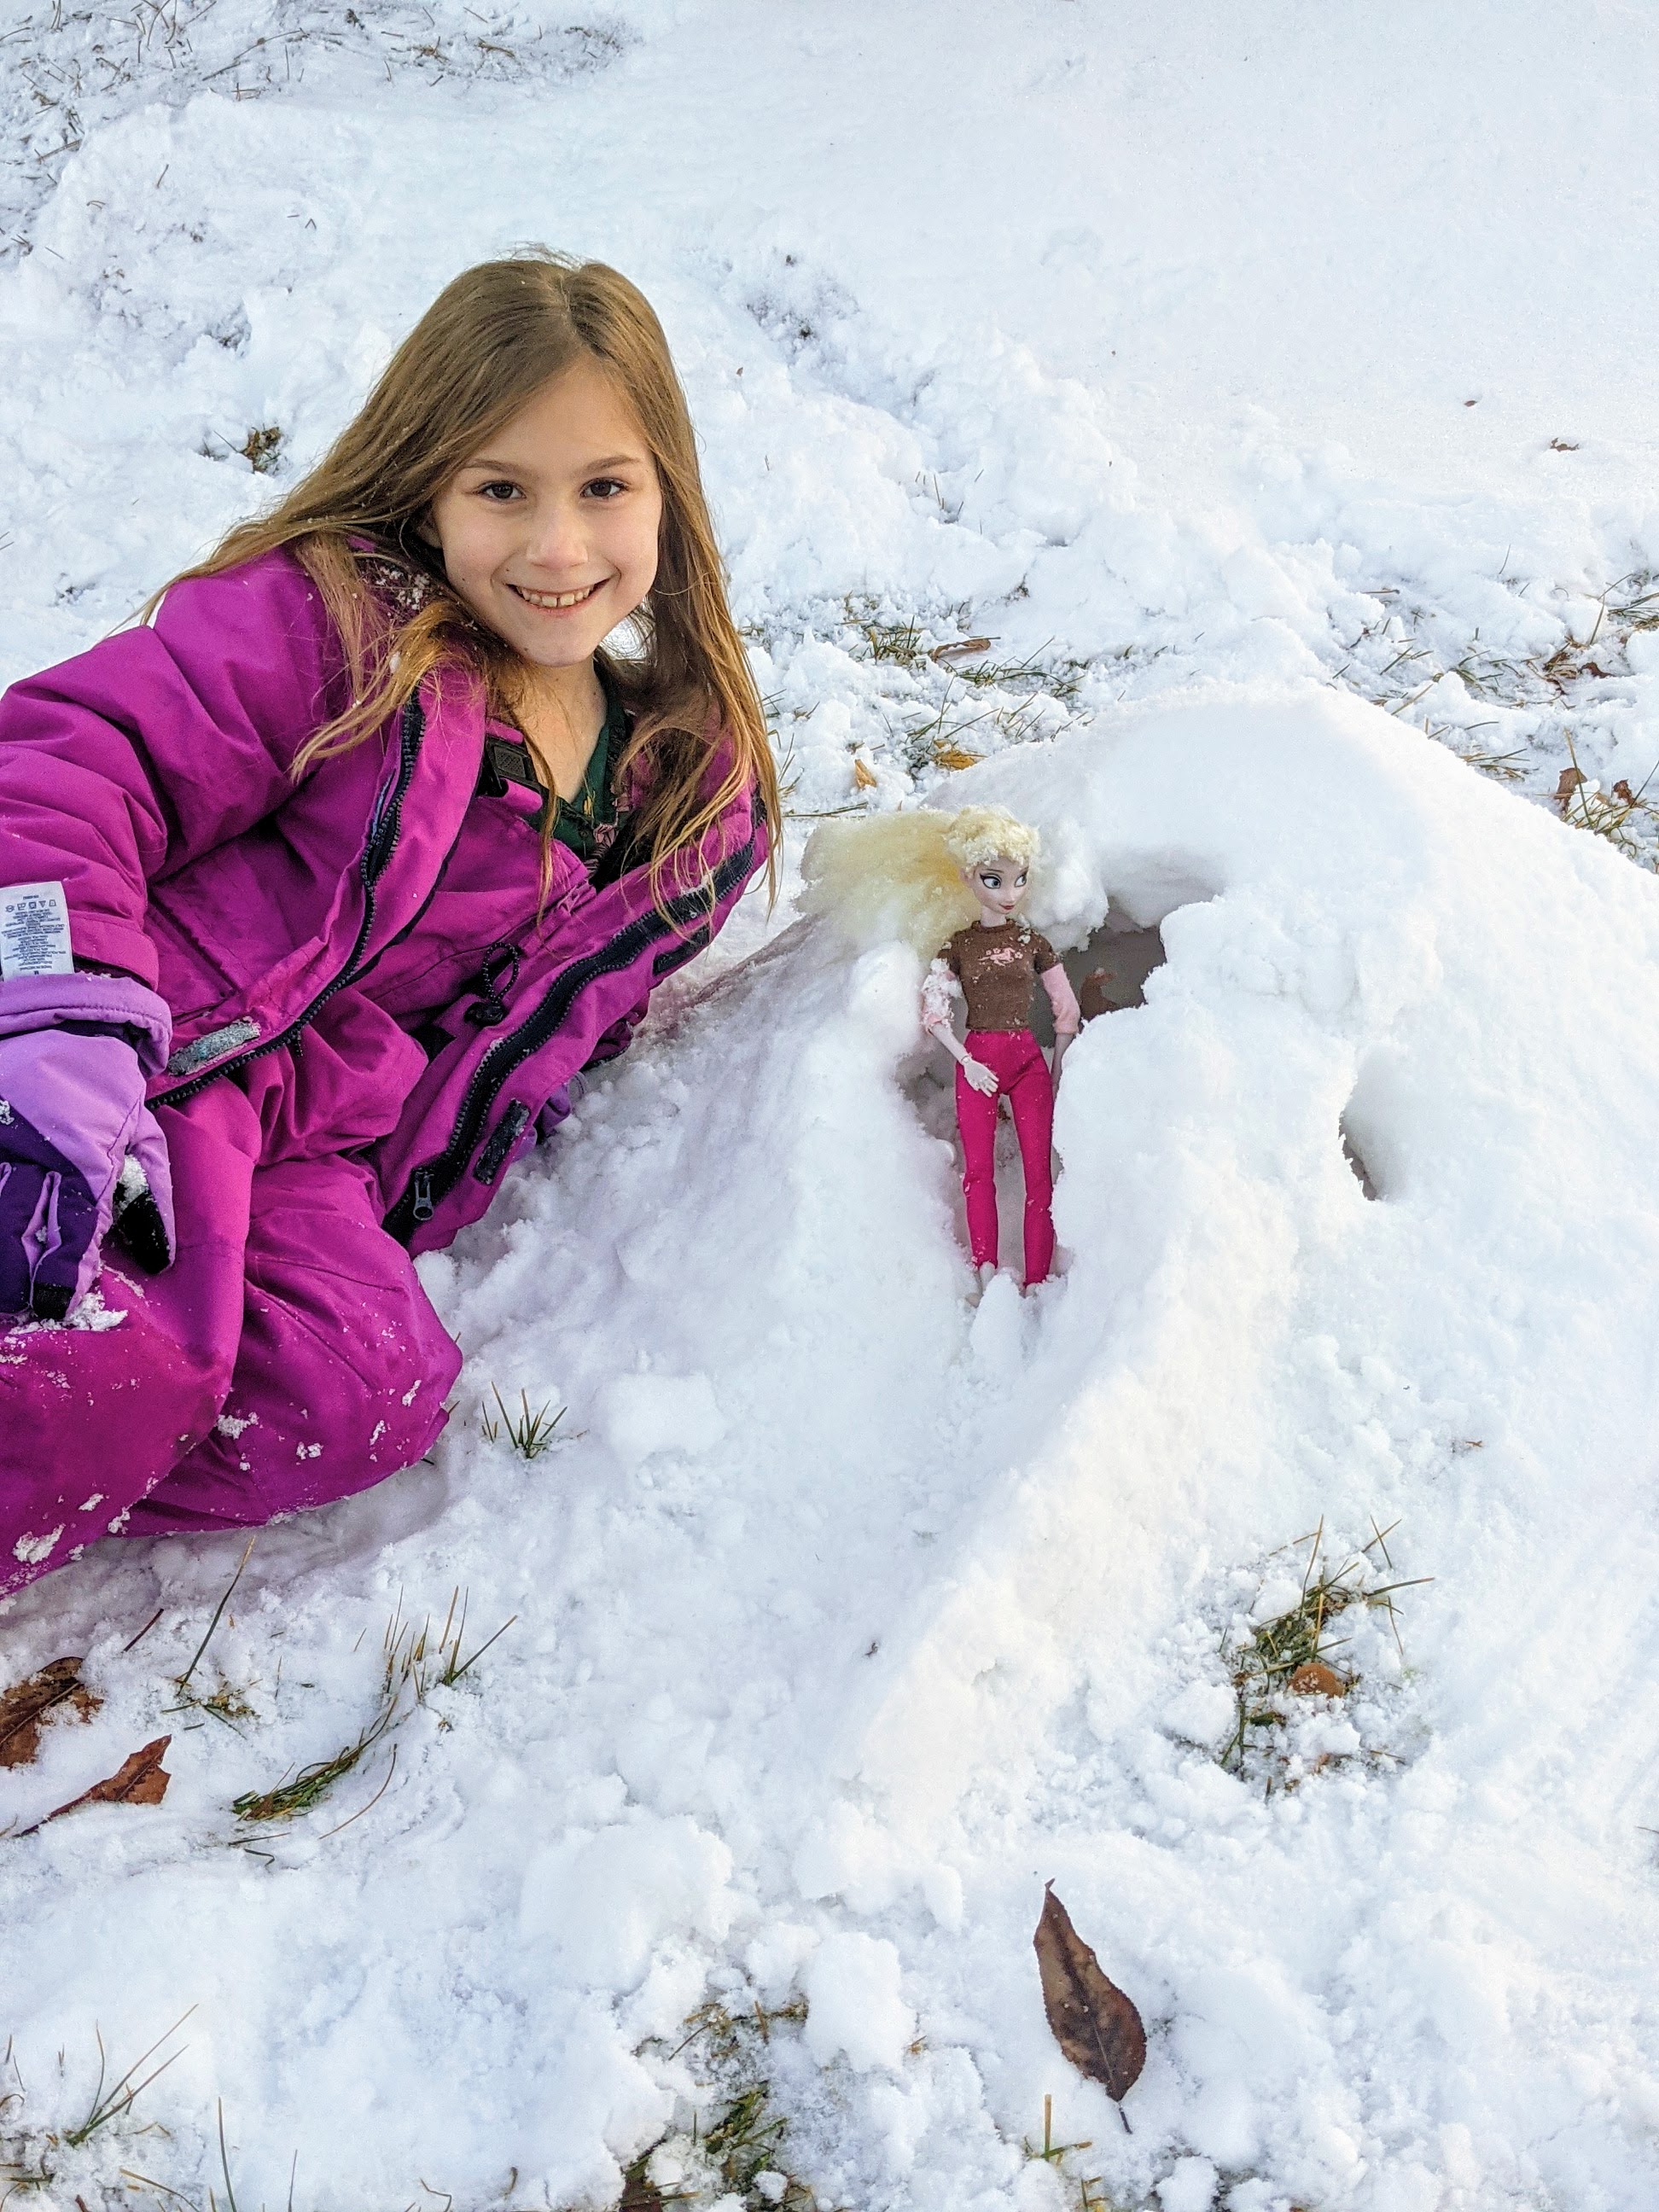
My 8 year old and I had a blast making a mini igloo for her Barbies.
- Encourage warm up breaks with hot cocoa and granola bars and bananas.
- It take a LOT of energy outside of the normal playing in the yard in the snow! Rather than just cookies and hot cocoa, bring out the granola bars and some energy fruit like bananas. Otherwise prepare for some tired grumpy bumps.

Keeping those stir-crazy little bodies busy during quarantine is not easy! So I have come up with 10 fun activities to do in the backyard to keep those little imaginations busy, energy to be set free and family bonding to grow.
-
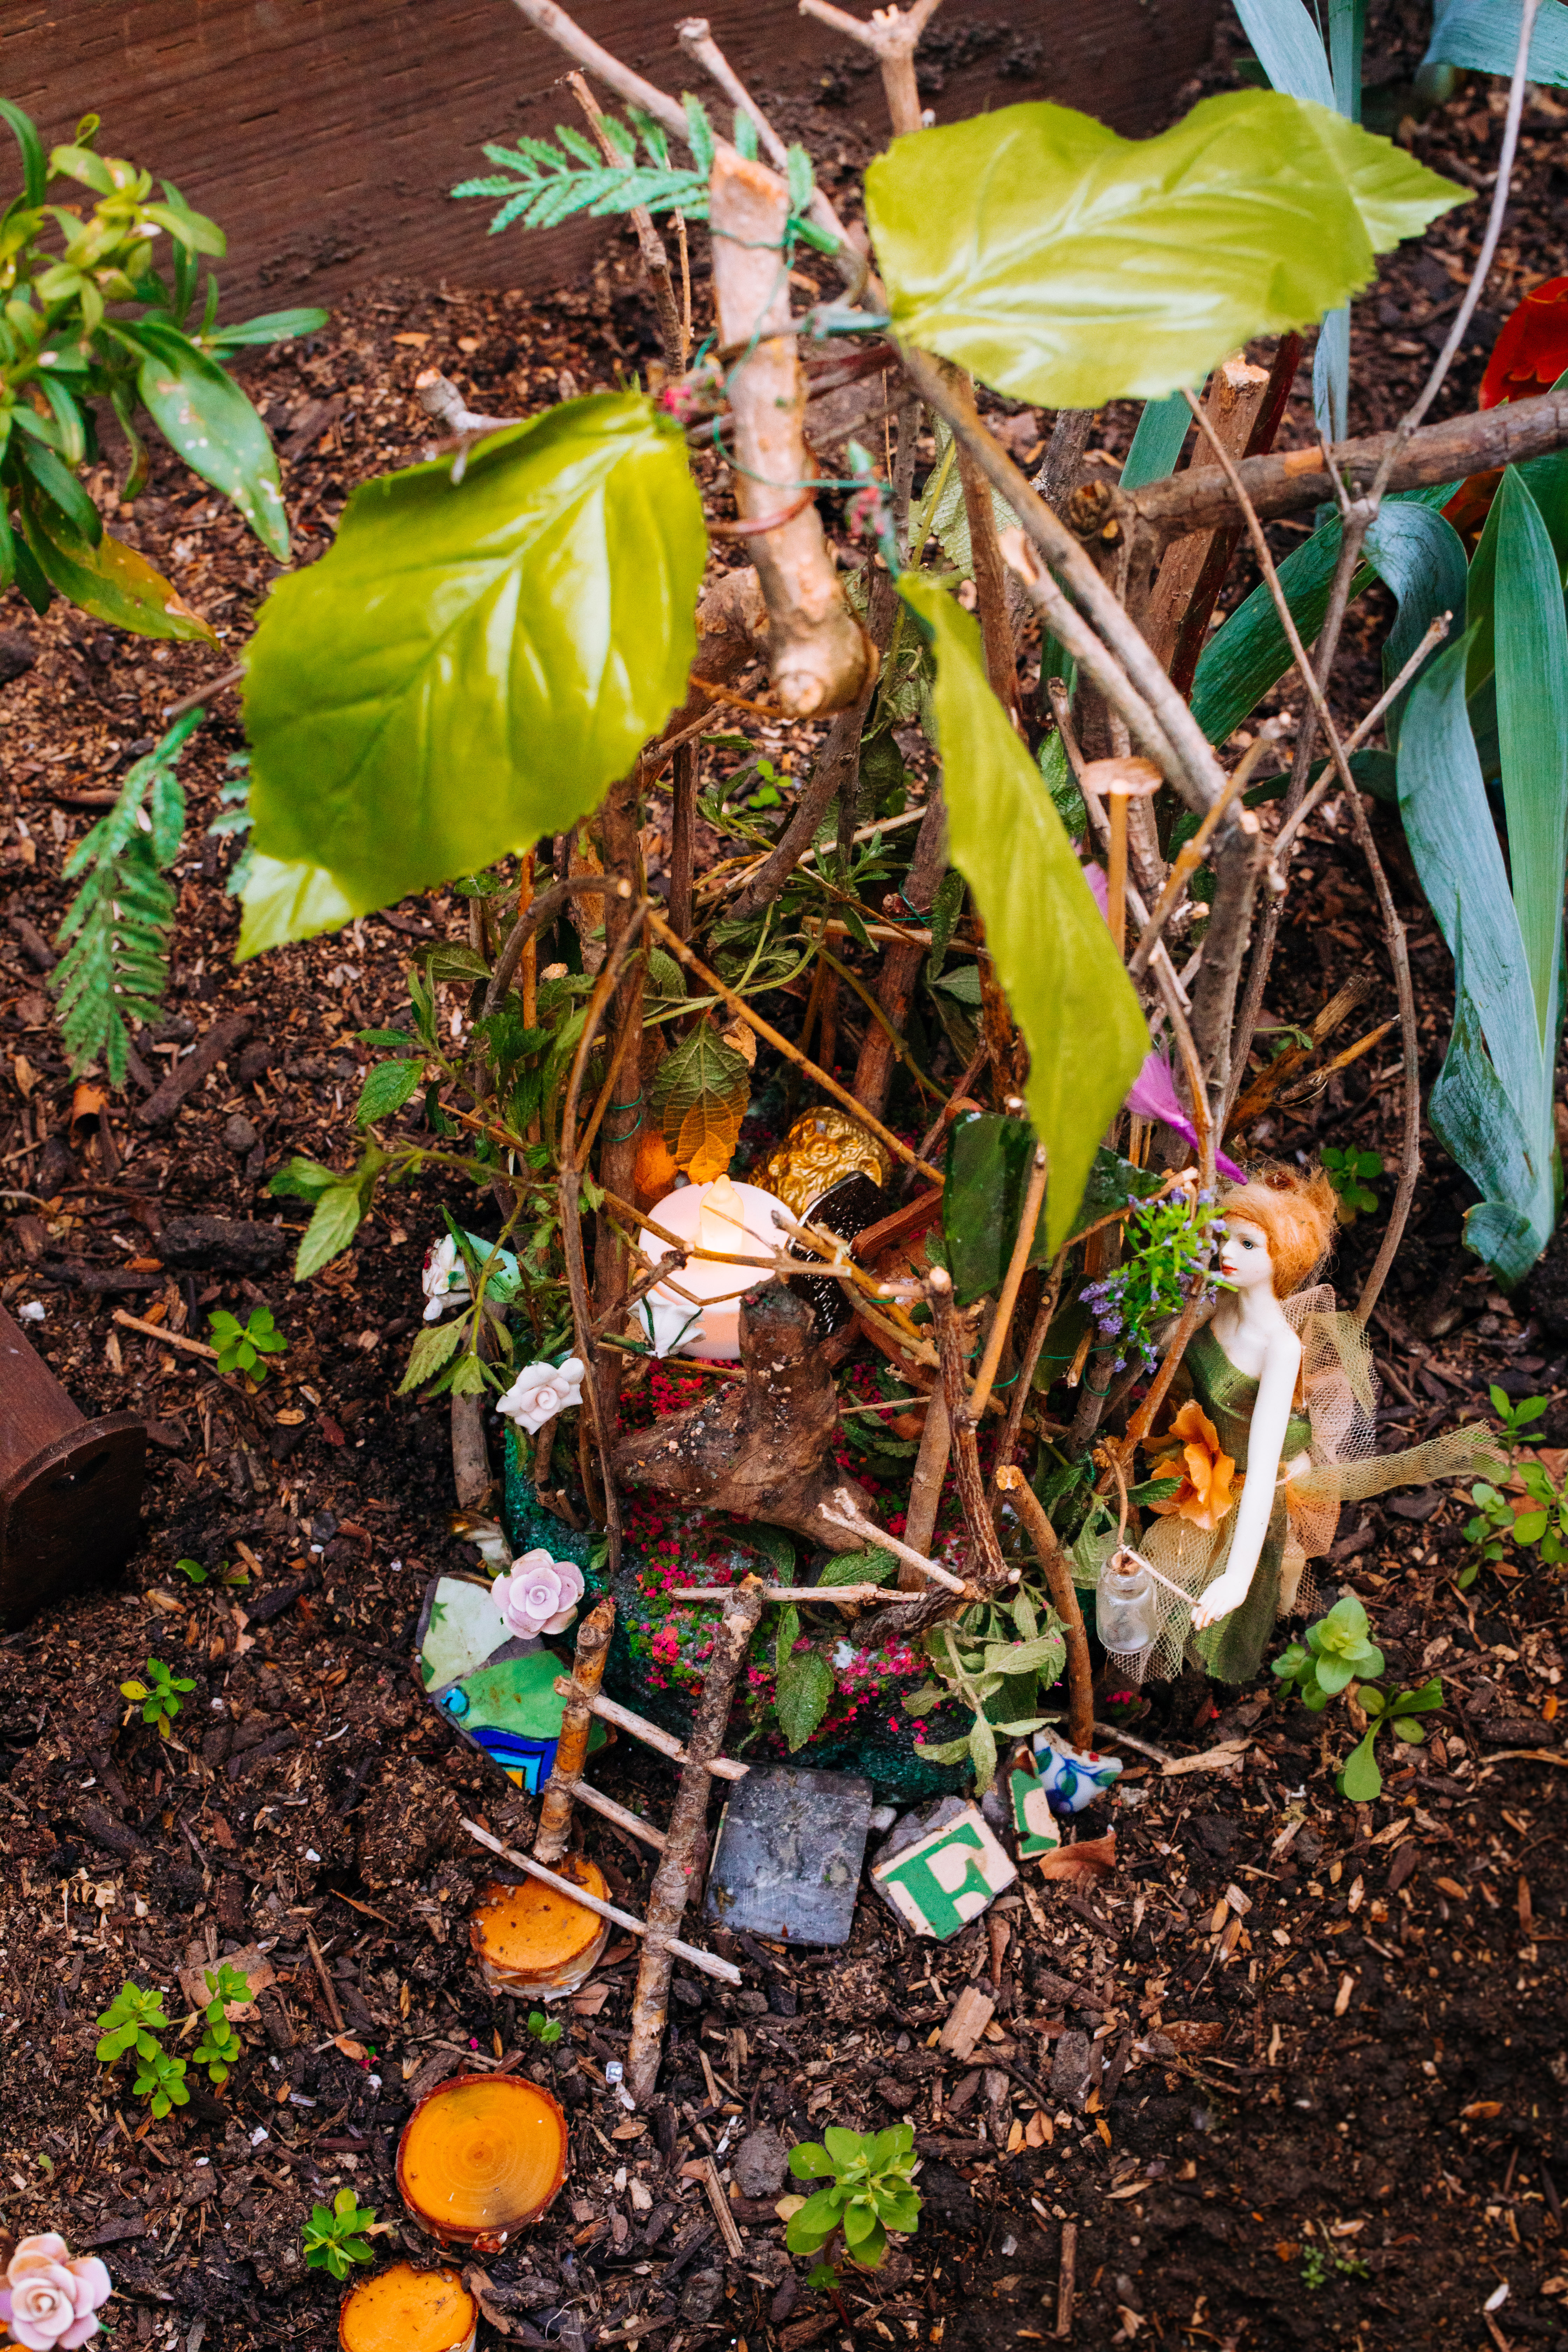
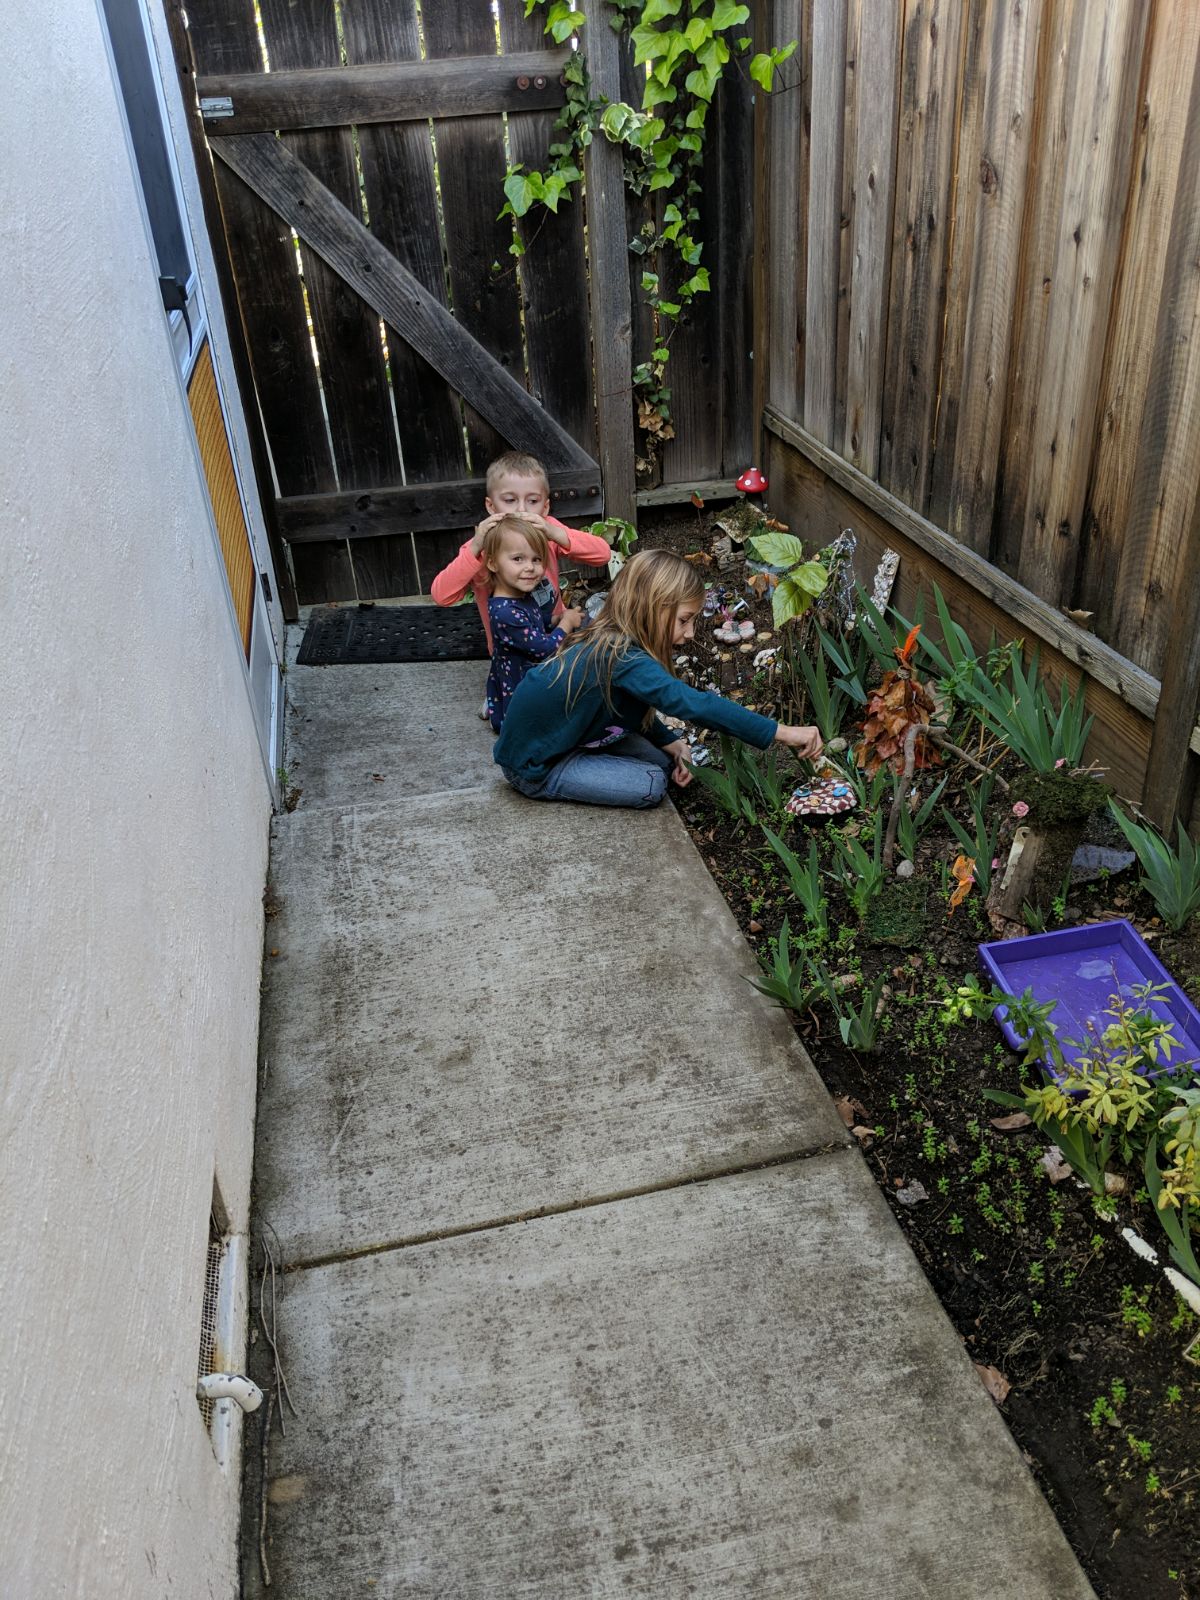
Create a Fairy Village
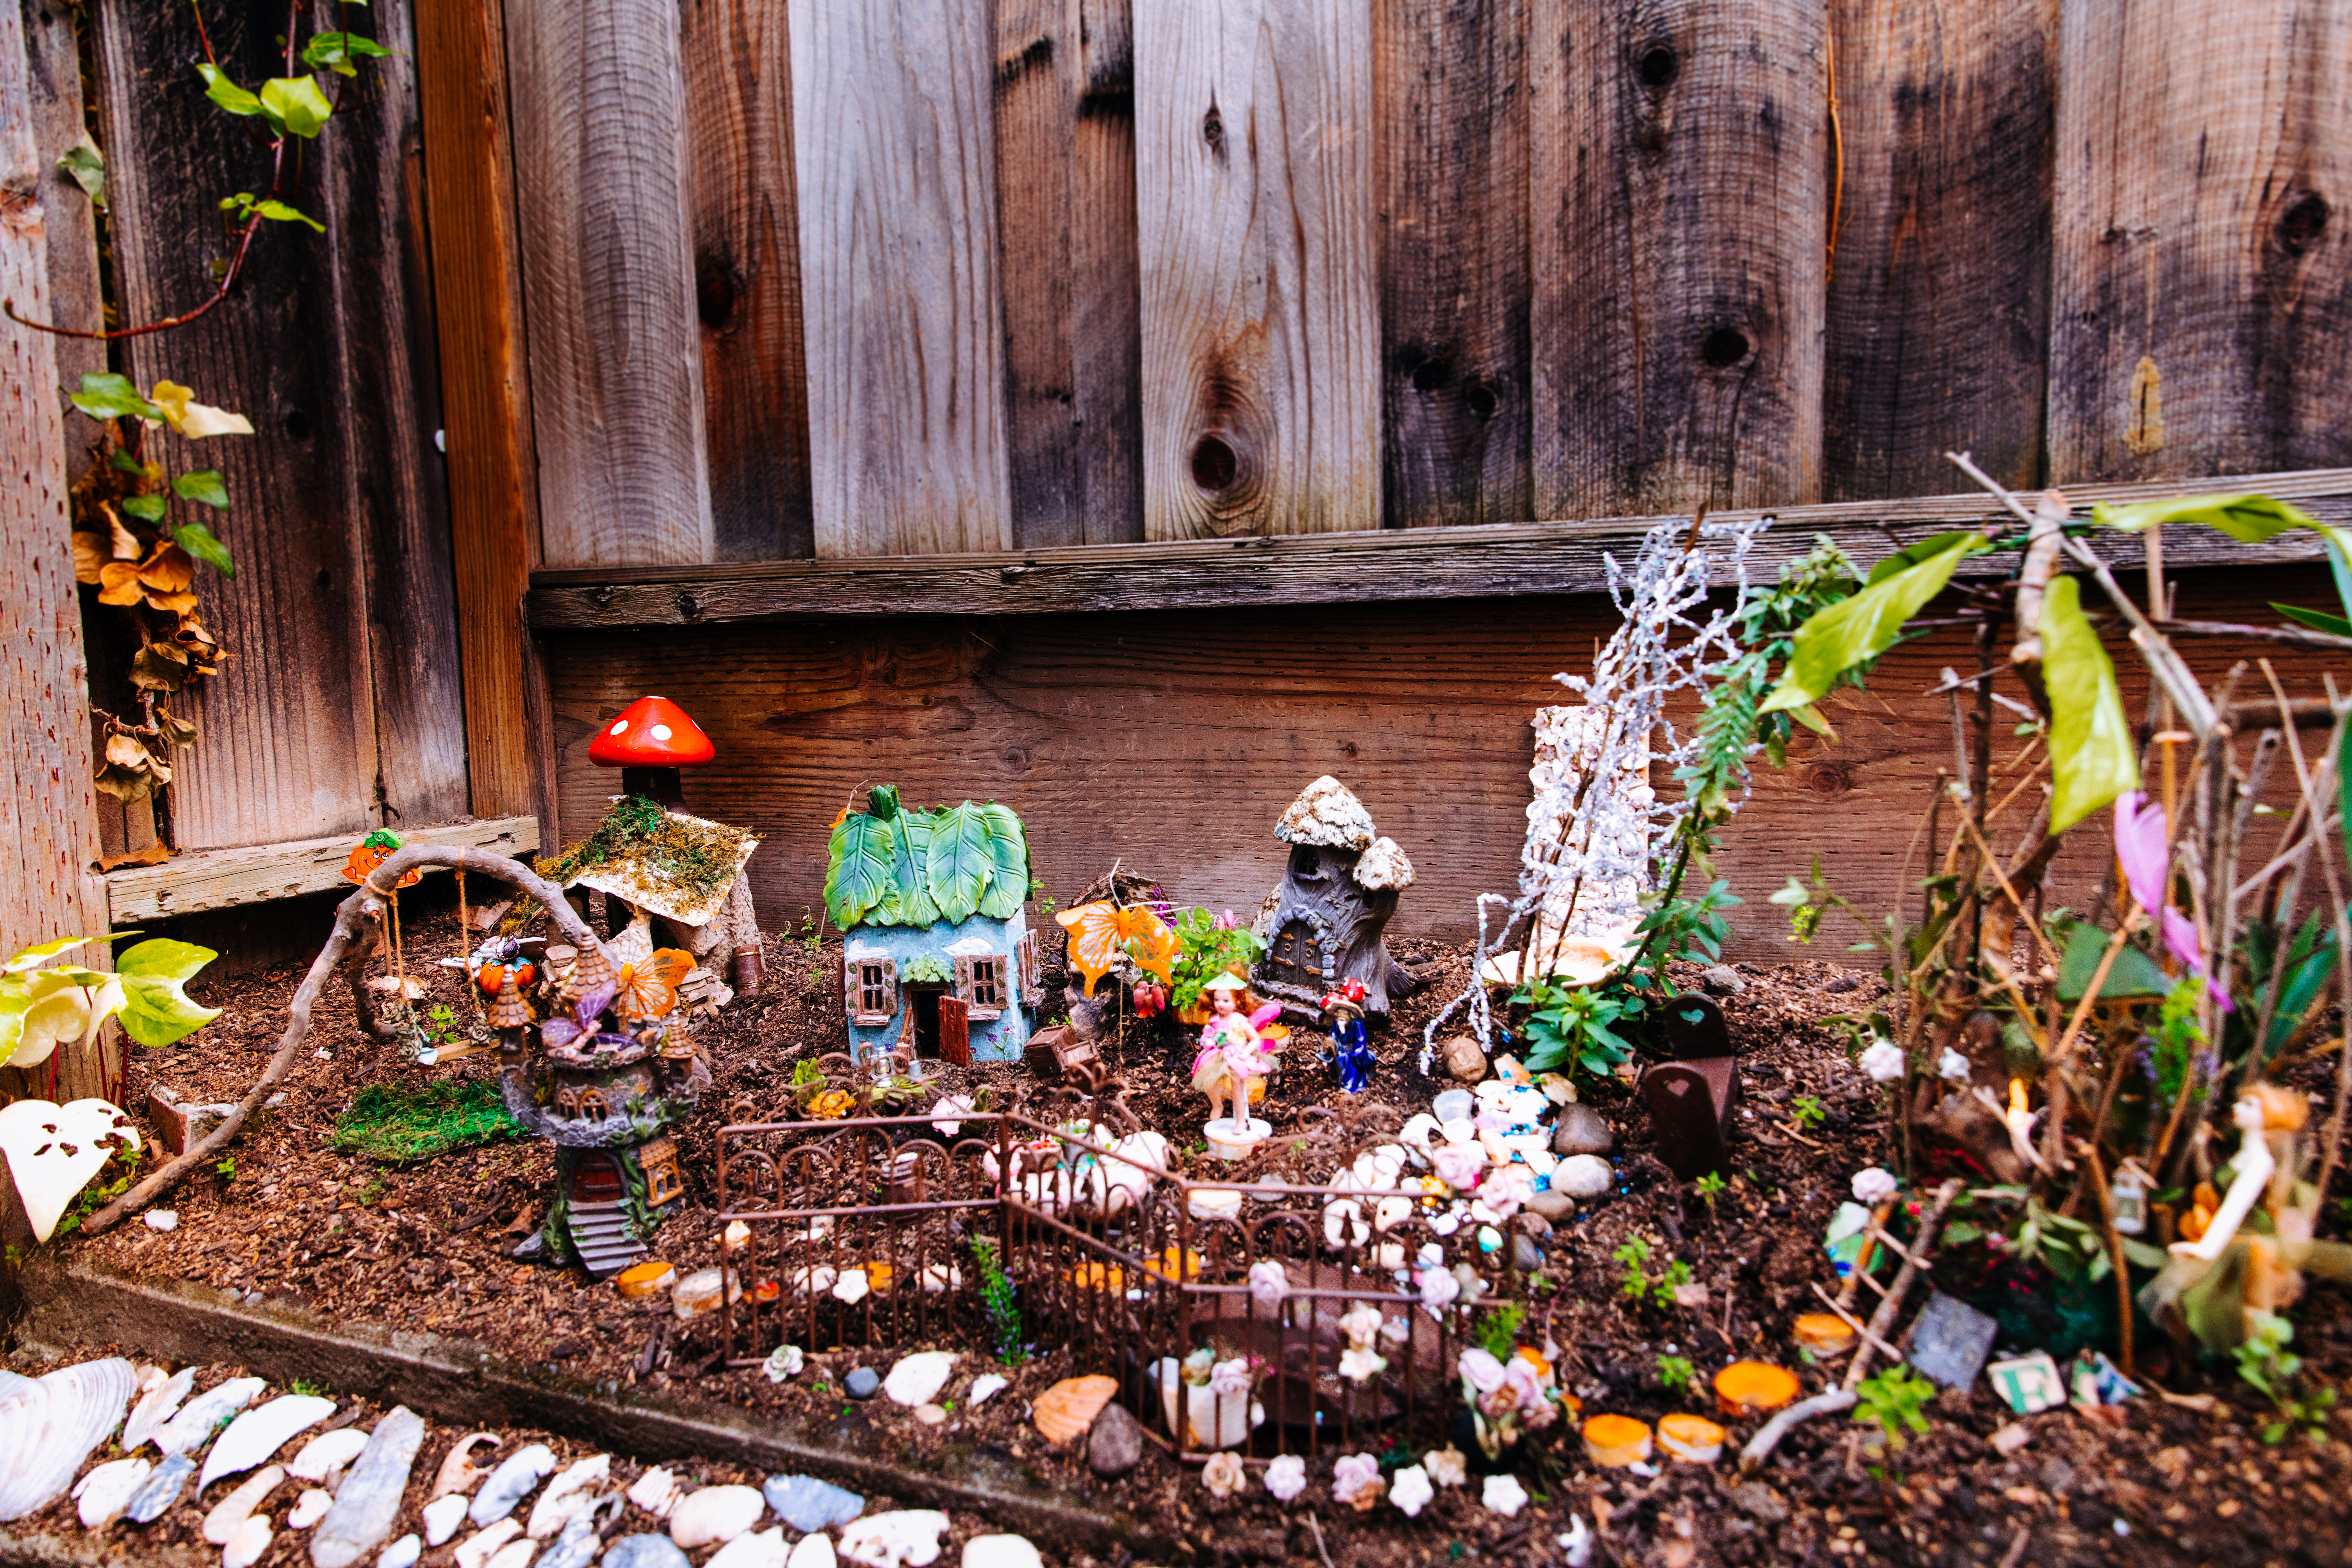
- A little magical world to play with and enjoy. Welcome! Let’s explore.
- At the base of this fairies house are little finds. Old broken bits from dishes and such. A little story in and of itself. And stepping stones of little sliced wood that I got from Micheals.

- Our collection of seashells from the beach are put to good use as we used them to line our fairy village and make a creek. Little sparkle blue beads made for an extra touch of magic. One day I will make a fairy village with a running water creek and mini solar power pump.
- A little lantern sits on this table as fairies like to flutter and light up the night as they enjoy their mushroom pie
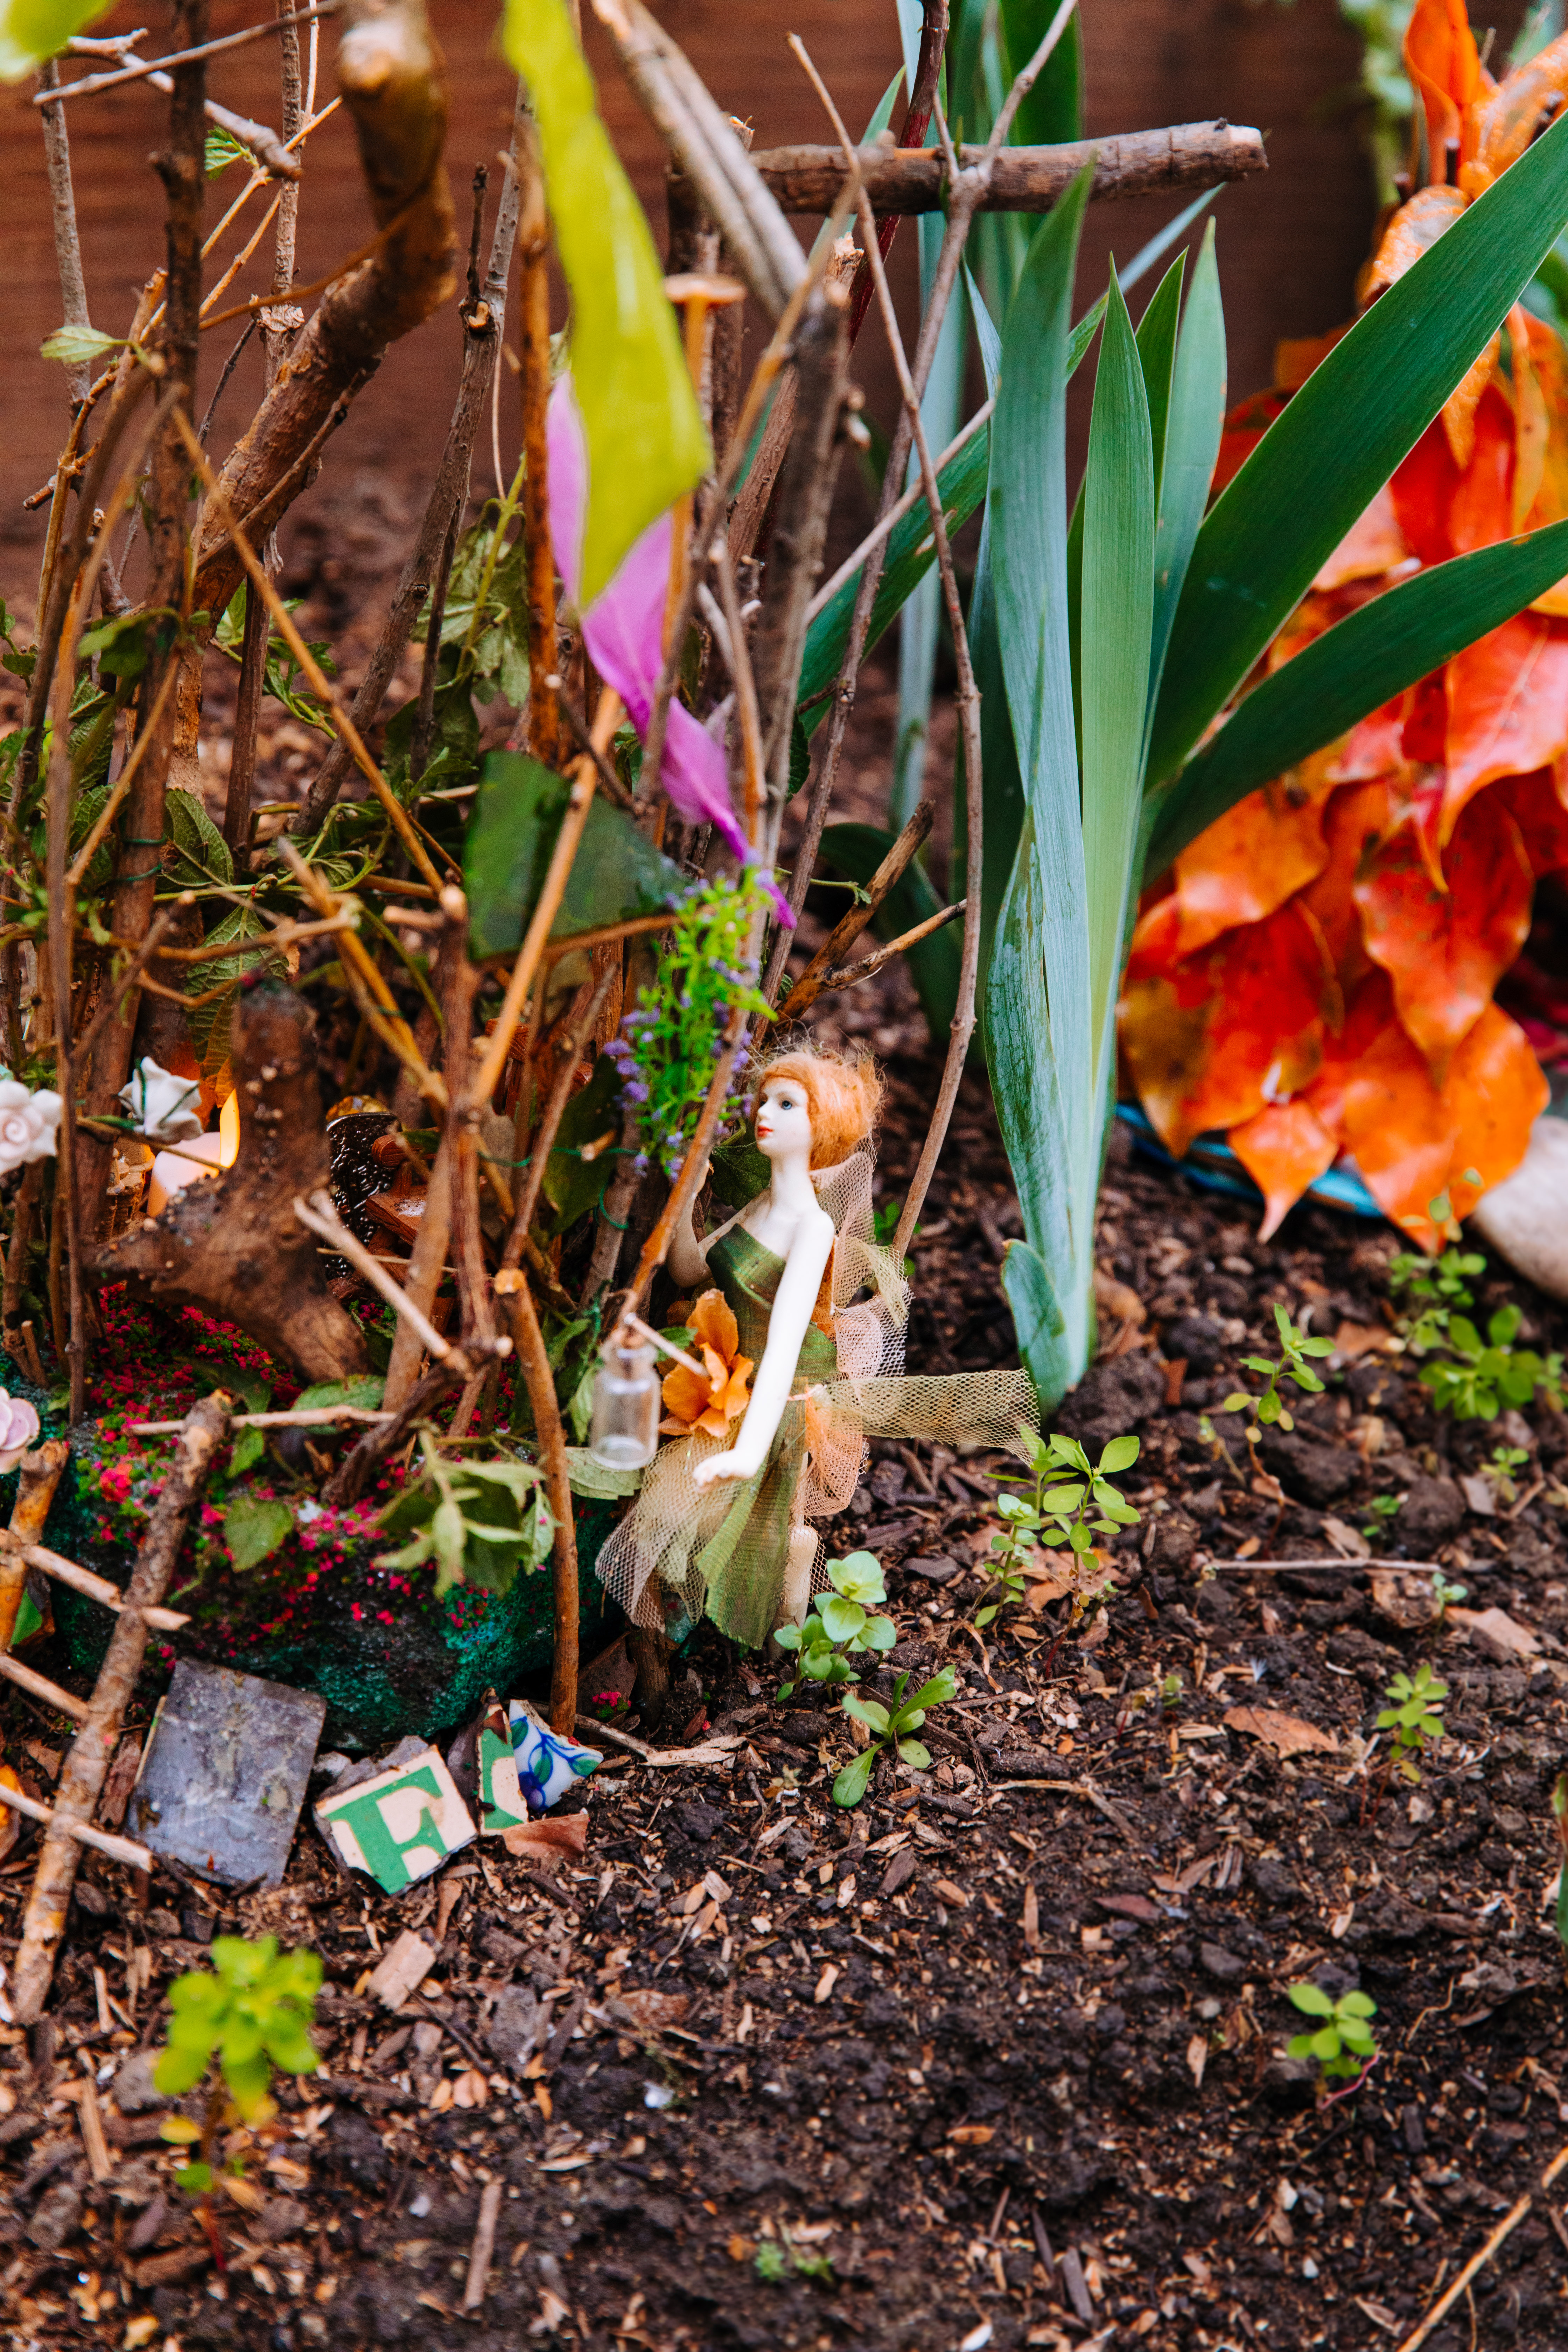
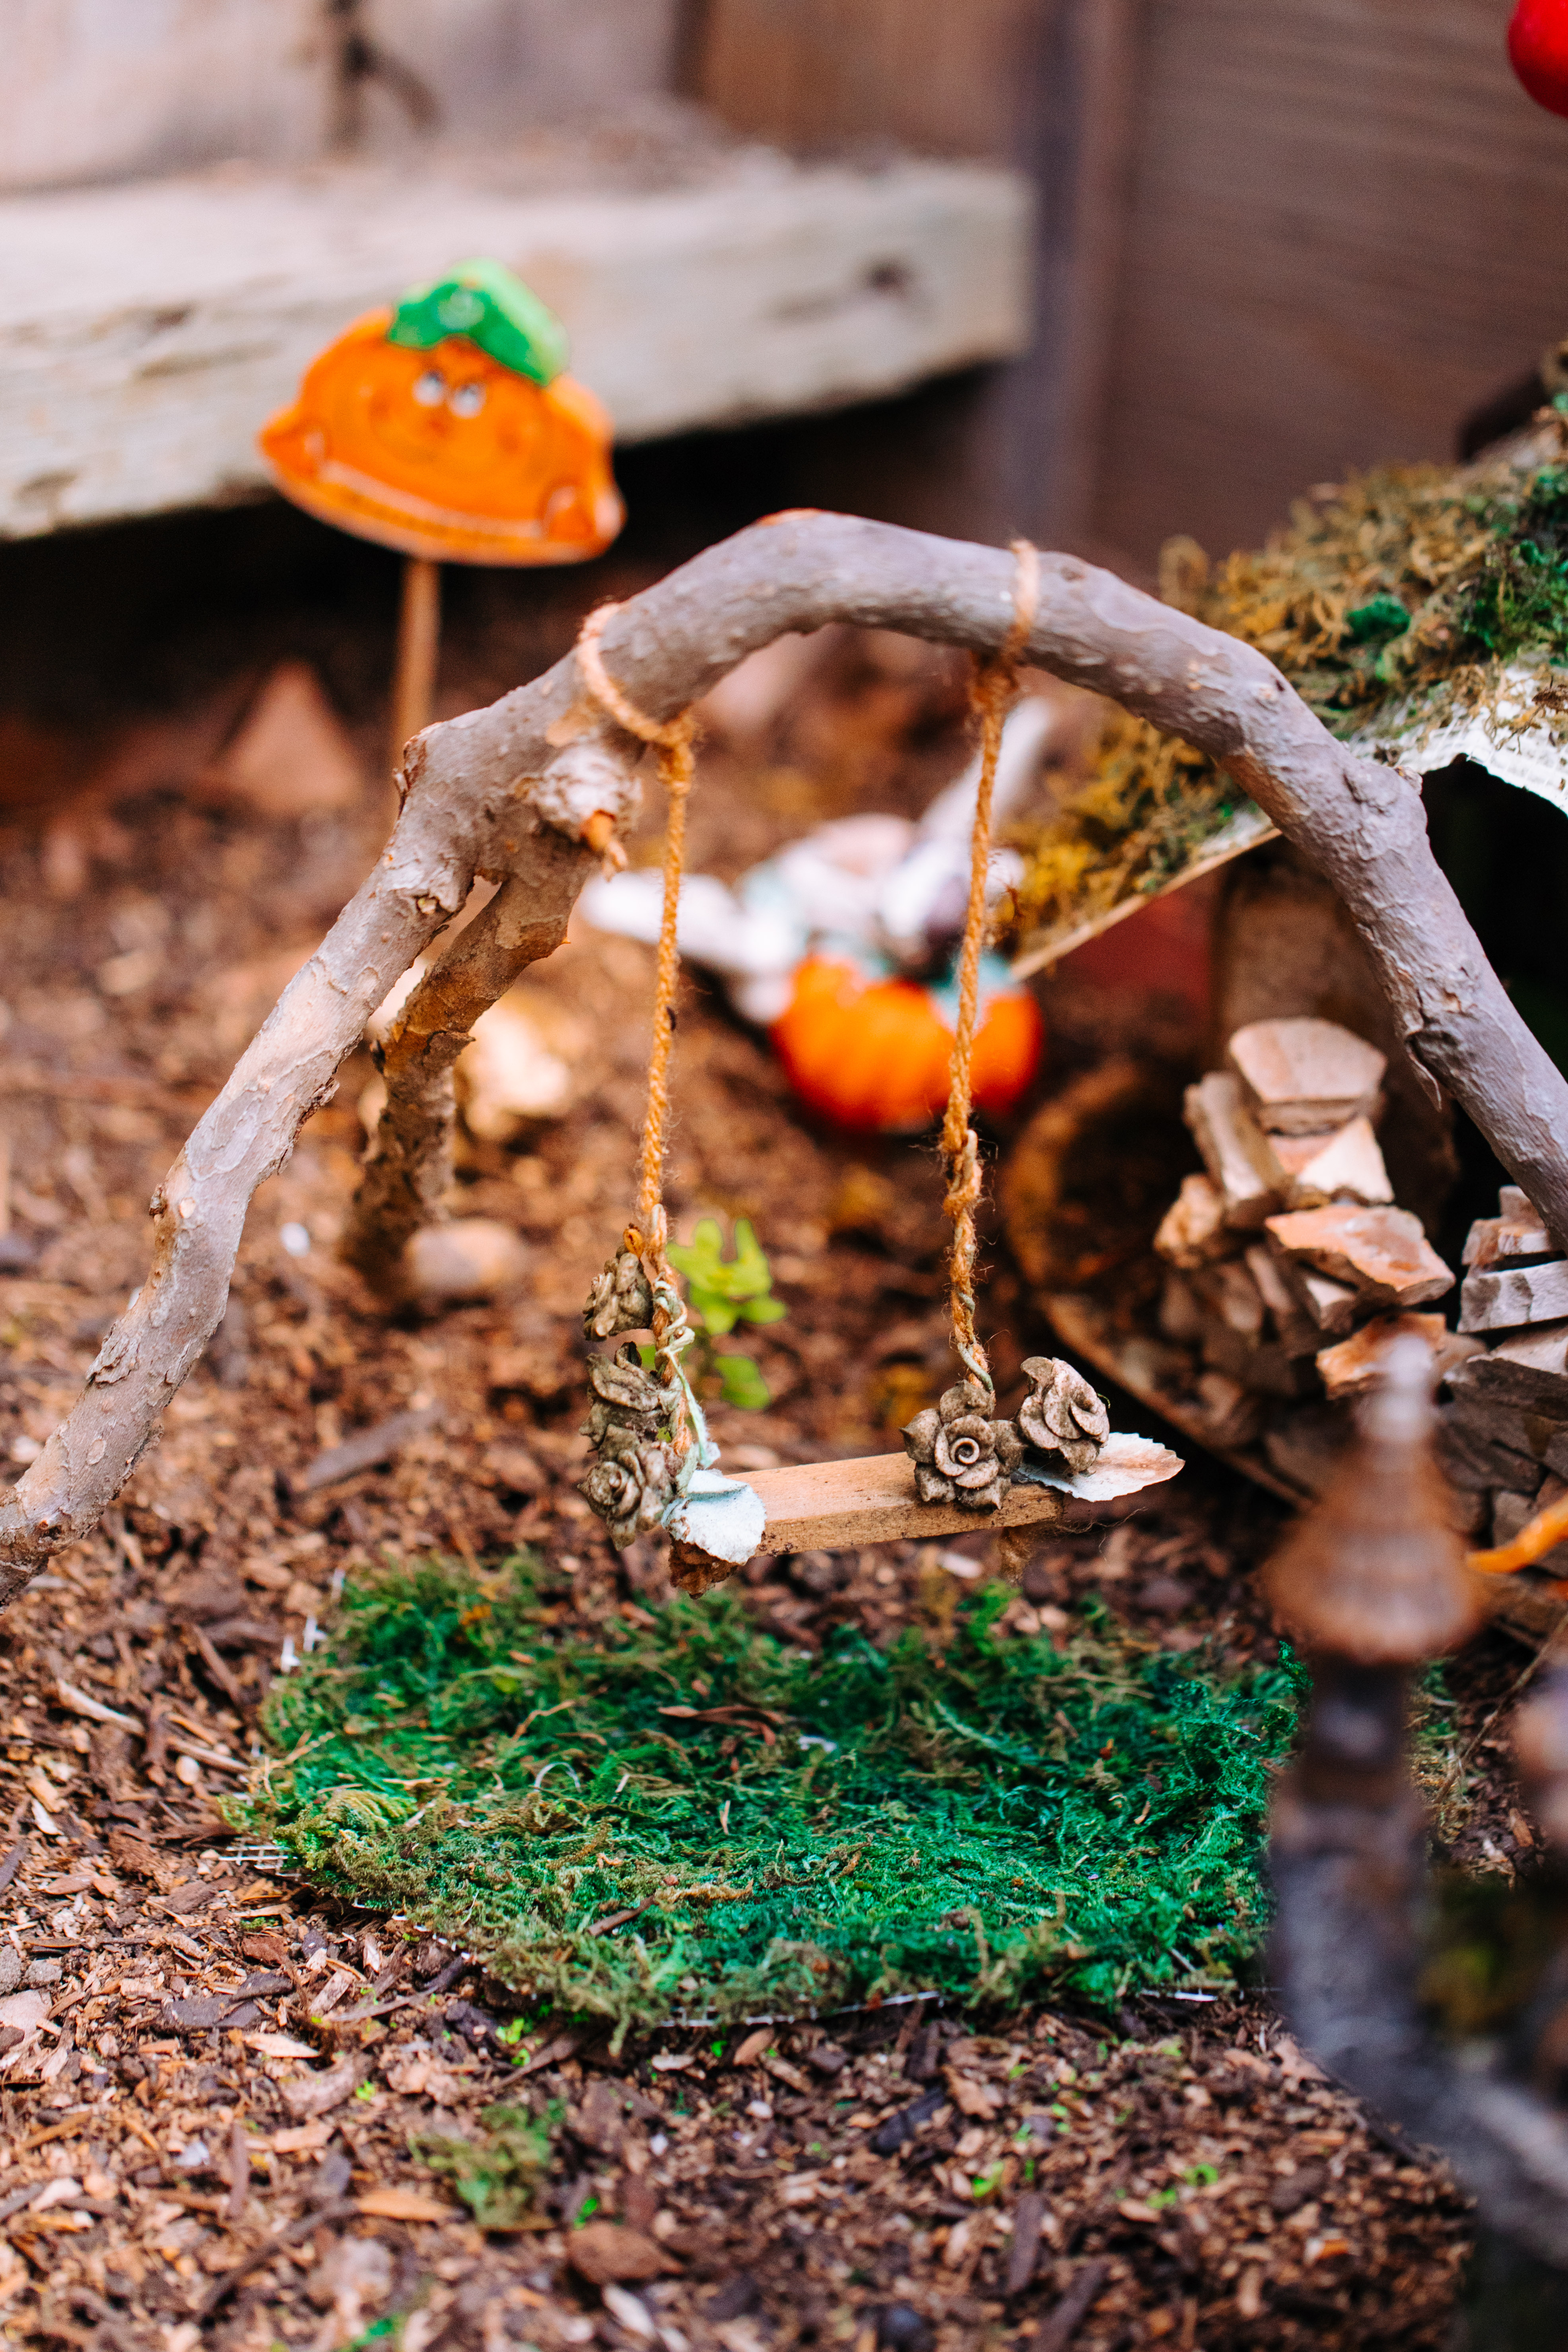
- With all our nature walks recently, we enjoy finding unique sticks like this curved one and imagine what use we could make of it for our fairy garden. This is where the imagination and engineer aspect of building fairy gardens comes in. A perfect three-pronged stick perfect for a supportive swing set. Little wired roses decorate the base.
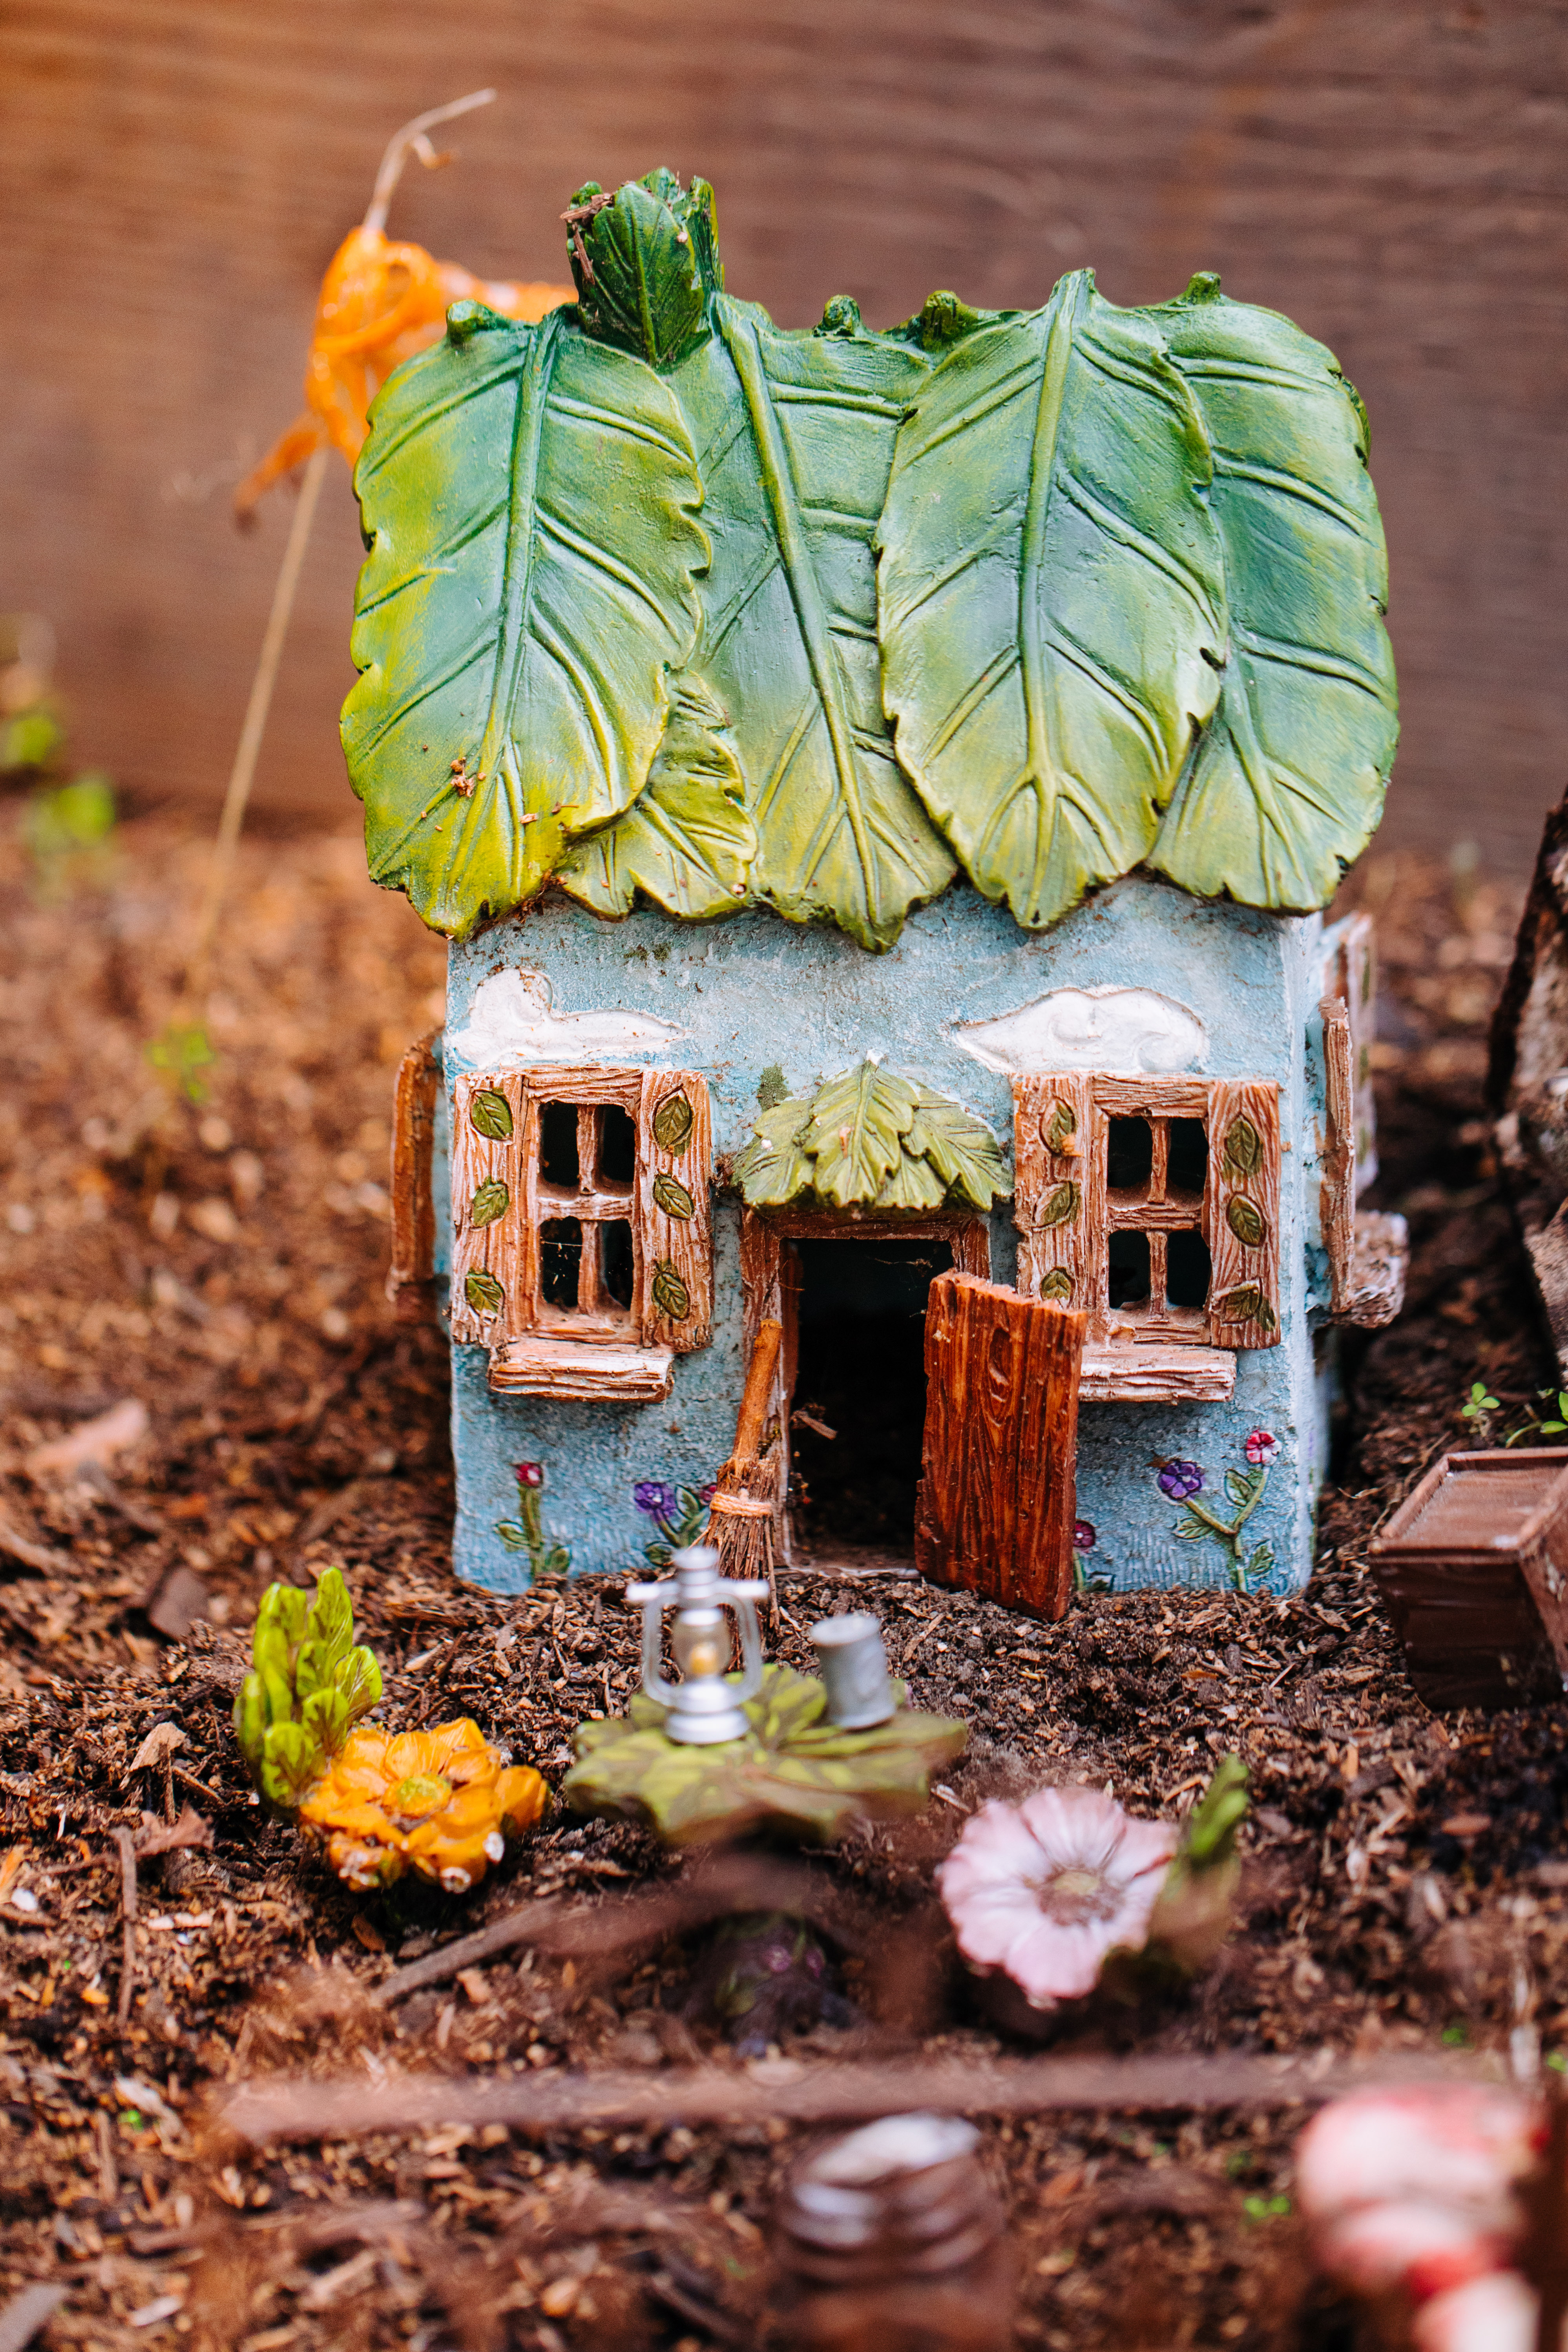 Fairies are most welcoming with an open door.
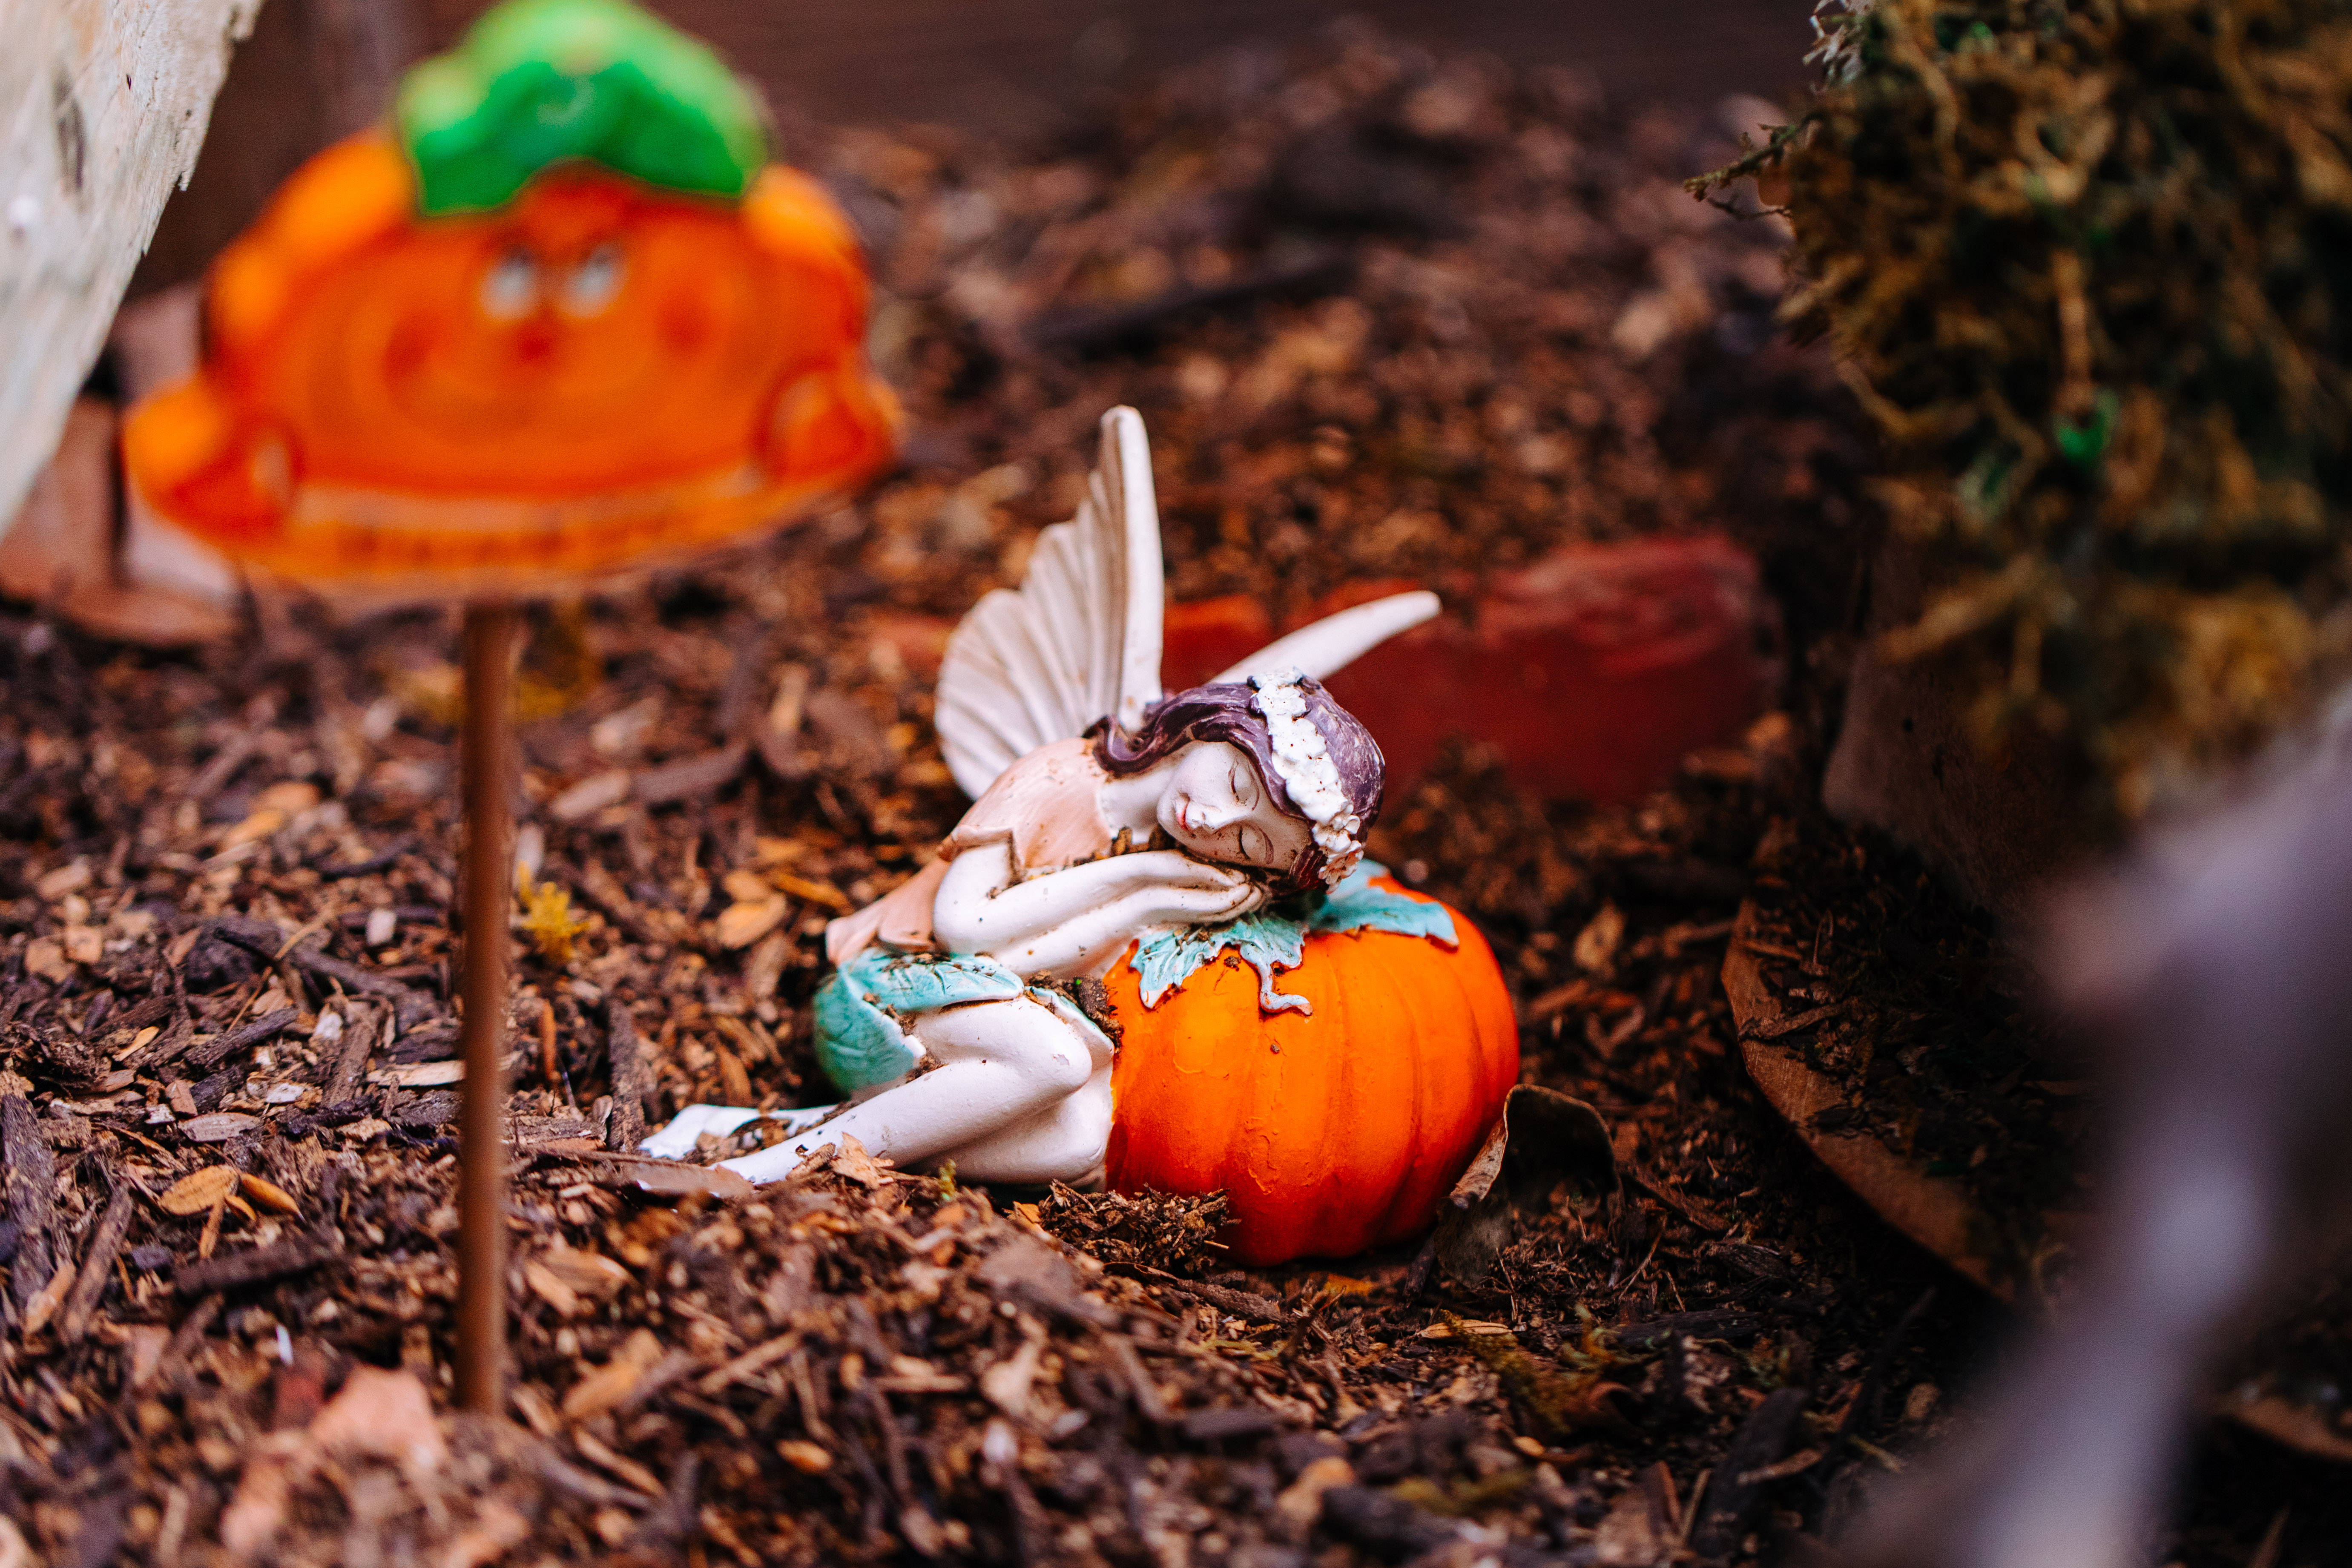 Since is it only springtime this little autumn fairy is taking a snooze on one of her pumpkins. She won’t be needed for a while.
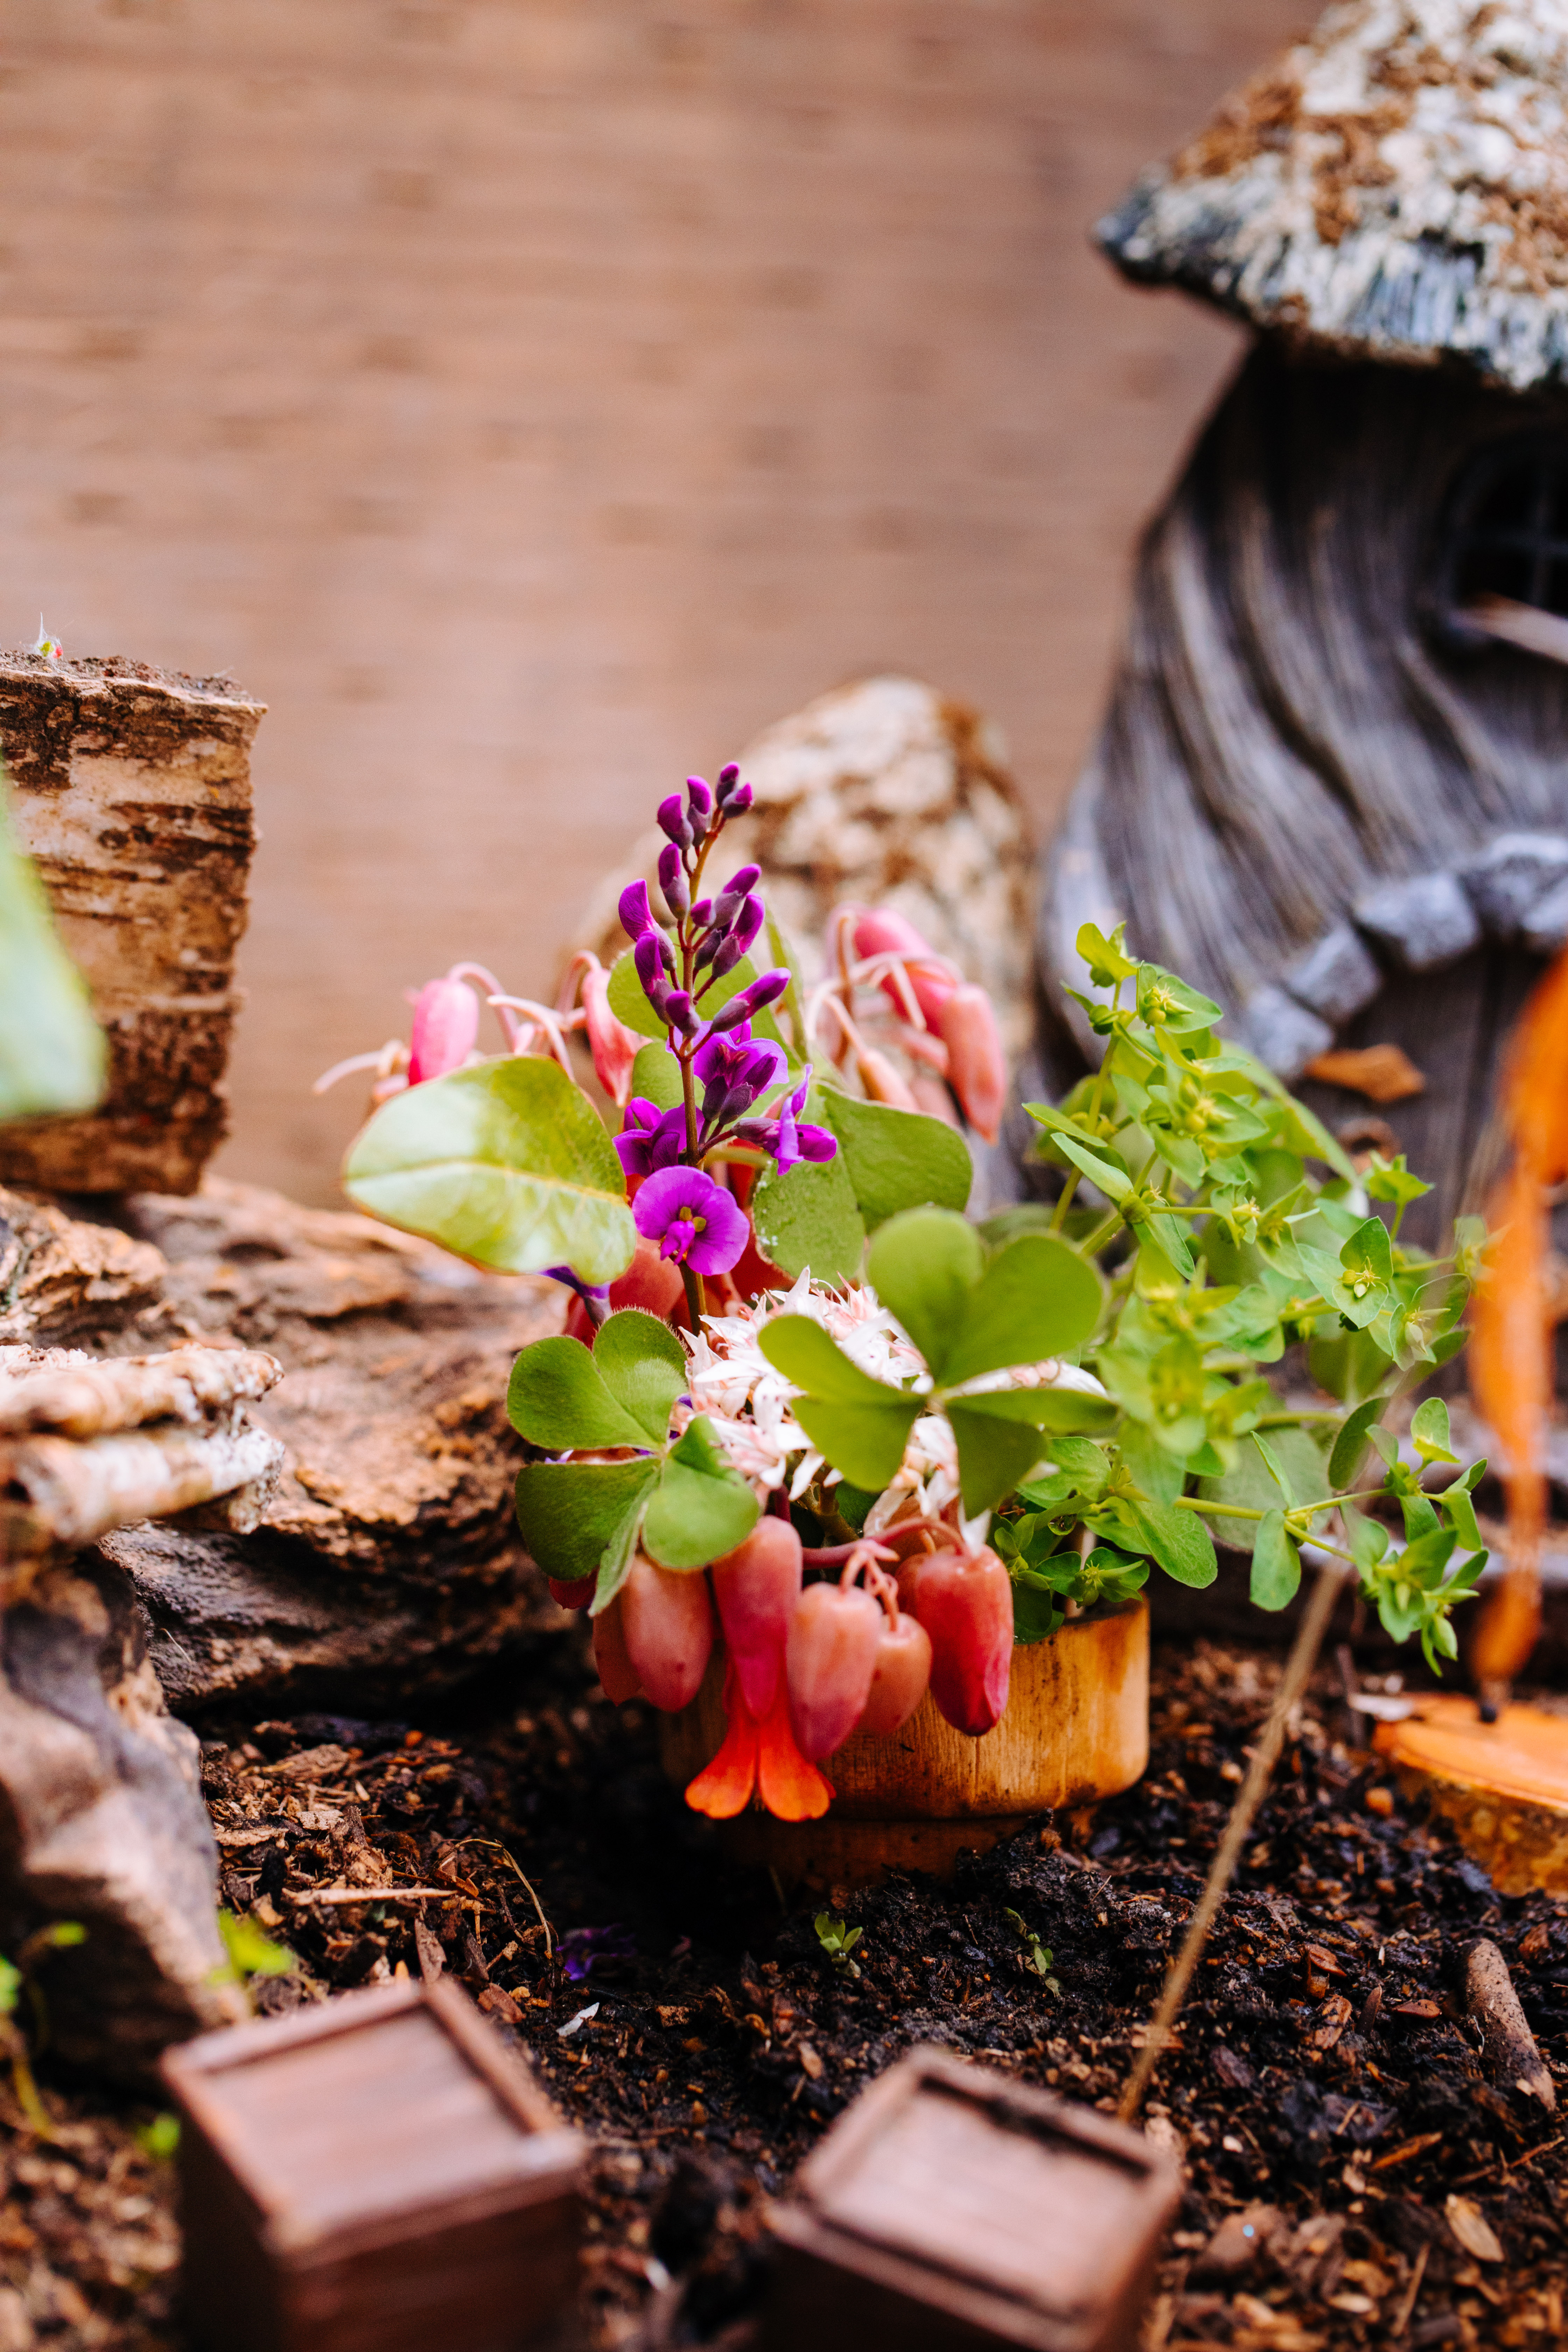
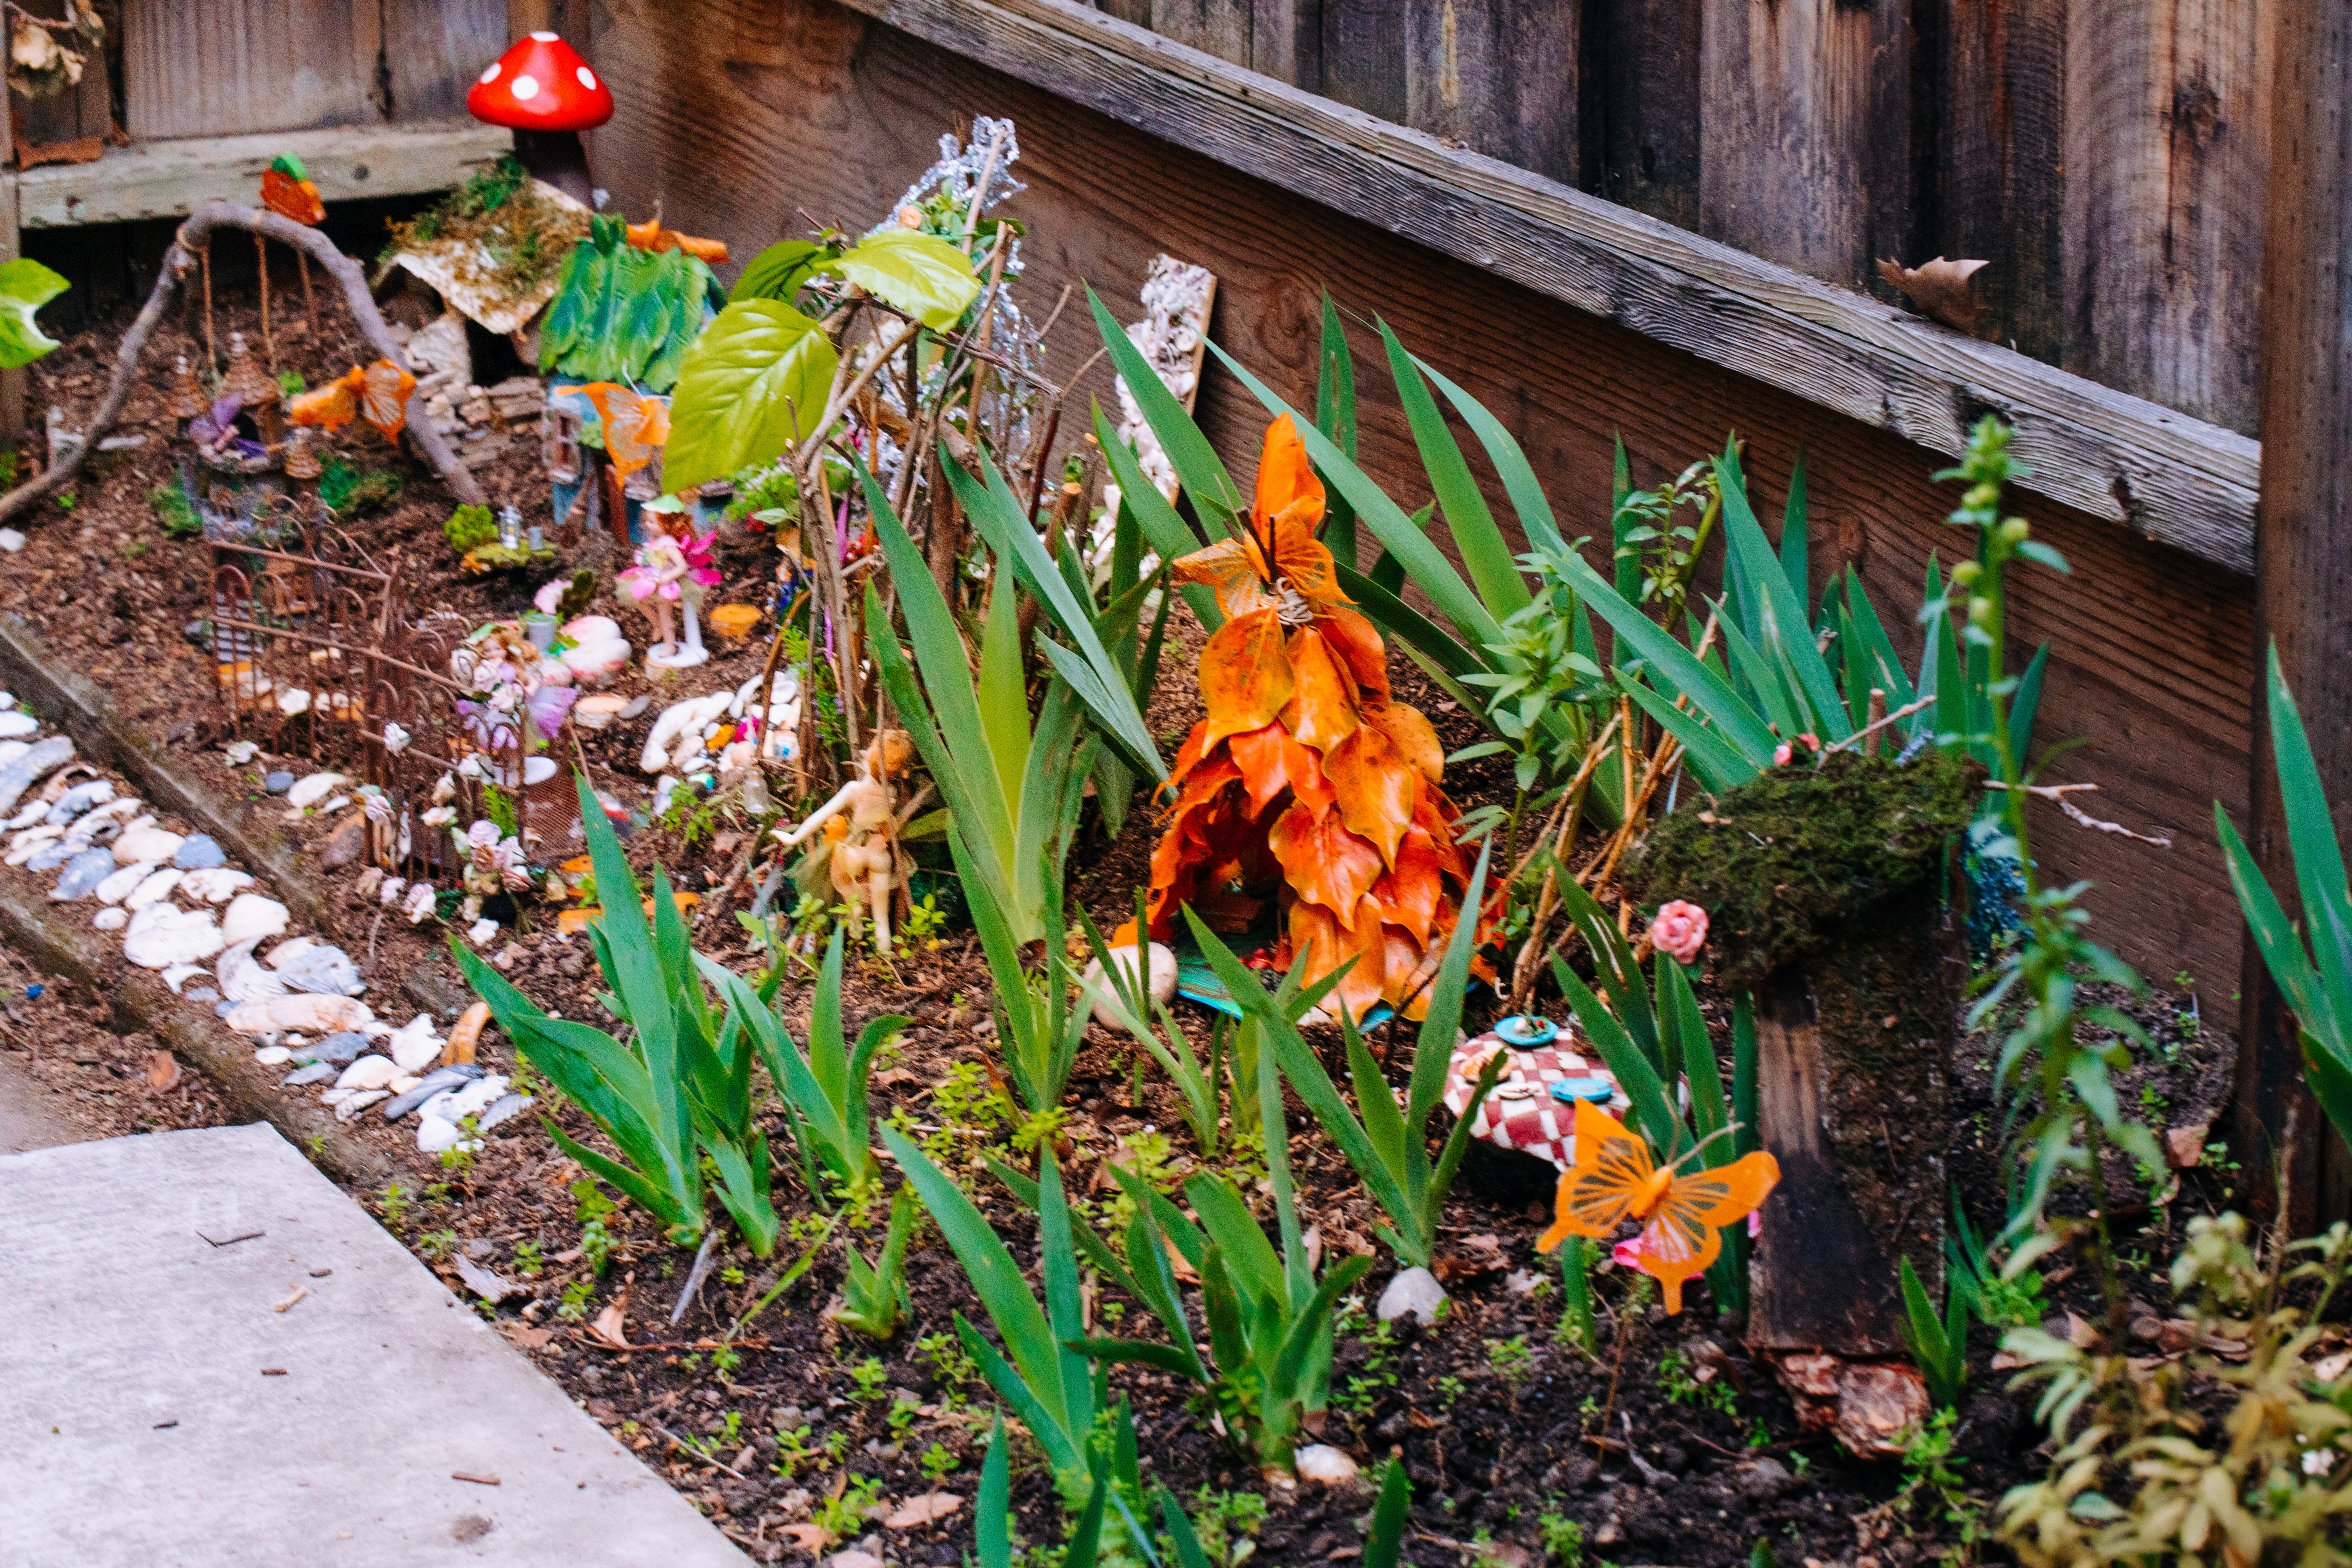
- This green thumb fairy is the keeper of springtime and always has fresh blooms right in her own garden.
- We skowered the yard for our own little mini flowers to add to her collection.
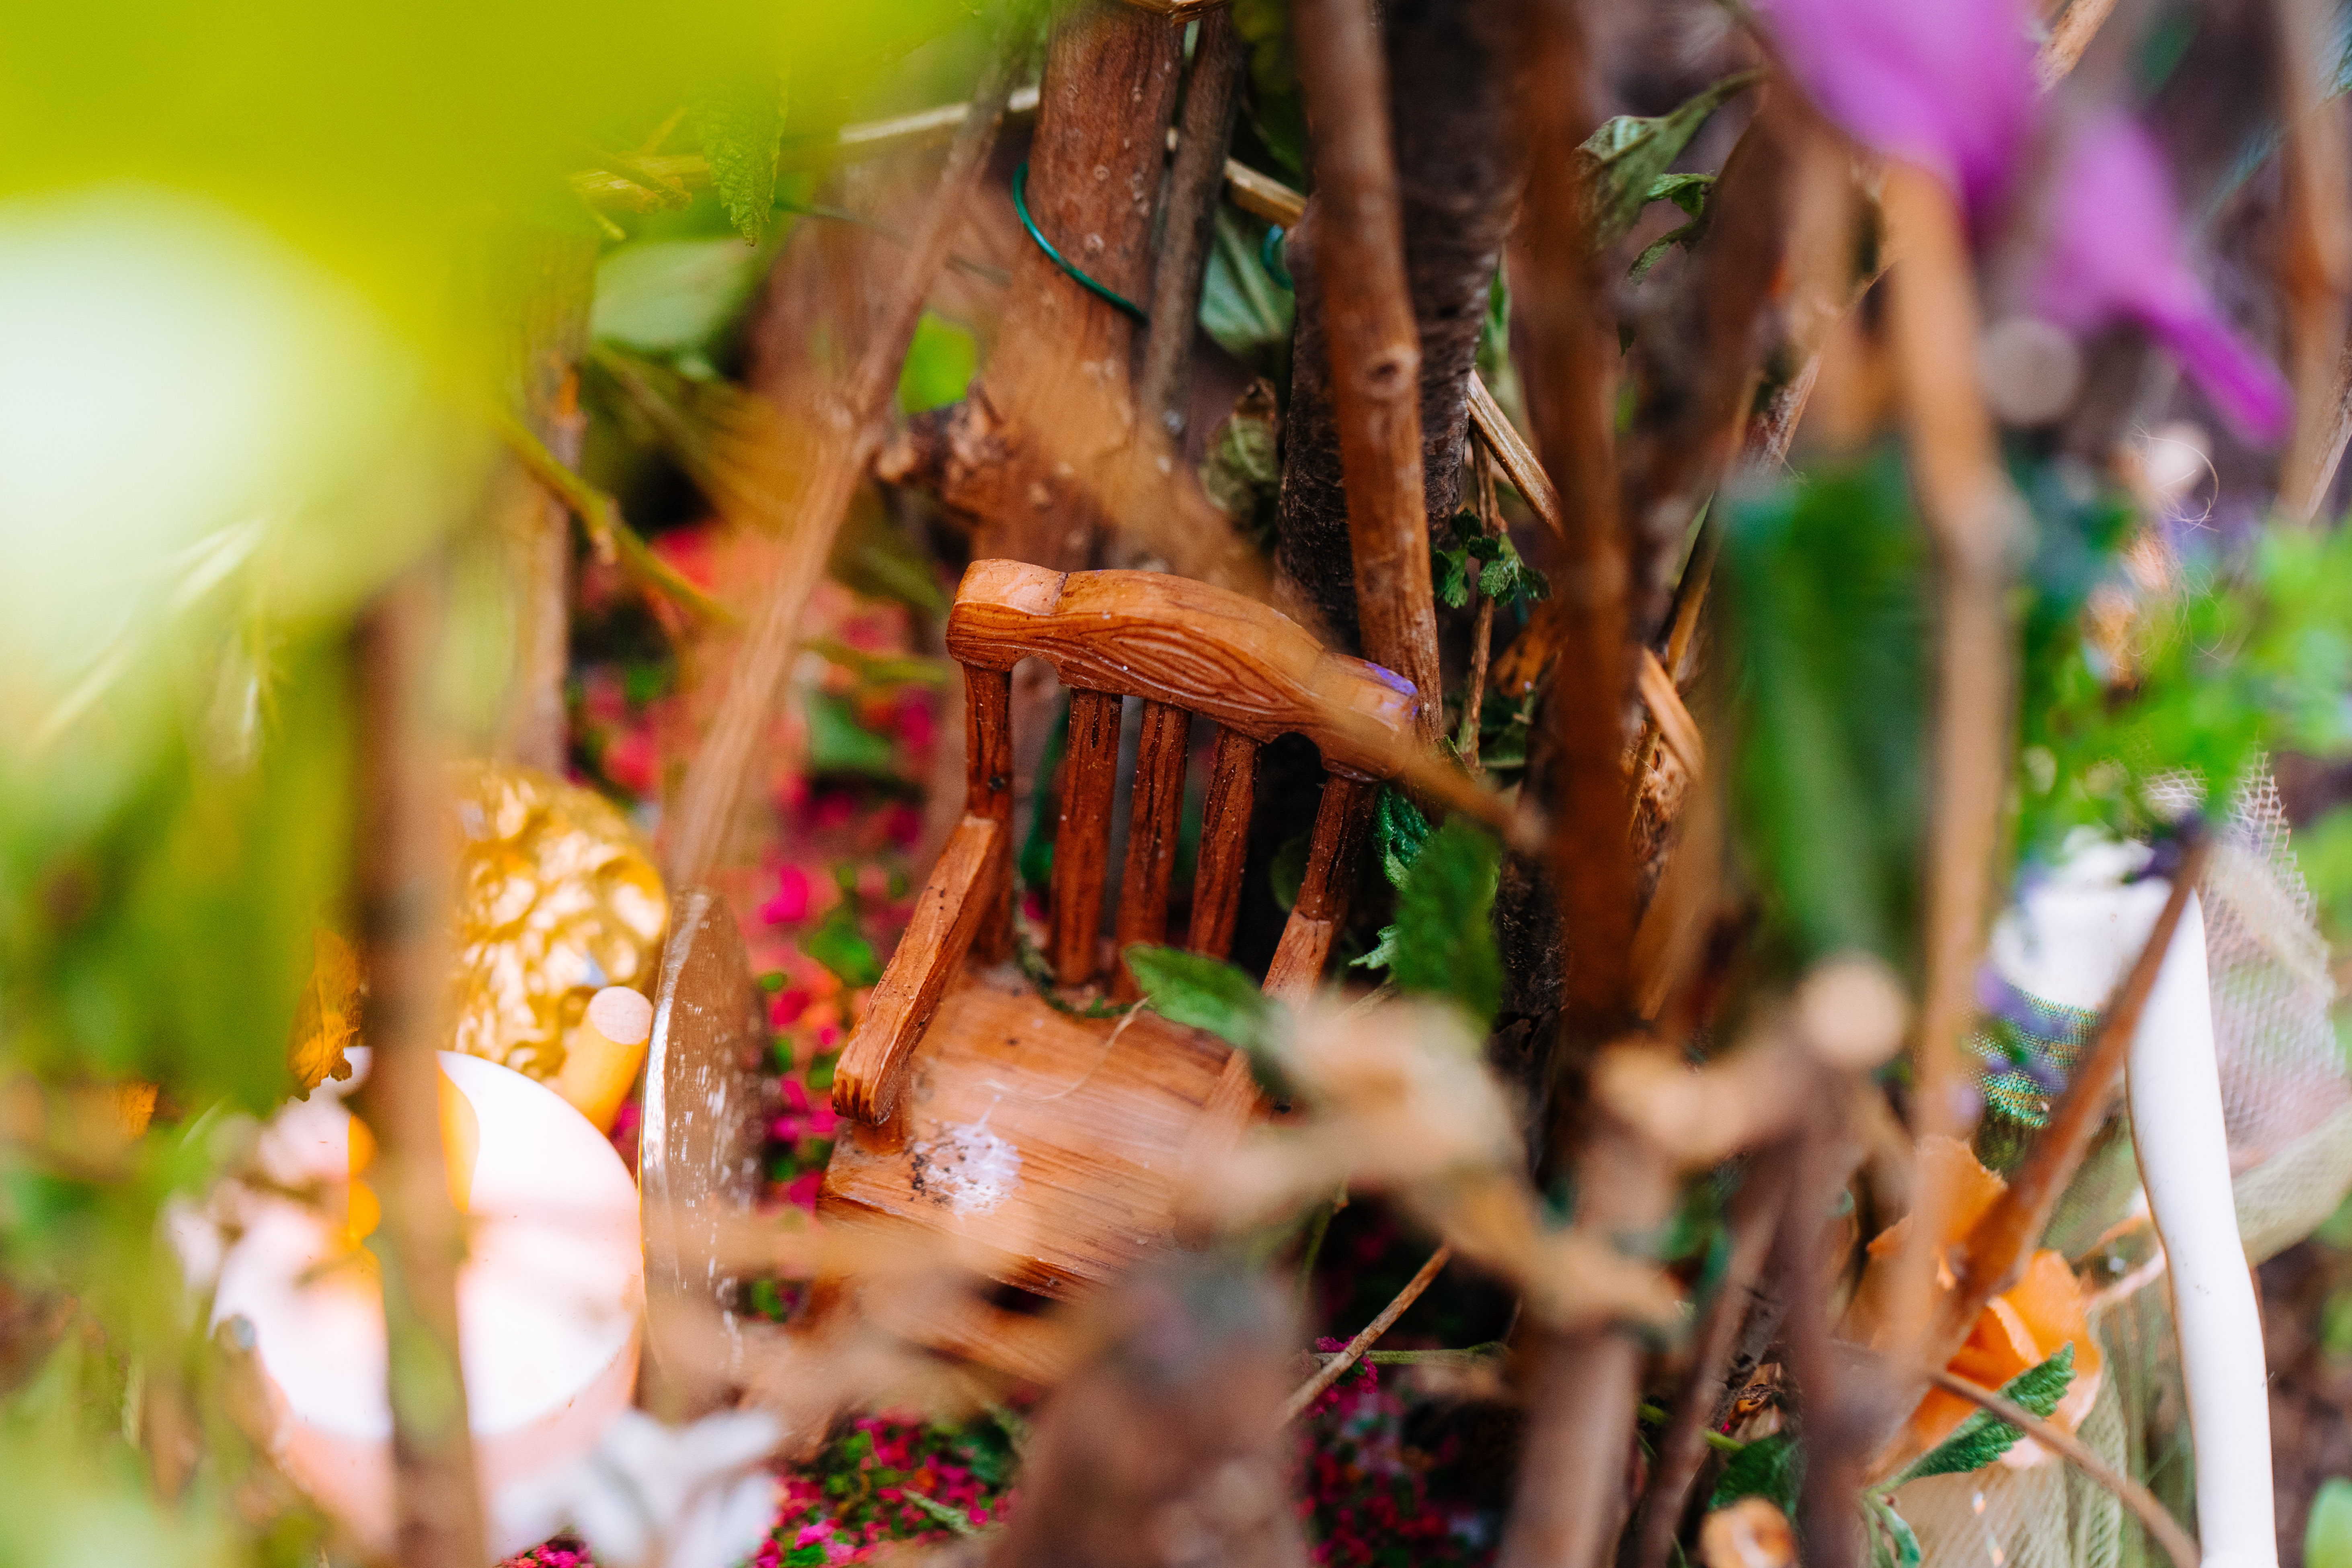 A little rocking chair awaits this fairy when she comes home from collecting fresh forest finds for her soup.
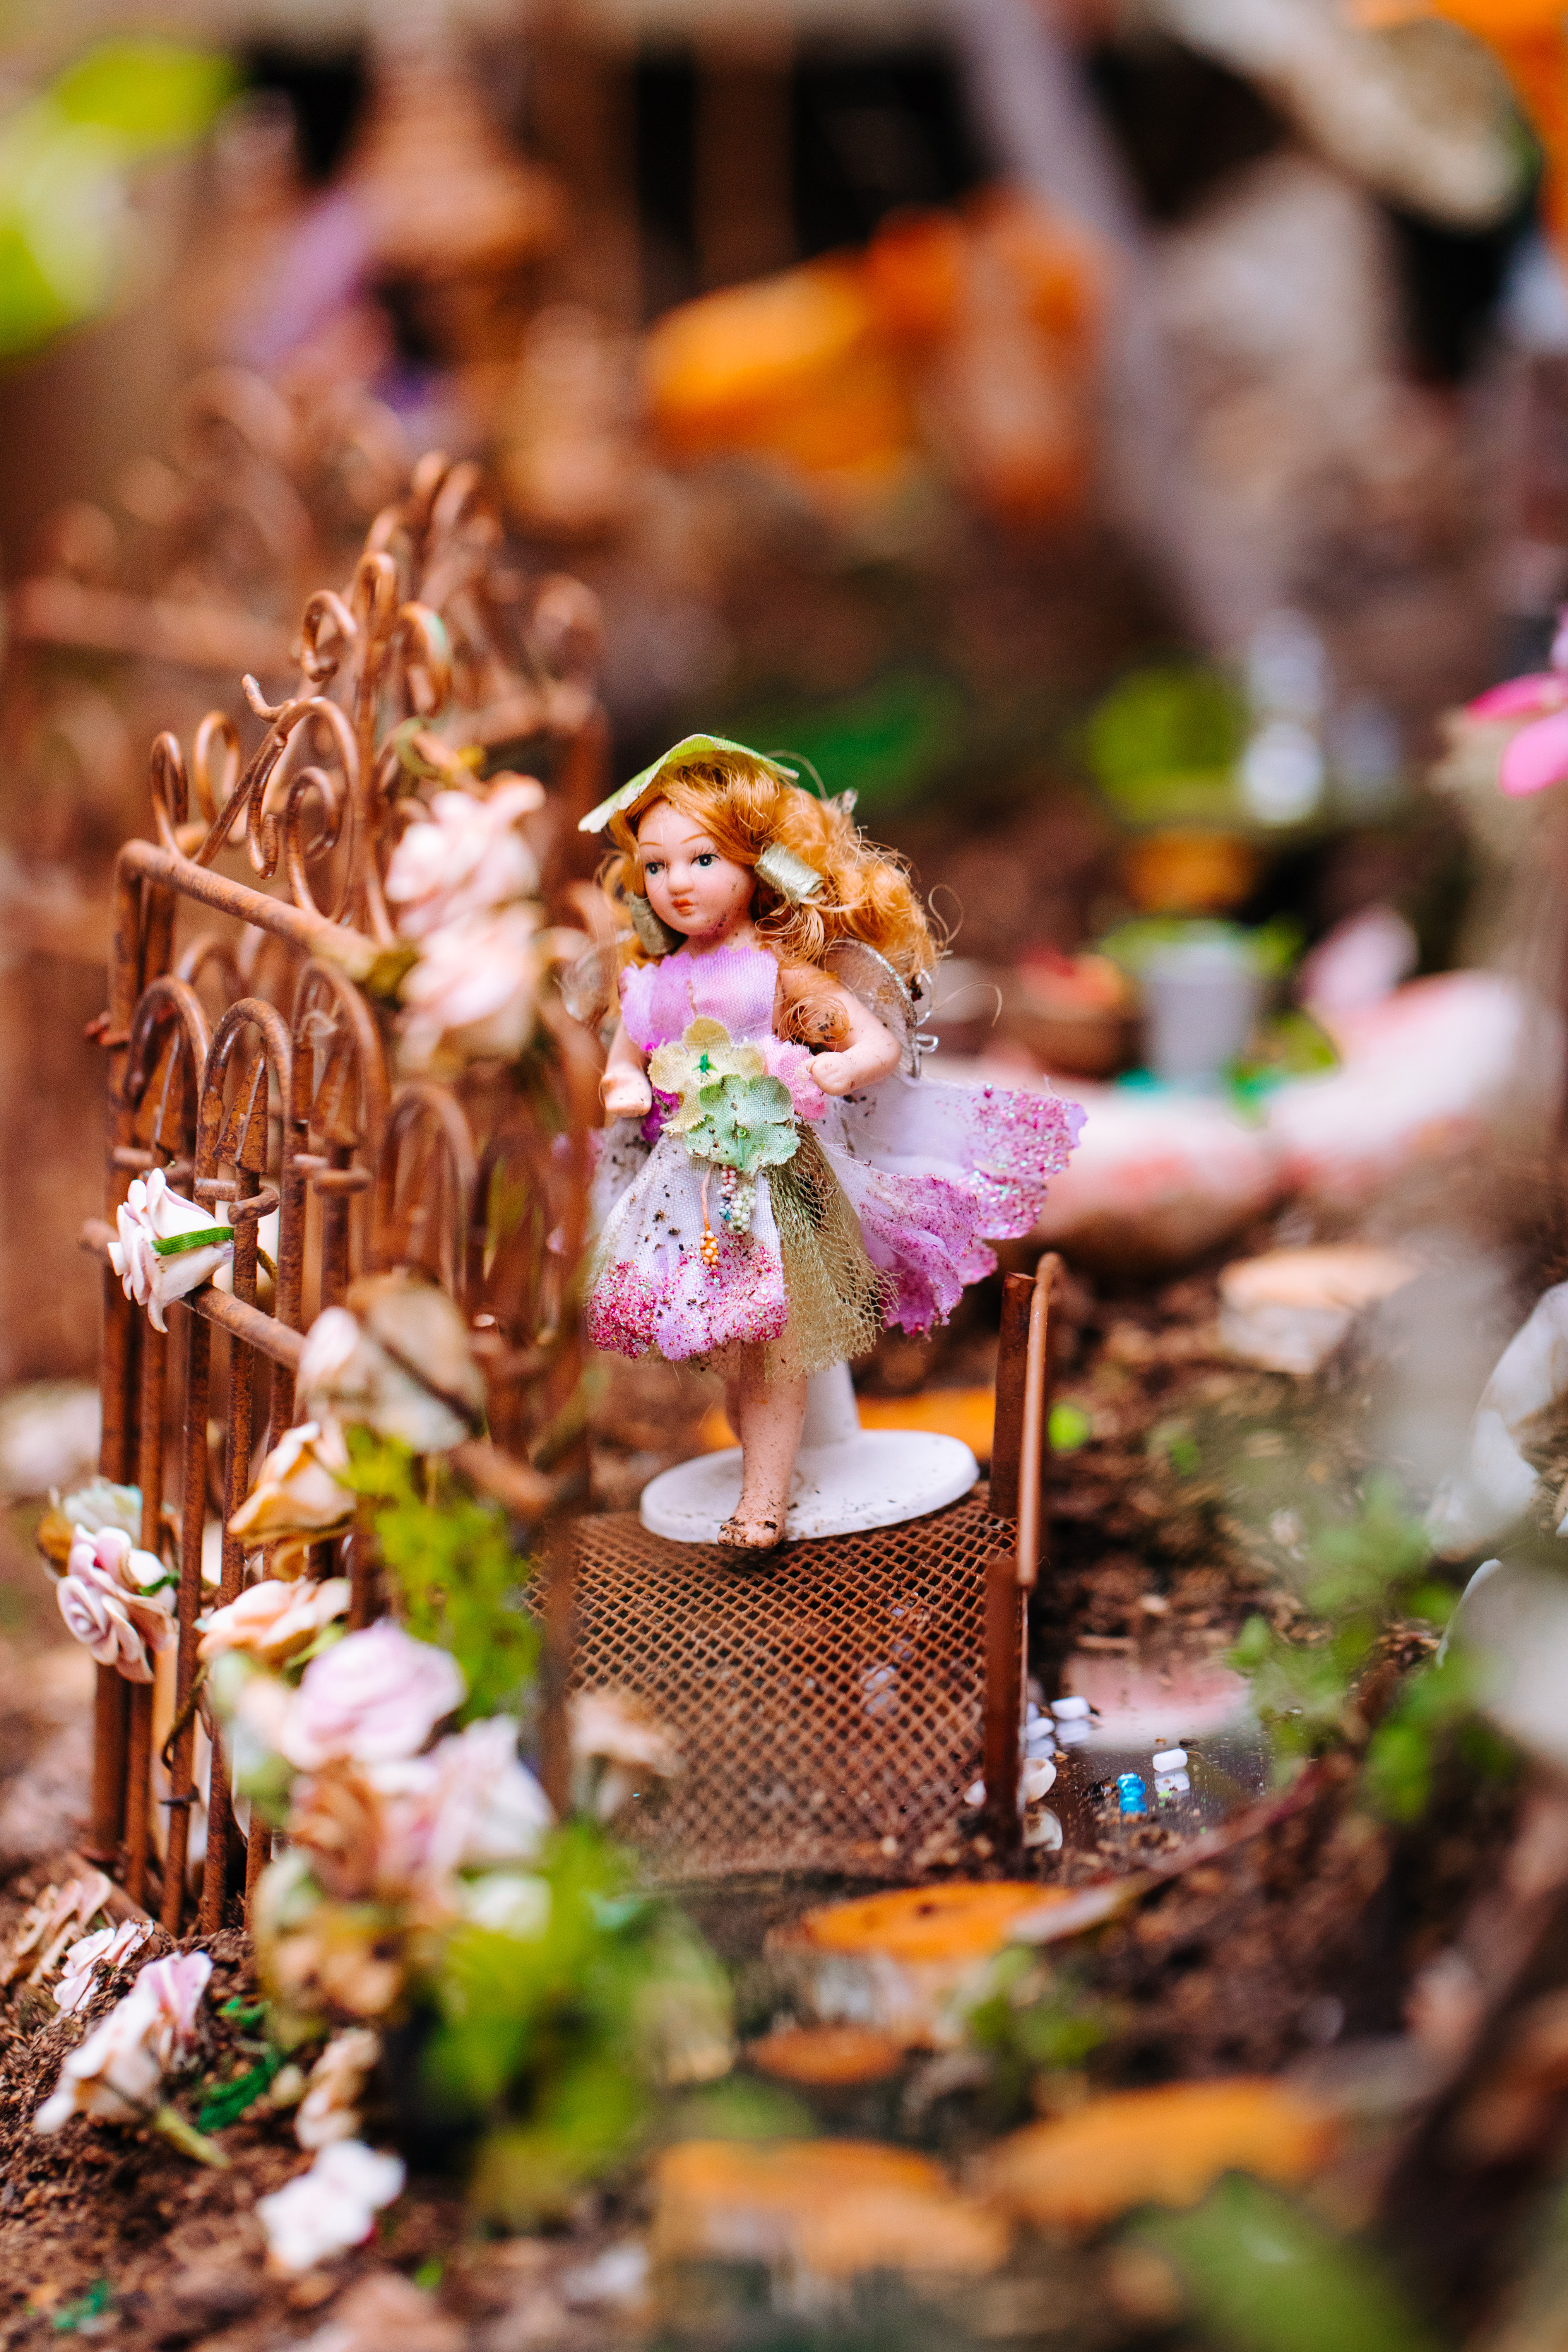 Little fairy crossing the stream to her friend’s house. Fairies are too small to get the coronavirus and may visit their friends as they please.
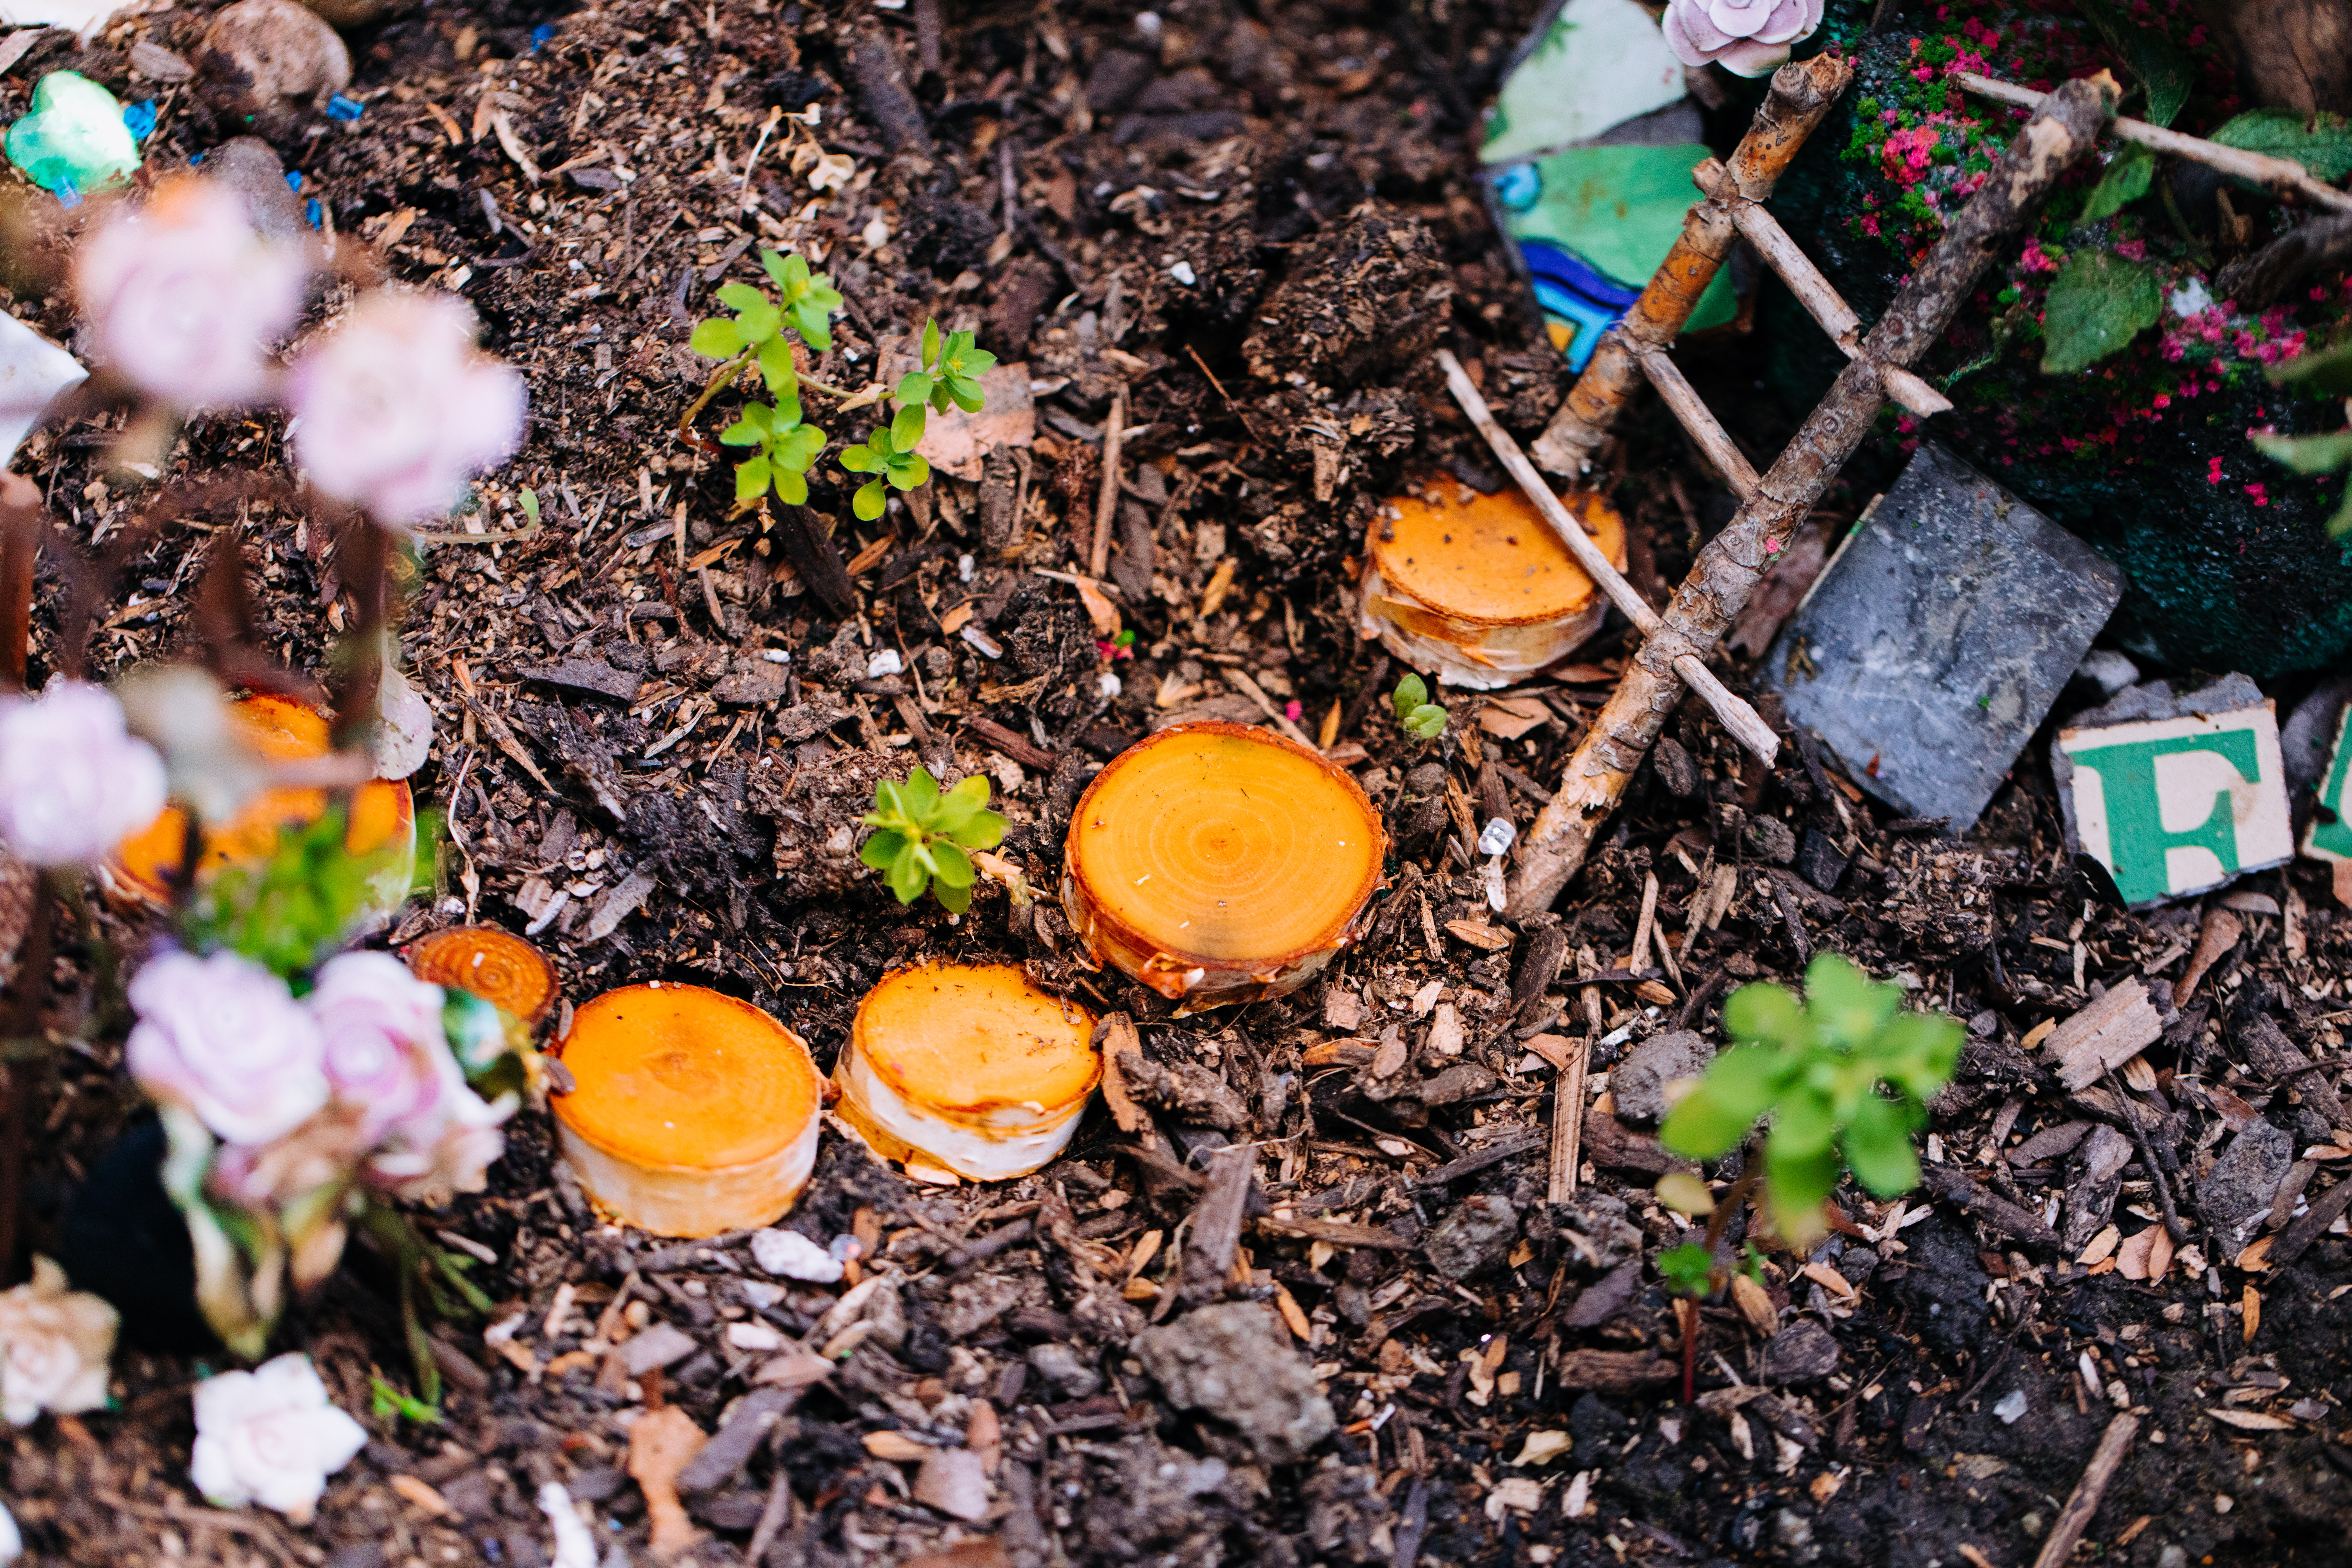 I used a small drill tool to drill holes through two sticks and smaller sticks to weave through them. This little ladder is a cute detail.
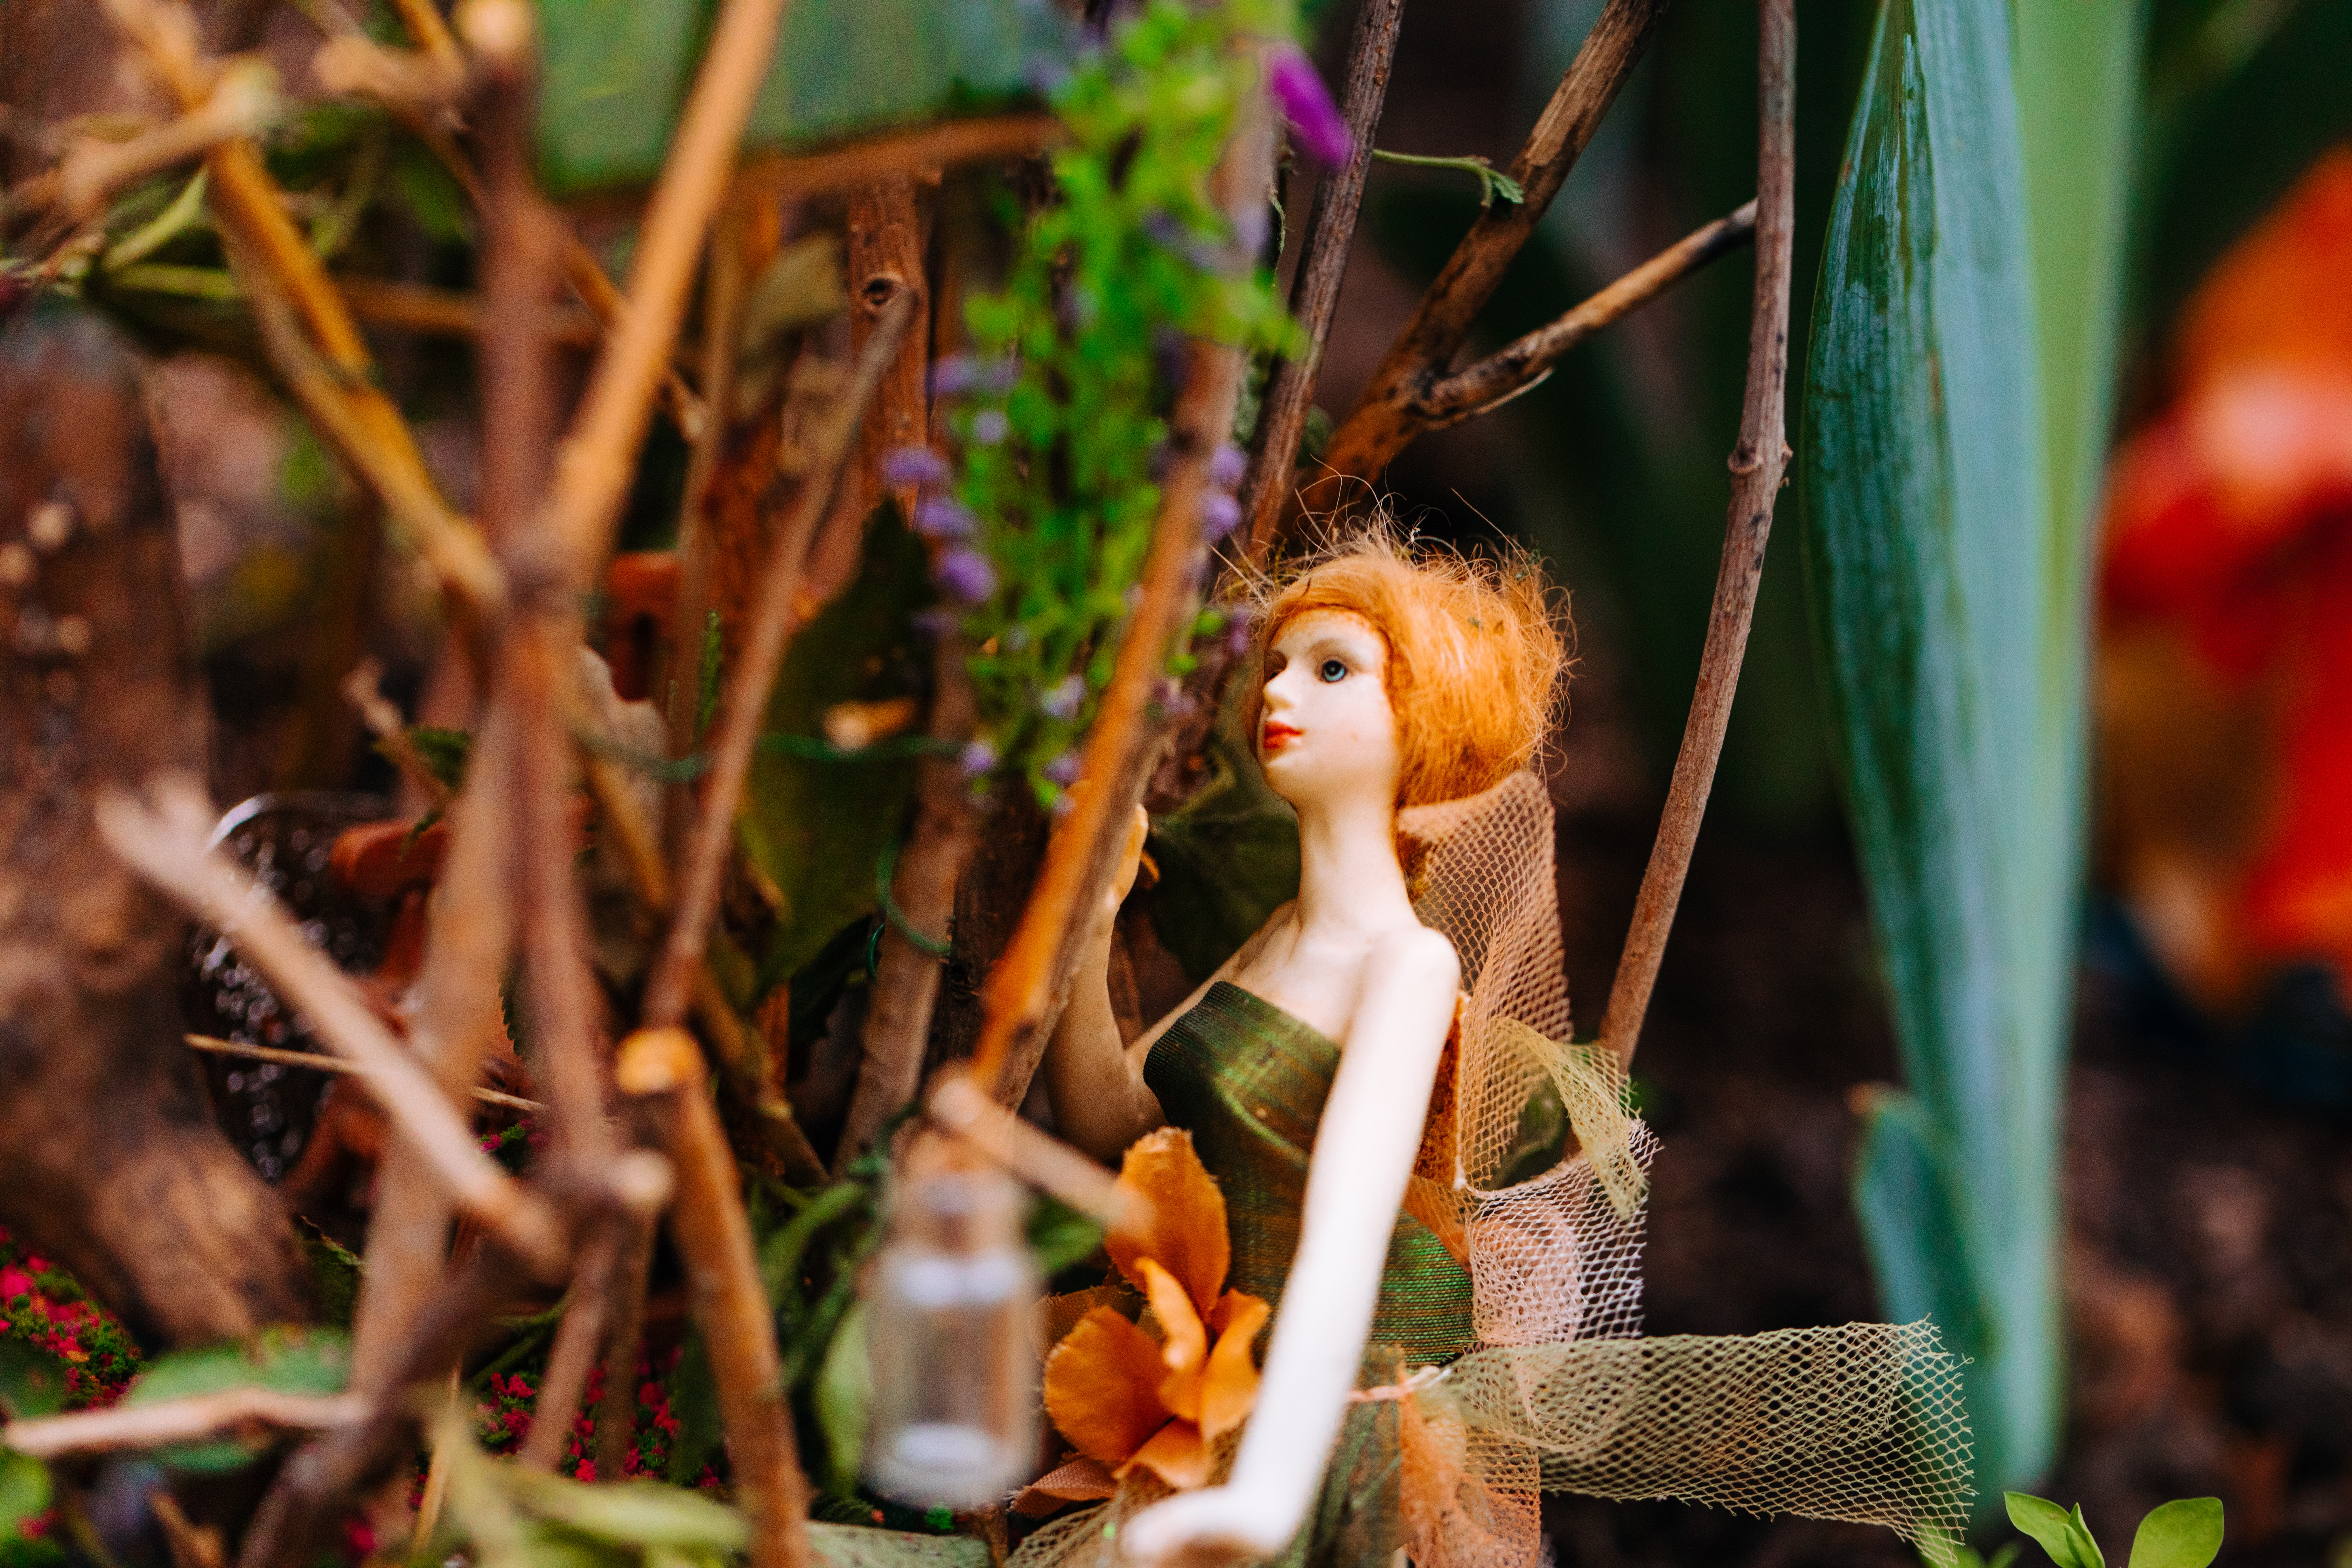
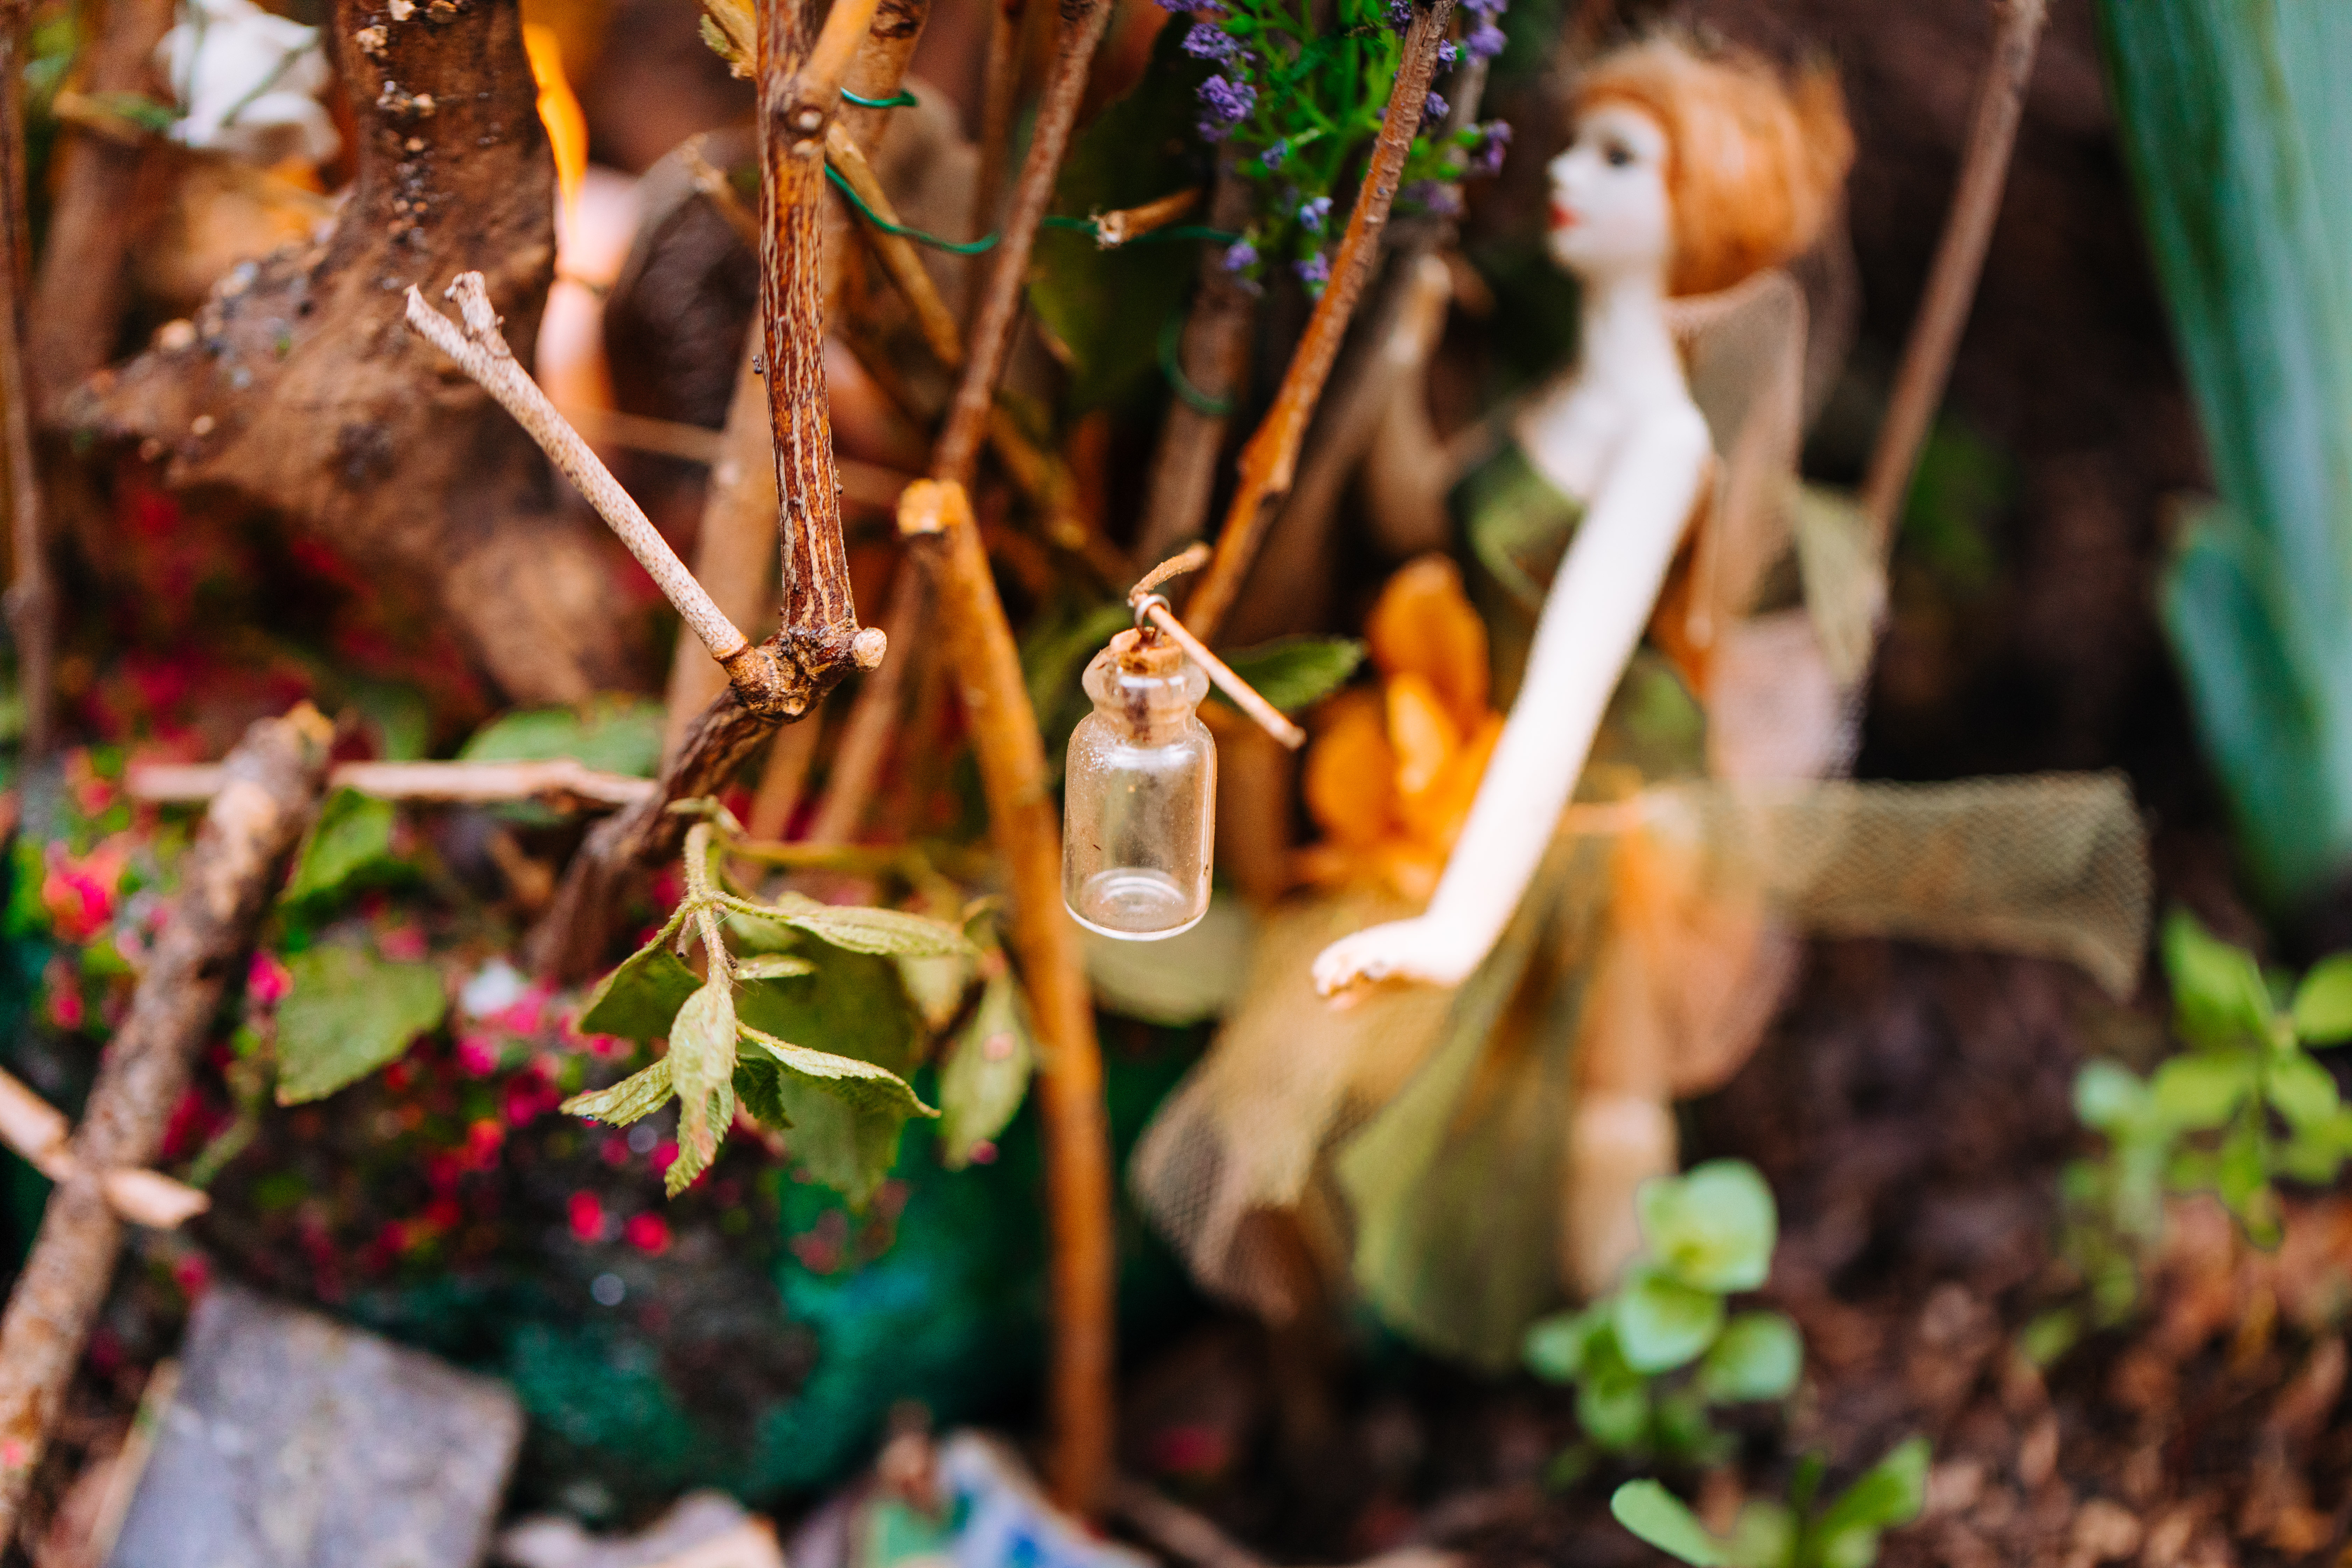
- When I find little things around the house, like this little bottle, we add it to the fairy village. Perhaps a bit of extra fairy dust is stored in it.
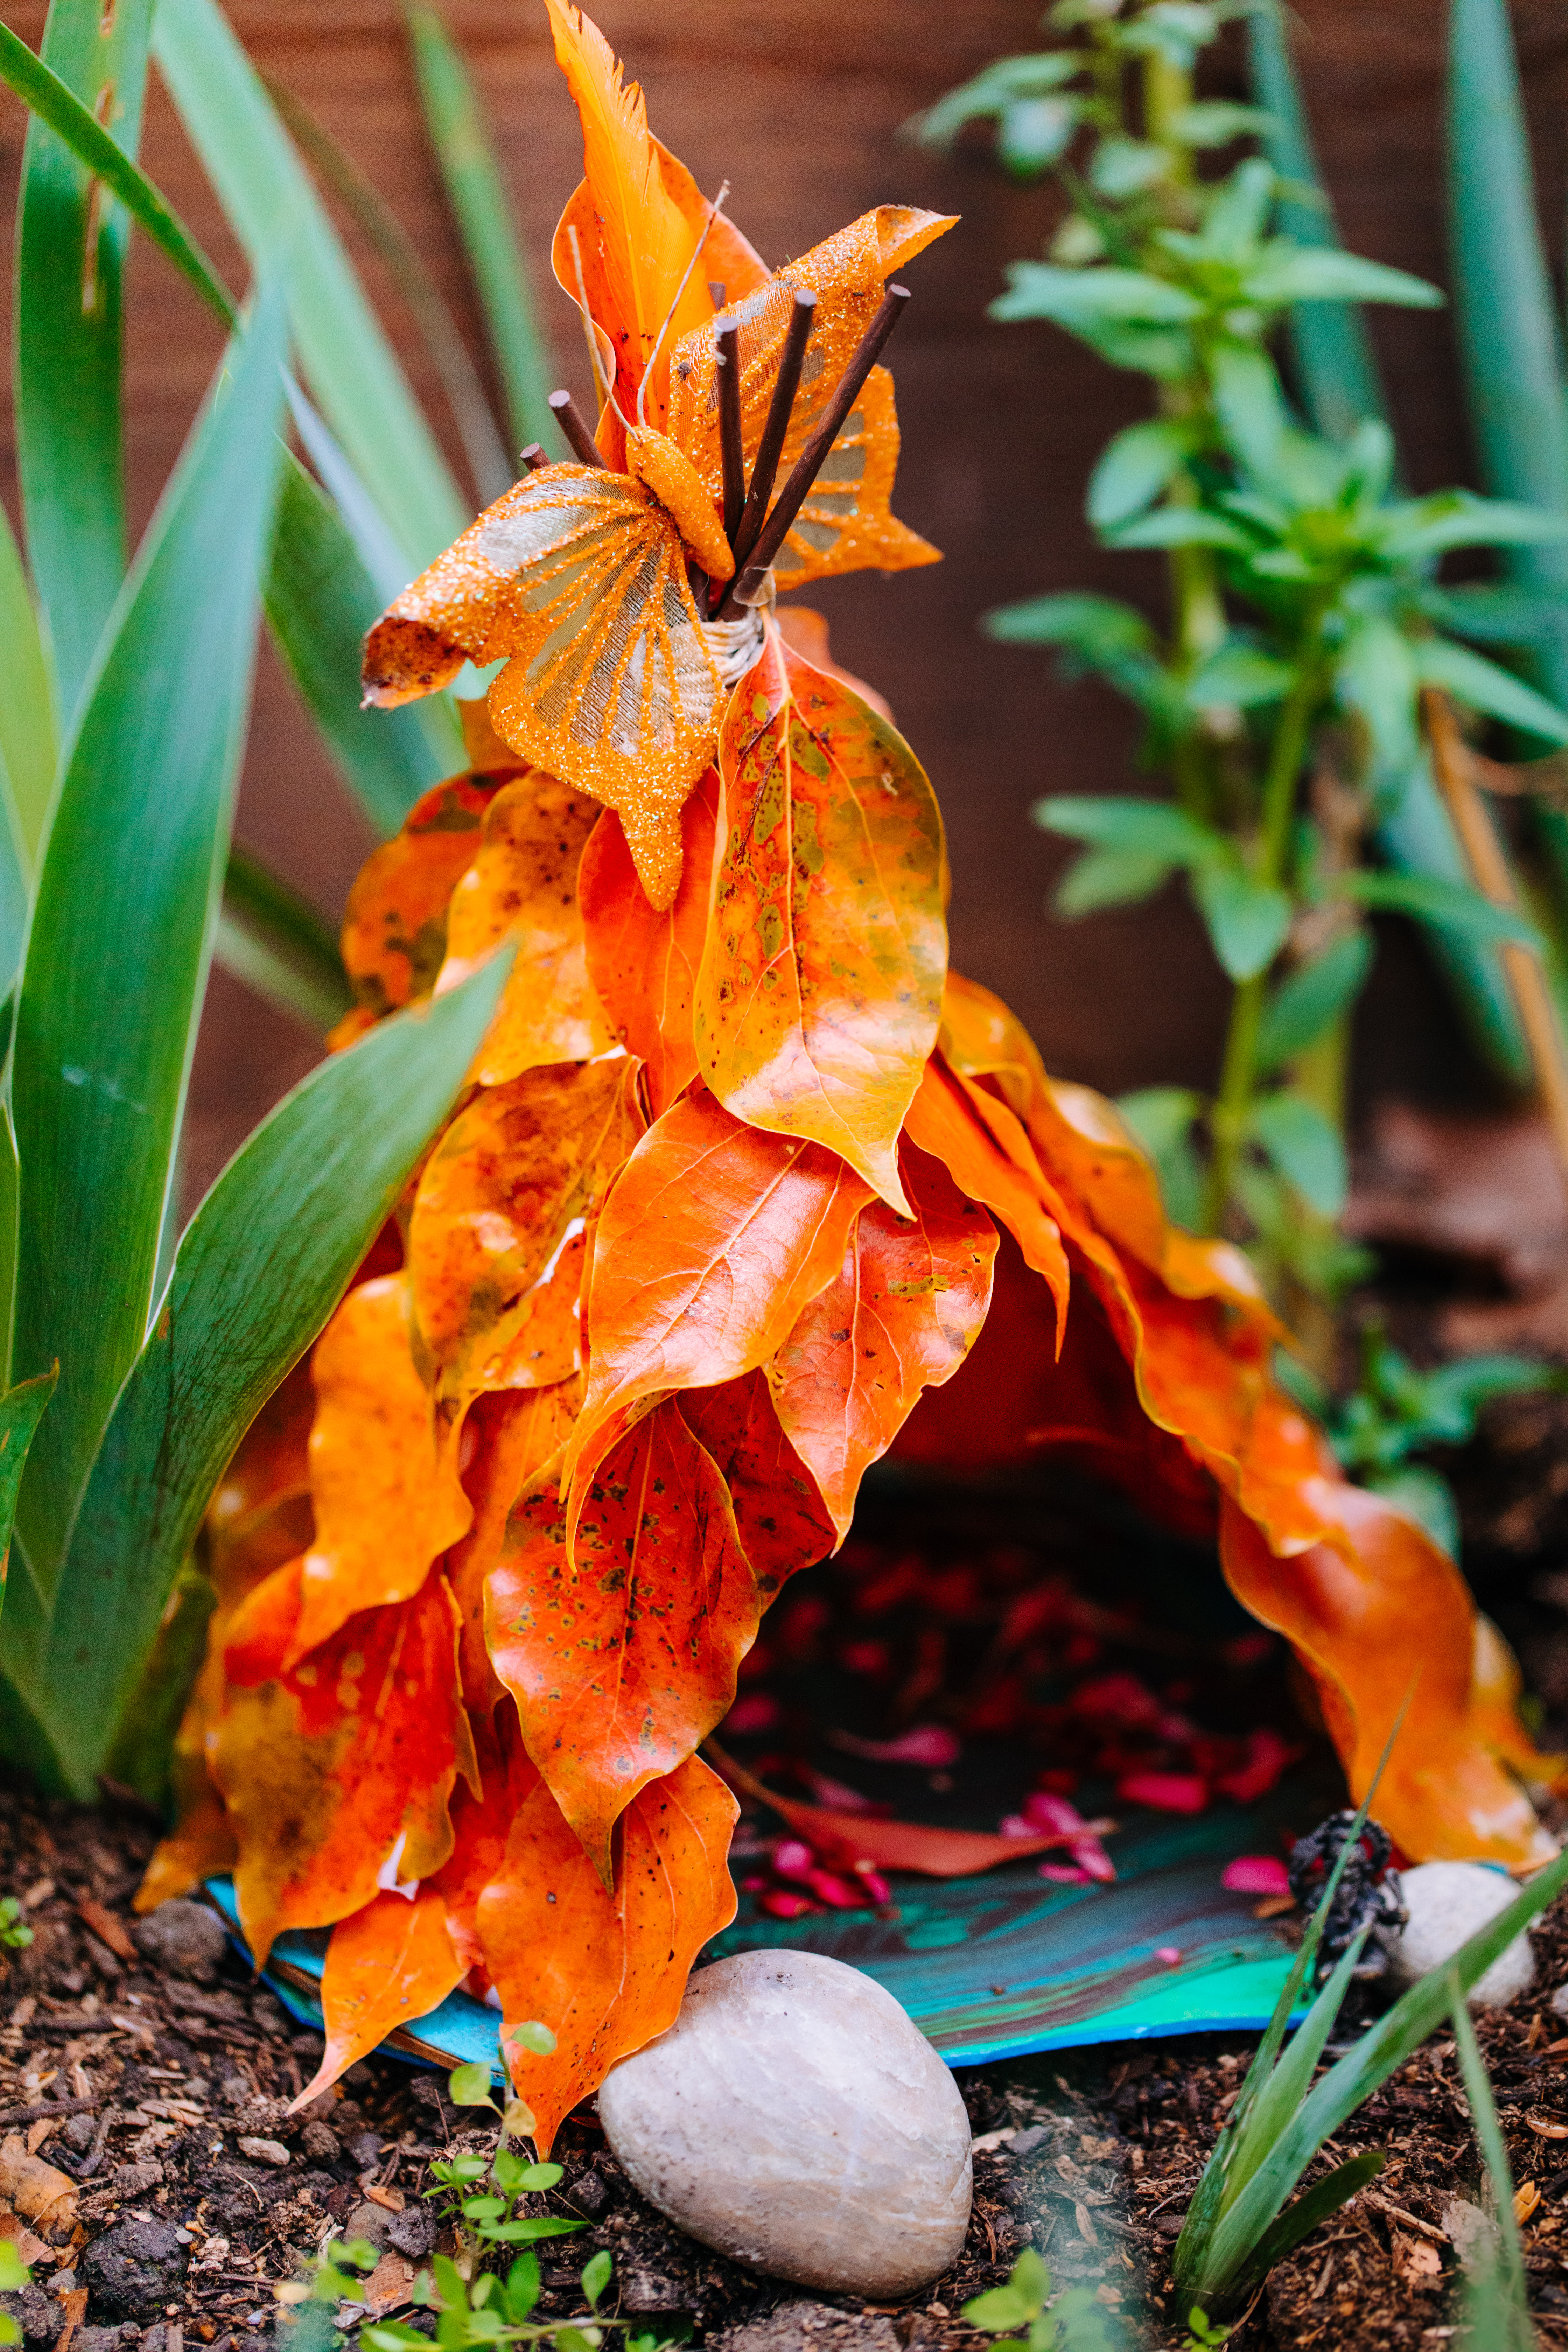
- These vibrant flowers we found on our walk around the block and collected as many whole leaves as we could find. Then attached them to a teepee base with some good old red duct tape.
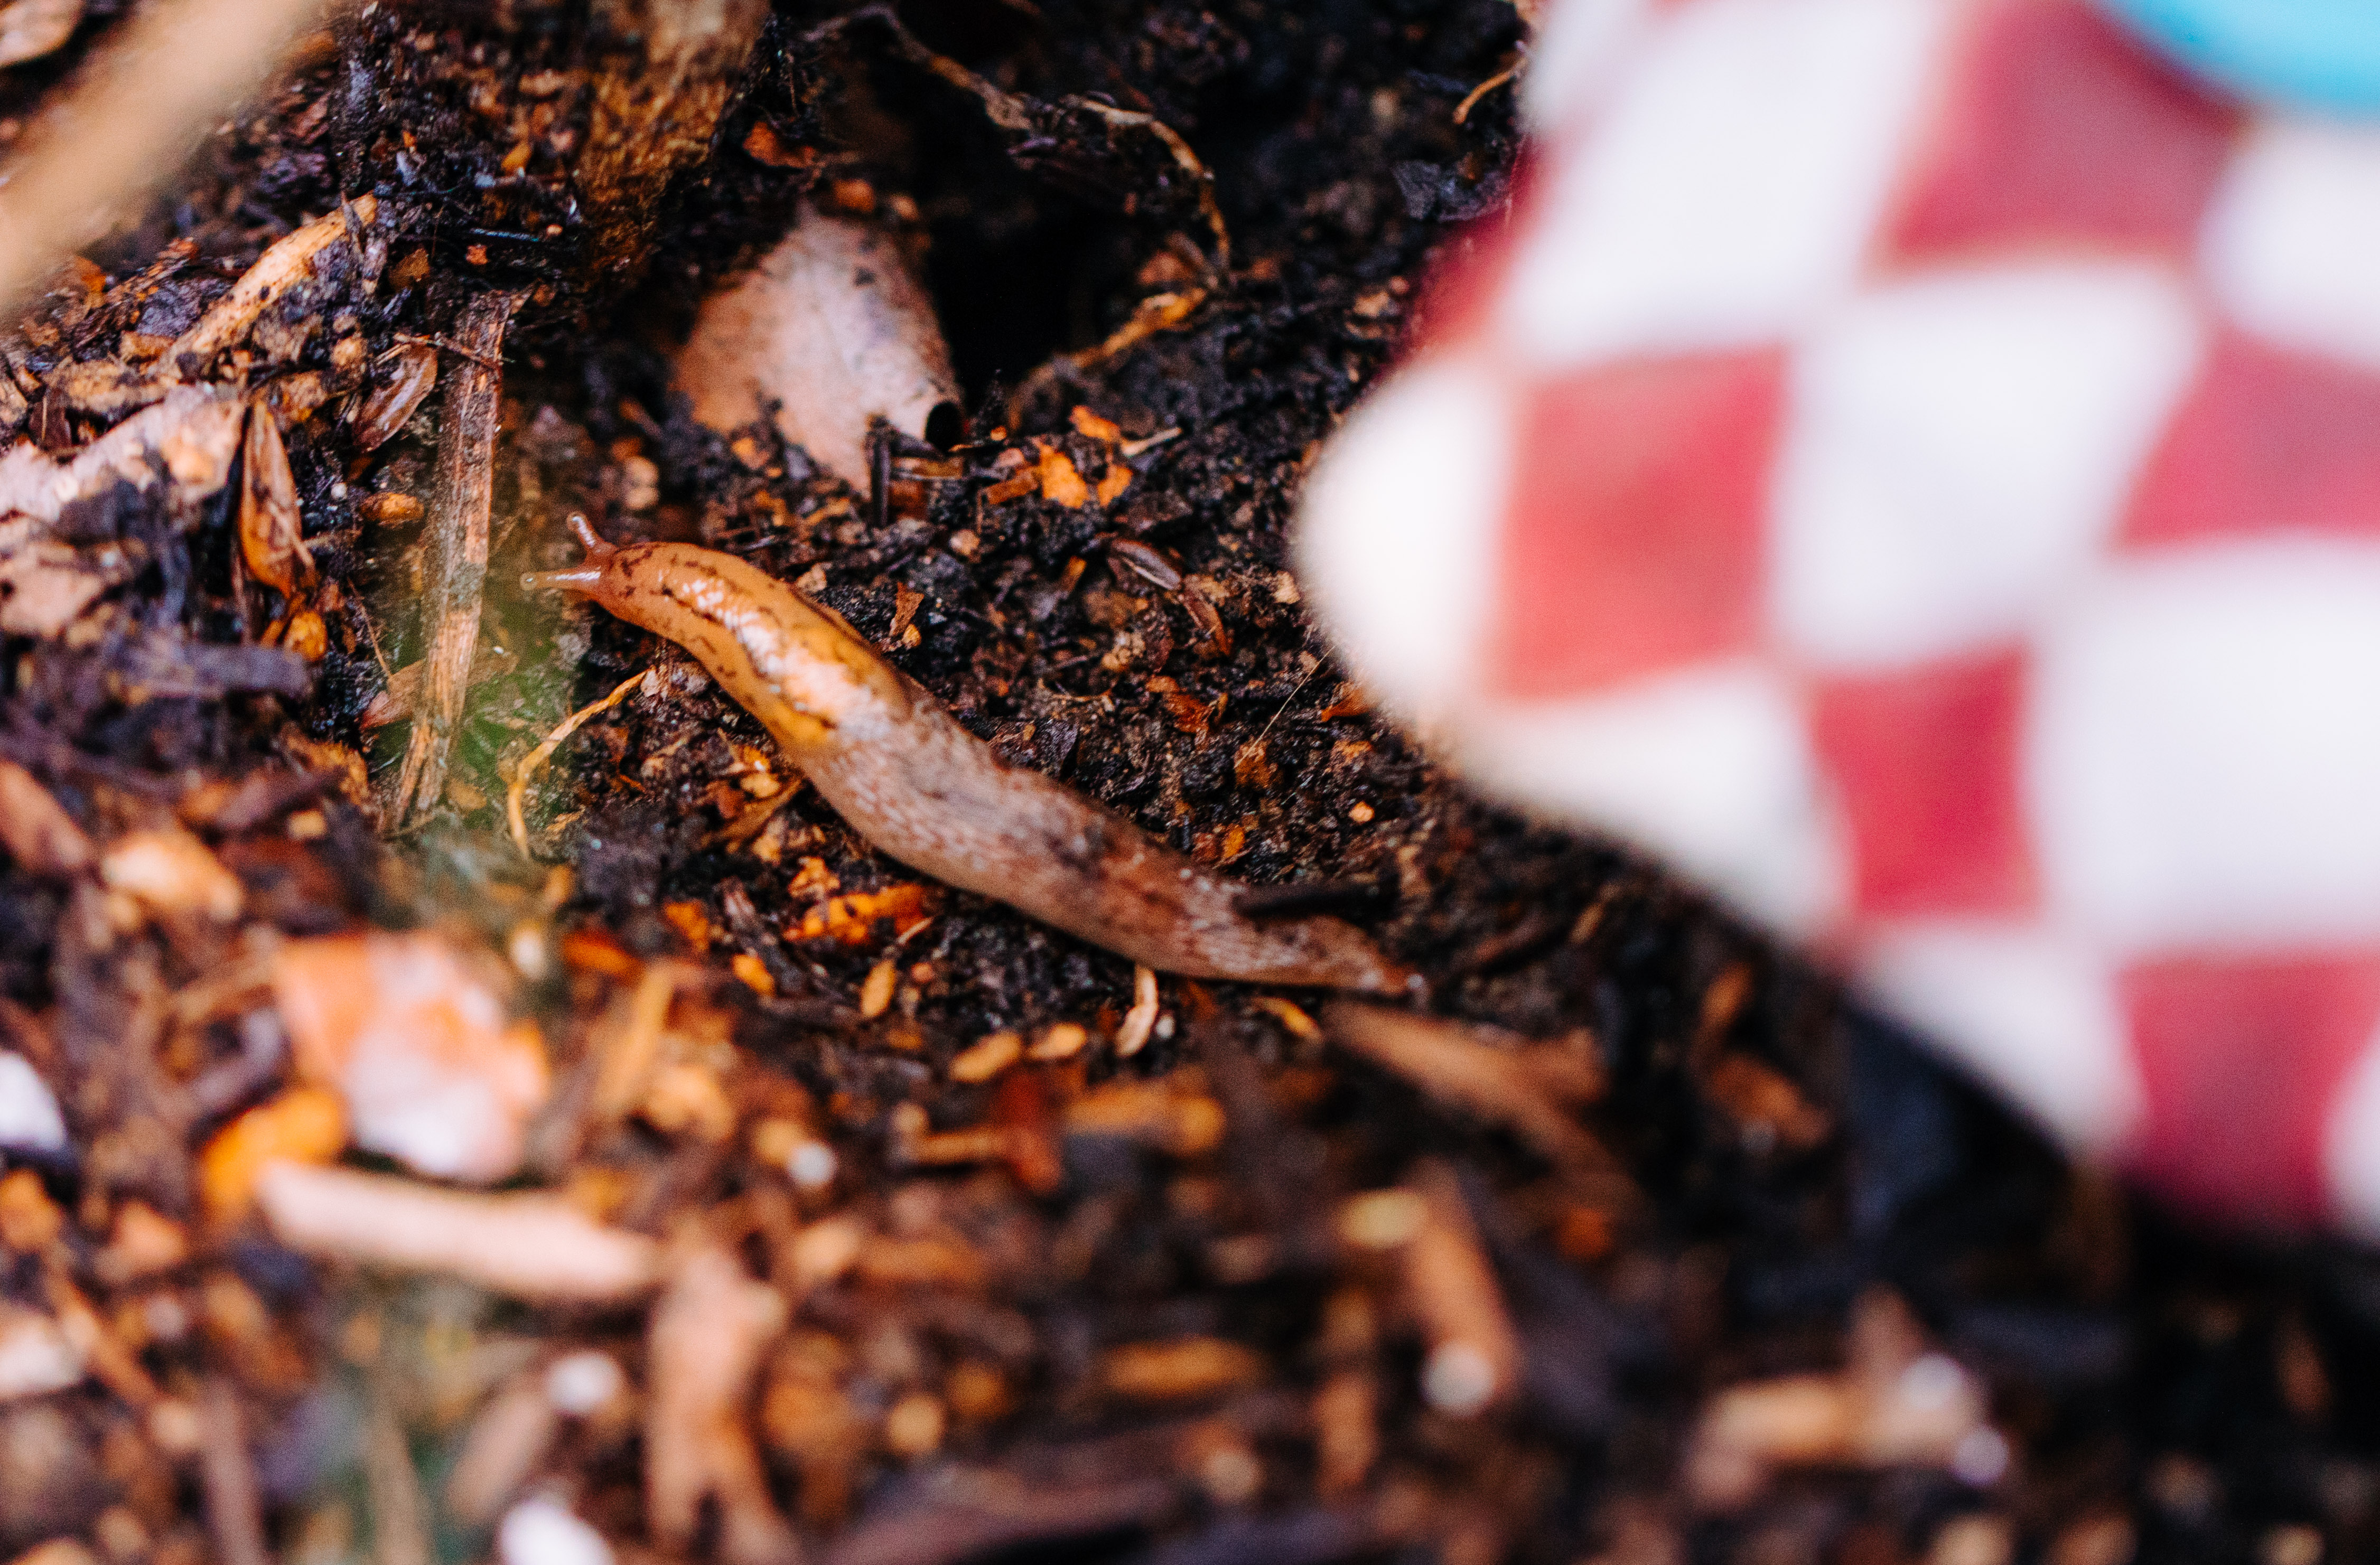
- Other little critters make their way around the fairy garden. A slug of a friend.
- Slice of gooseberry pie anyone?
- A red mushroom chimney top.
This fairy house (below) was built by myself and my 5 and 2-year-old. It was not hard and they enjoyed helping! We had a round block of foam (like the kind you put in fake flower vases) and collected sticks from around the yard and stuck them into the foam. We painted the base and put a floor of glue then fake moss for the carpet flooring. I used green wire to weave the structure together is a sturdier fashion and small vines and flexible sticks to weave it all together like a basket. A few large fake leaves made for the roof.
- Come fall we will collect all the fairy village pieces, clean them and put them away to be pulled out and enjoyed next spring. This activity had the kids entertained in their imaginary play world for hours! And it is a very calming activity too. With all that is going on in the world right now, we could all use a little escape of a project that is calming and soothing for the soul and something that is a fun little bonding activity.
-
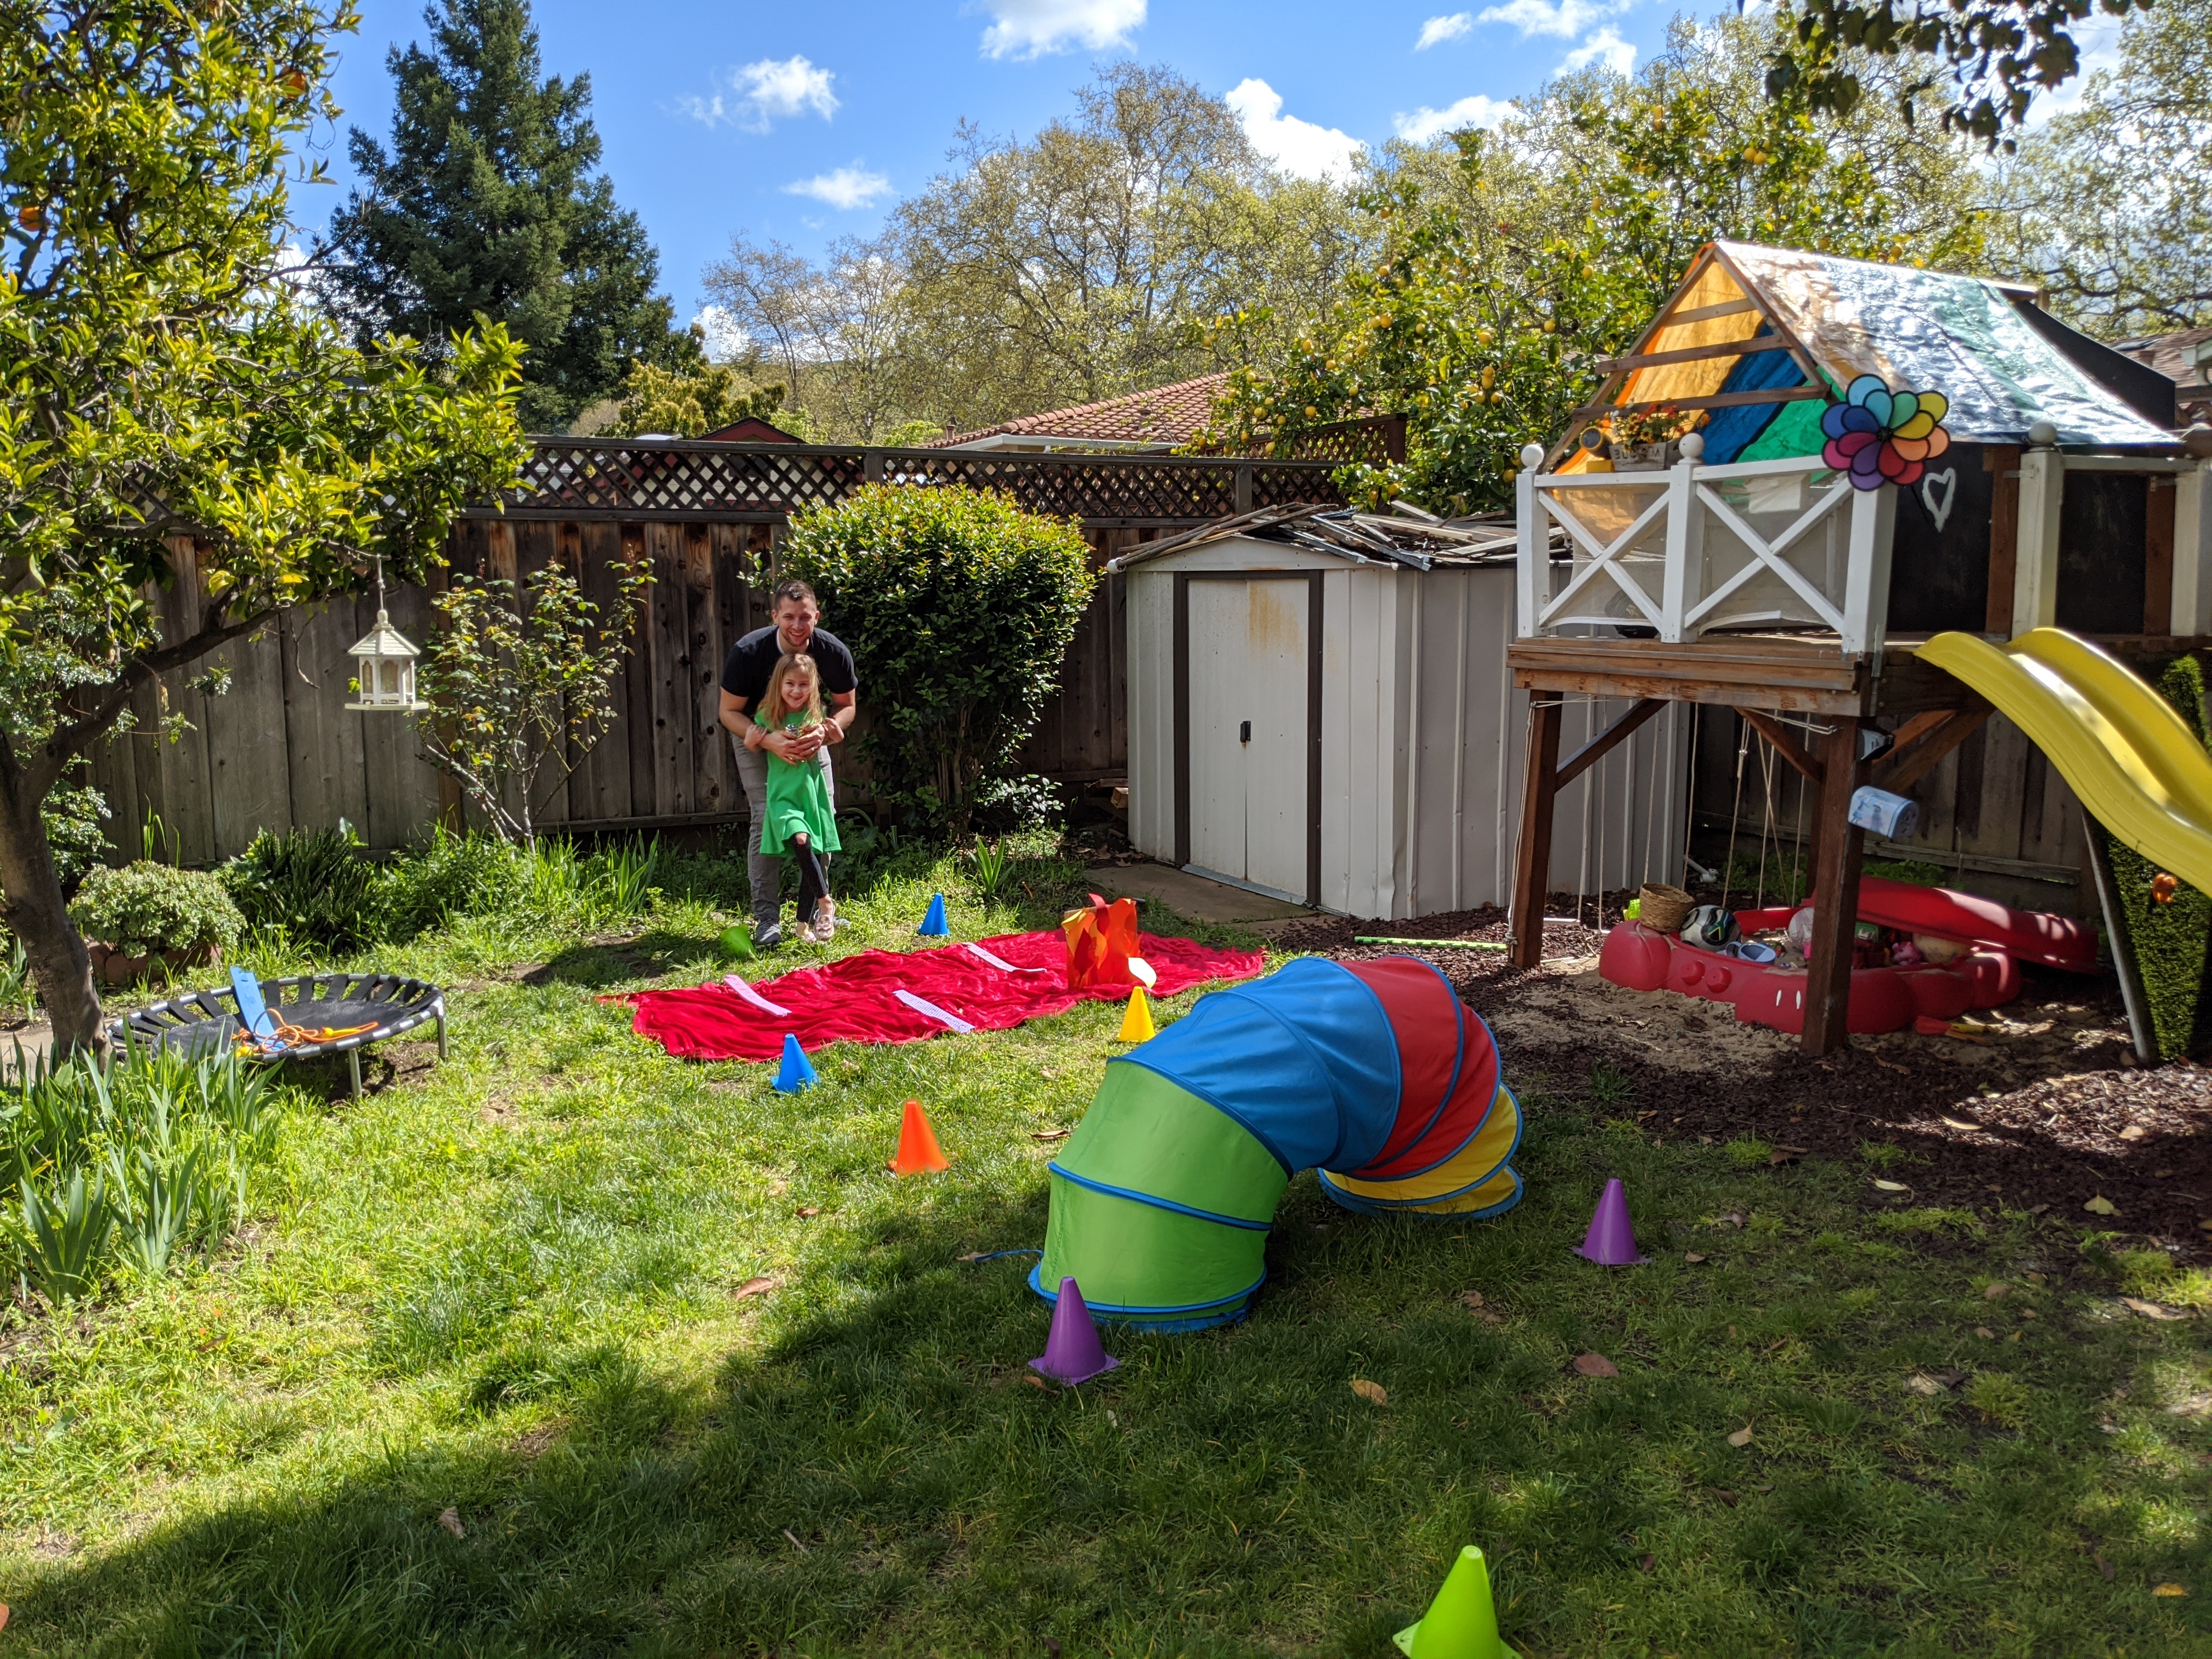
Build an obstacle course
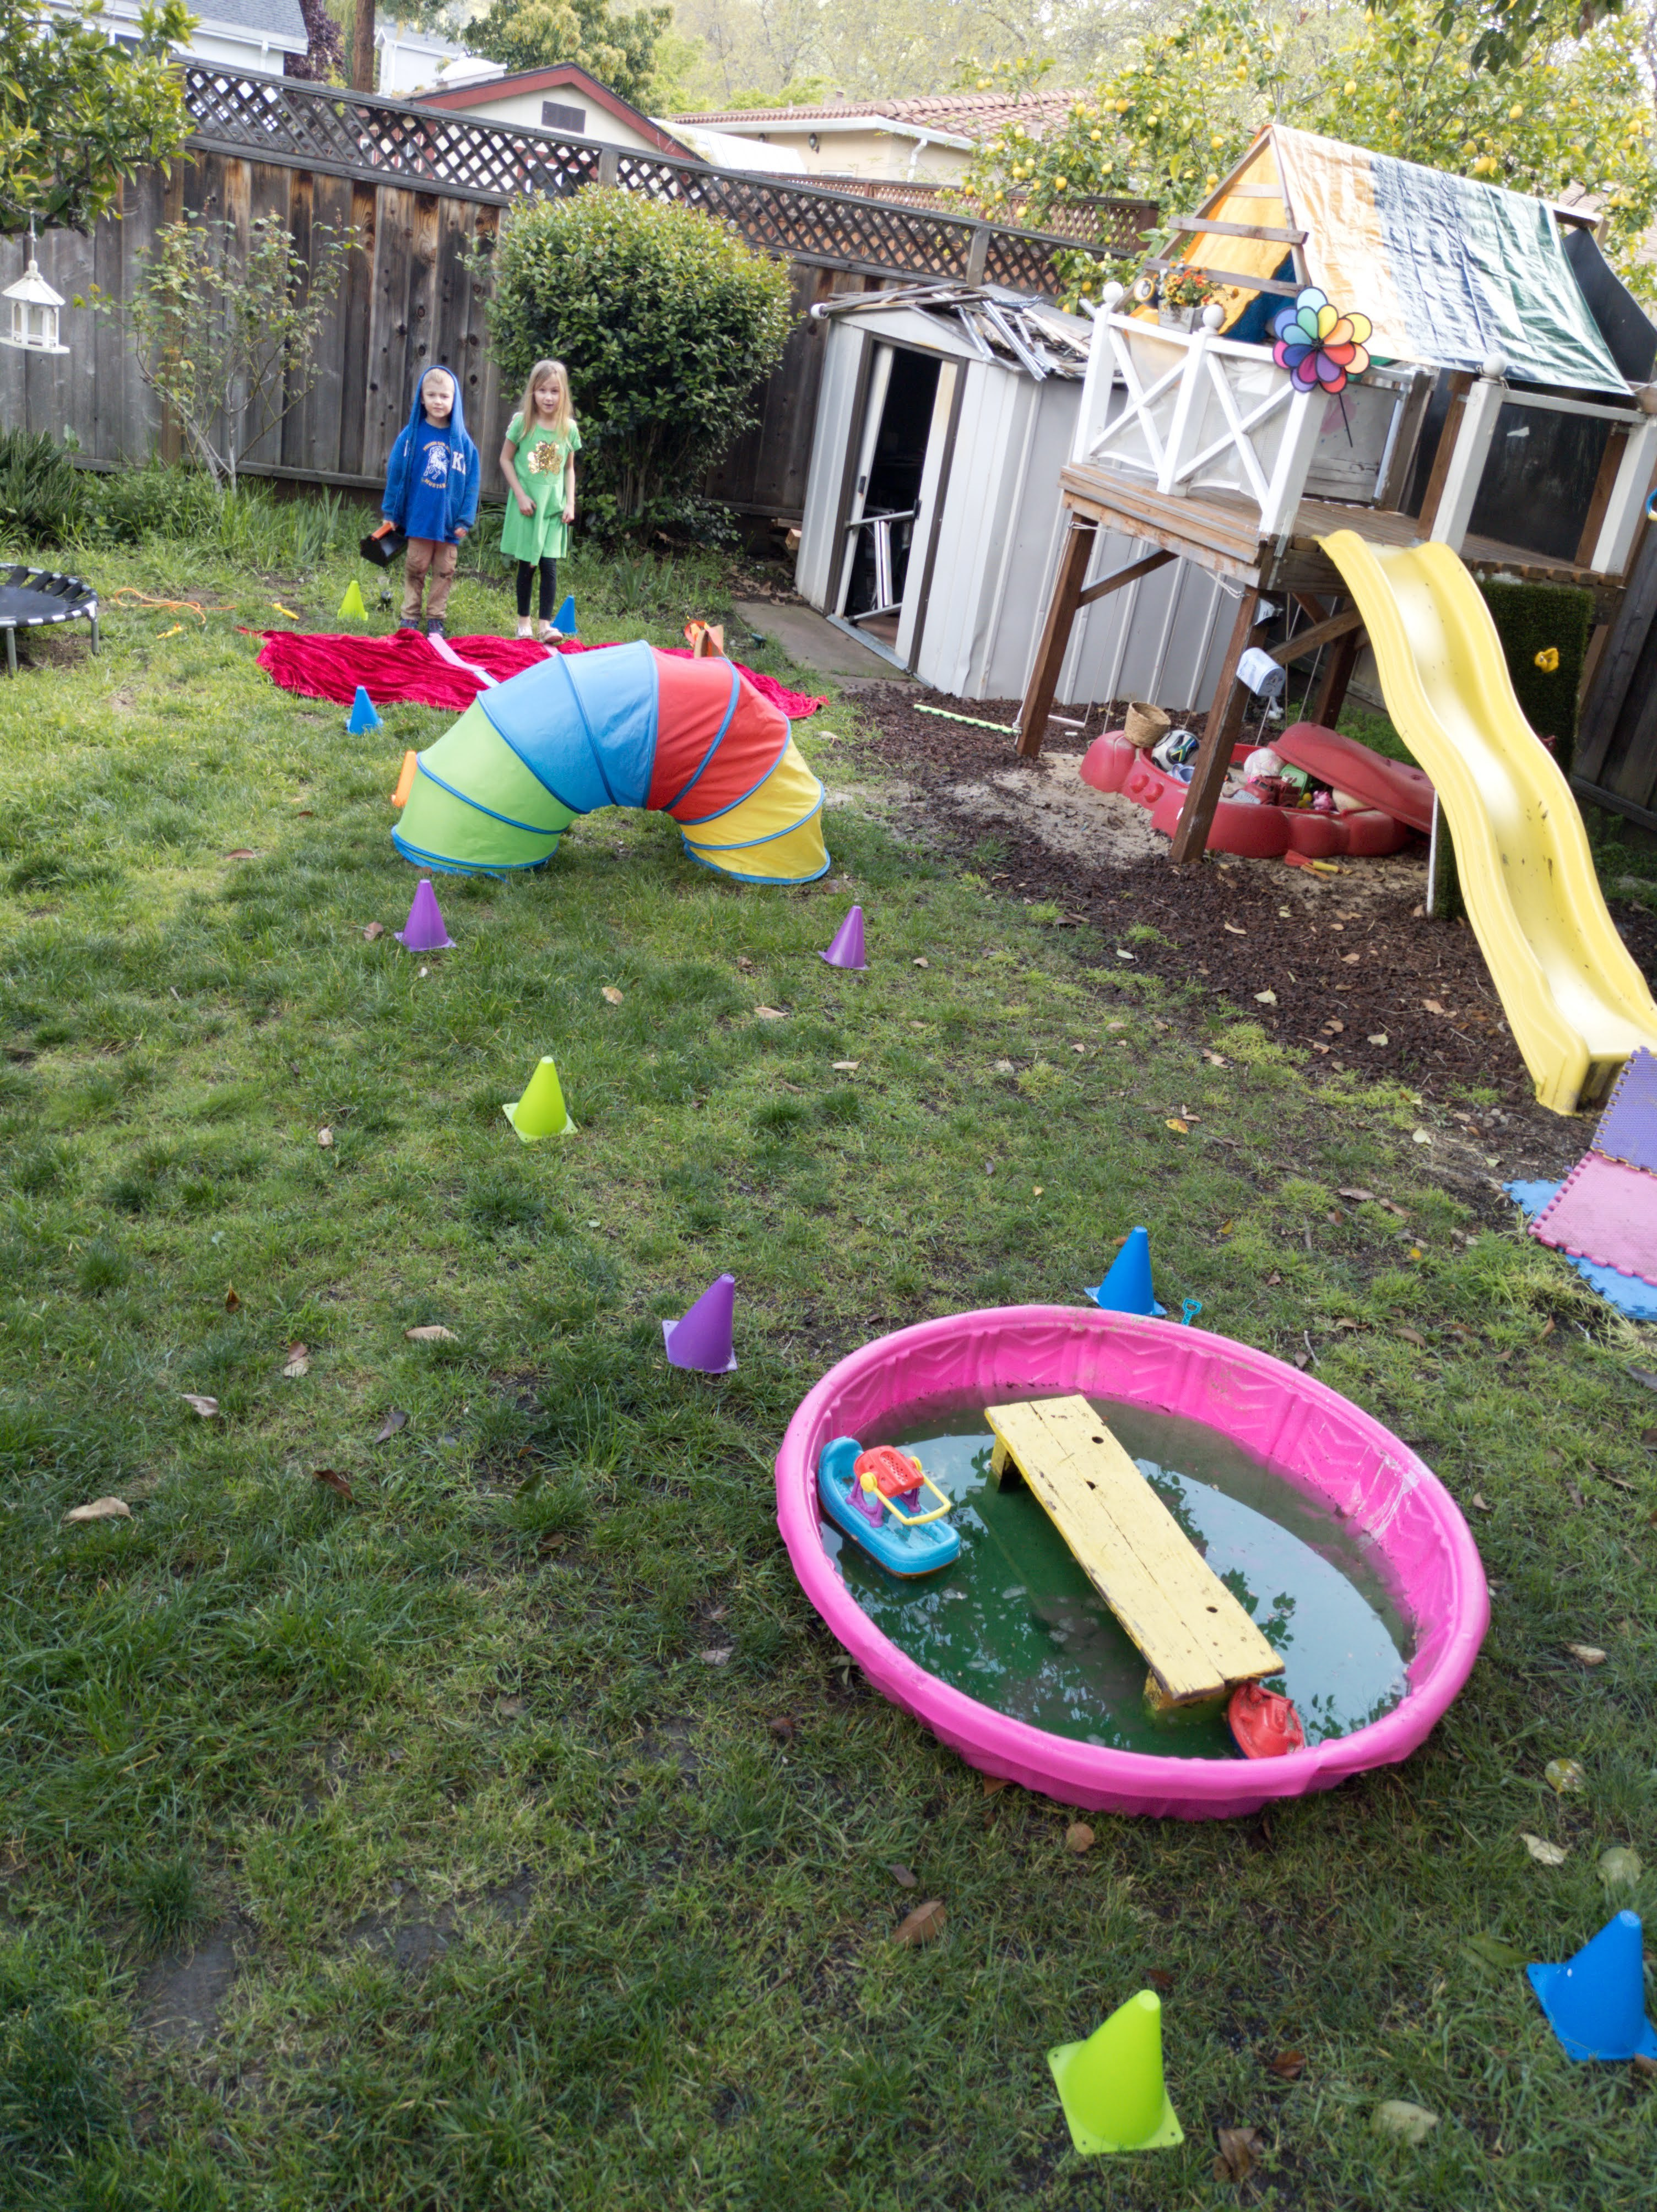
- This was actually part of a school assignment! For fun! My daughter had to build an obstacle course she planned and drew out and pick a song that you had to accomplish the course before it was over. We had fun hopping around the yard to “Happy Birthday to You”
-
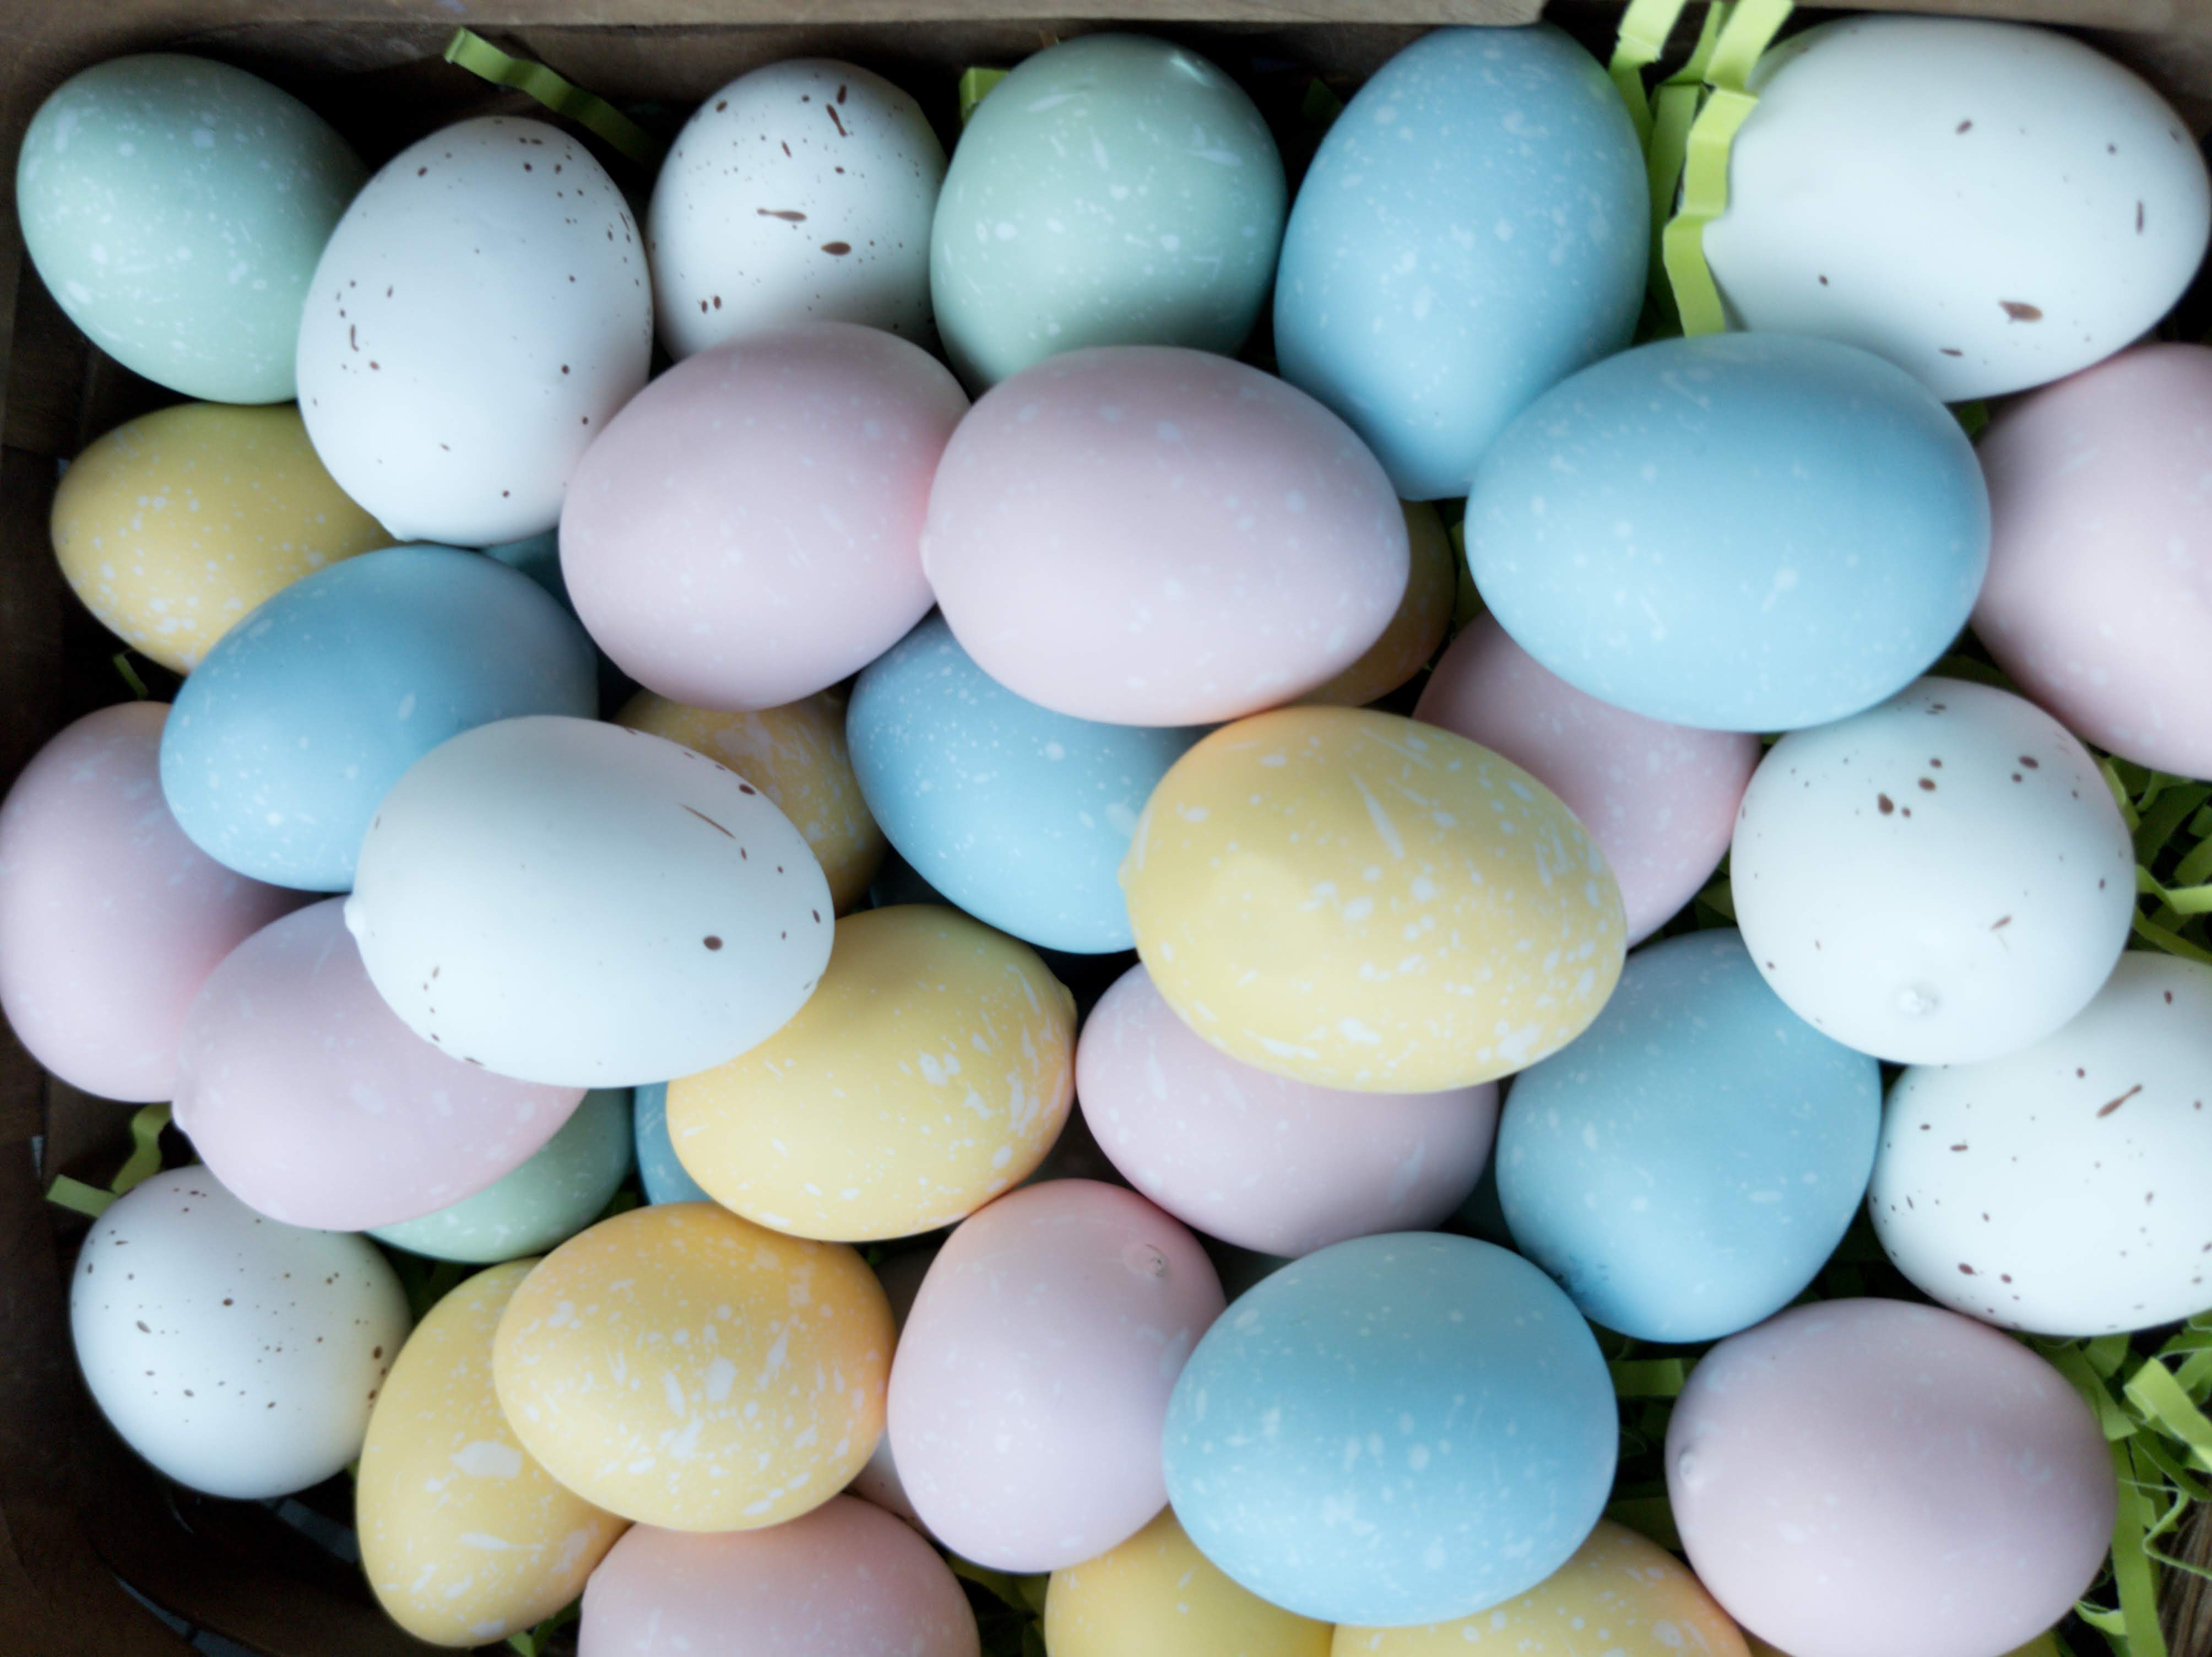
Have an Easter Egg Hunt, no candy required
- No need to prefill eggs for this one! We had to teams of our group of four. Two would hide the eggs with the others were inside then they would come out and run around and try to collect the most with their little baskets. I found these cute foam decorative eggs at target earlier this year. But any will do. The kids just had fun with the whole process and played this game for over an hour.
-
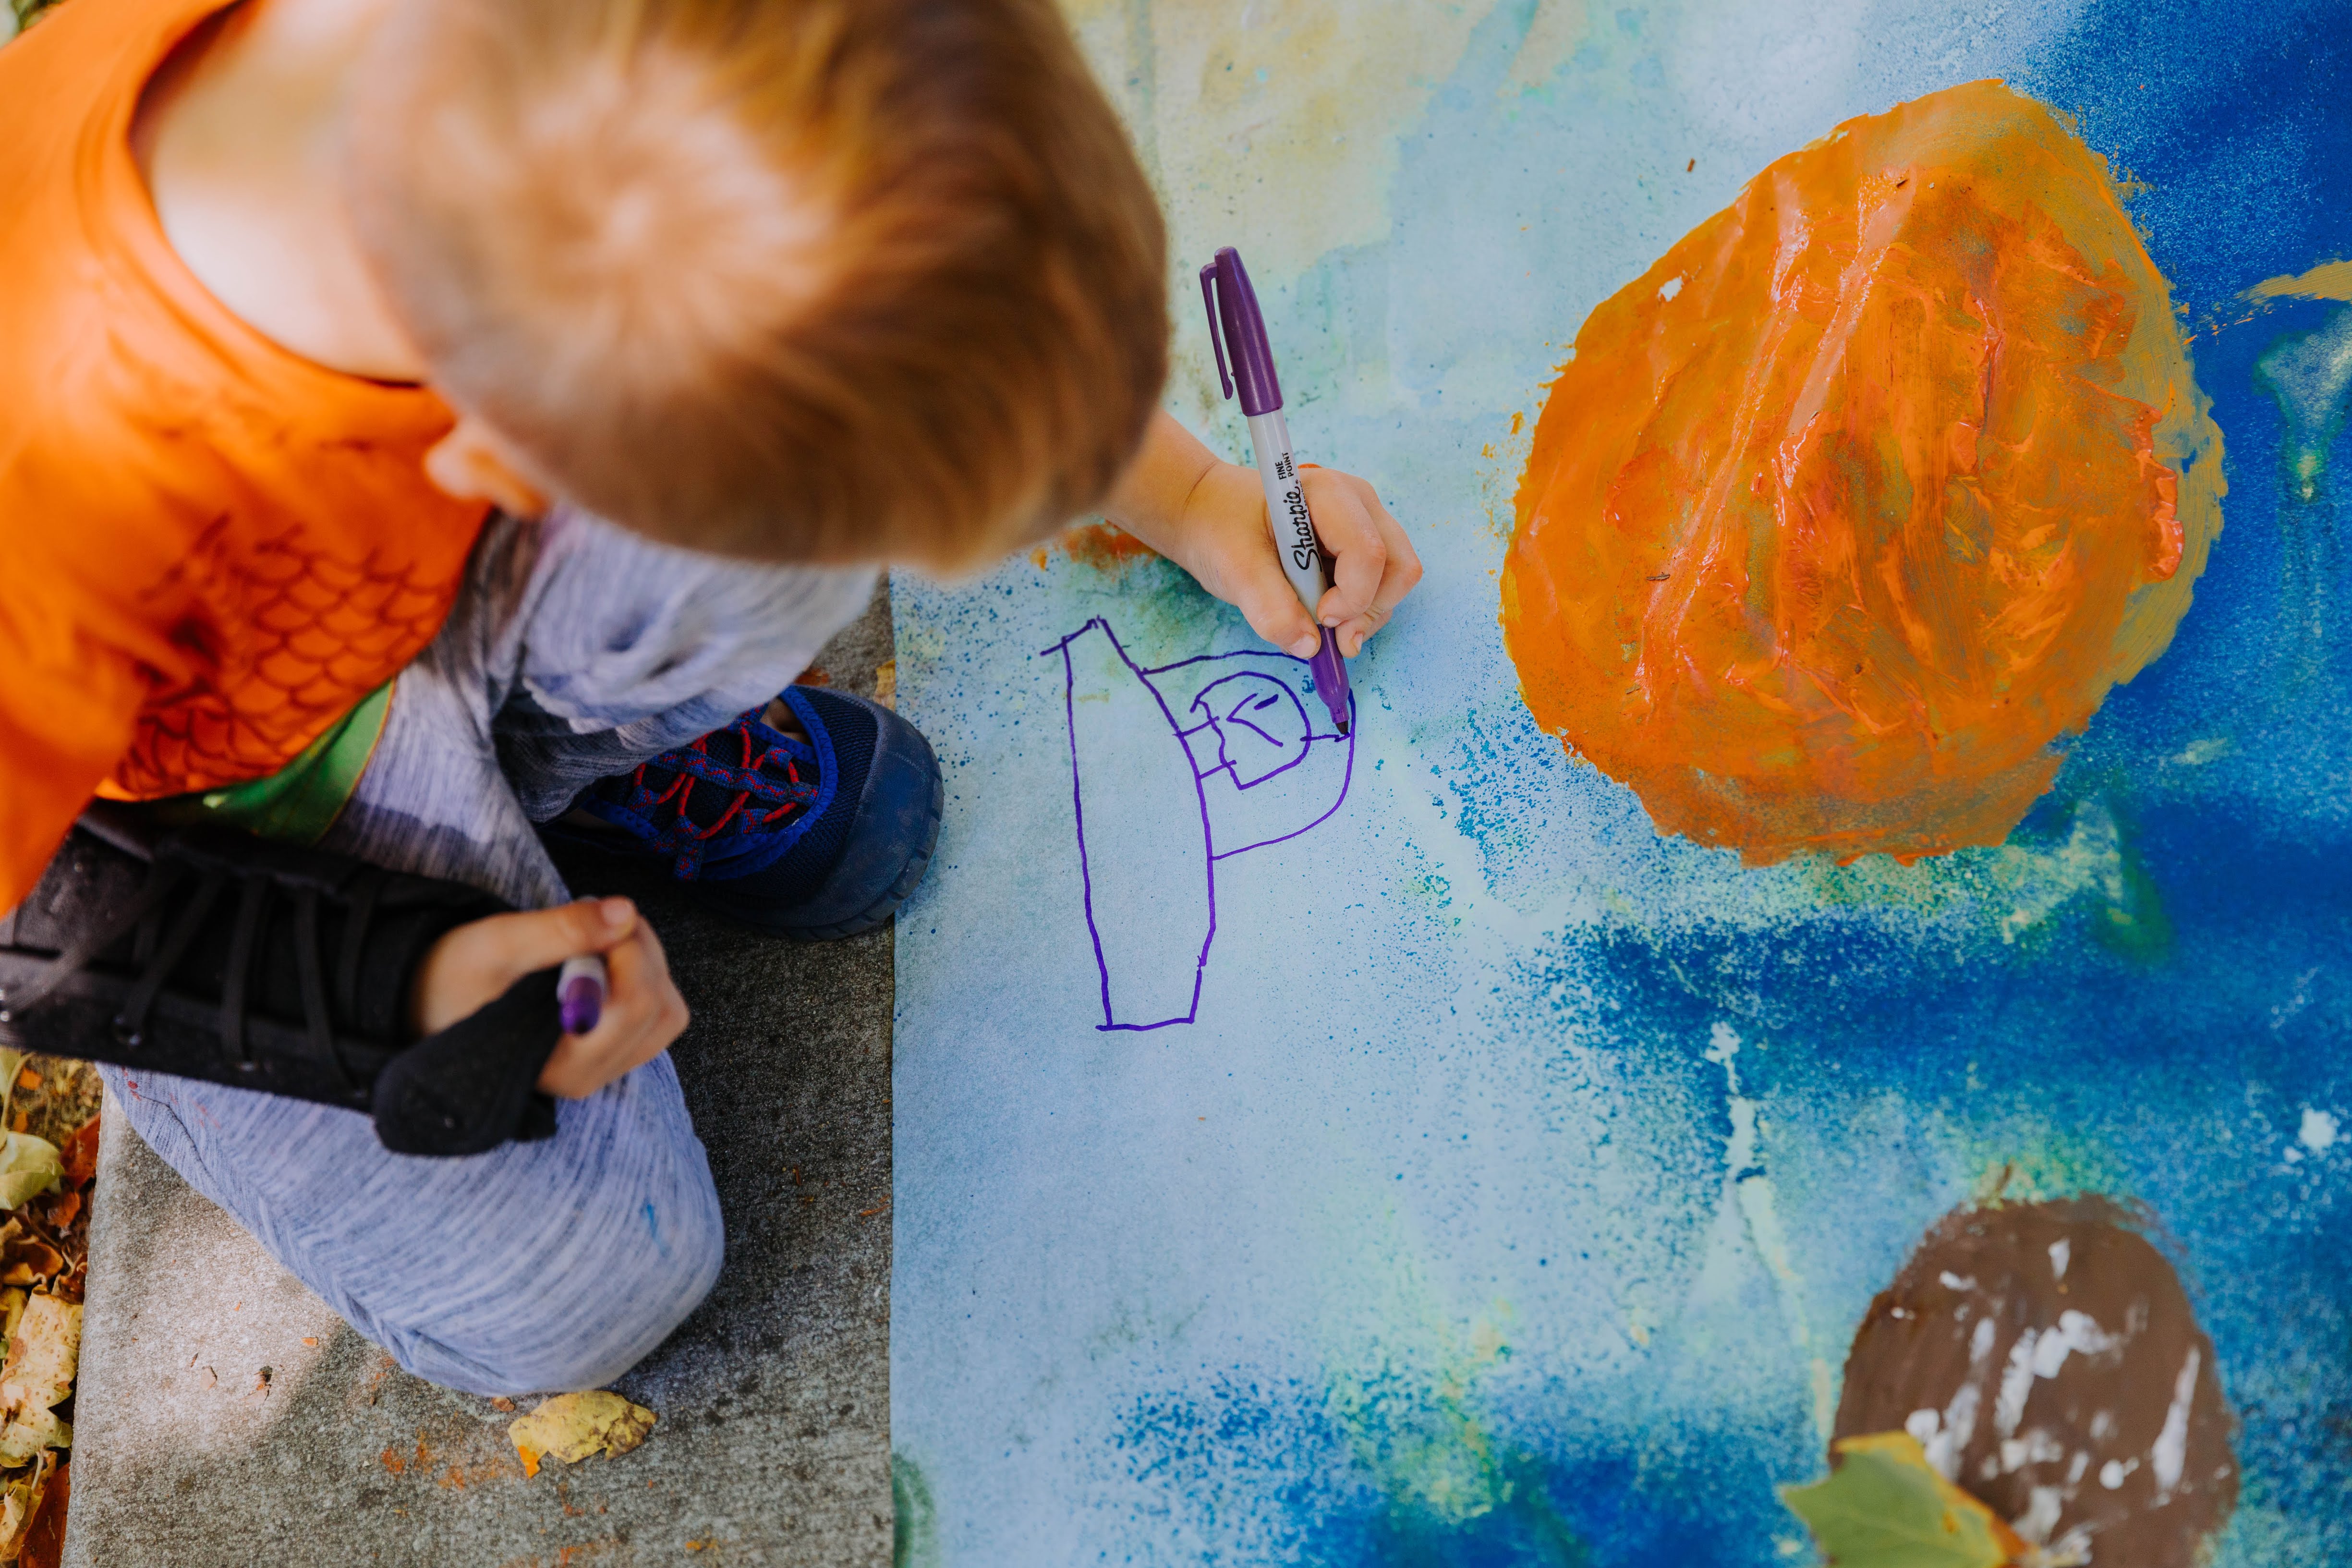
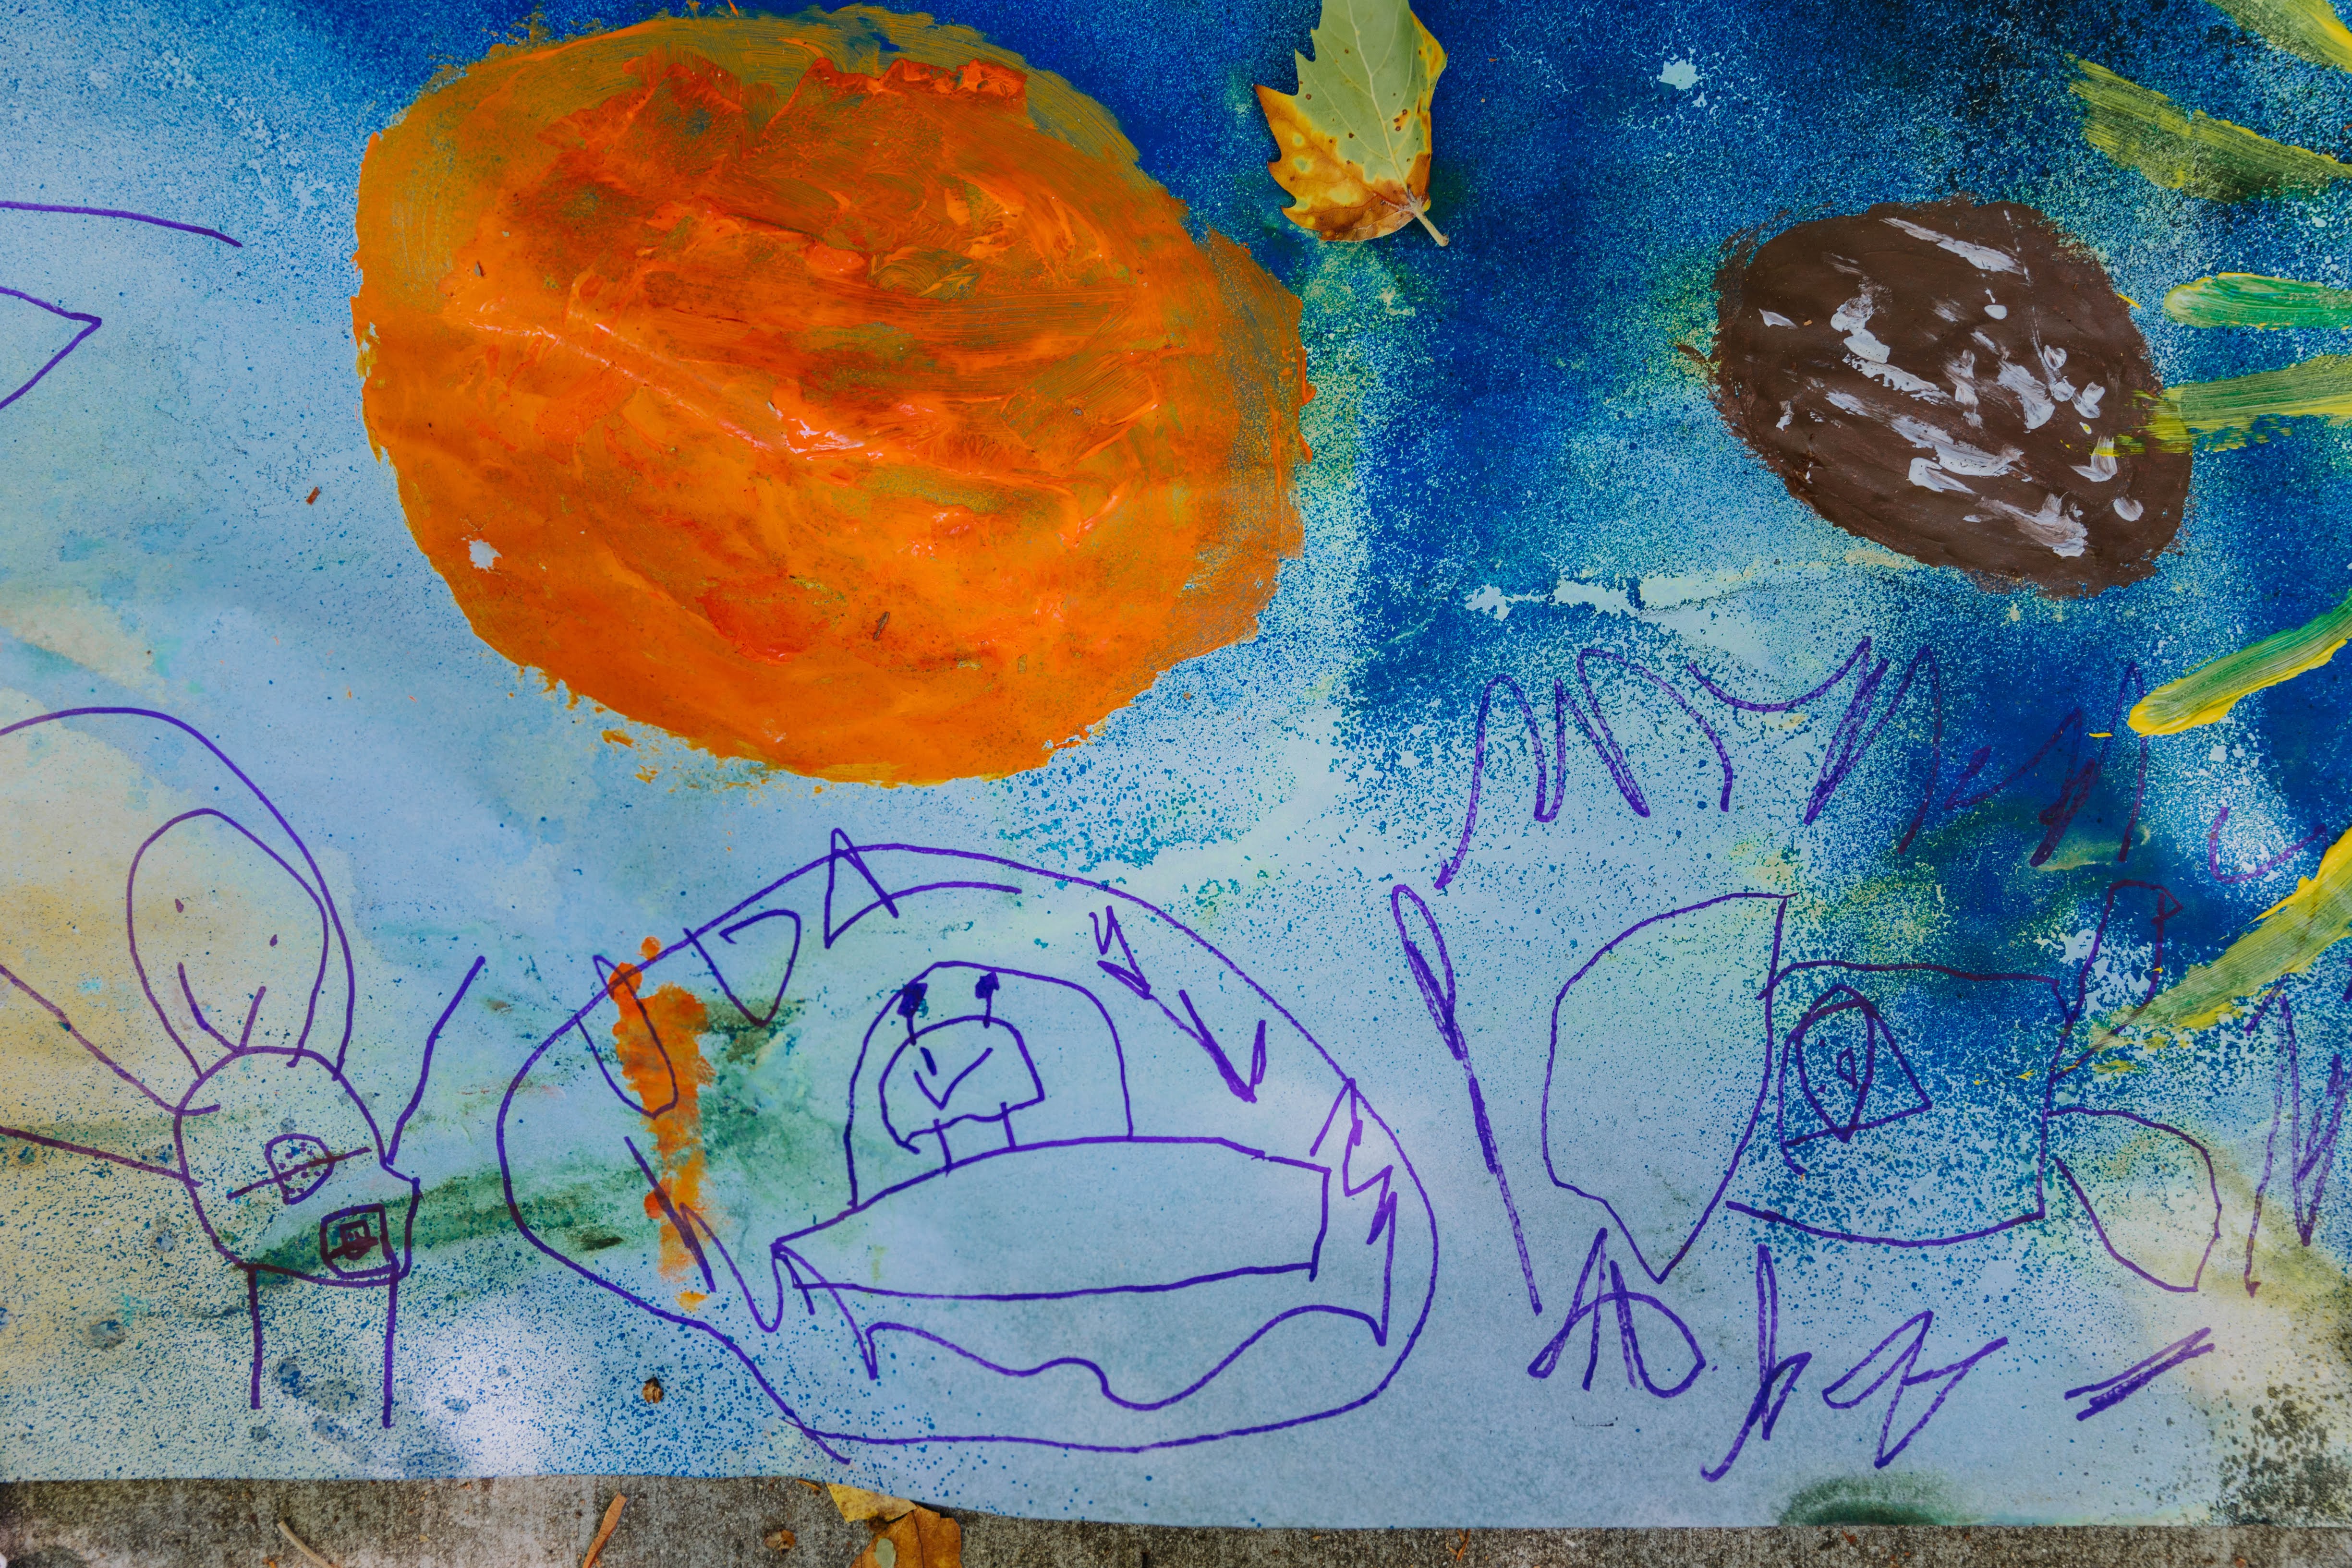
Make a paper mural of the Solar System
- We rolled out a giant roll of art paper across our front sidewalk for this last summer… but the back deck/ patio will do. Creating a group art piece like this one was a fun team effort. We learned the names of the planets and painted them out and were not afraid to get a little messy. Markers followed for details like aliens and space ships.
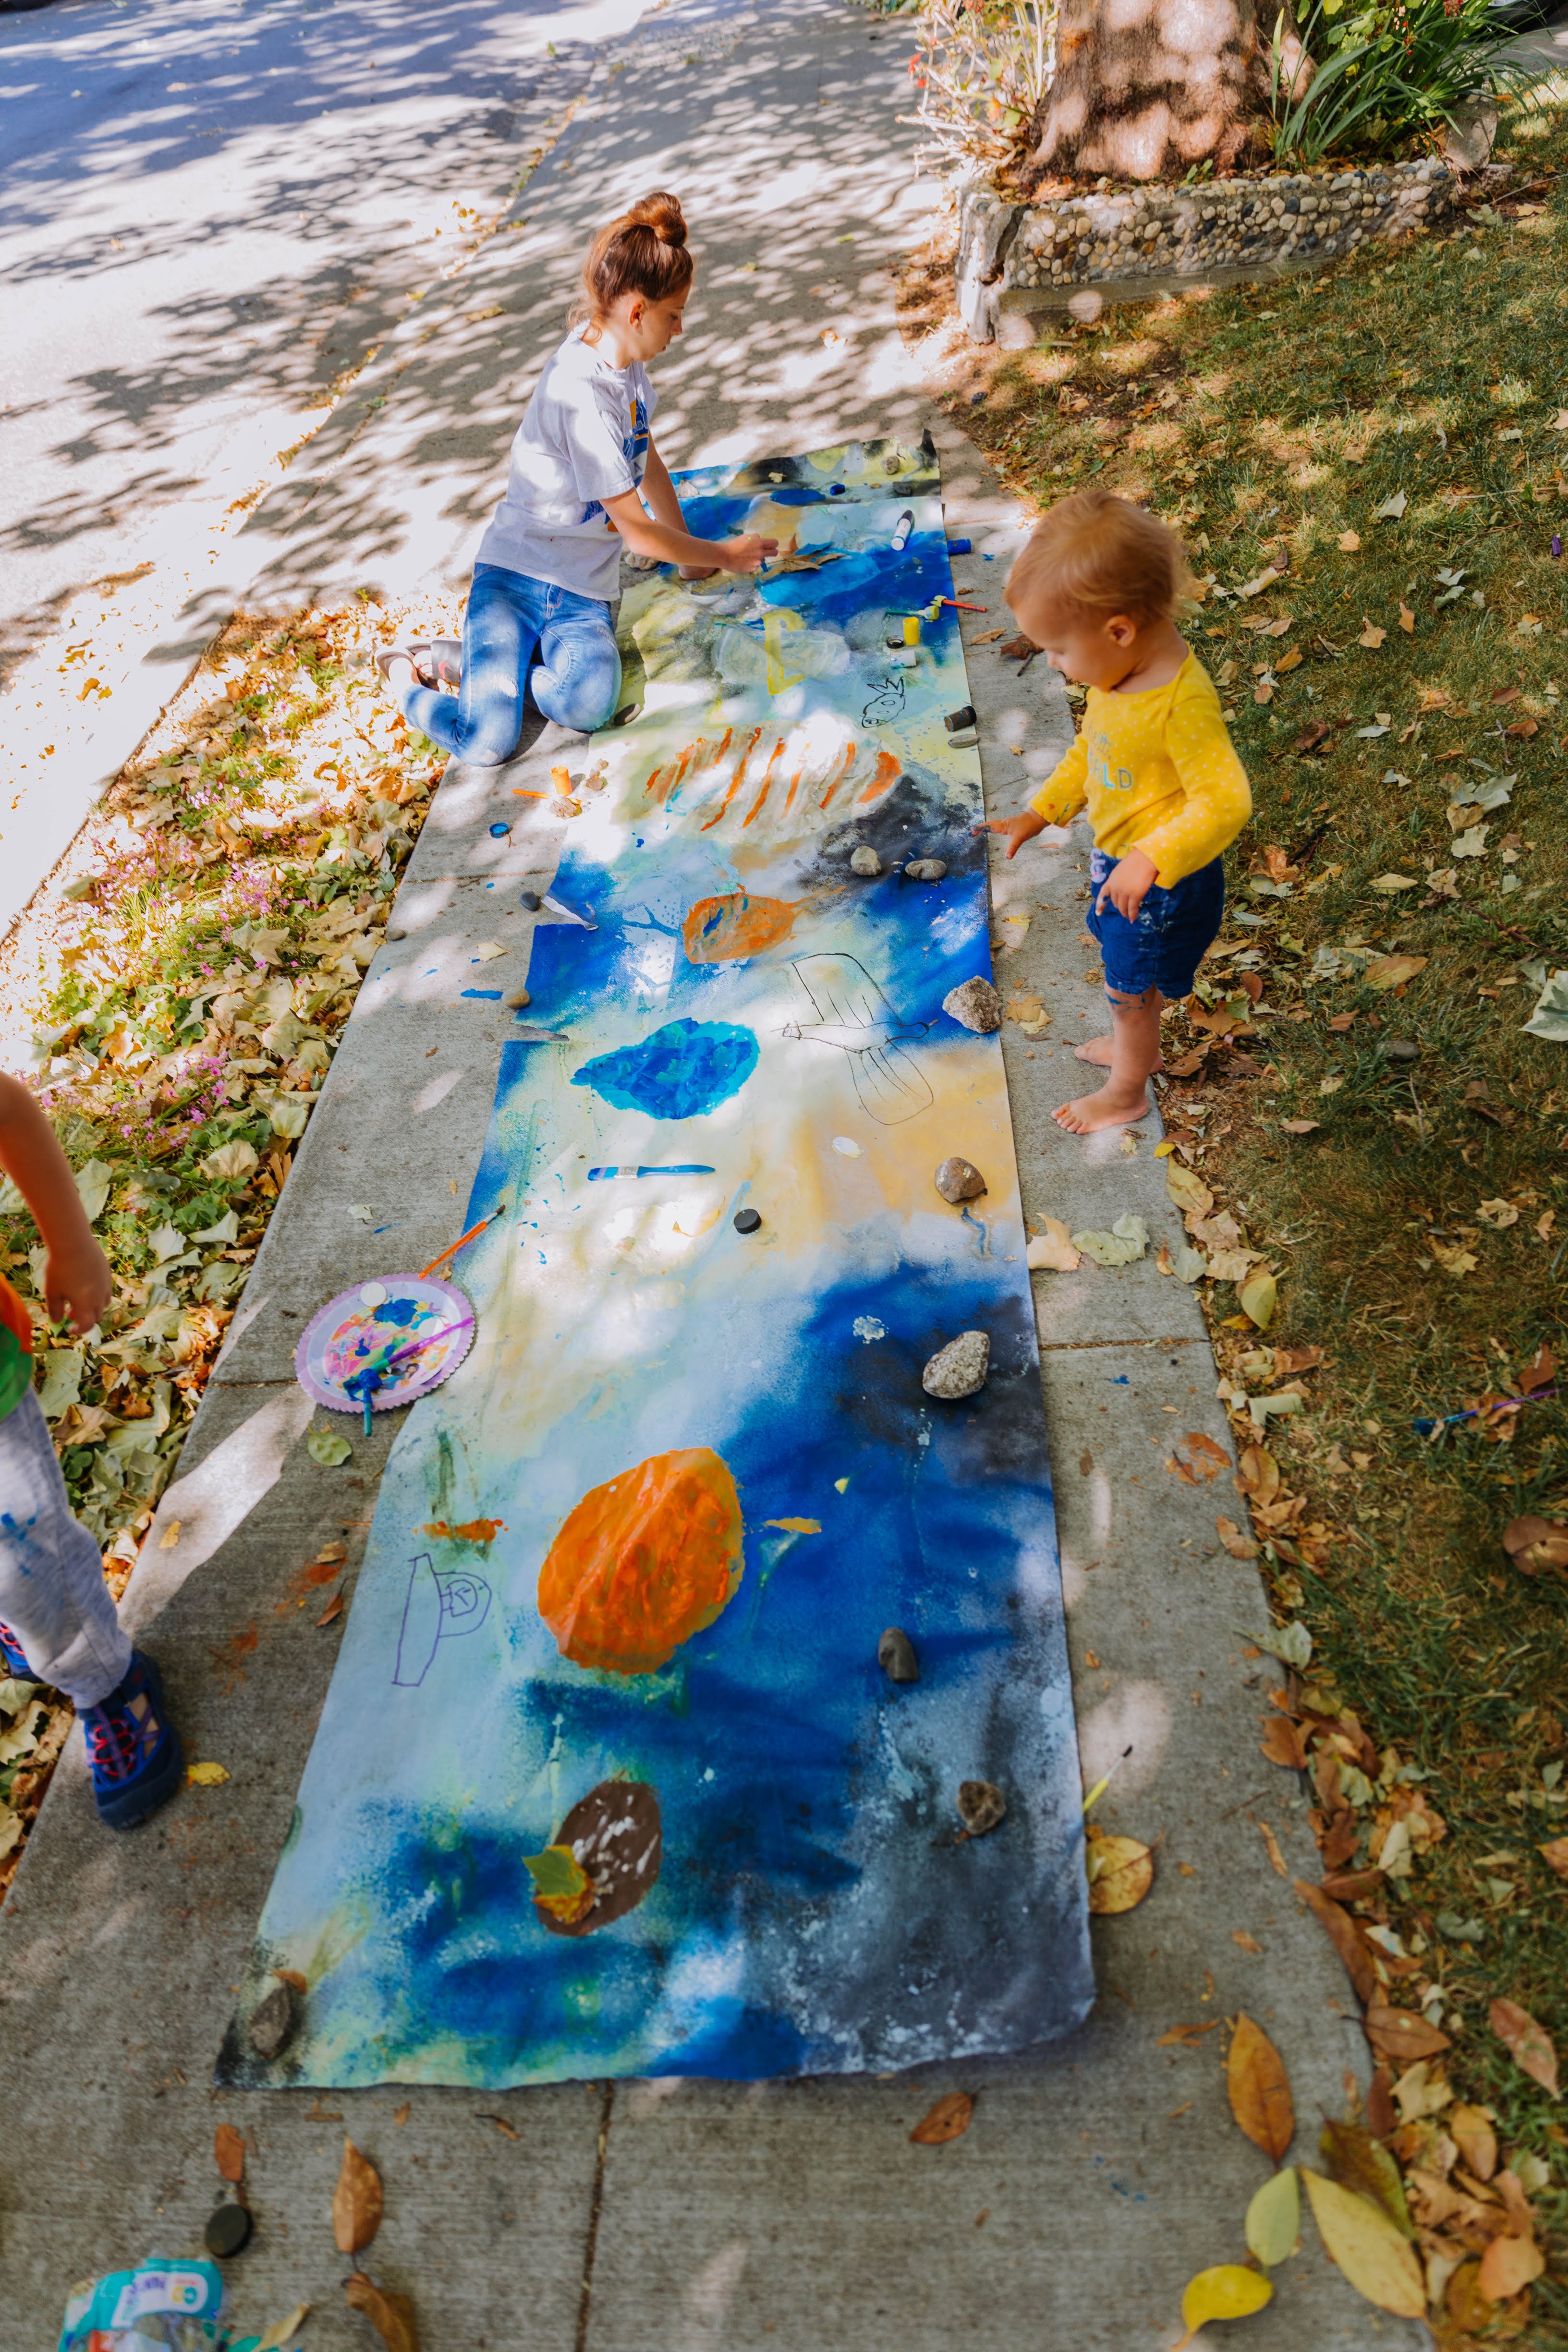
- Realistically this is a two-day project. One for painting/ spraying paint for the space sky… and then let it dry. The next for the planets and details.
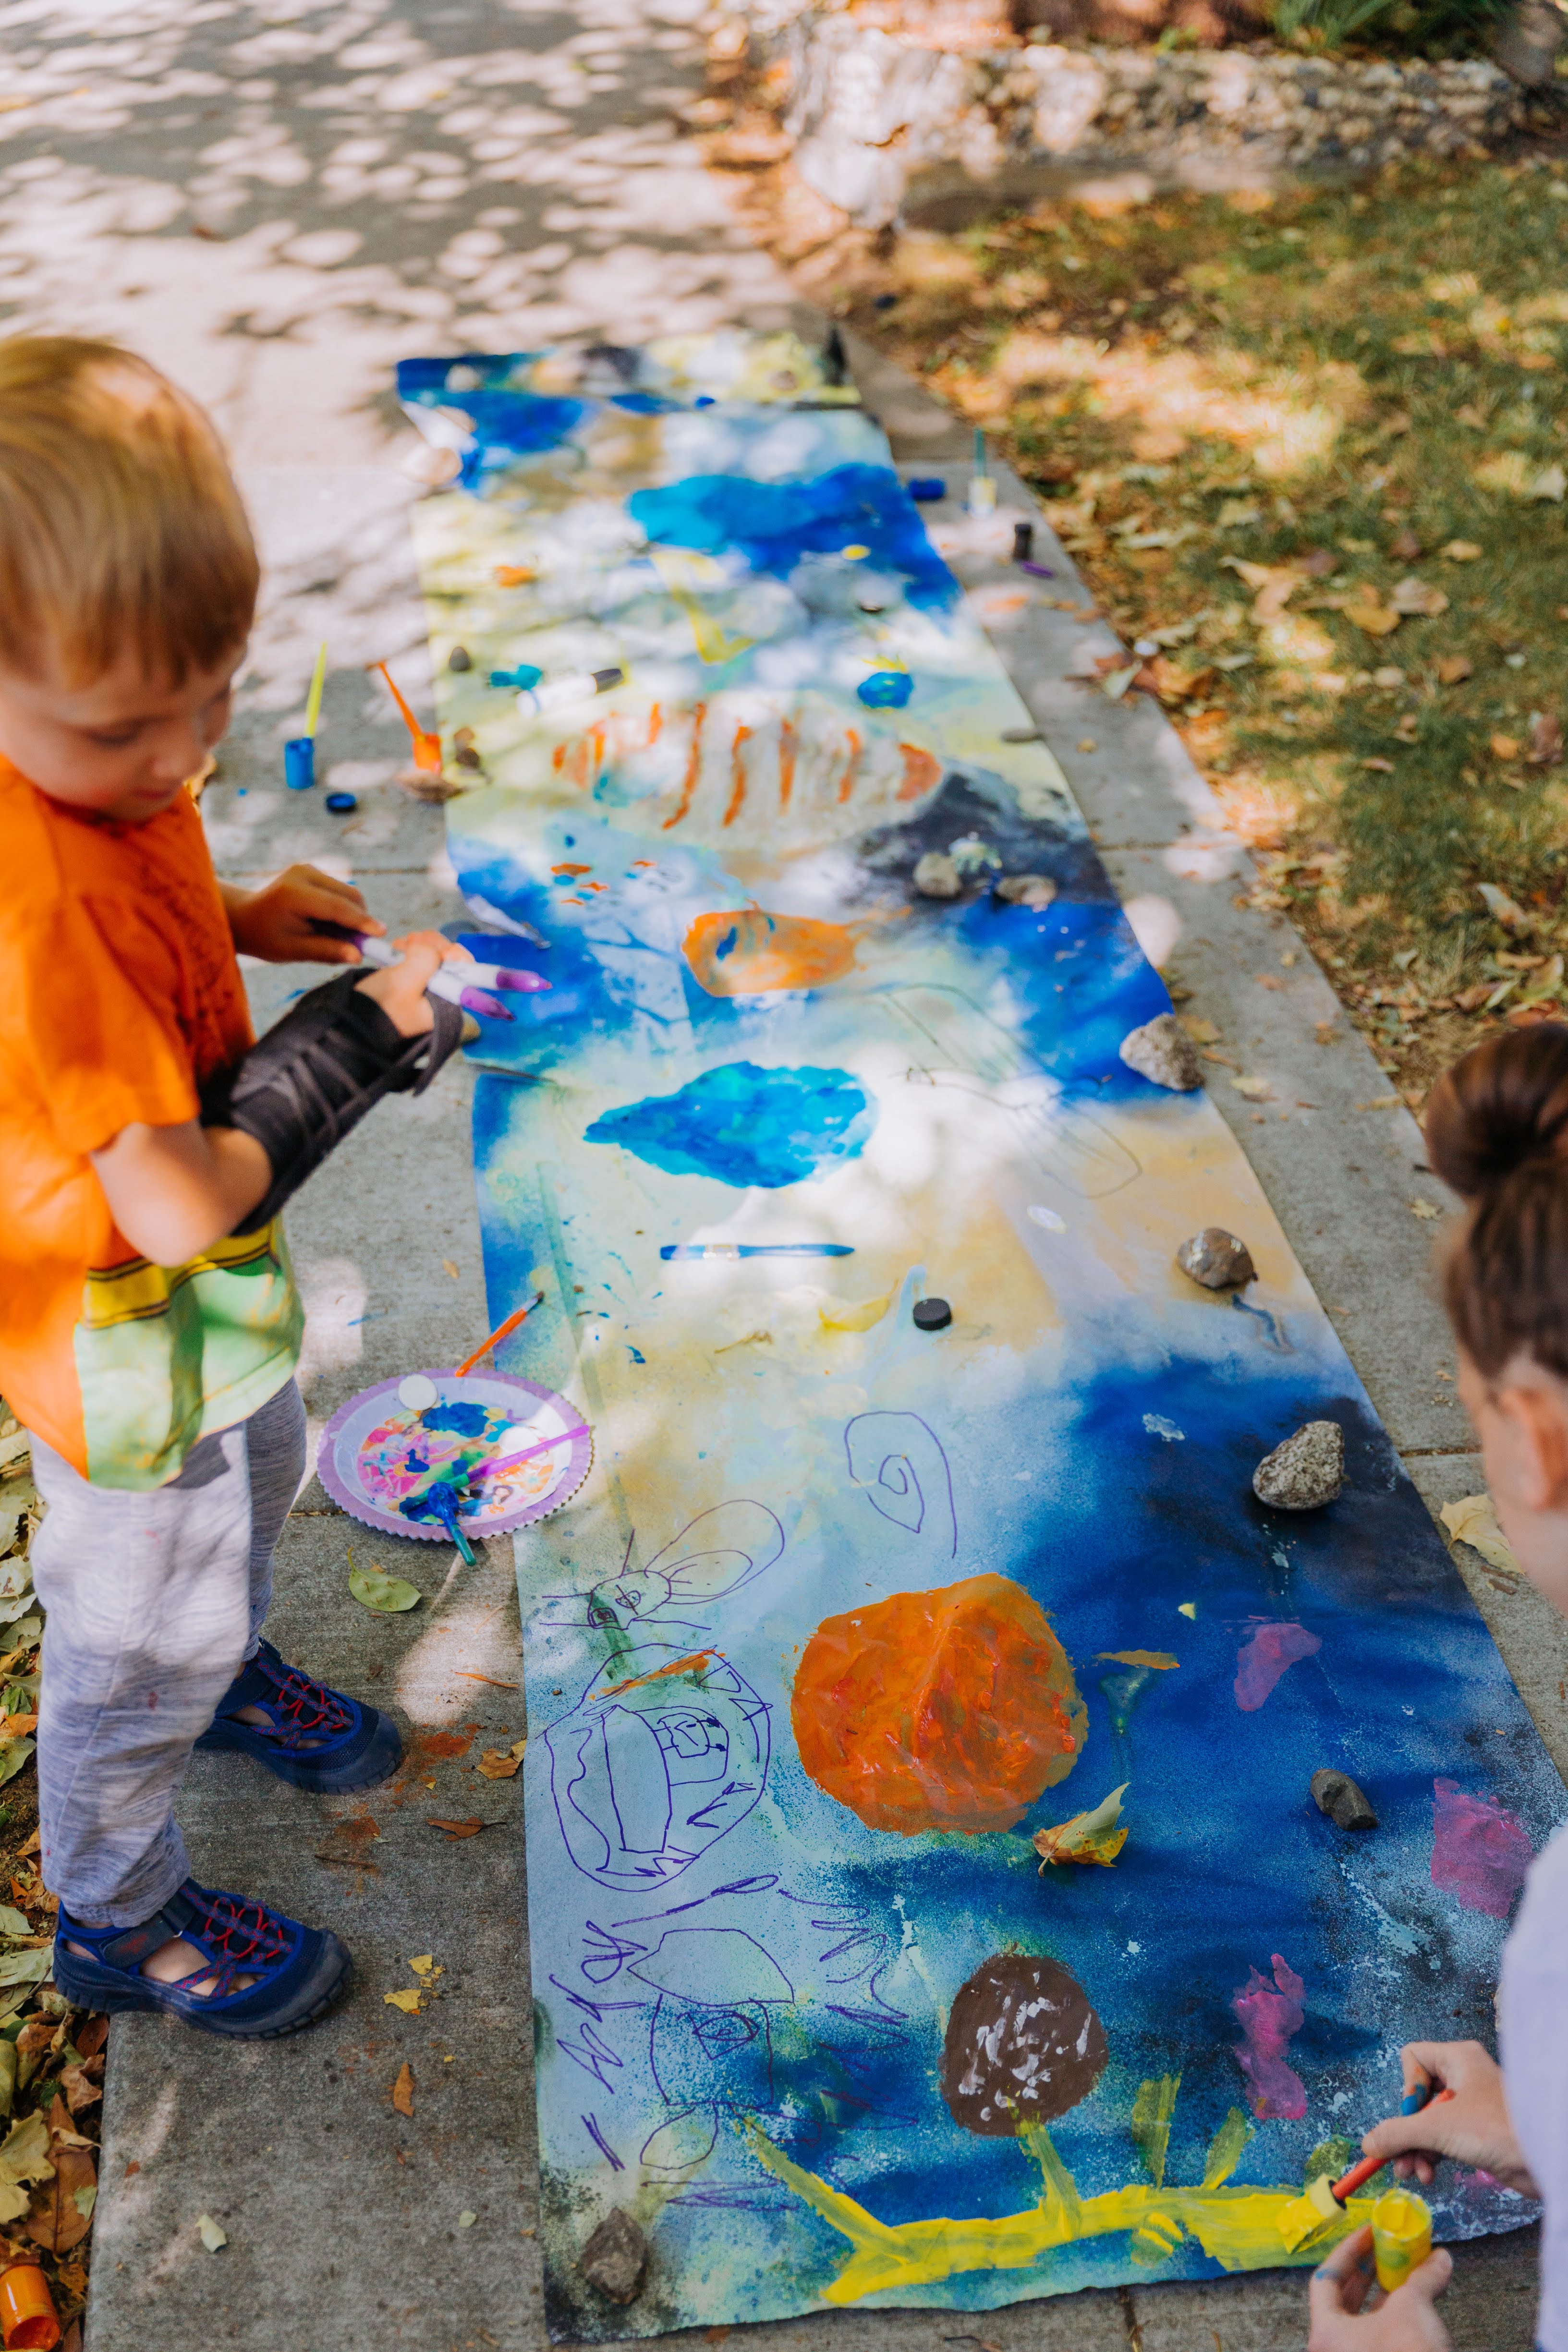
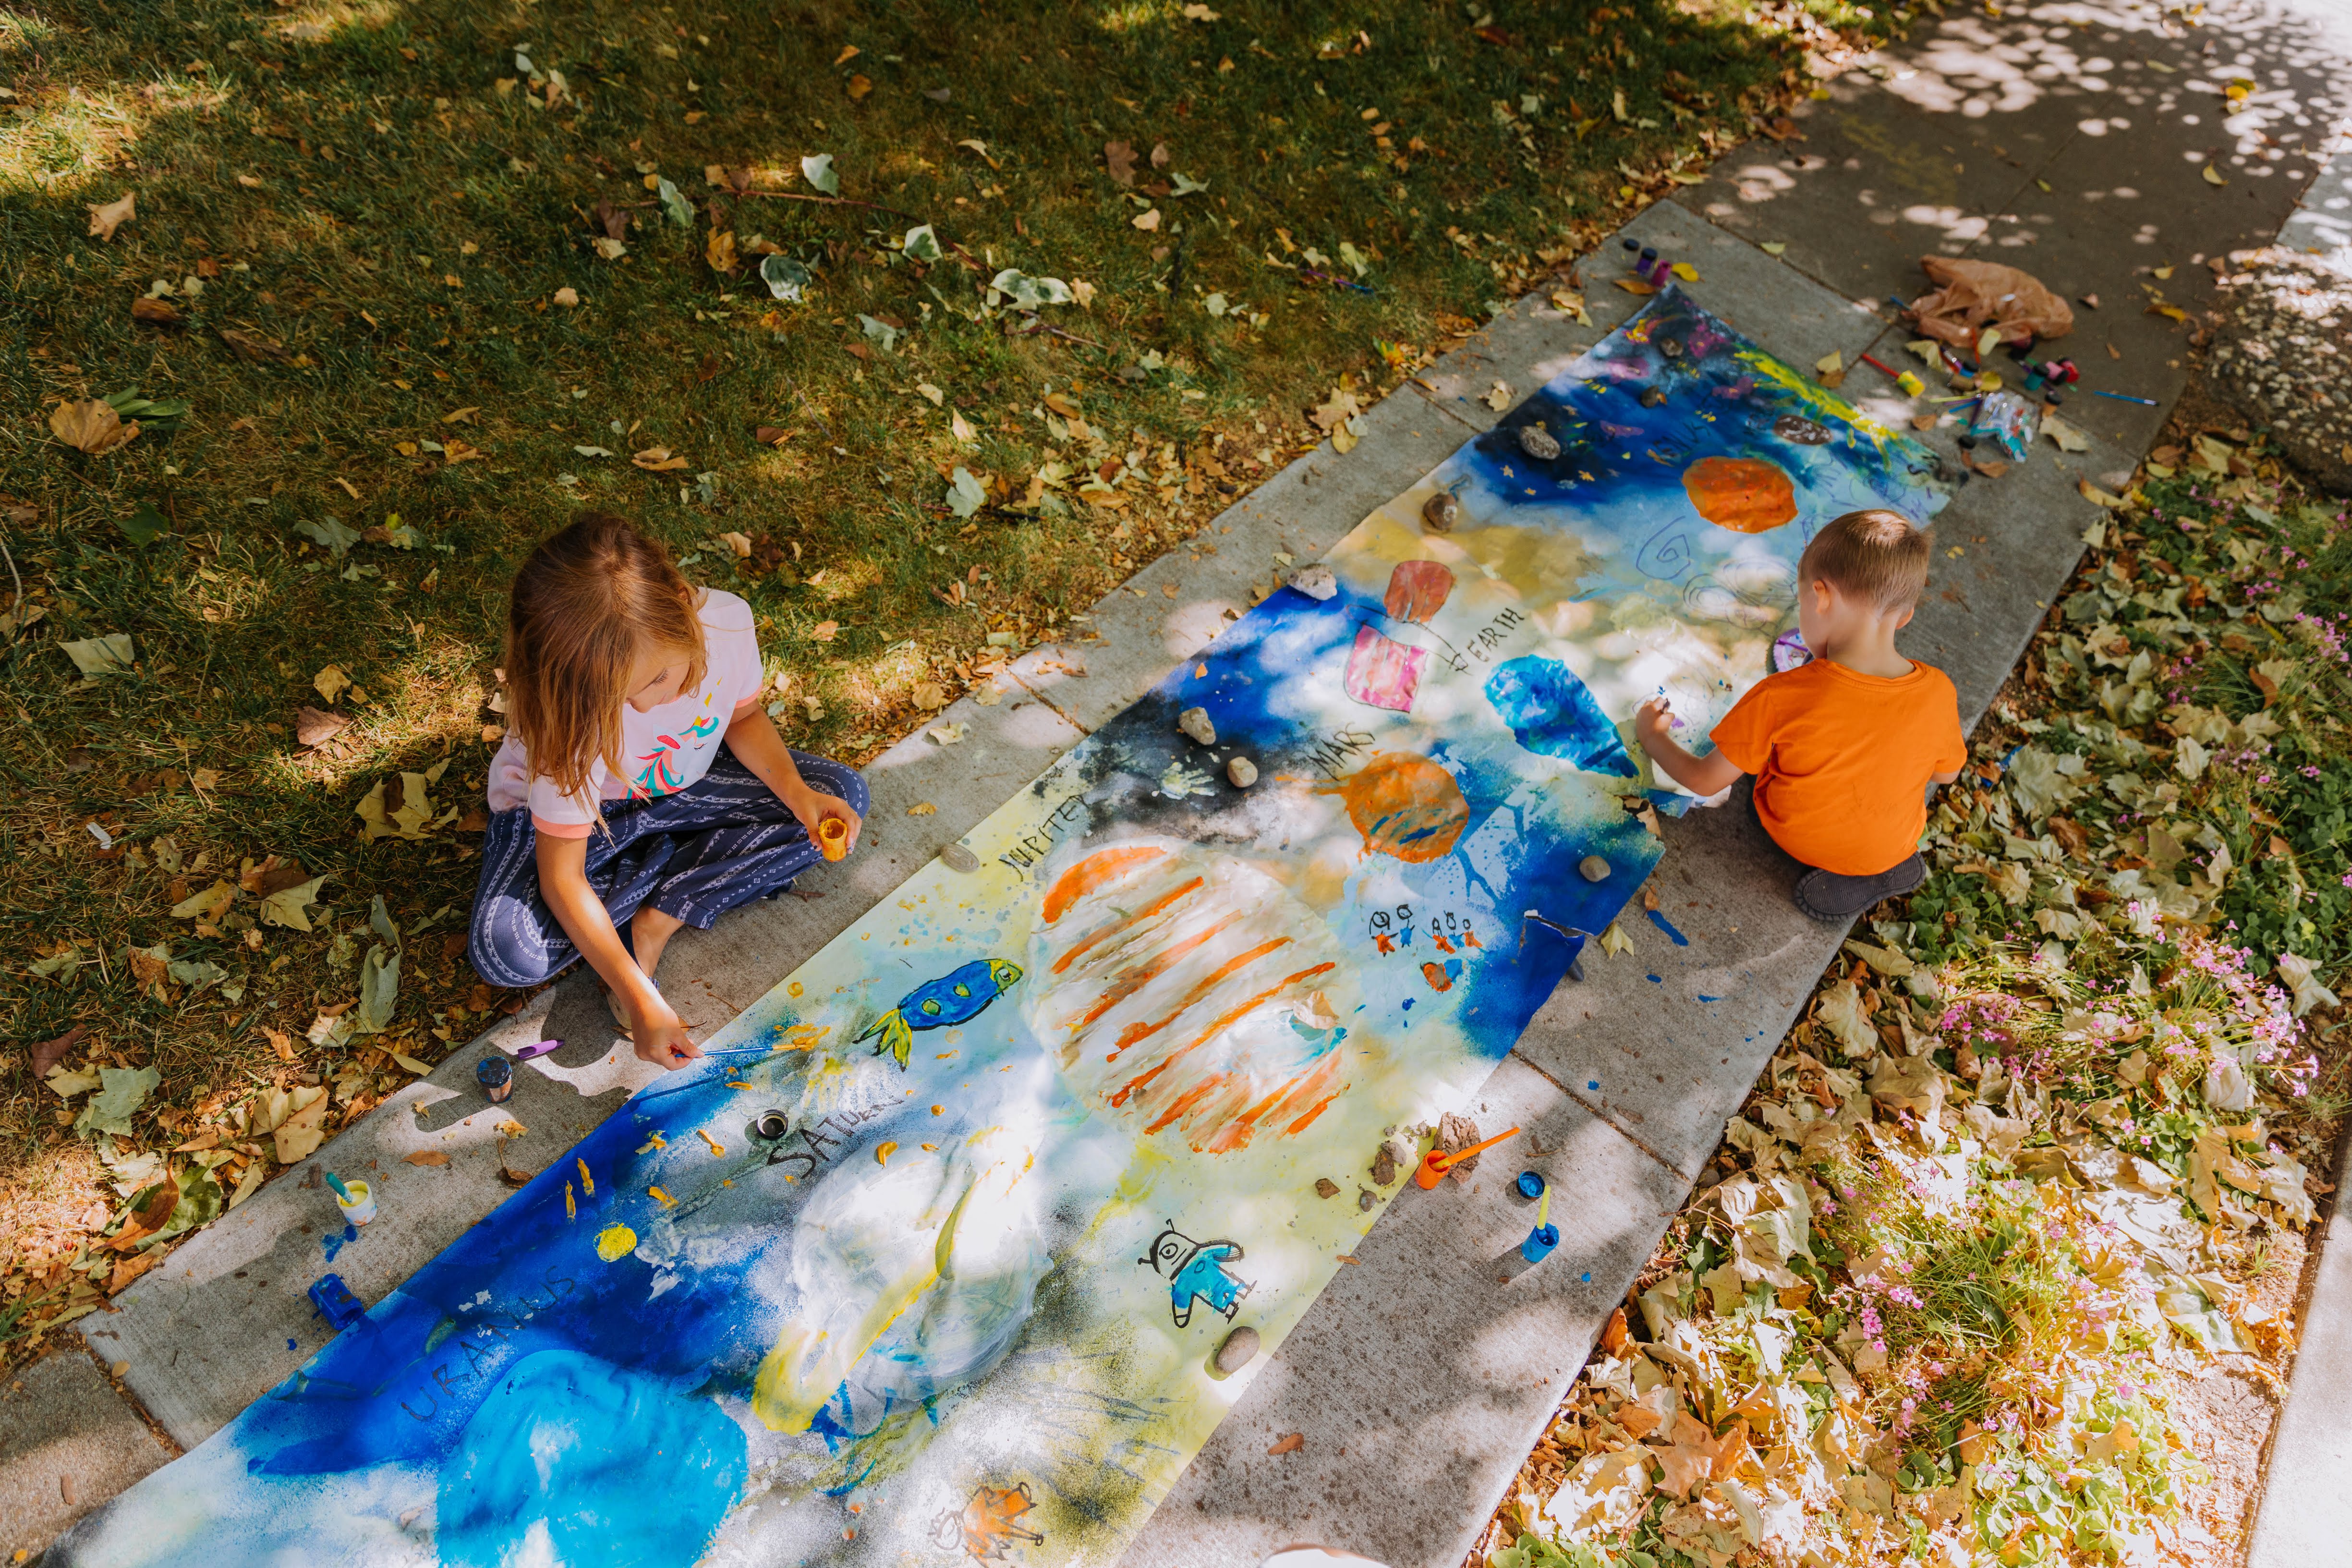
- We hung this up in our home school area for some time and it made for a wonderfully colorful addition to our outdoor classroom area.
-
Play Nature Bingo
- Write or print the ABC’s 4 inches apart on a poster board OR use chalk and draw the abc’s on an open space. Then have the kids collect as many items around the yard to fill in those abc’s. L for Leaf, R for rock, S for stick, D for dirt, T for Toy, F for Flower etc.
-
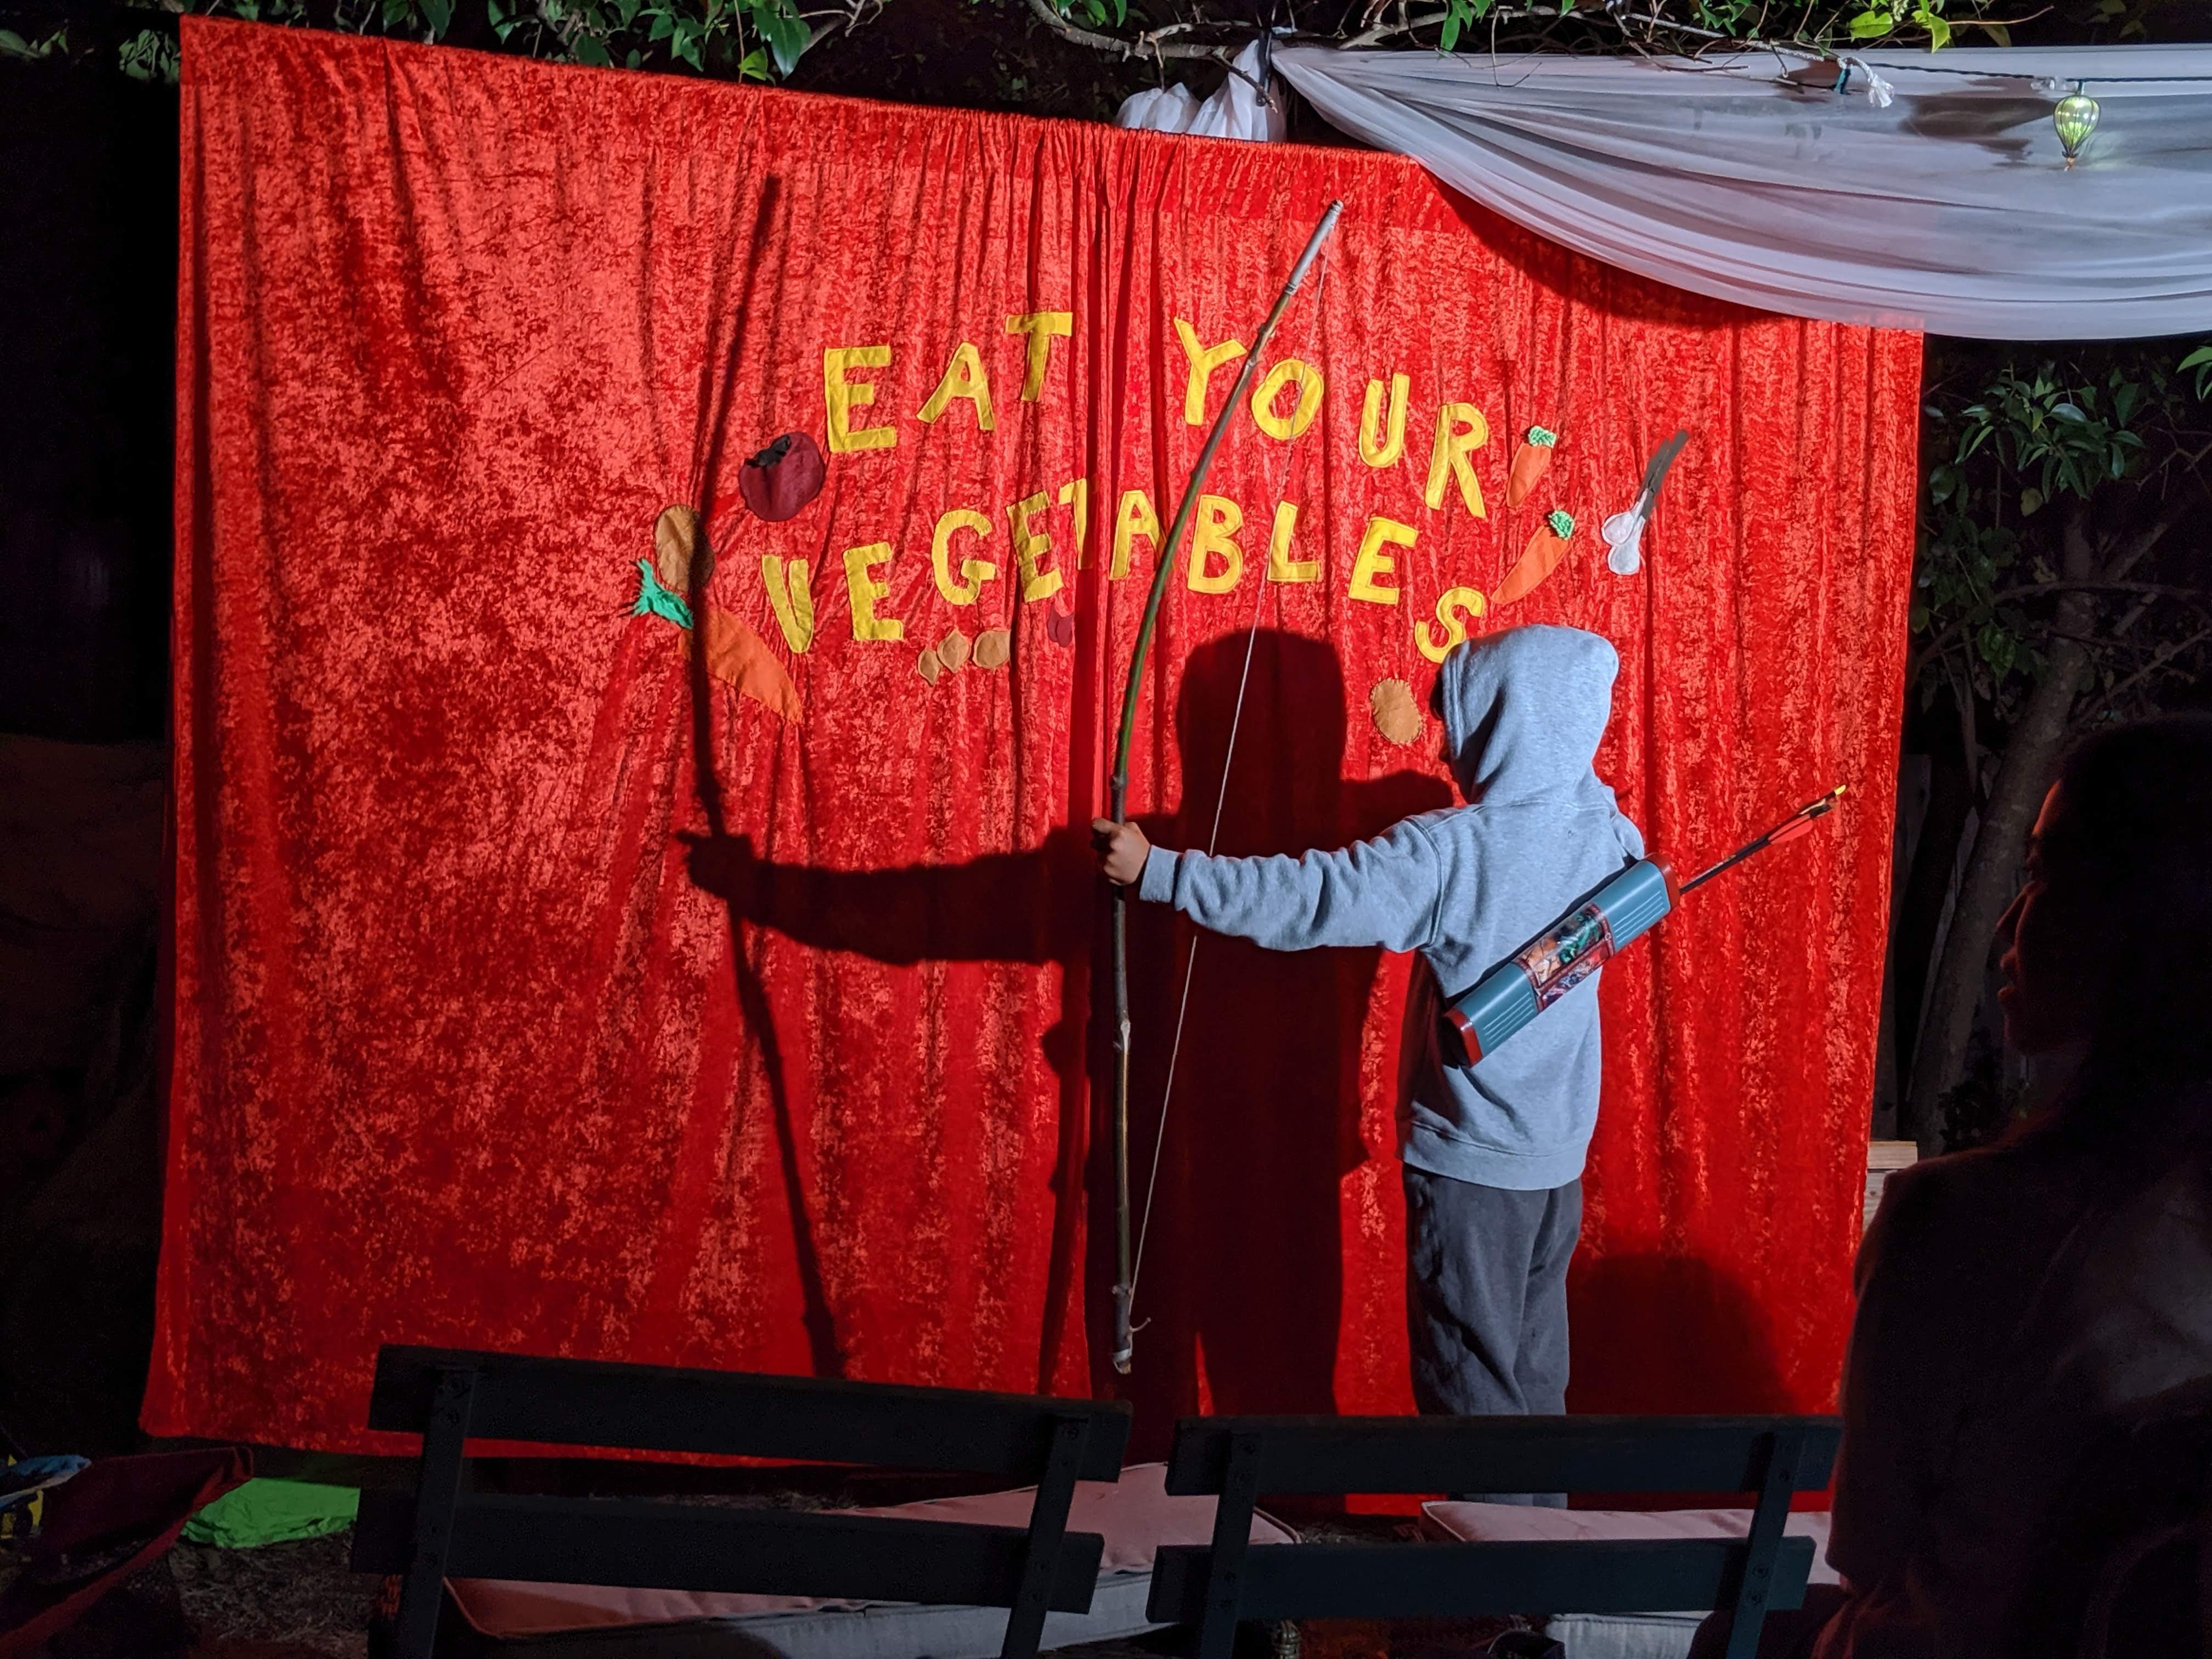
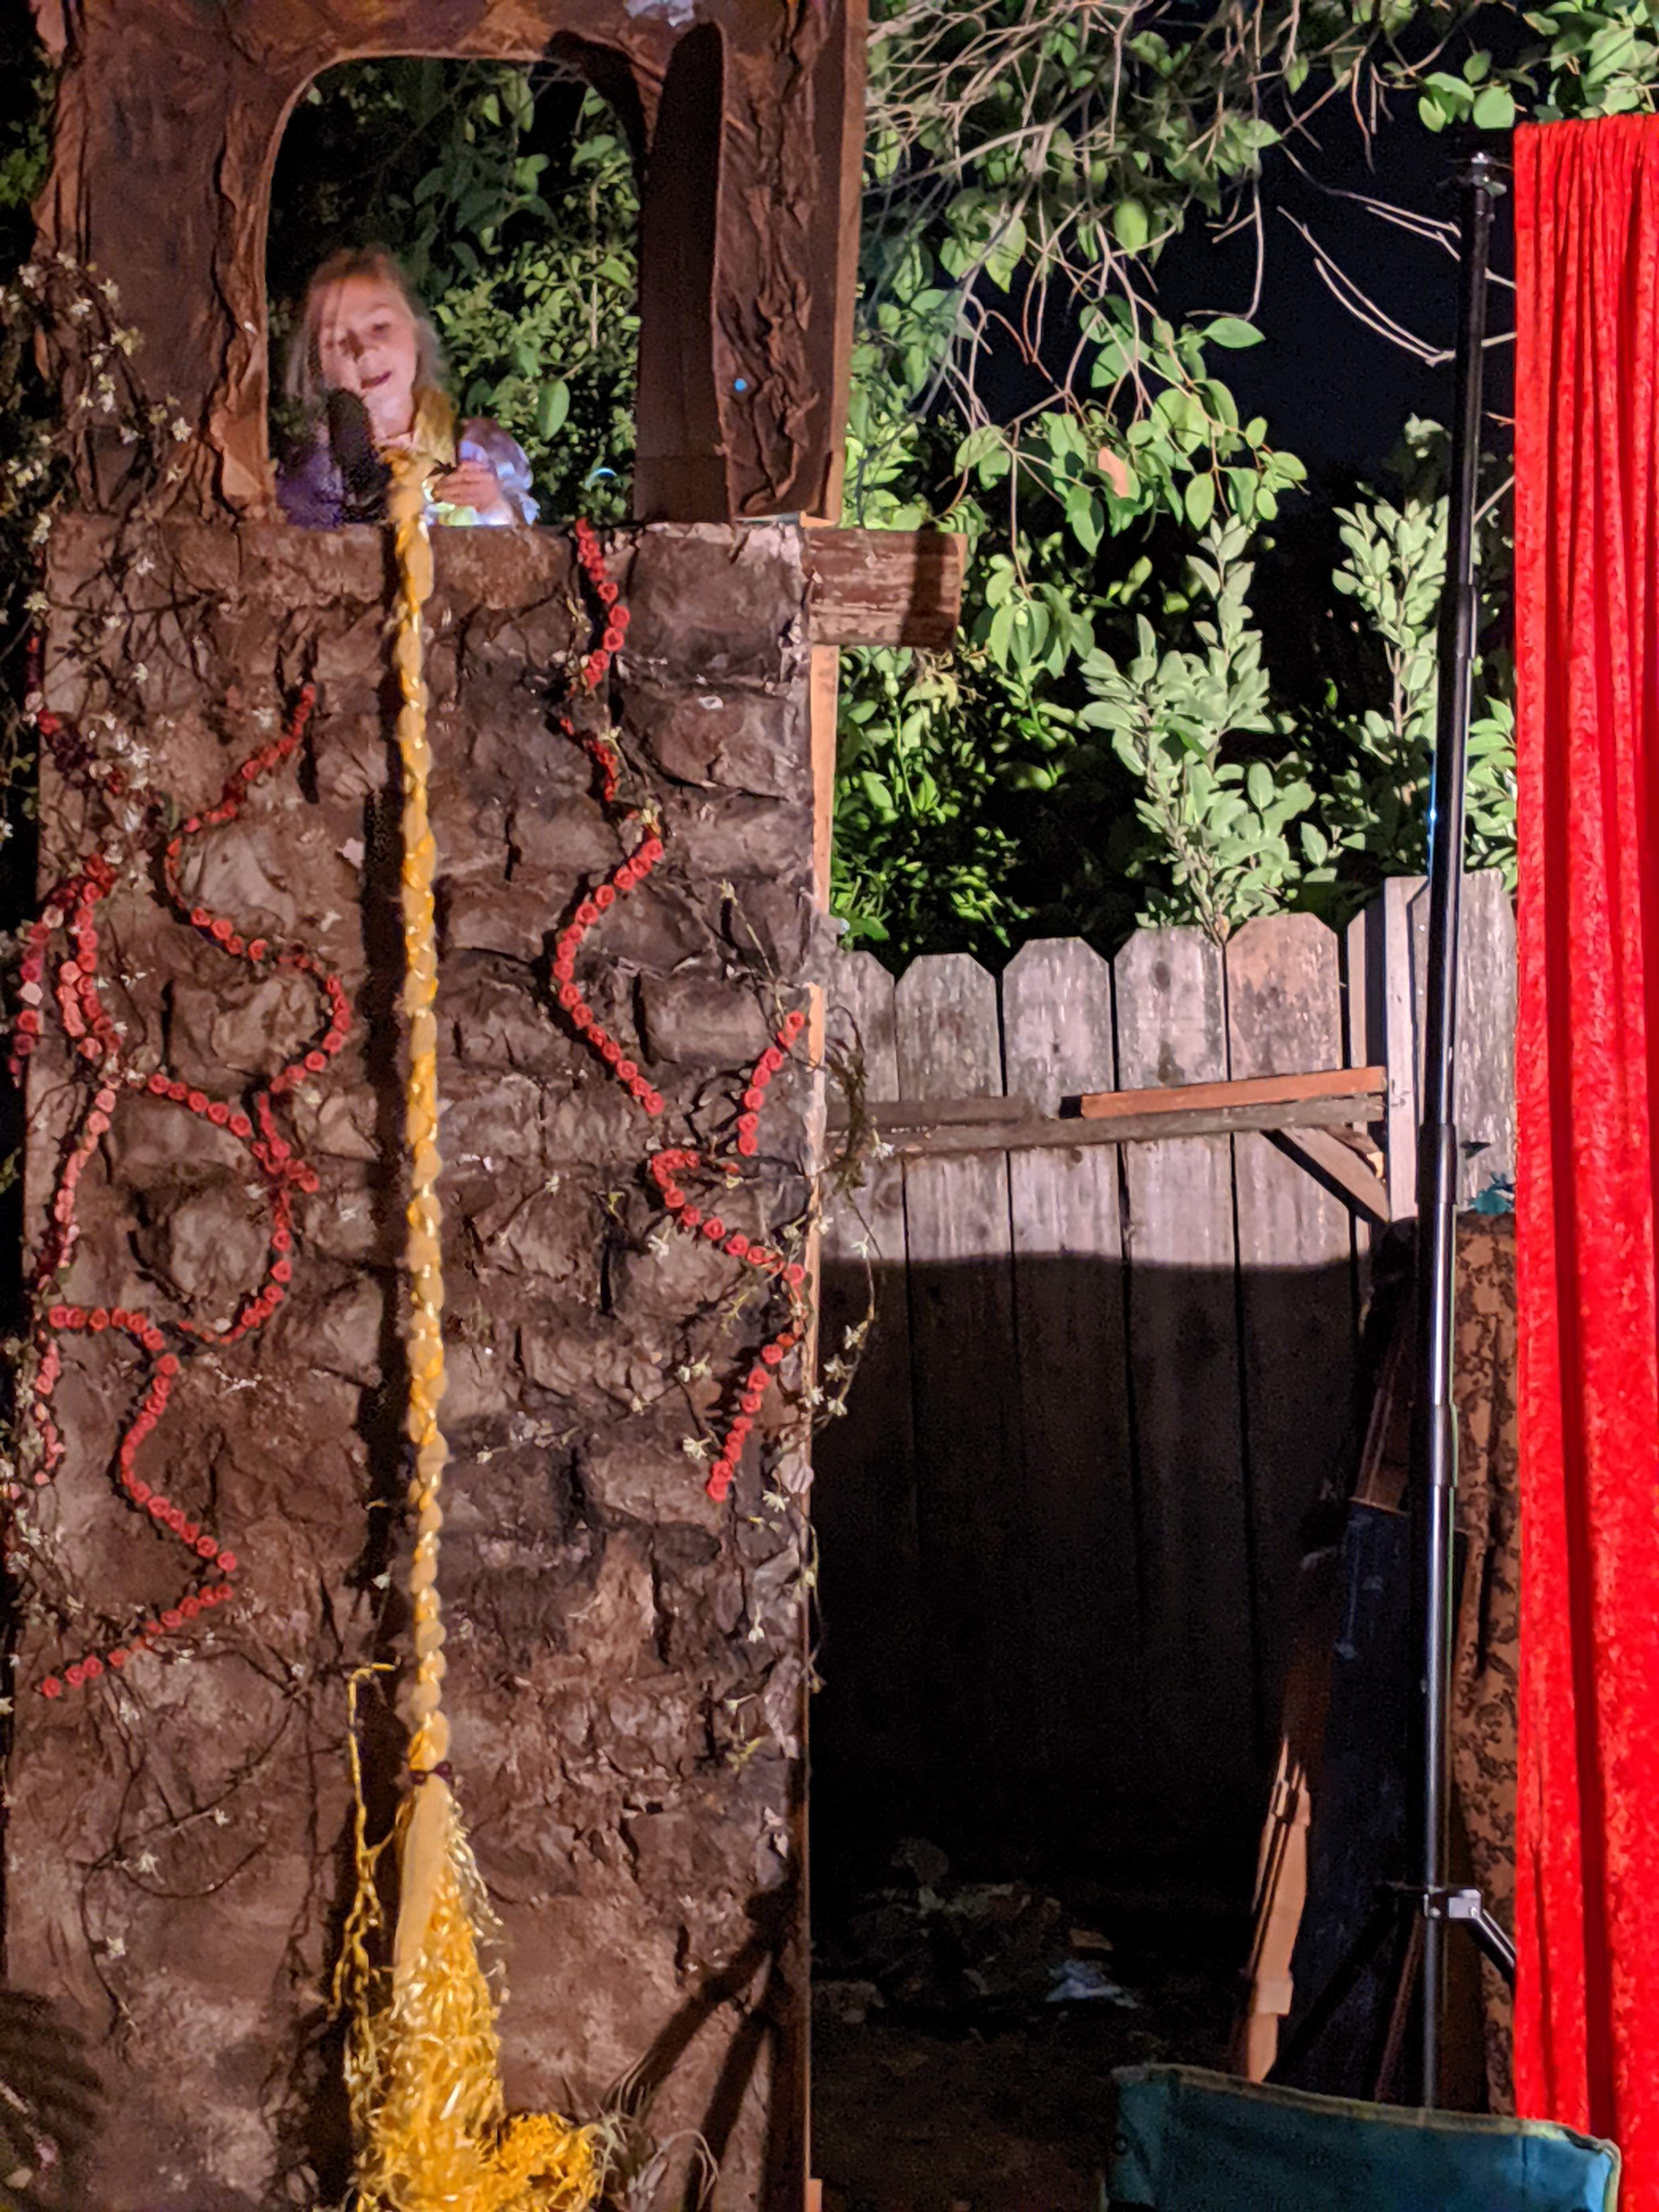
Put on a Backyard Play
- Last summer we hosted a talent night and it was a special event to bring our neighbors together. While we are limited for a full audience, we can still facetime in a few family members to enjoy the children’s rendition of a fairytale.
For our play, we merged a few favorite fairytales and characters together for a humourous outcome. Robinhood joined Rapunzel and took her on an adventure as an escape from her boredom (sound familiar). We didn’t need to go all out on costumes. Mr. Robinhood wore his “hooded” sweater as his costume. Rapunzel’s hair was created from some yellow yarn and ribbon.
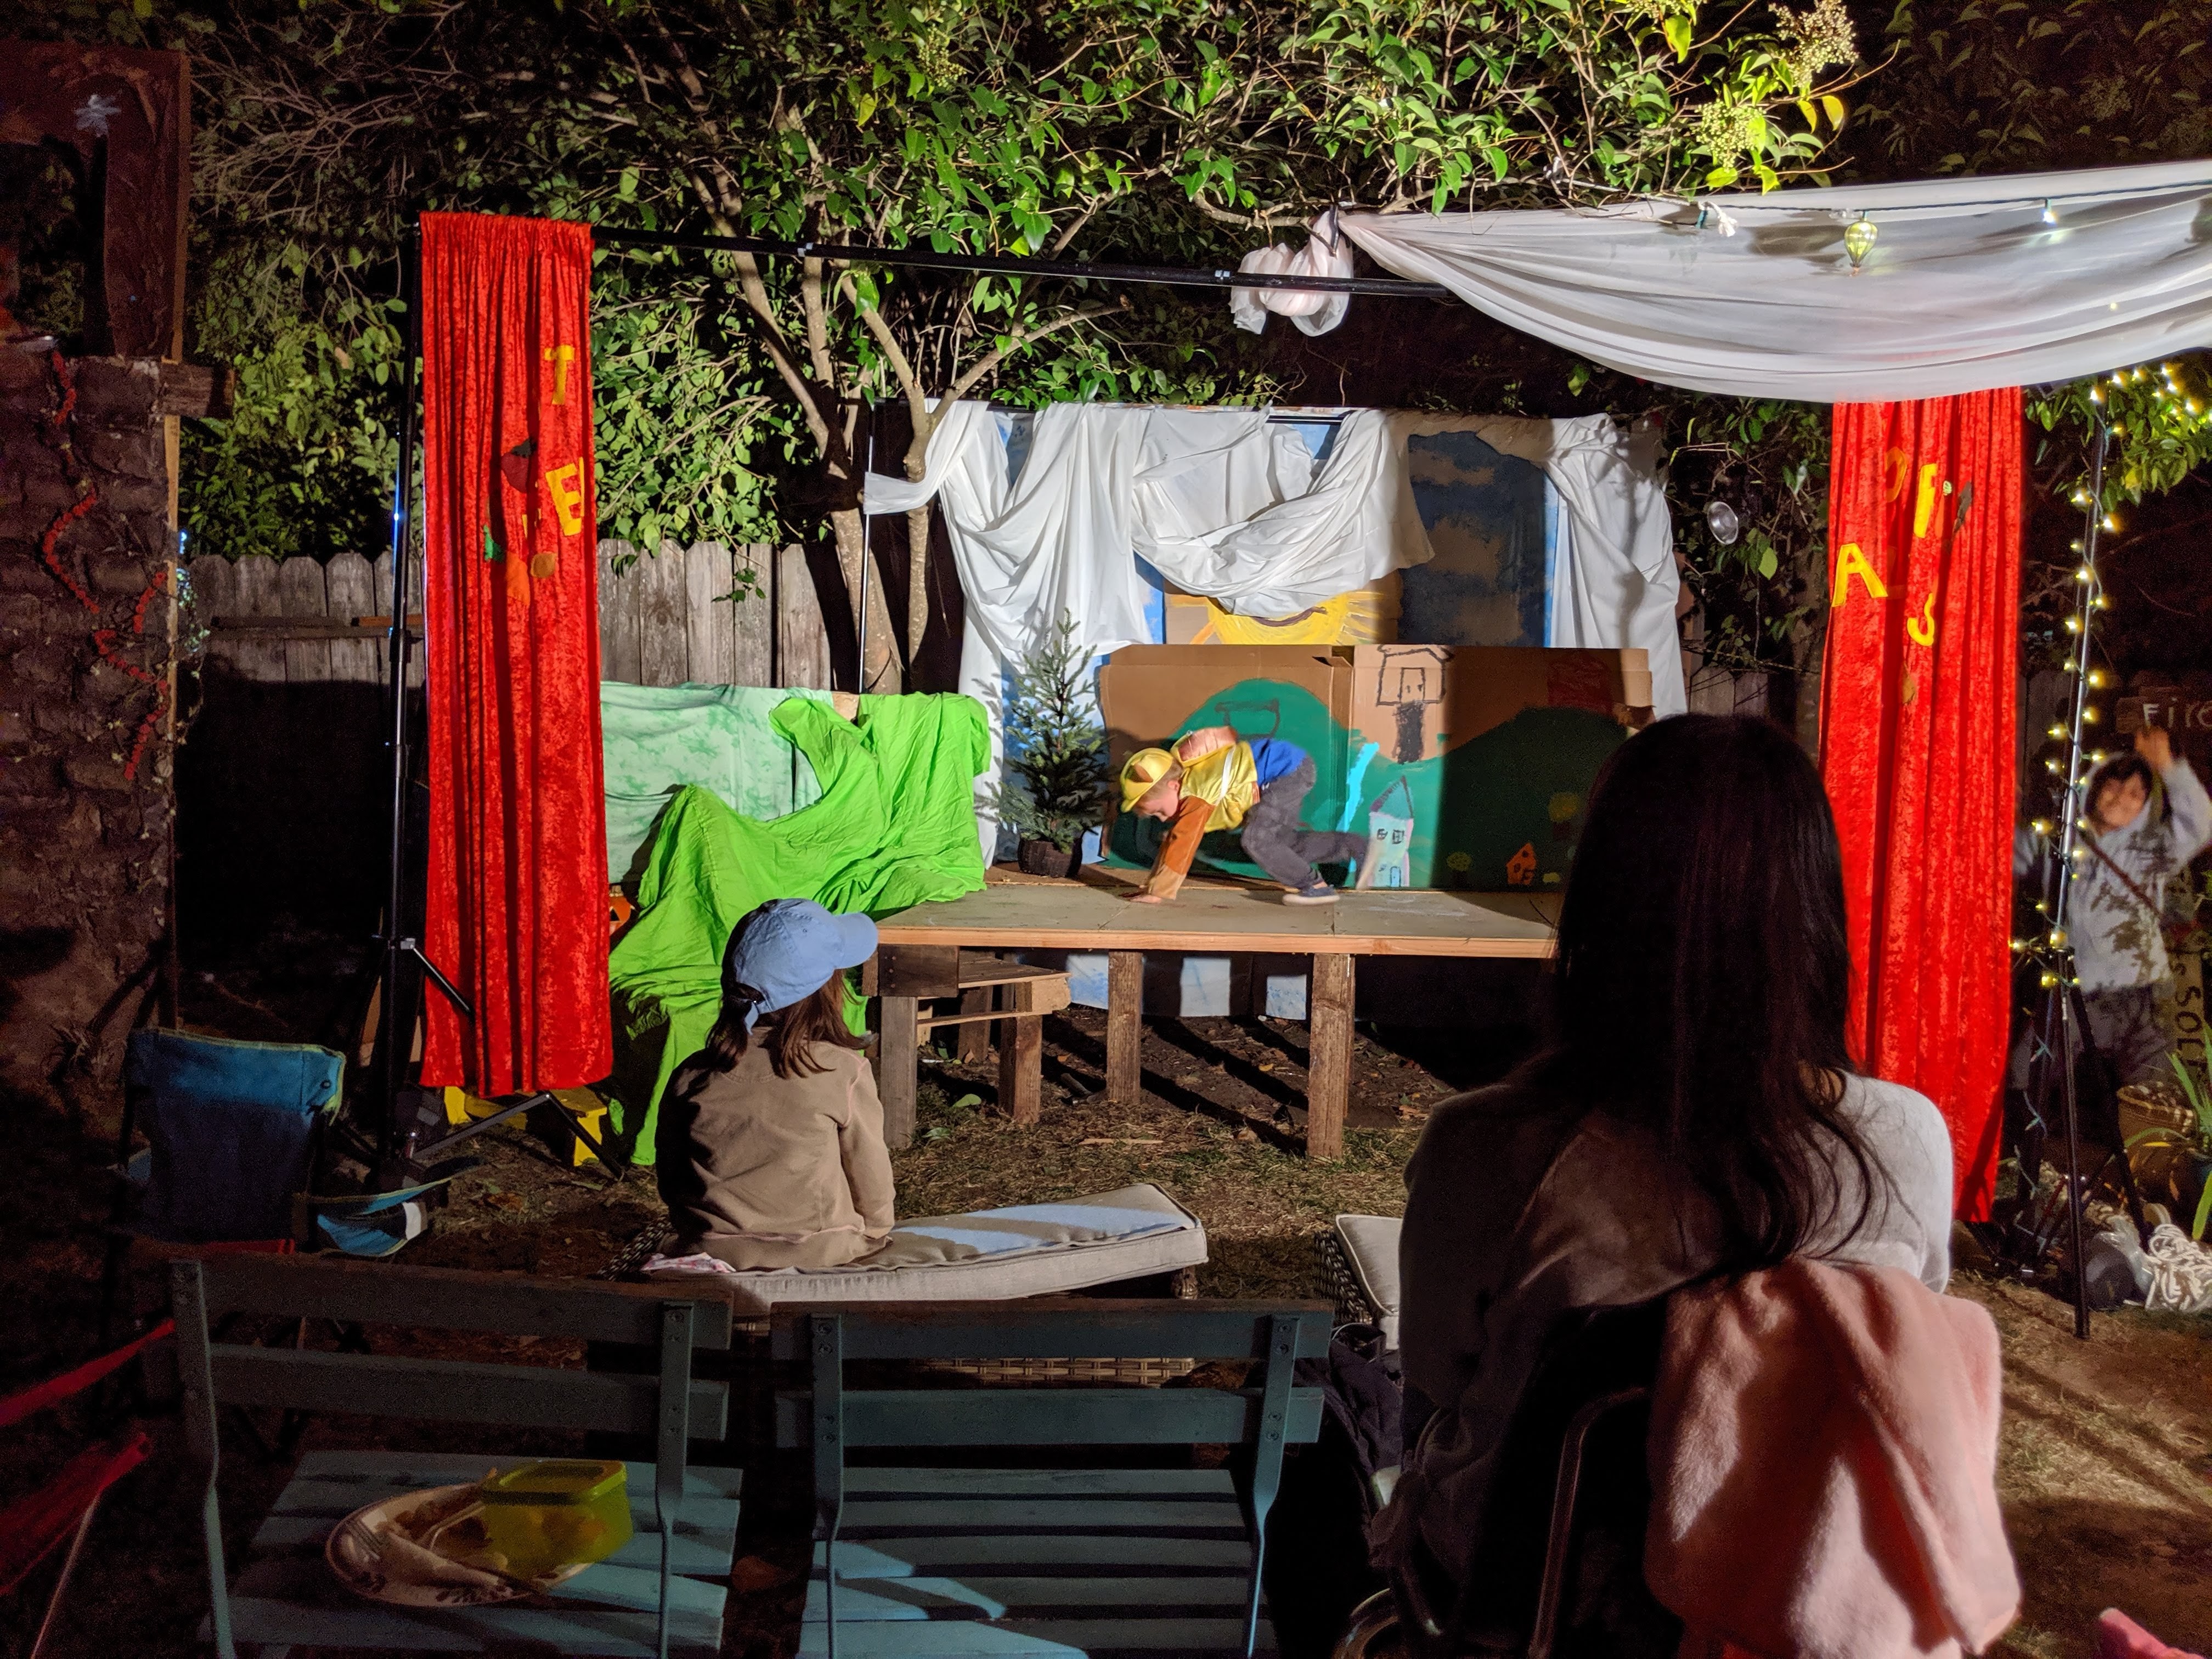
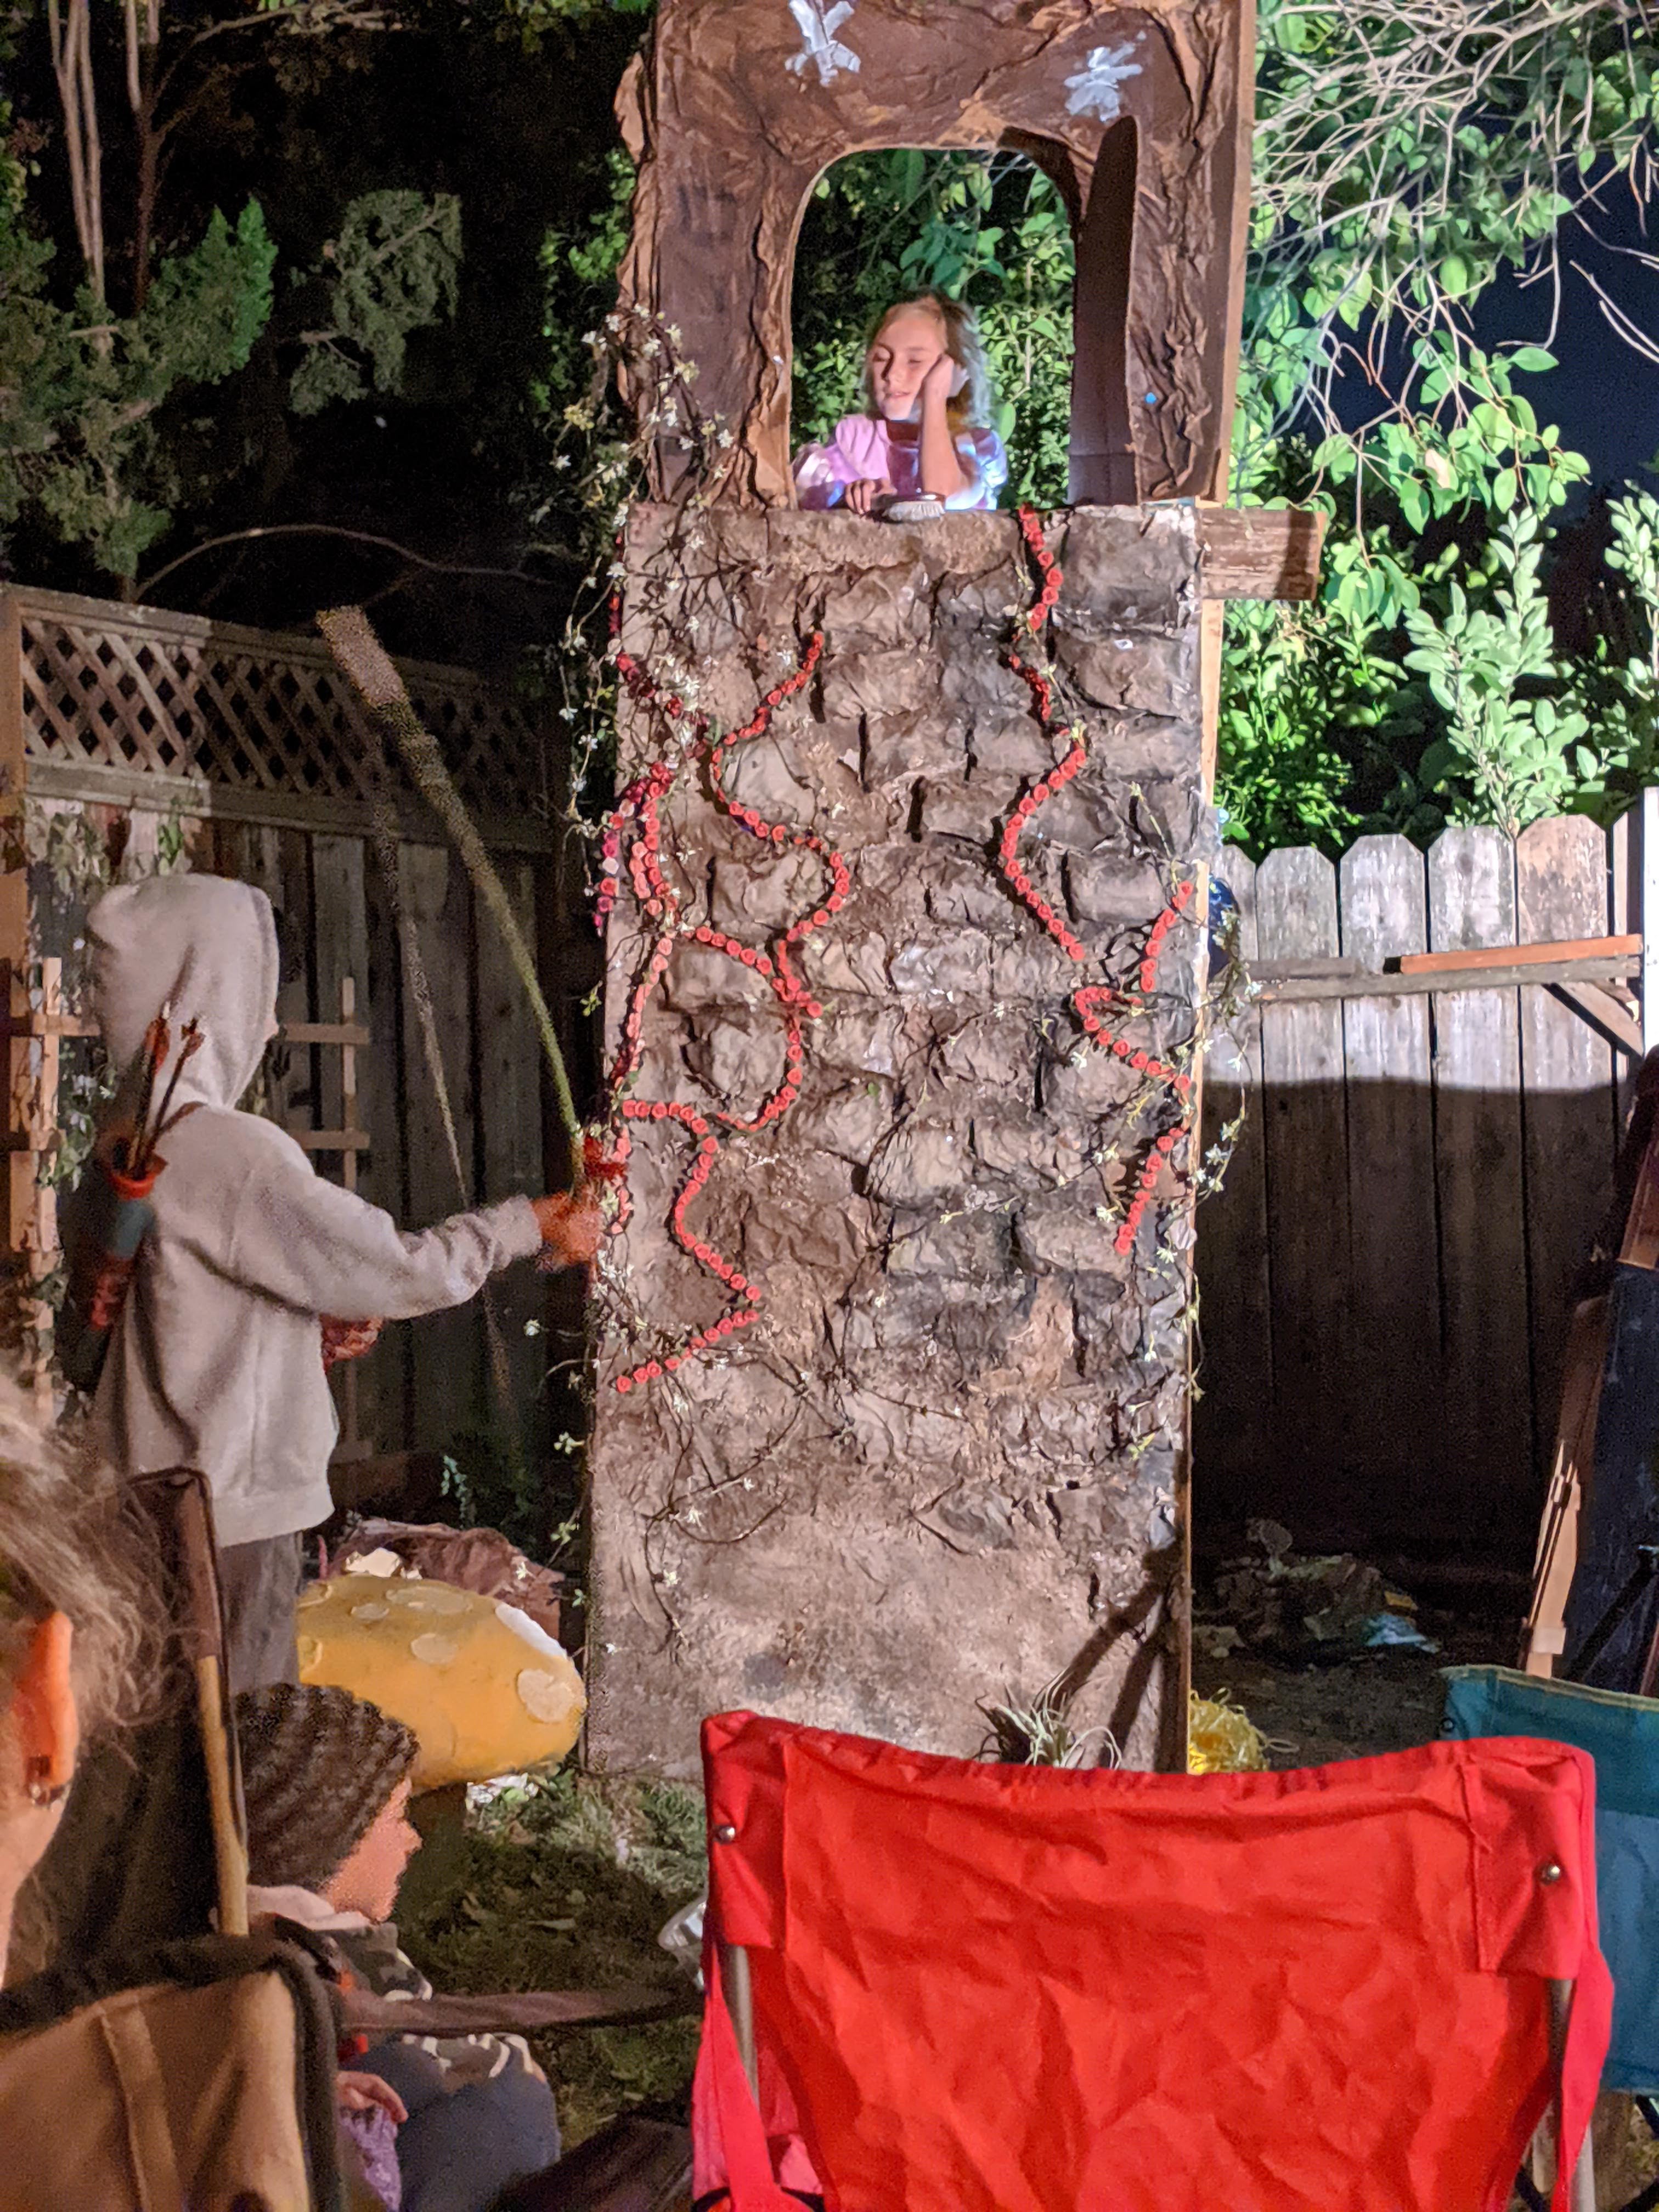
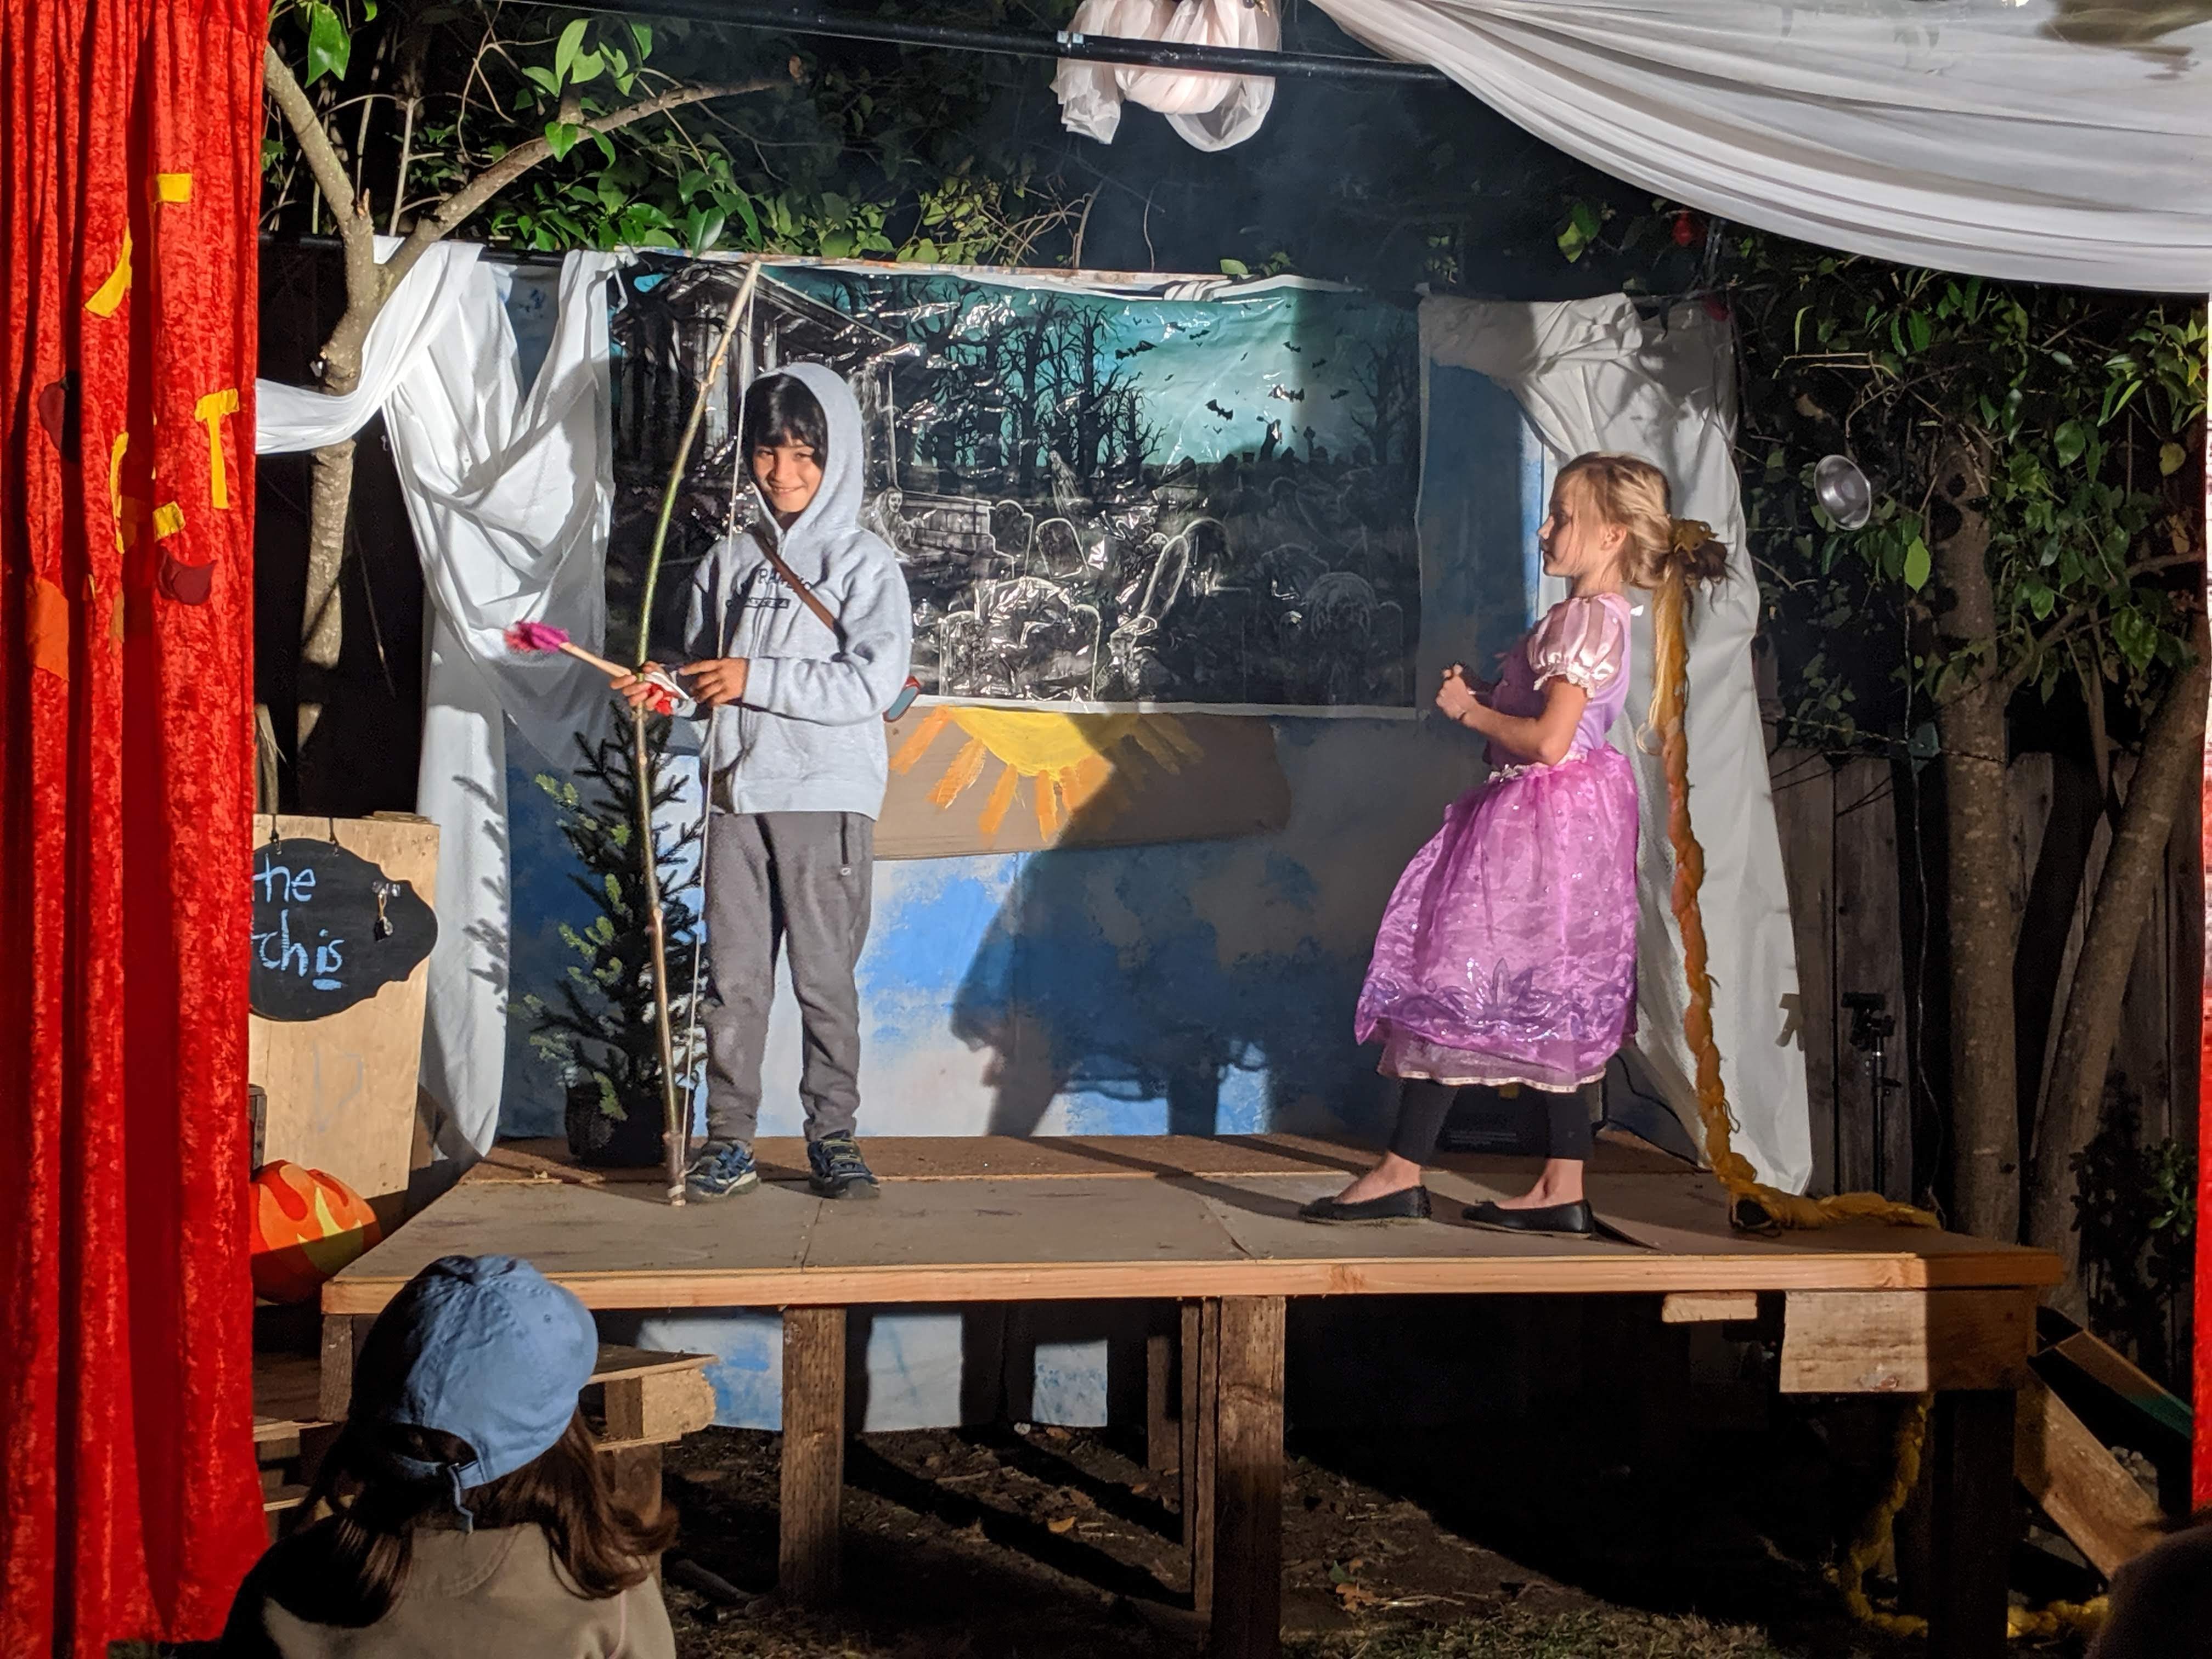
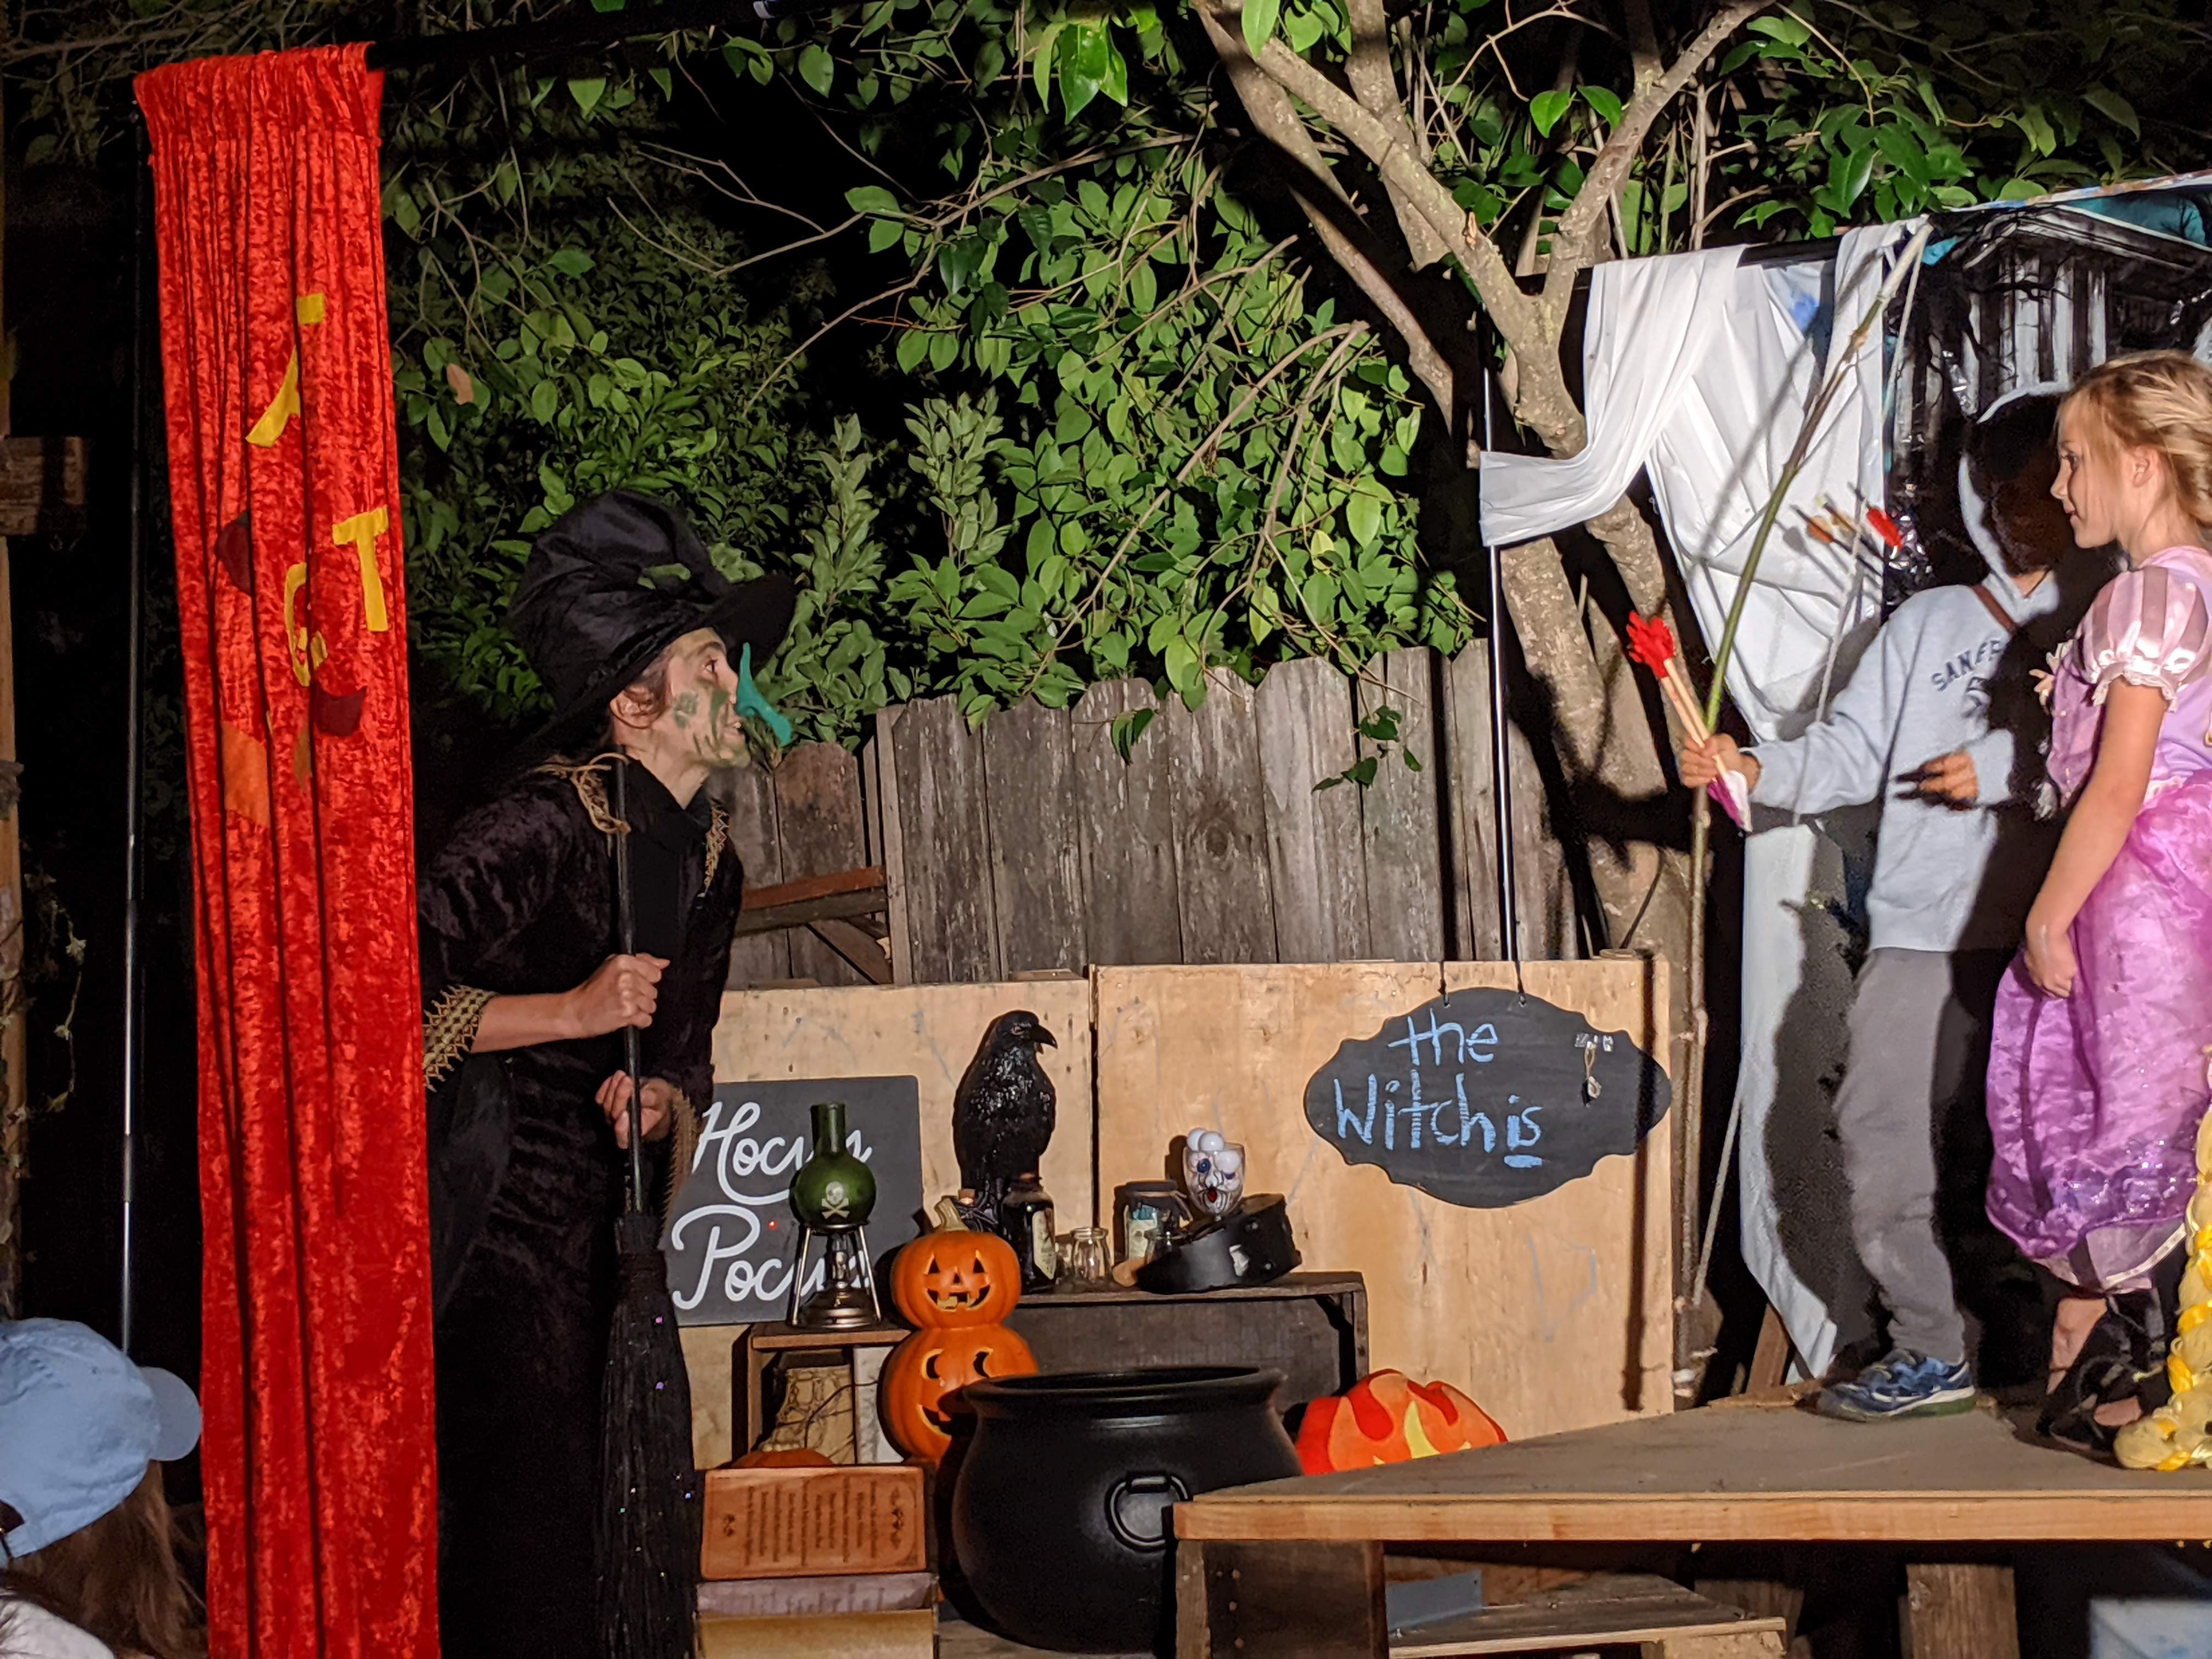
- I seem to have too much fun playing the cackling witch for my character. And my nose I made out of air-drying clay haha.
-
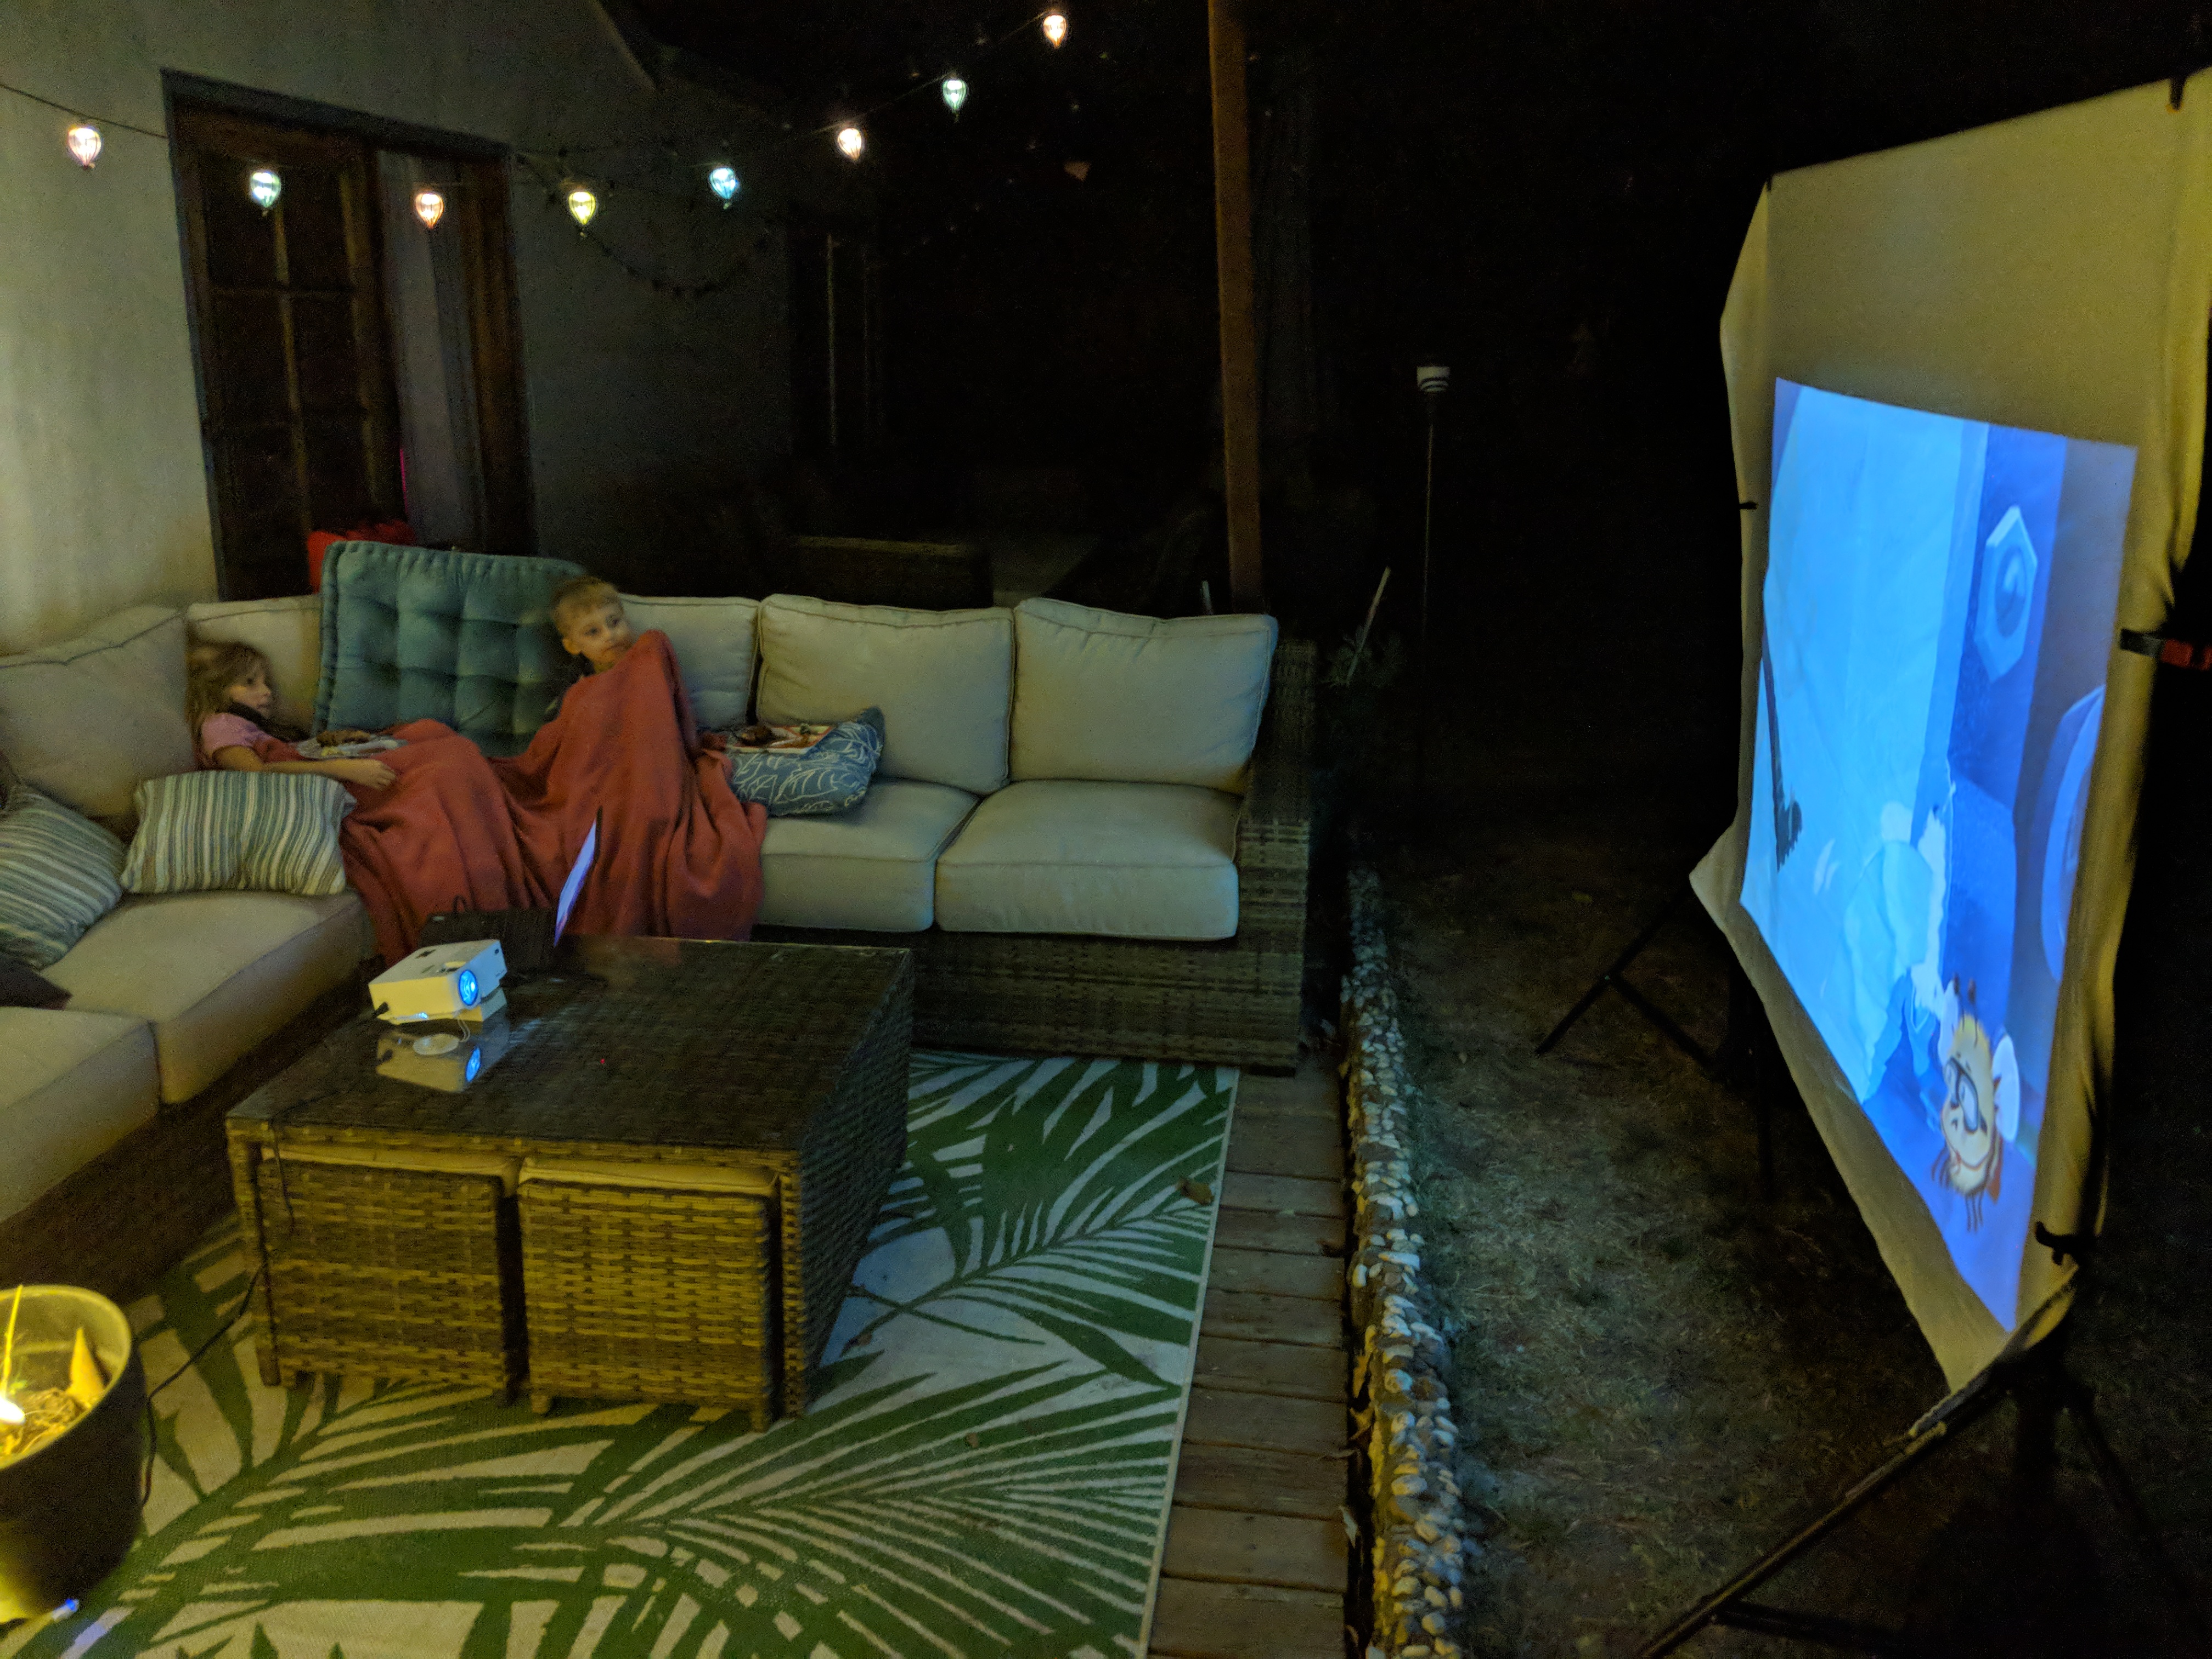
Have a drive-in Movie Night
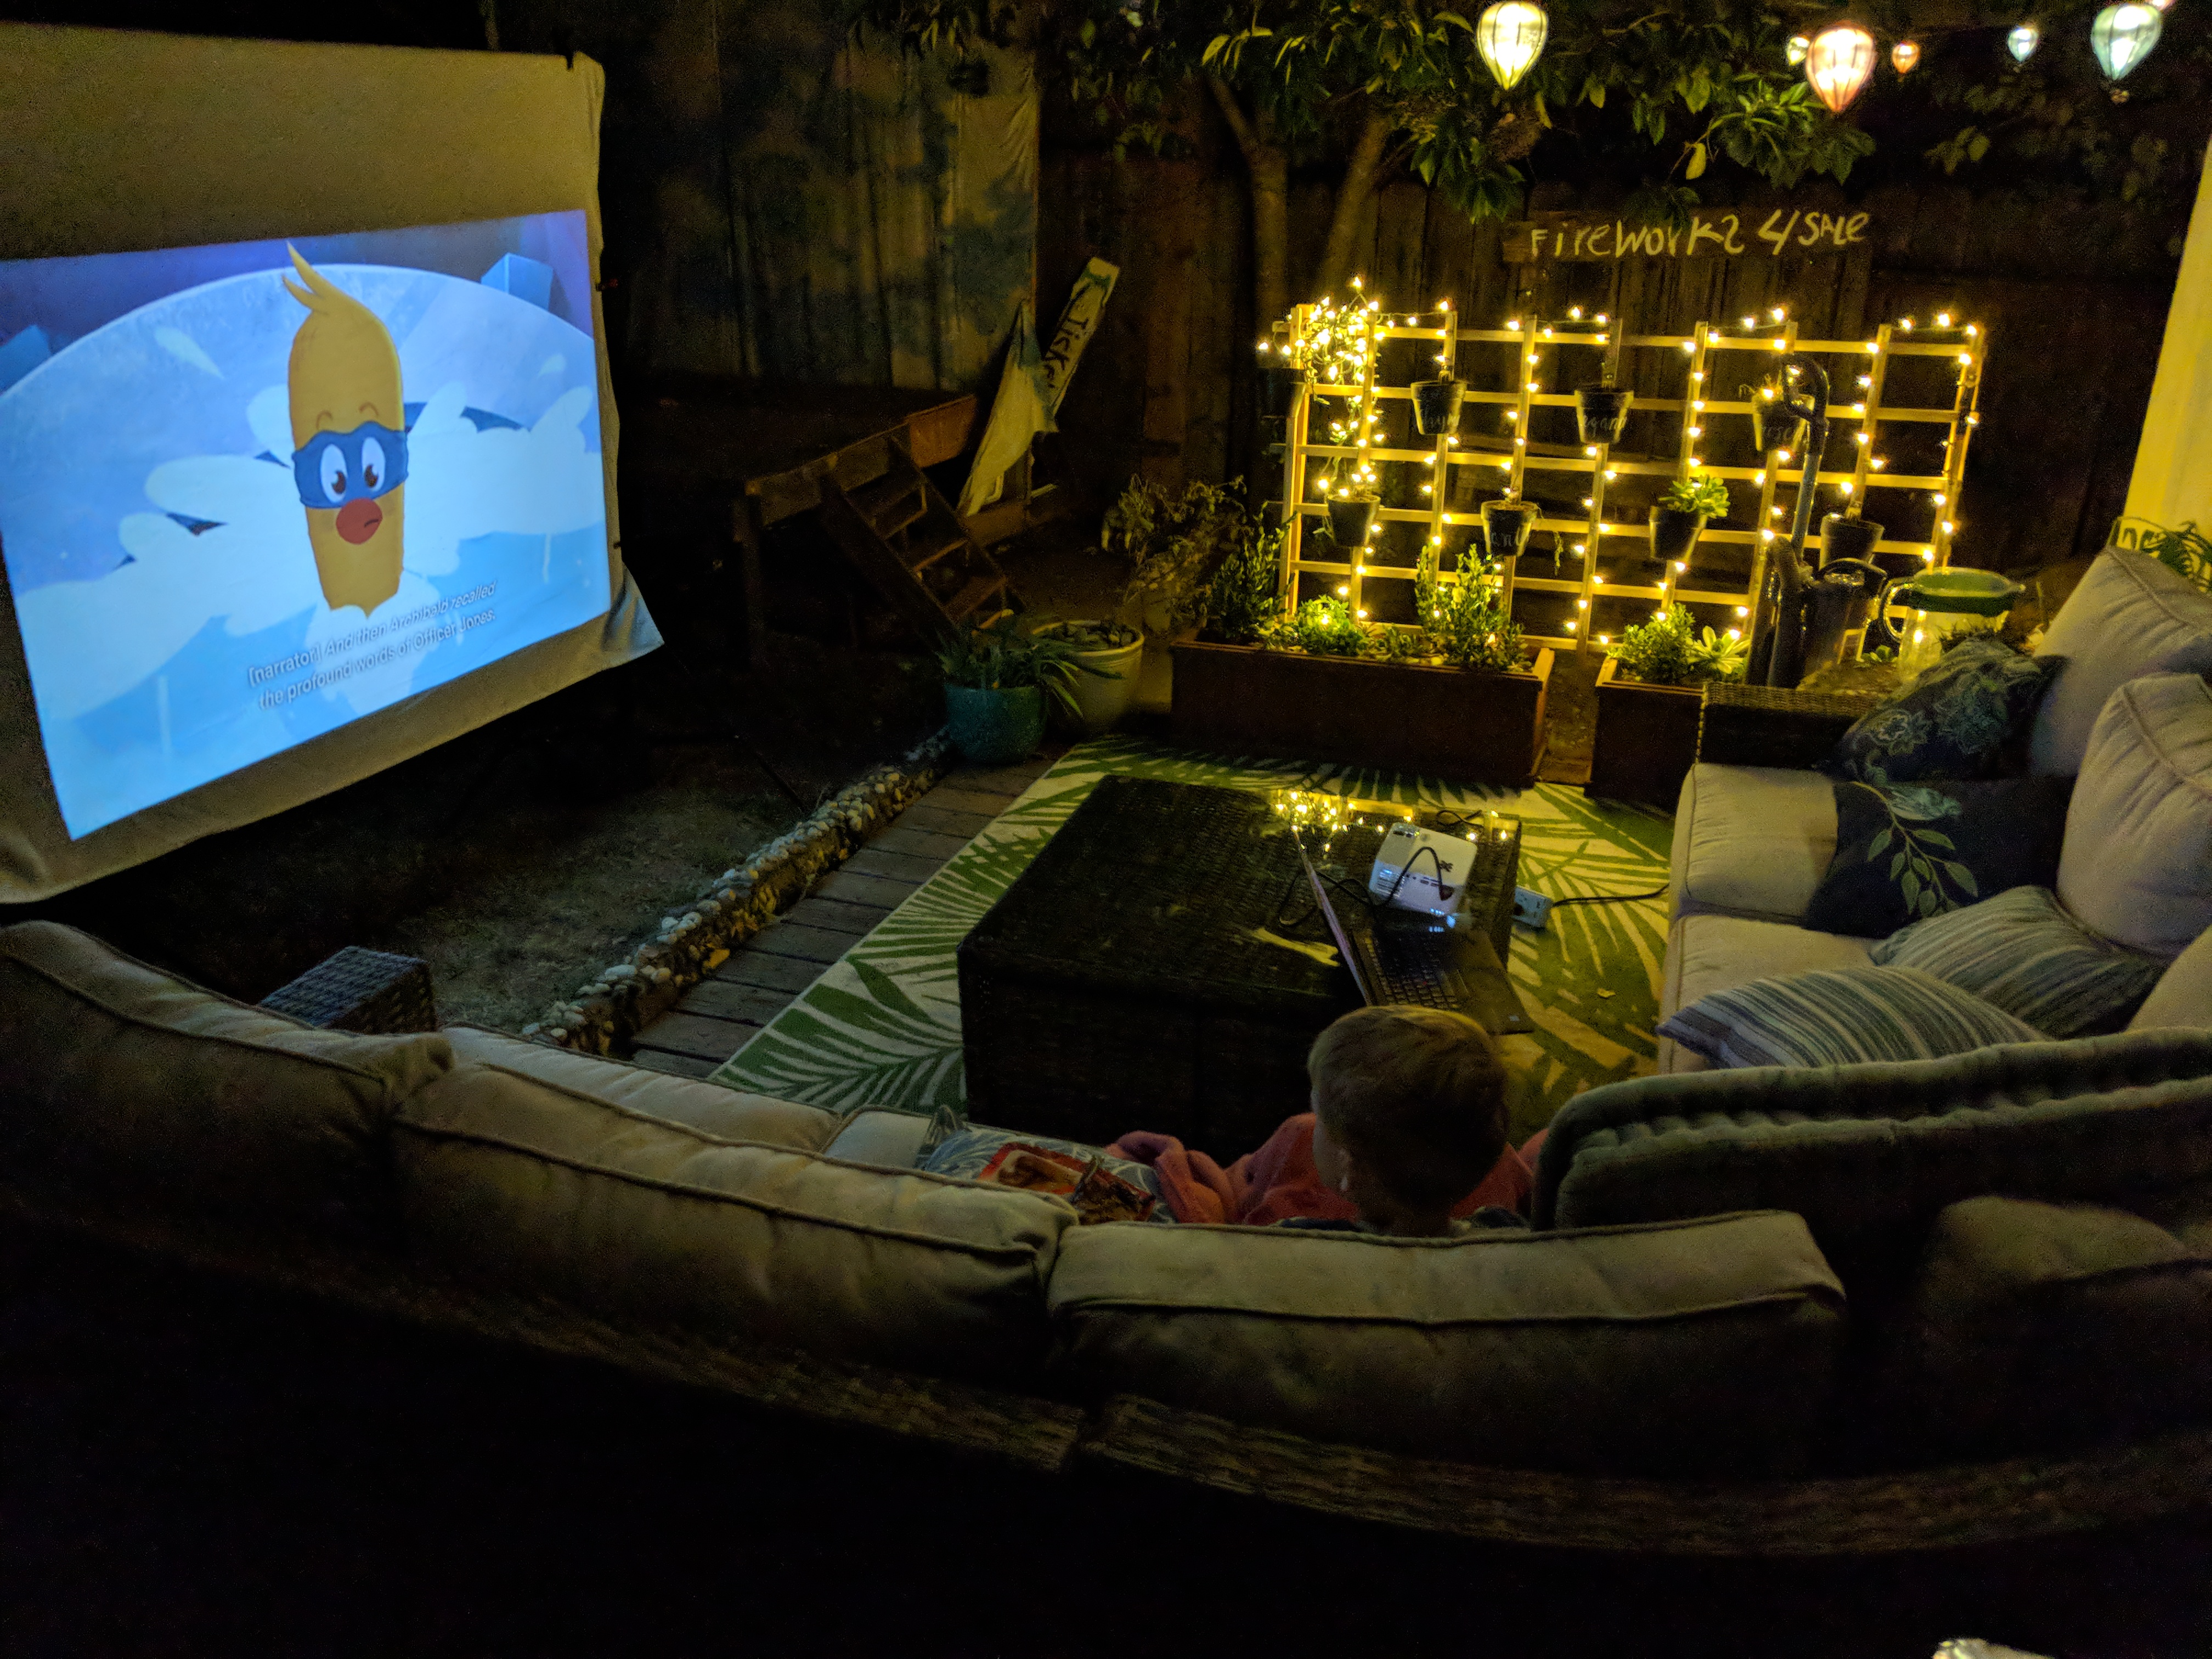
- As it starts to warm up take your family movie night to the backyard with a projector. We found a basic $99 one off of amazon some time ago. Add to the fun with making it drive in style. Let the kids make their own box cars our of cardboard or let them bring their car toys if they have them. Take turns being the service to bring popcorn and drinks.
-
Put on a pretend restaurant
- Since going out is on hold, why not bring the restaurant to you! Have the kids make menus of the planned dinner with a few simple varieties such as milk or juice. Don’t forget to tip your server!
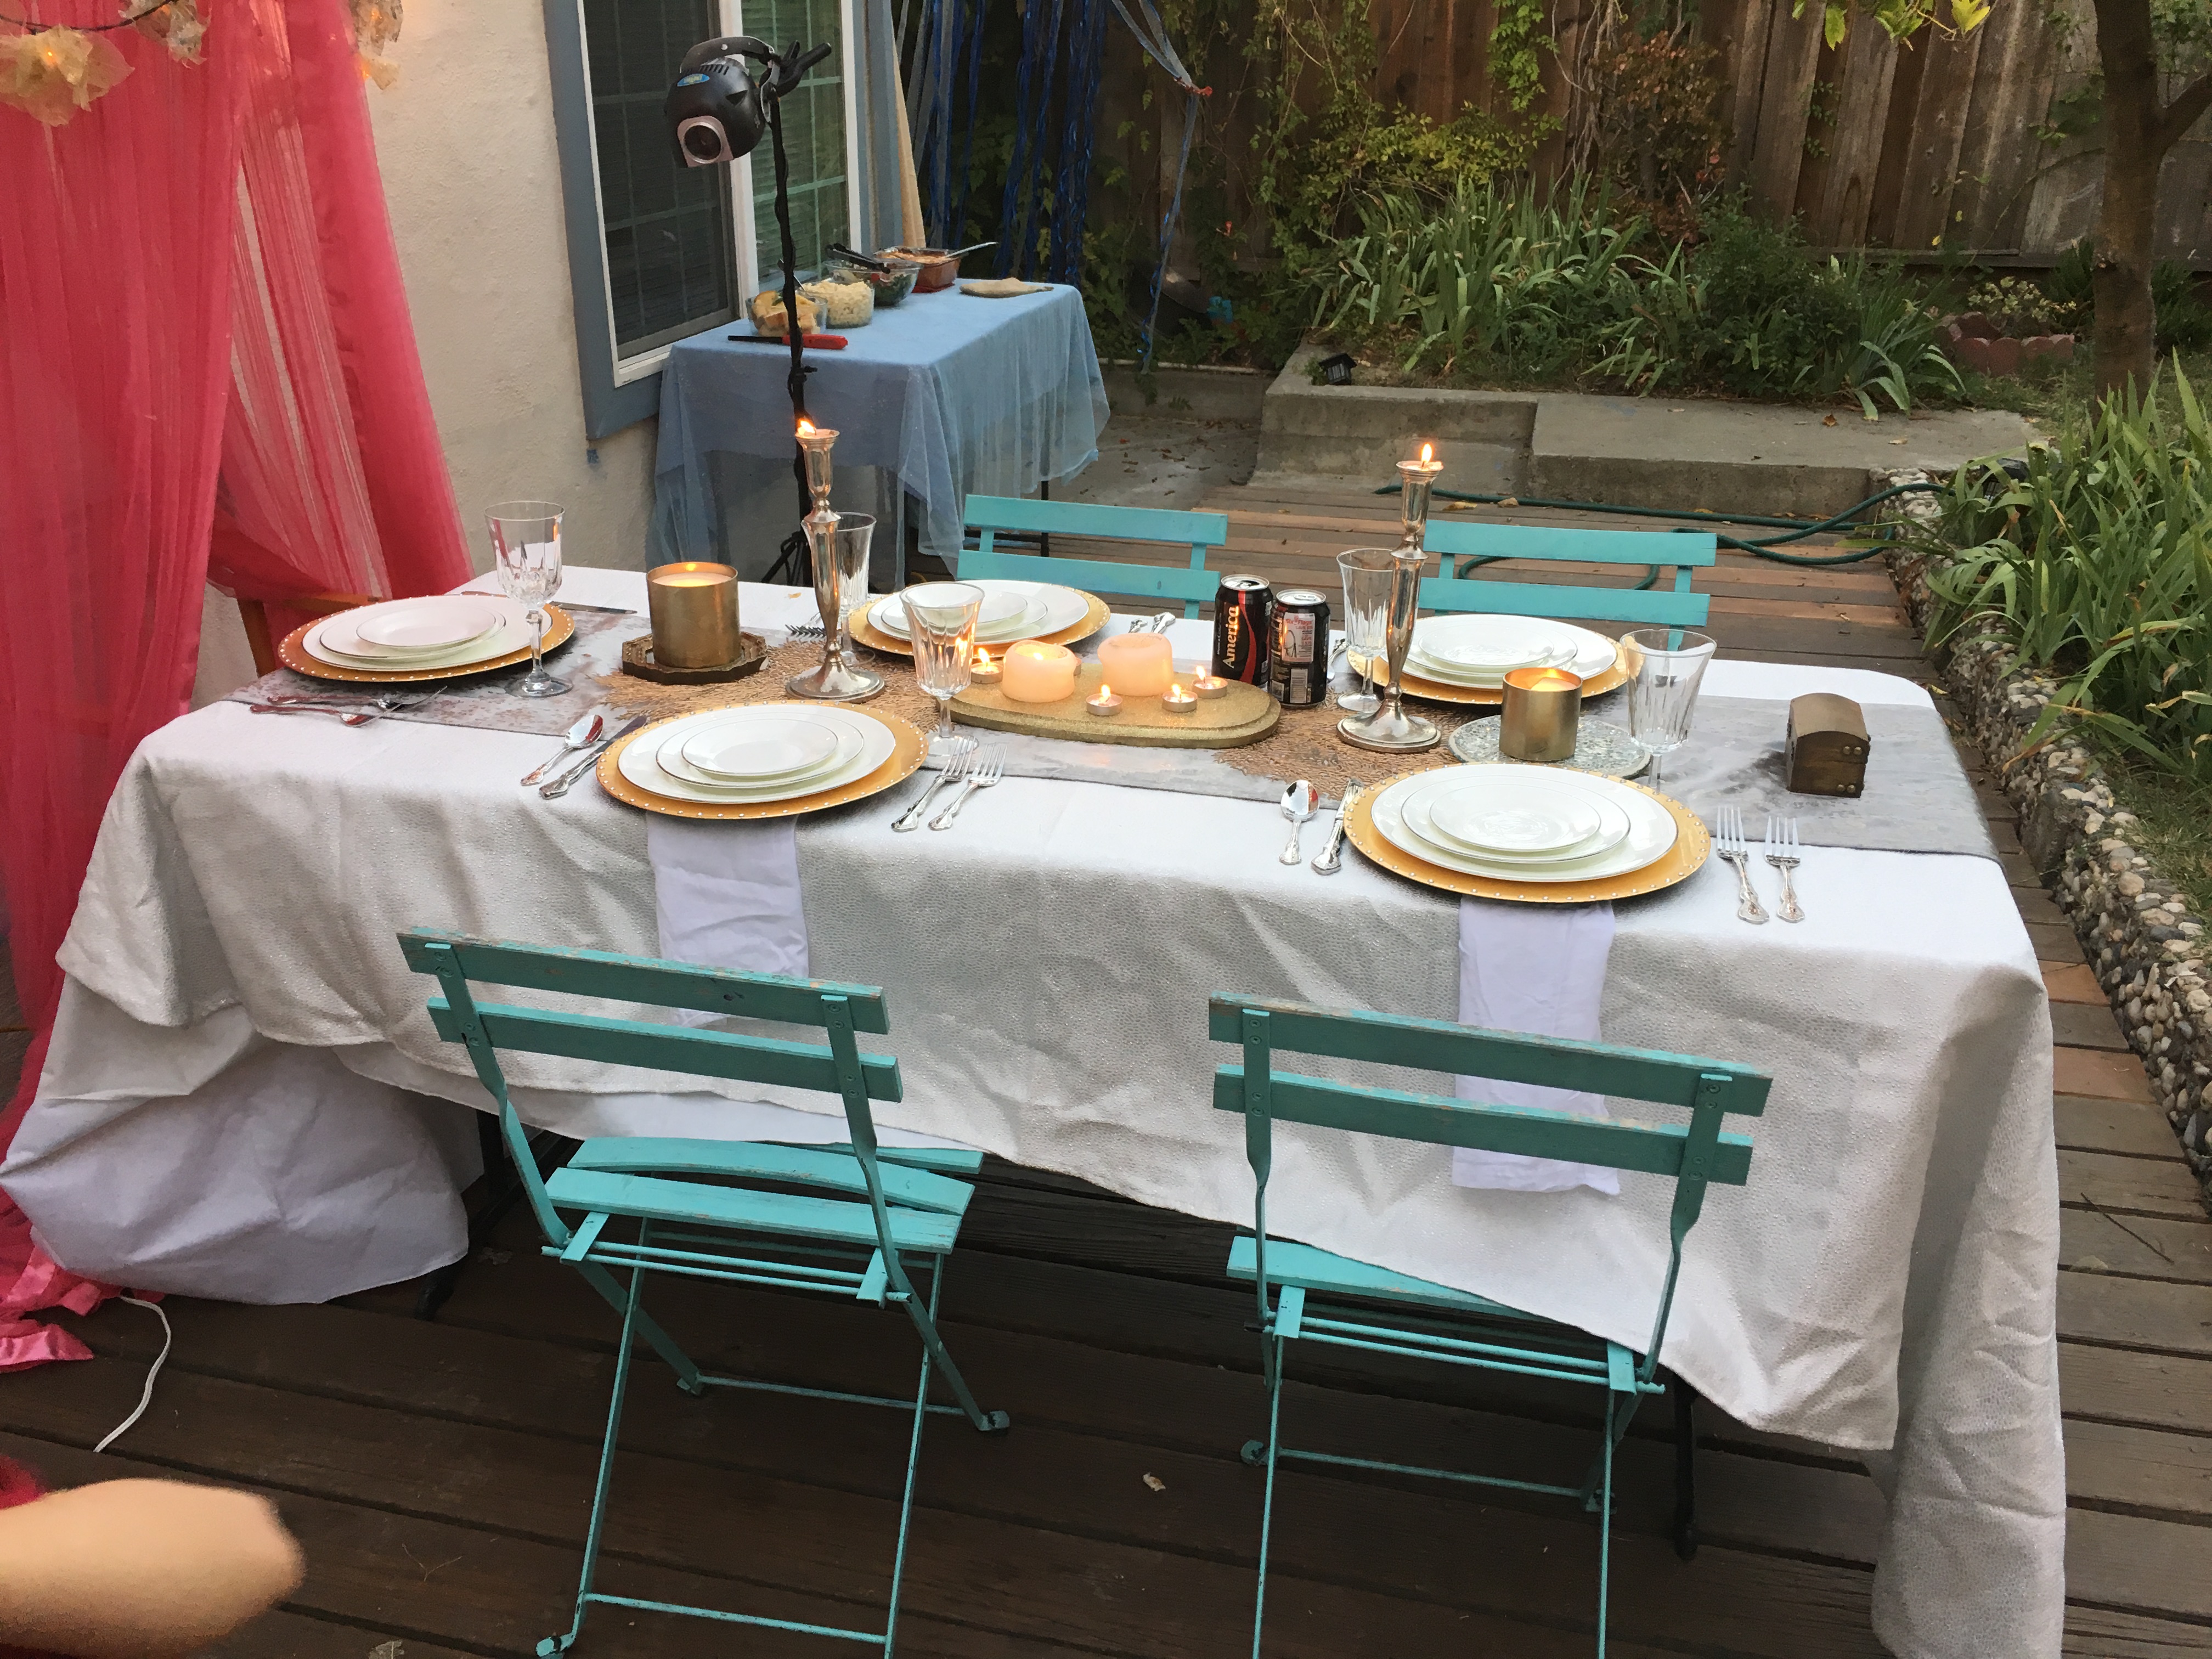
- We have done all kinds of fun themes and even did a fairytale banquet once… When else do you really pull out the nice stuff.
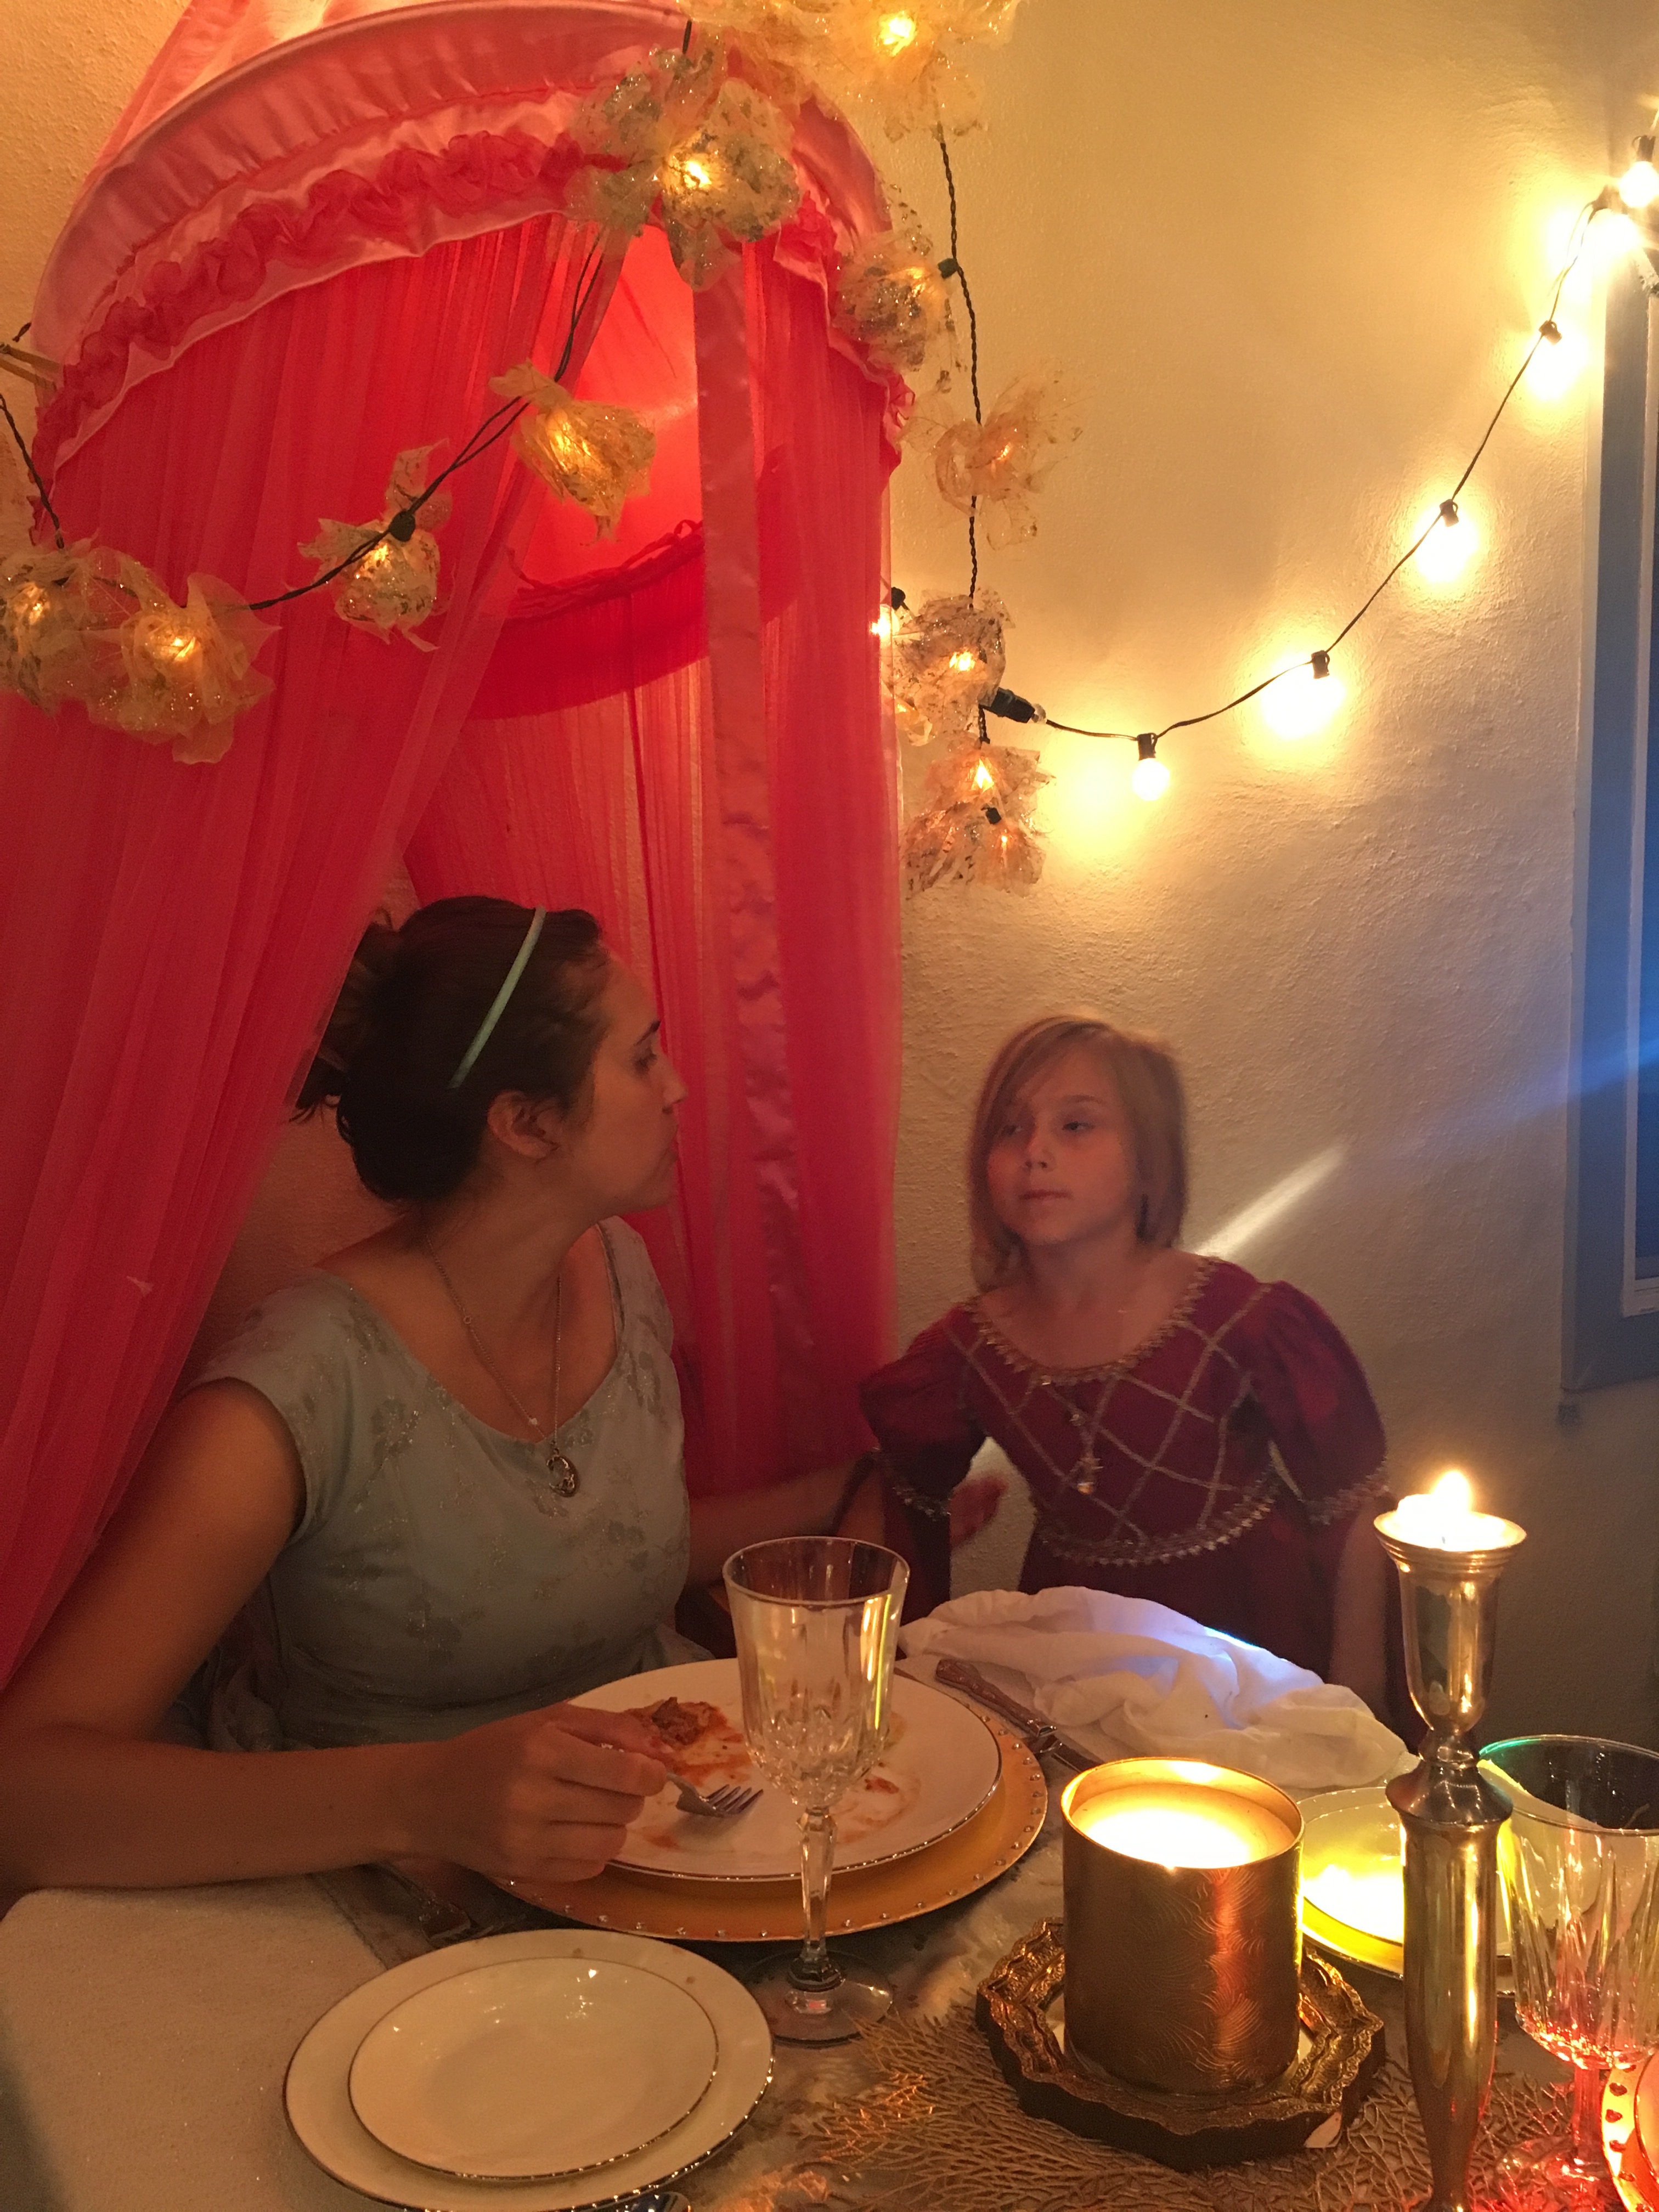
- My daughter wanted me to be the queen. Well alright, I guess if I have to lol.
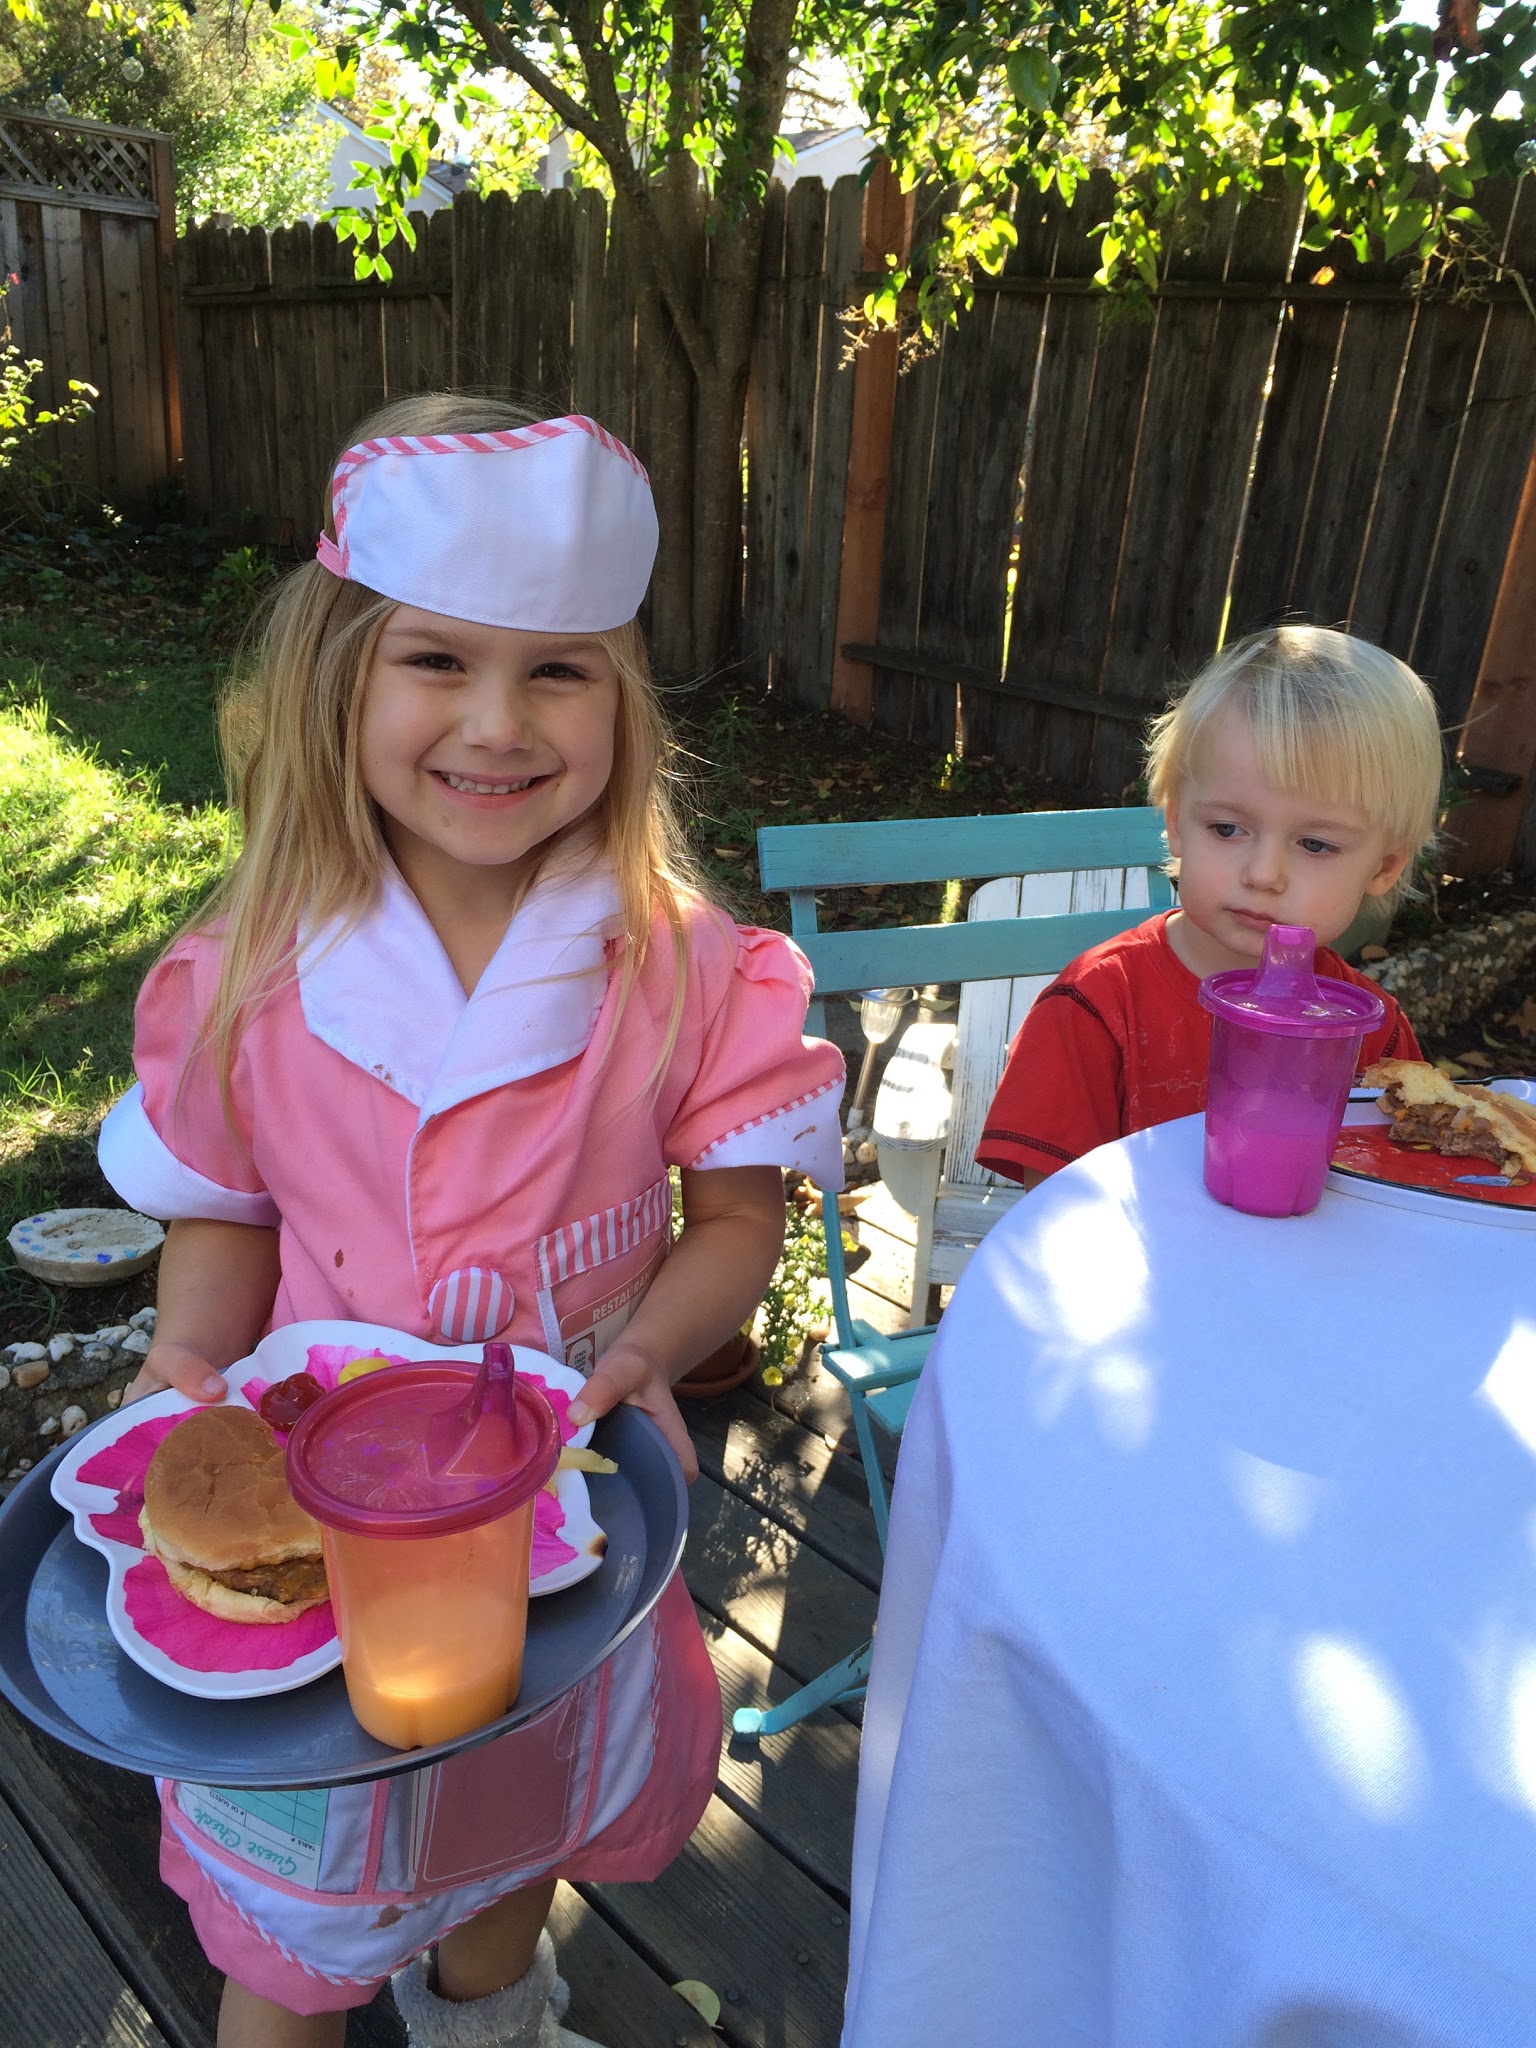
- I found this cute outfit by Melissa and Doug. Kids love to do pretend. Playing a waitress is a hit! There is also this adorable waitress costume from Princess Paradise. We loved that one too doing a donut themed family costume one year for Halloween.
- I save everything! Here are some old menus from a restaurant I use to work at. Great inspiration for dinner and making a menu for fun!
-
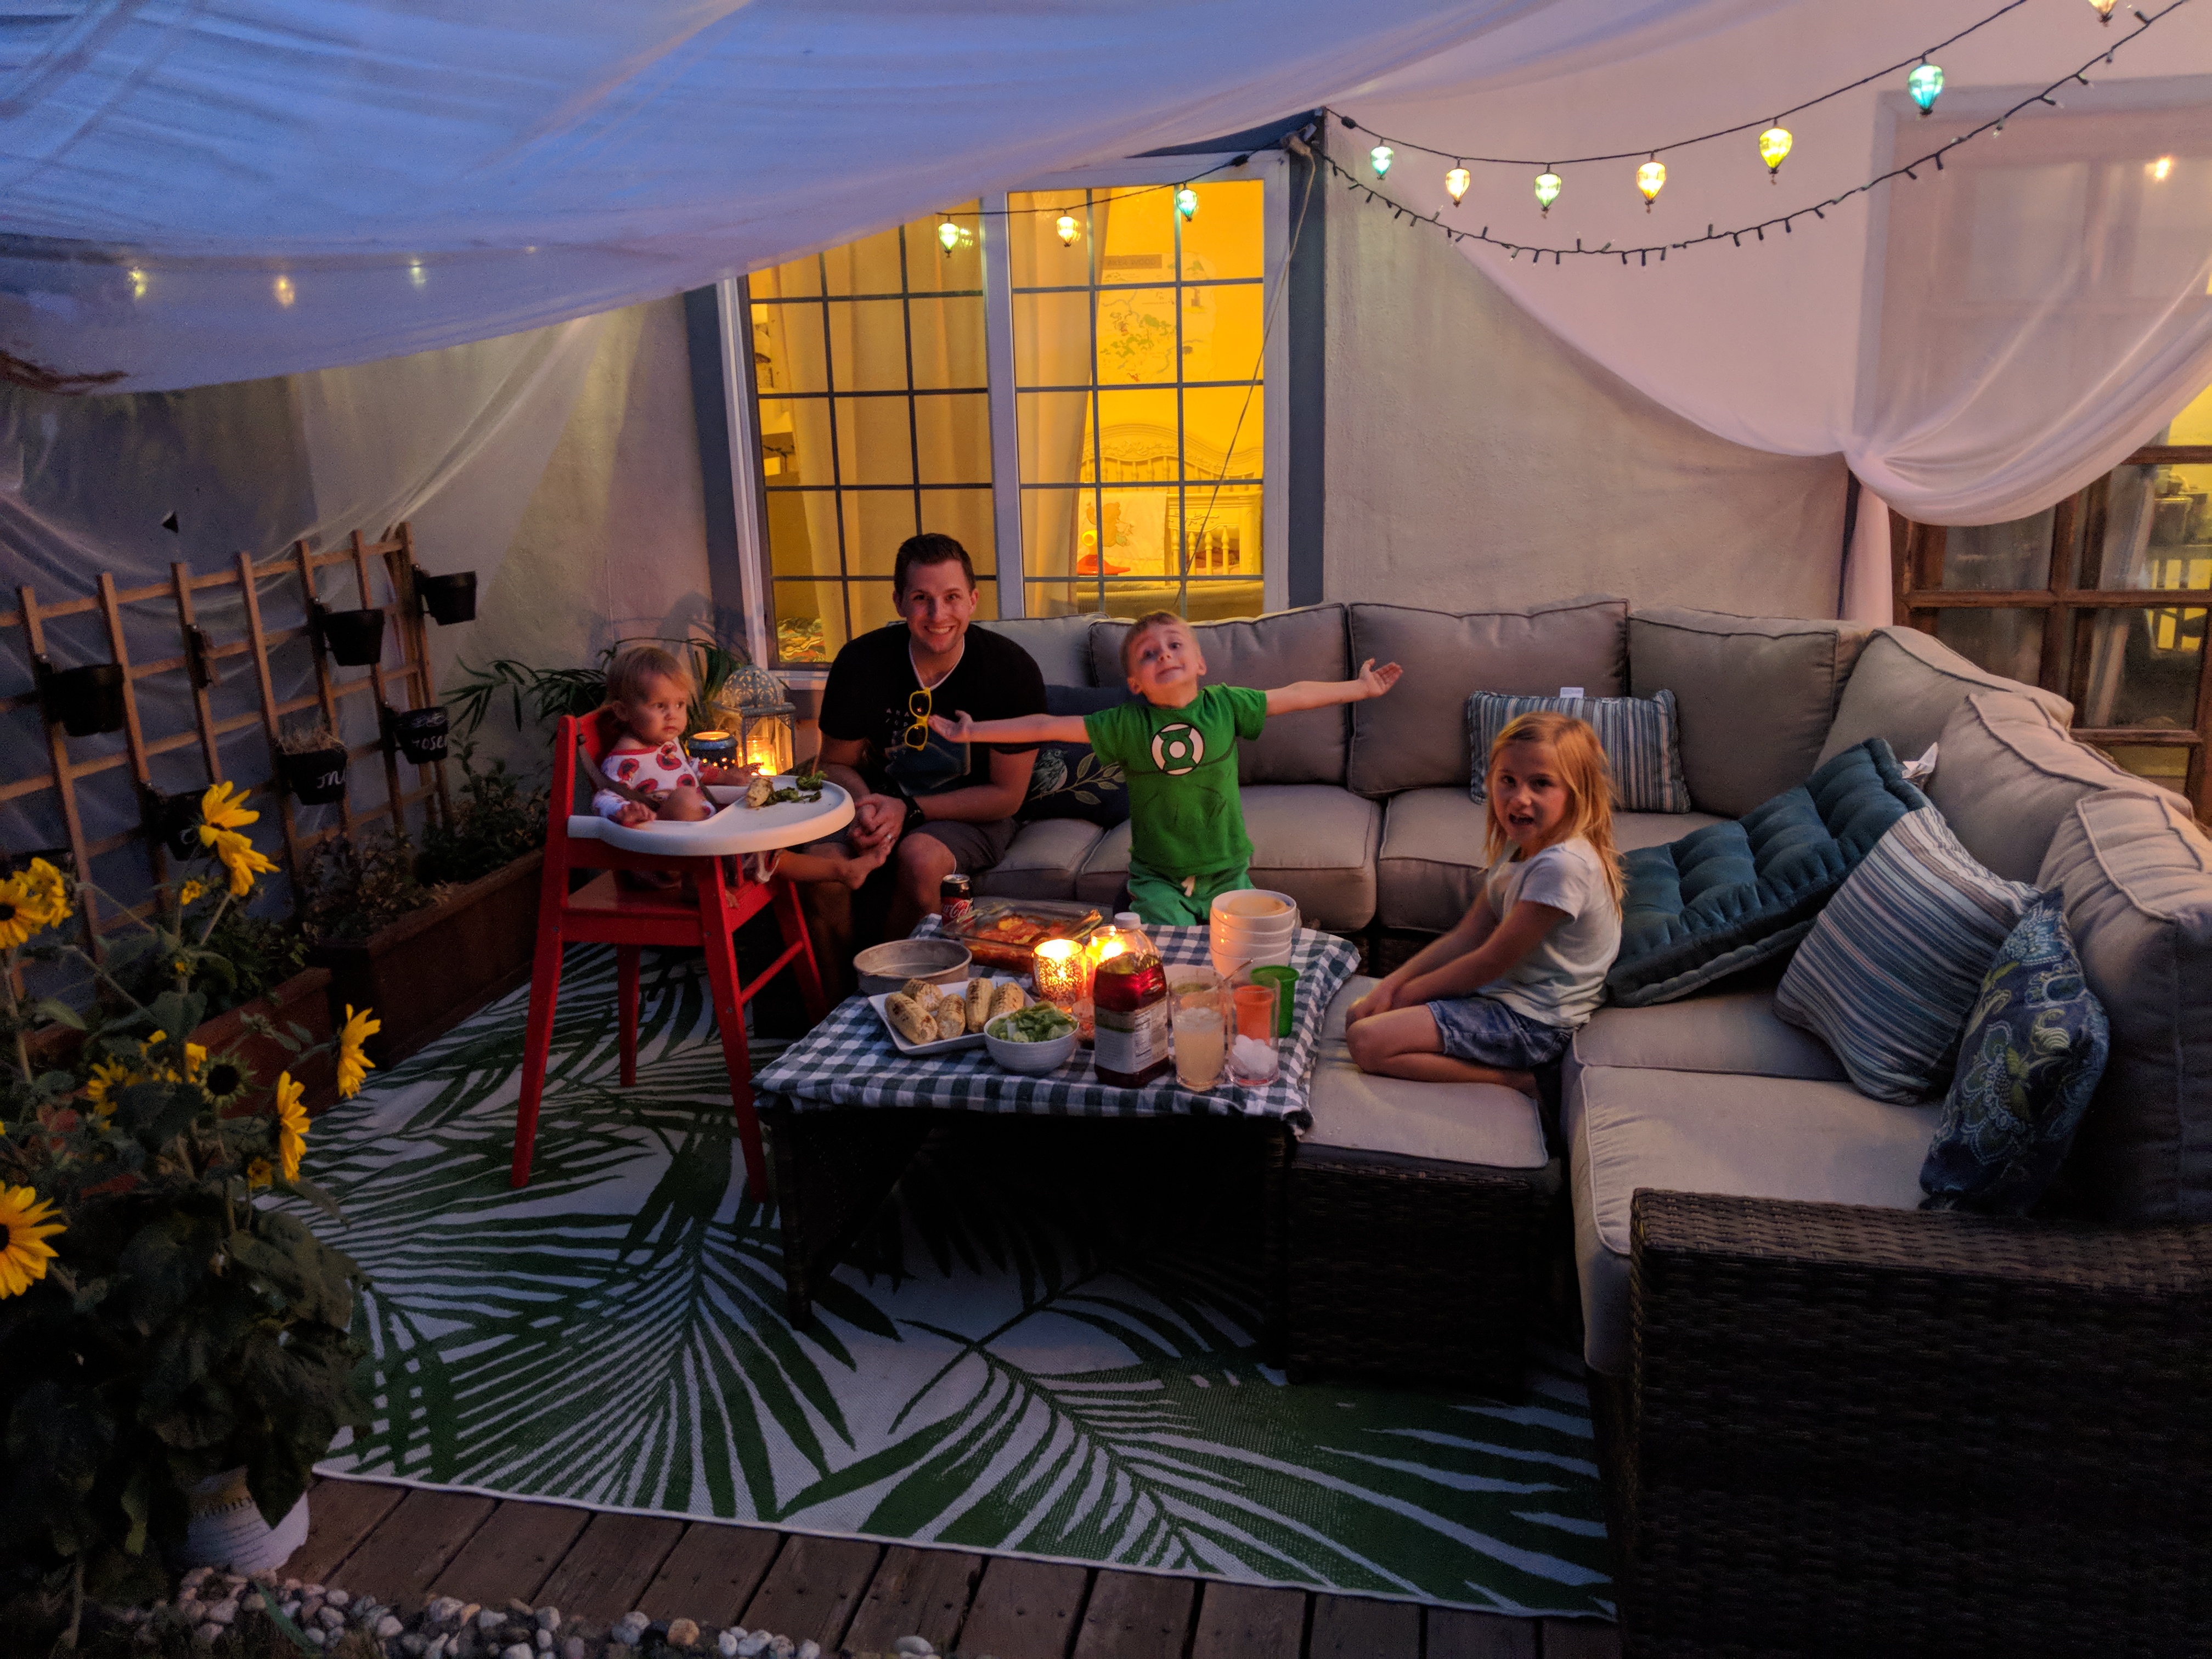
Build a fort and put on a backyard Salon
- My daughter got this idea from Fancy Nancy’s book: Fancy Nancy: Ooh La La! It’s Beauty Day! Where she gives her mom a beauty treatment in the backyard.
We love to do little spa days around here so what a fun idea! We used a big lightweight pink canopy tent intended for a teenage girls’ bed, leftover from my college dorm days lol. But has sense had many uses. The kids love this instant “fort” effect and it shaded us on our sunny back lawn. We laid a thick quilt down and even had treats.
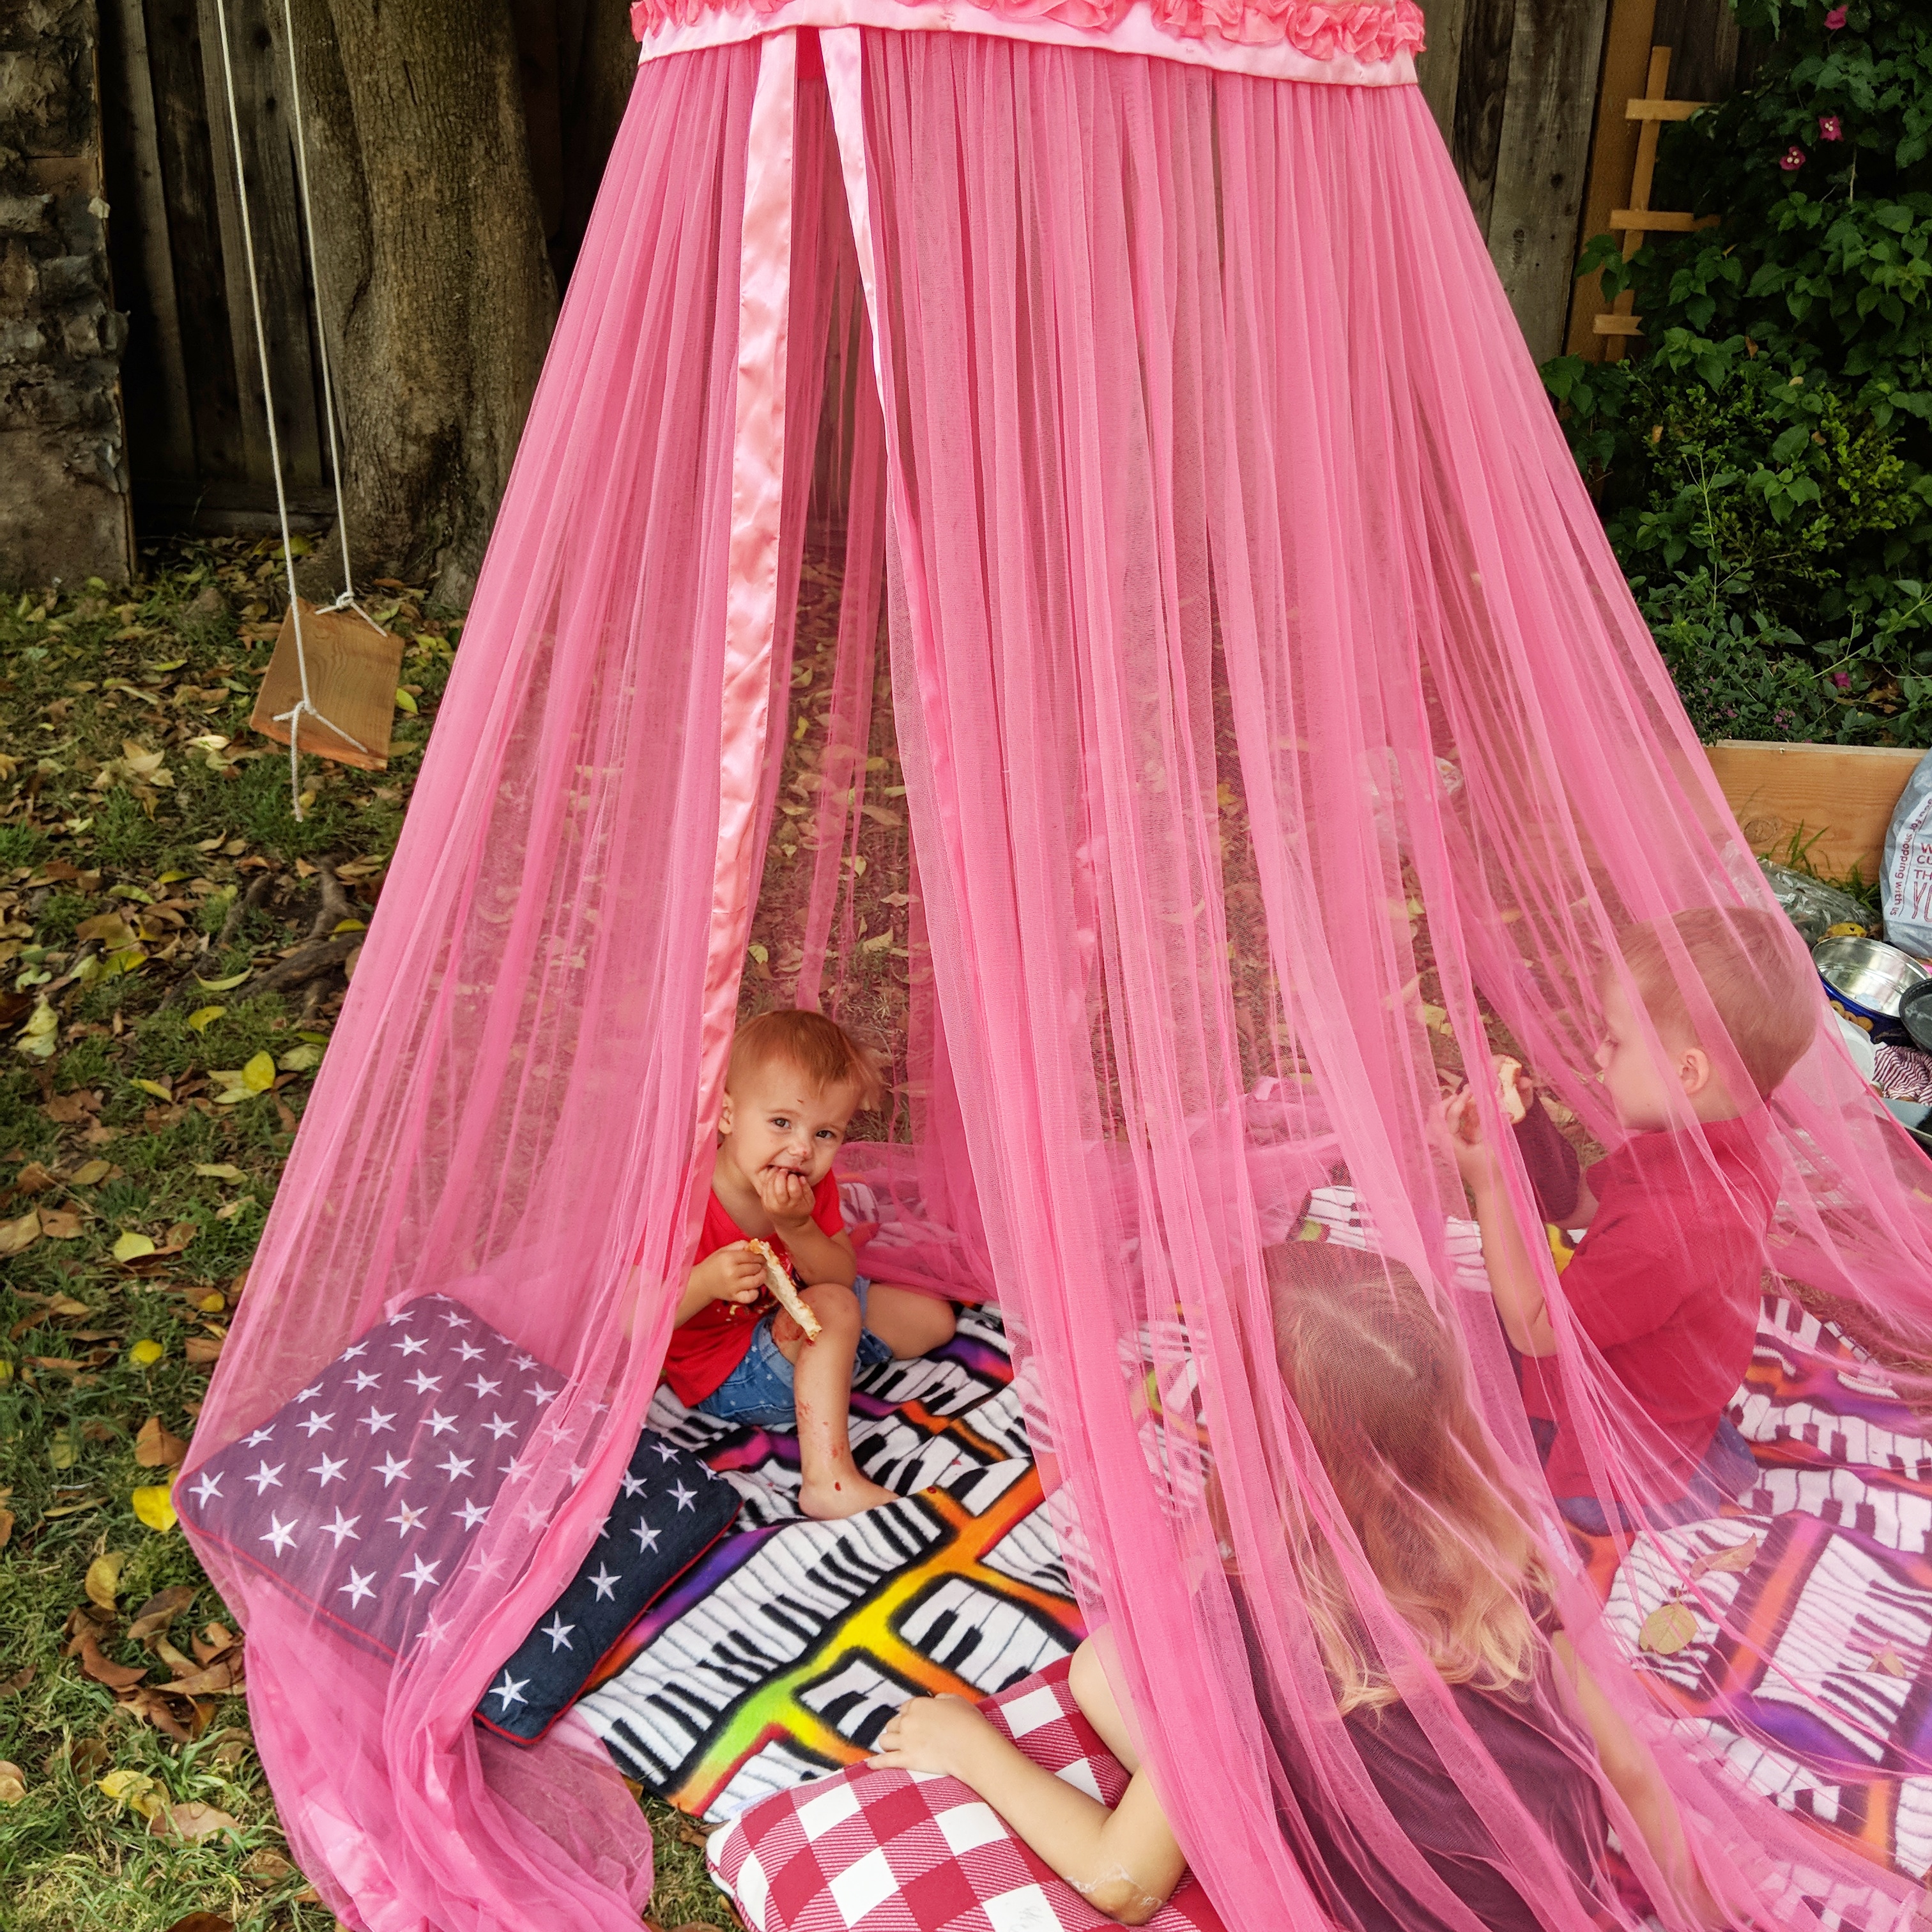
We’ve enjoyed “spa days” for birthday parties too! But since those are also on hold, at least we can do the spa part.
-
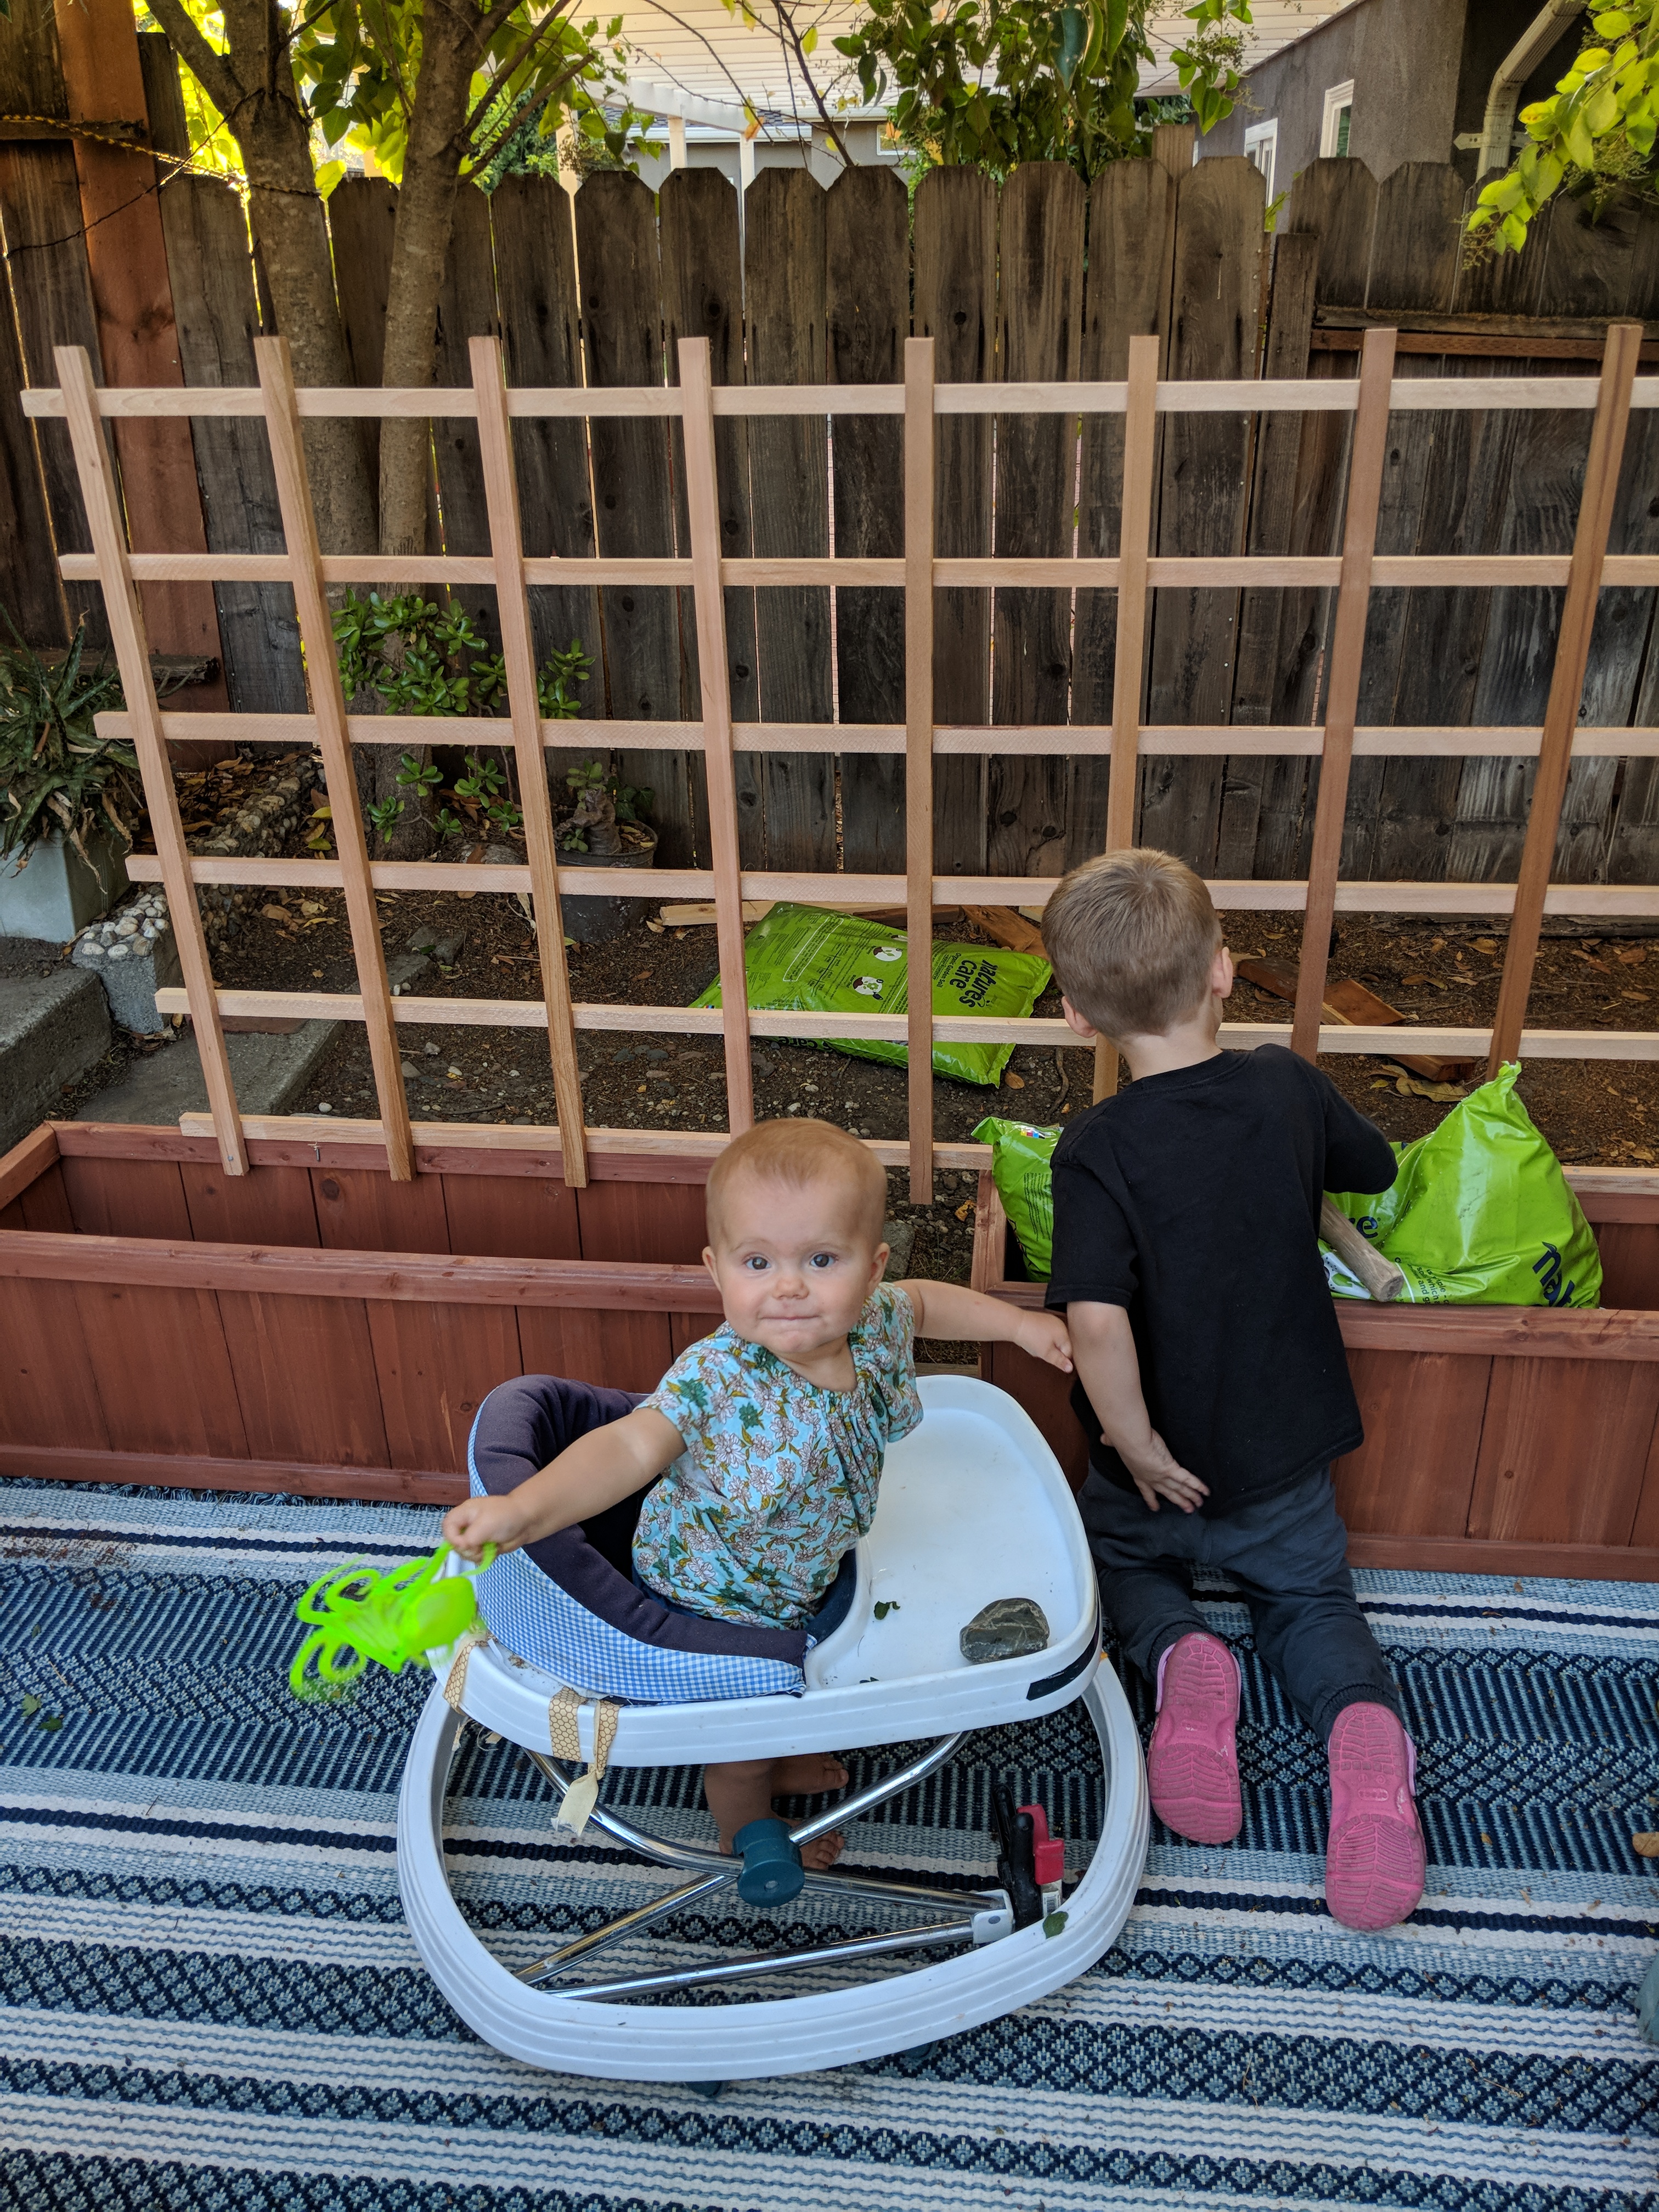
Work in the Garden as a family
- With this extra time together as a family, we have fewer things keeping us busy out there, and more time to spend slowing down together. Yes, those little ones keep up busy but the garden provides many learning opportunities in teaching our kids. Faith. Consistency. Working hard. Not letting weeds take over. Many examples of hands-on activities that can lead to a deeper more meaningful discussion to engage with our littles.
May you stay healthy and be safely gathered in and out in the backyard during this time of turbulence.

Photography by Effervescent Media Works
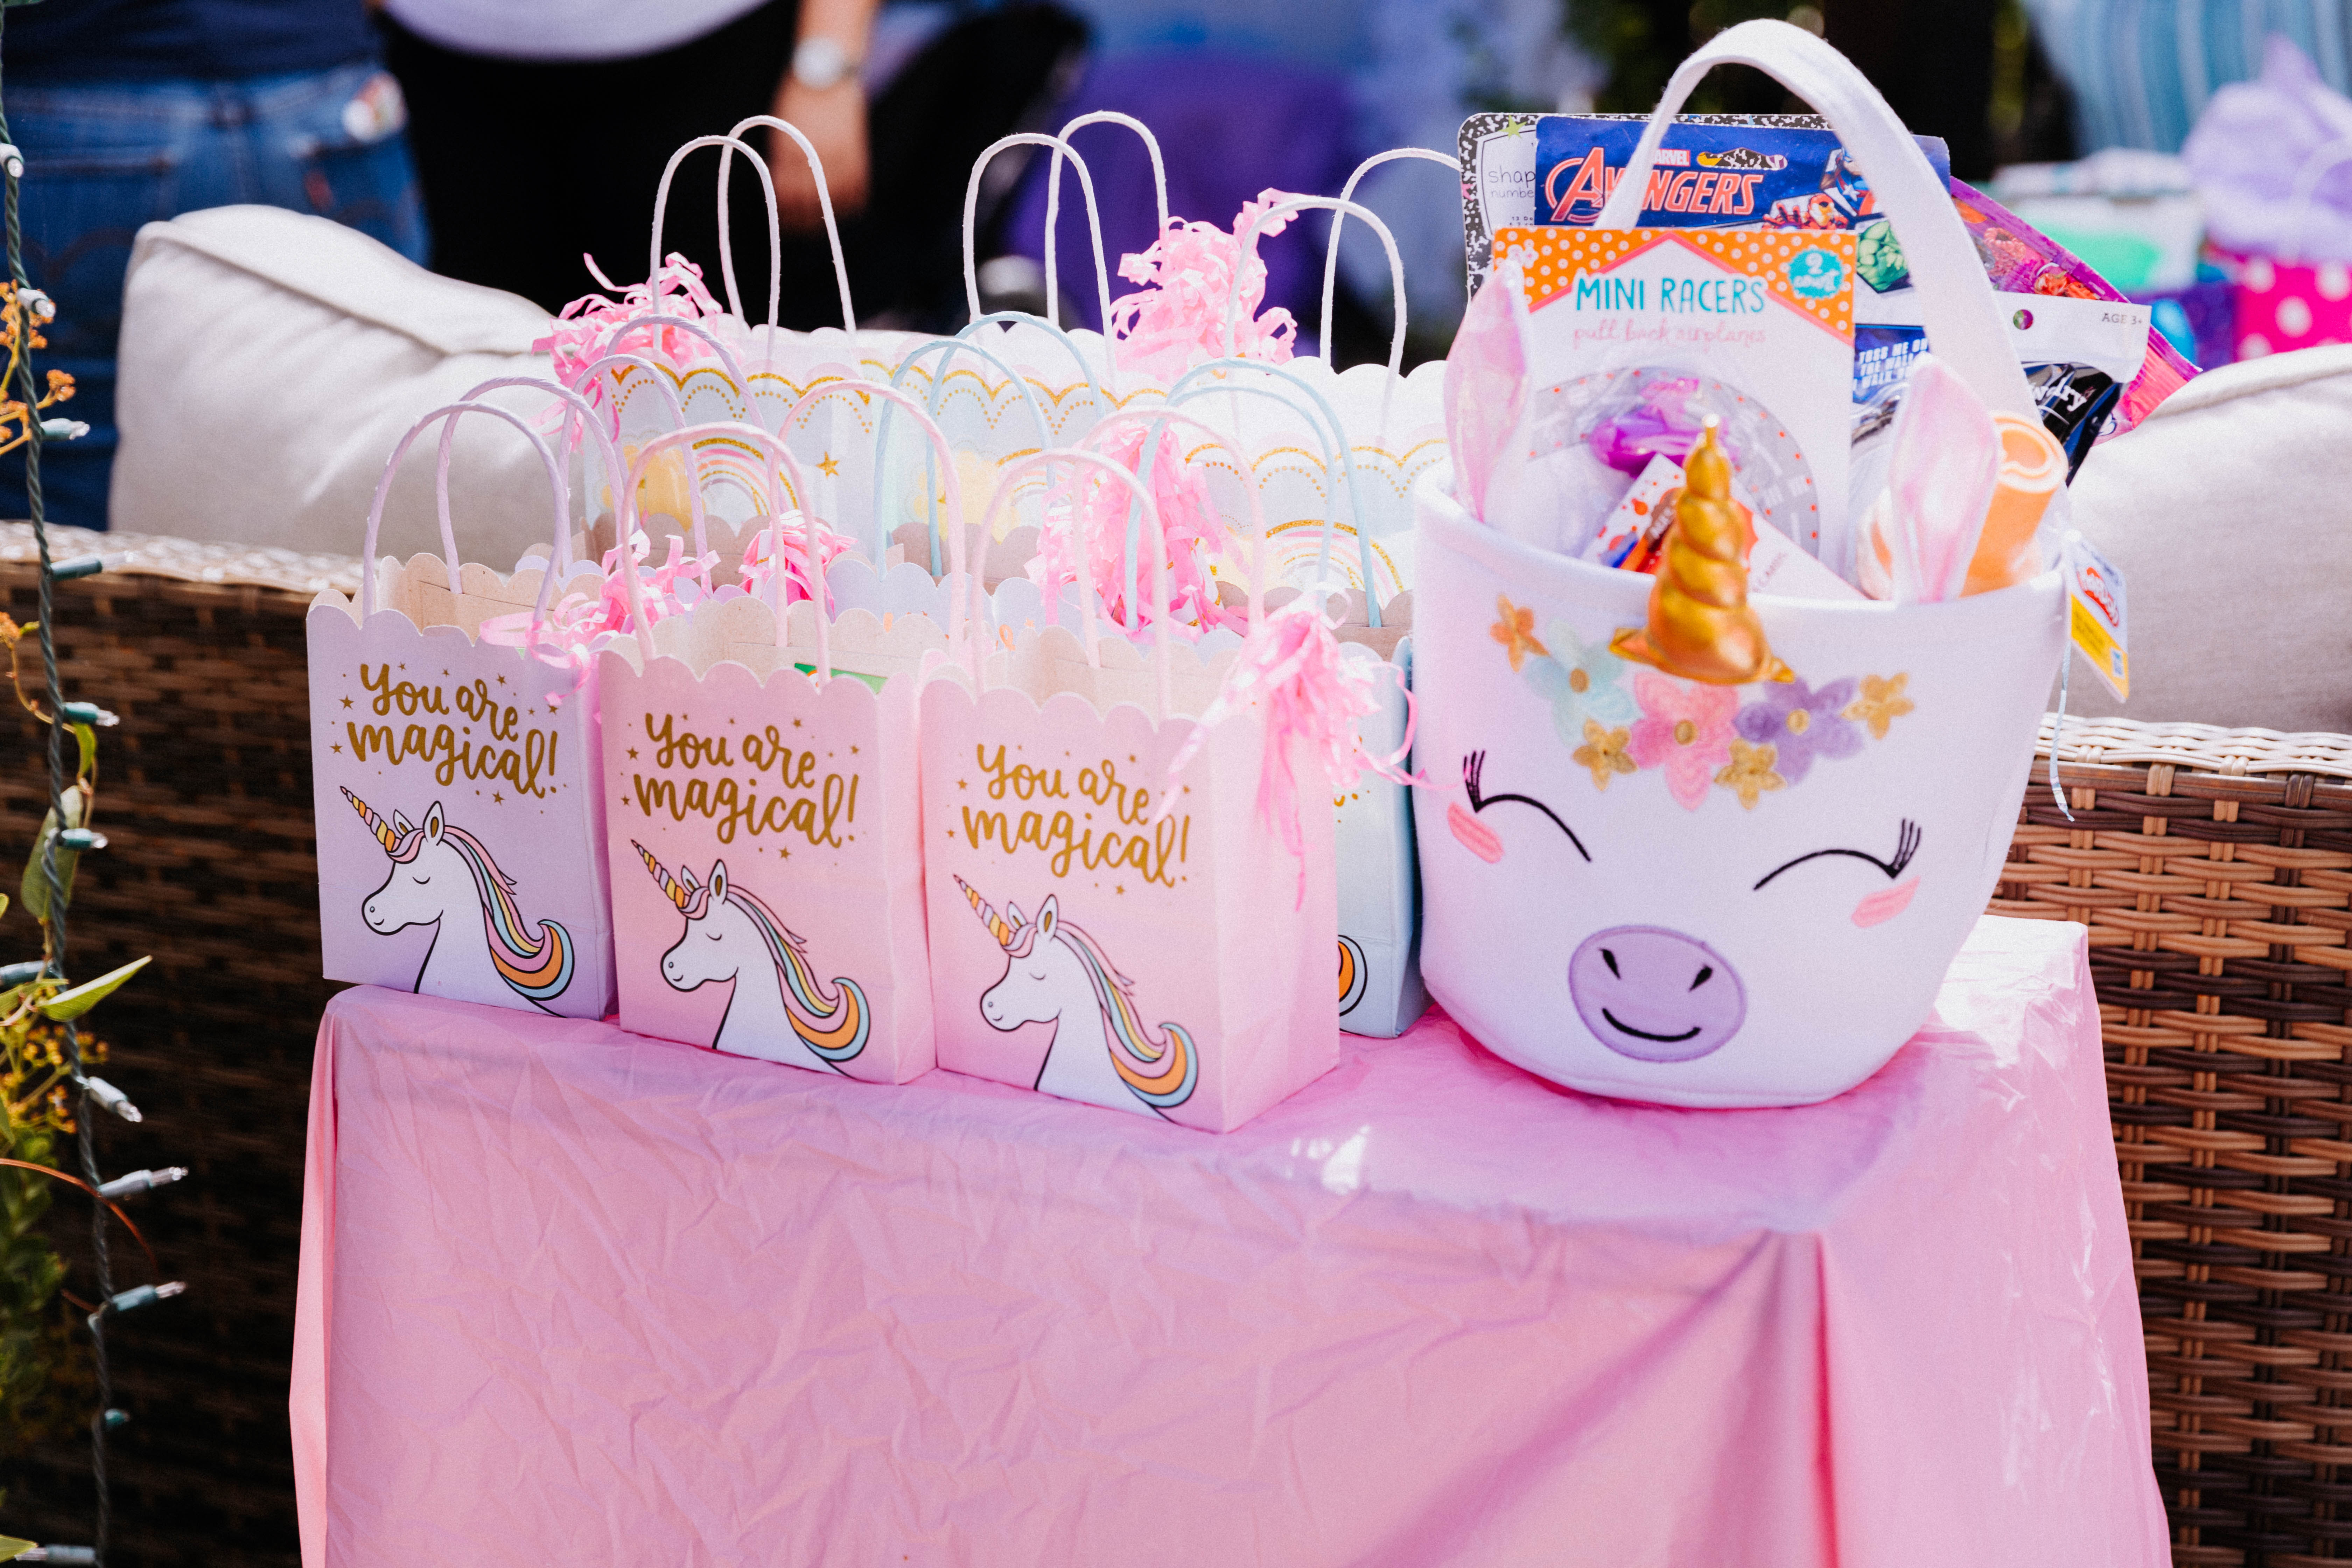
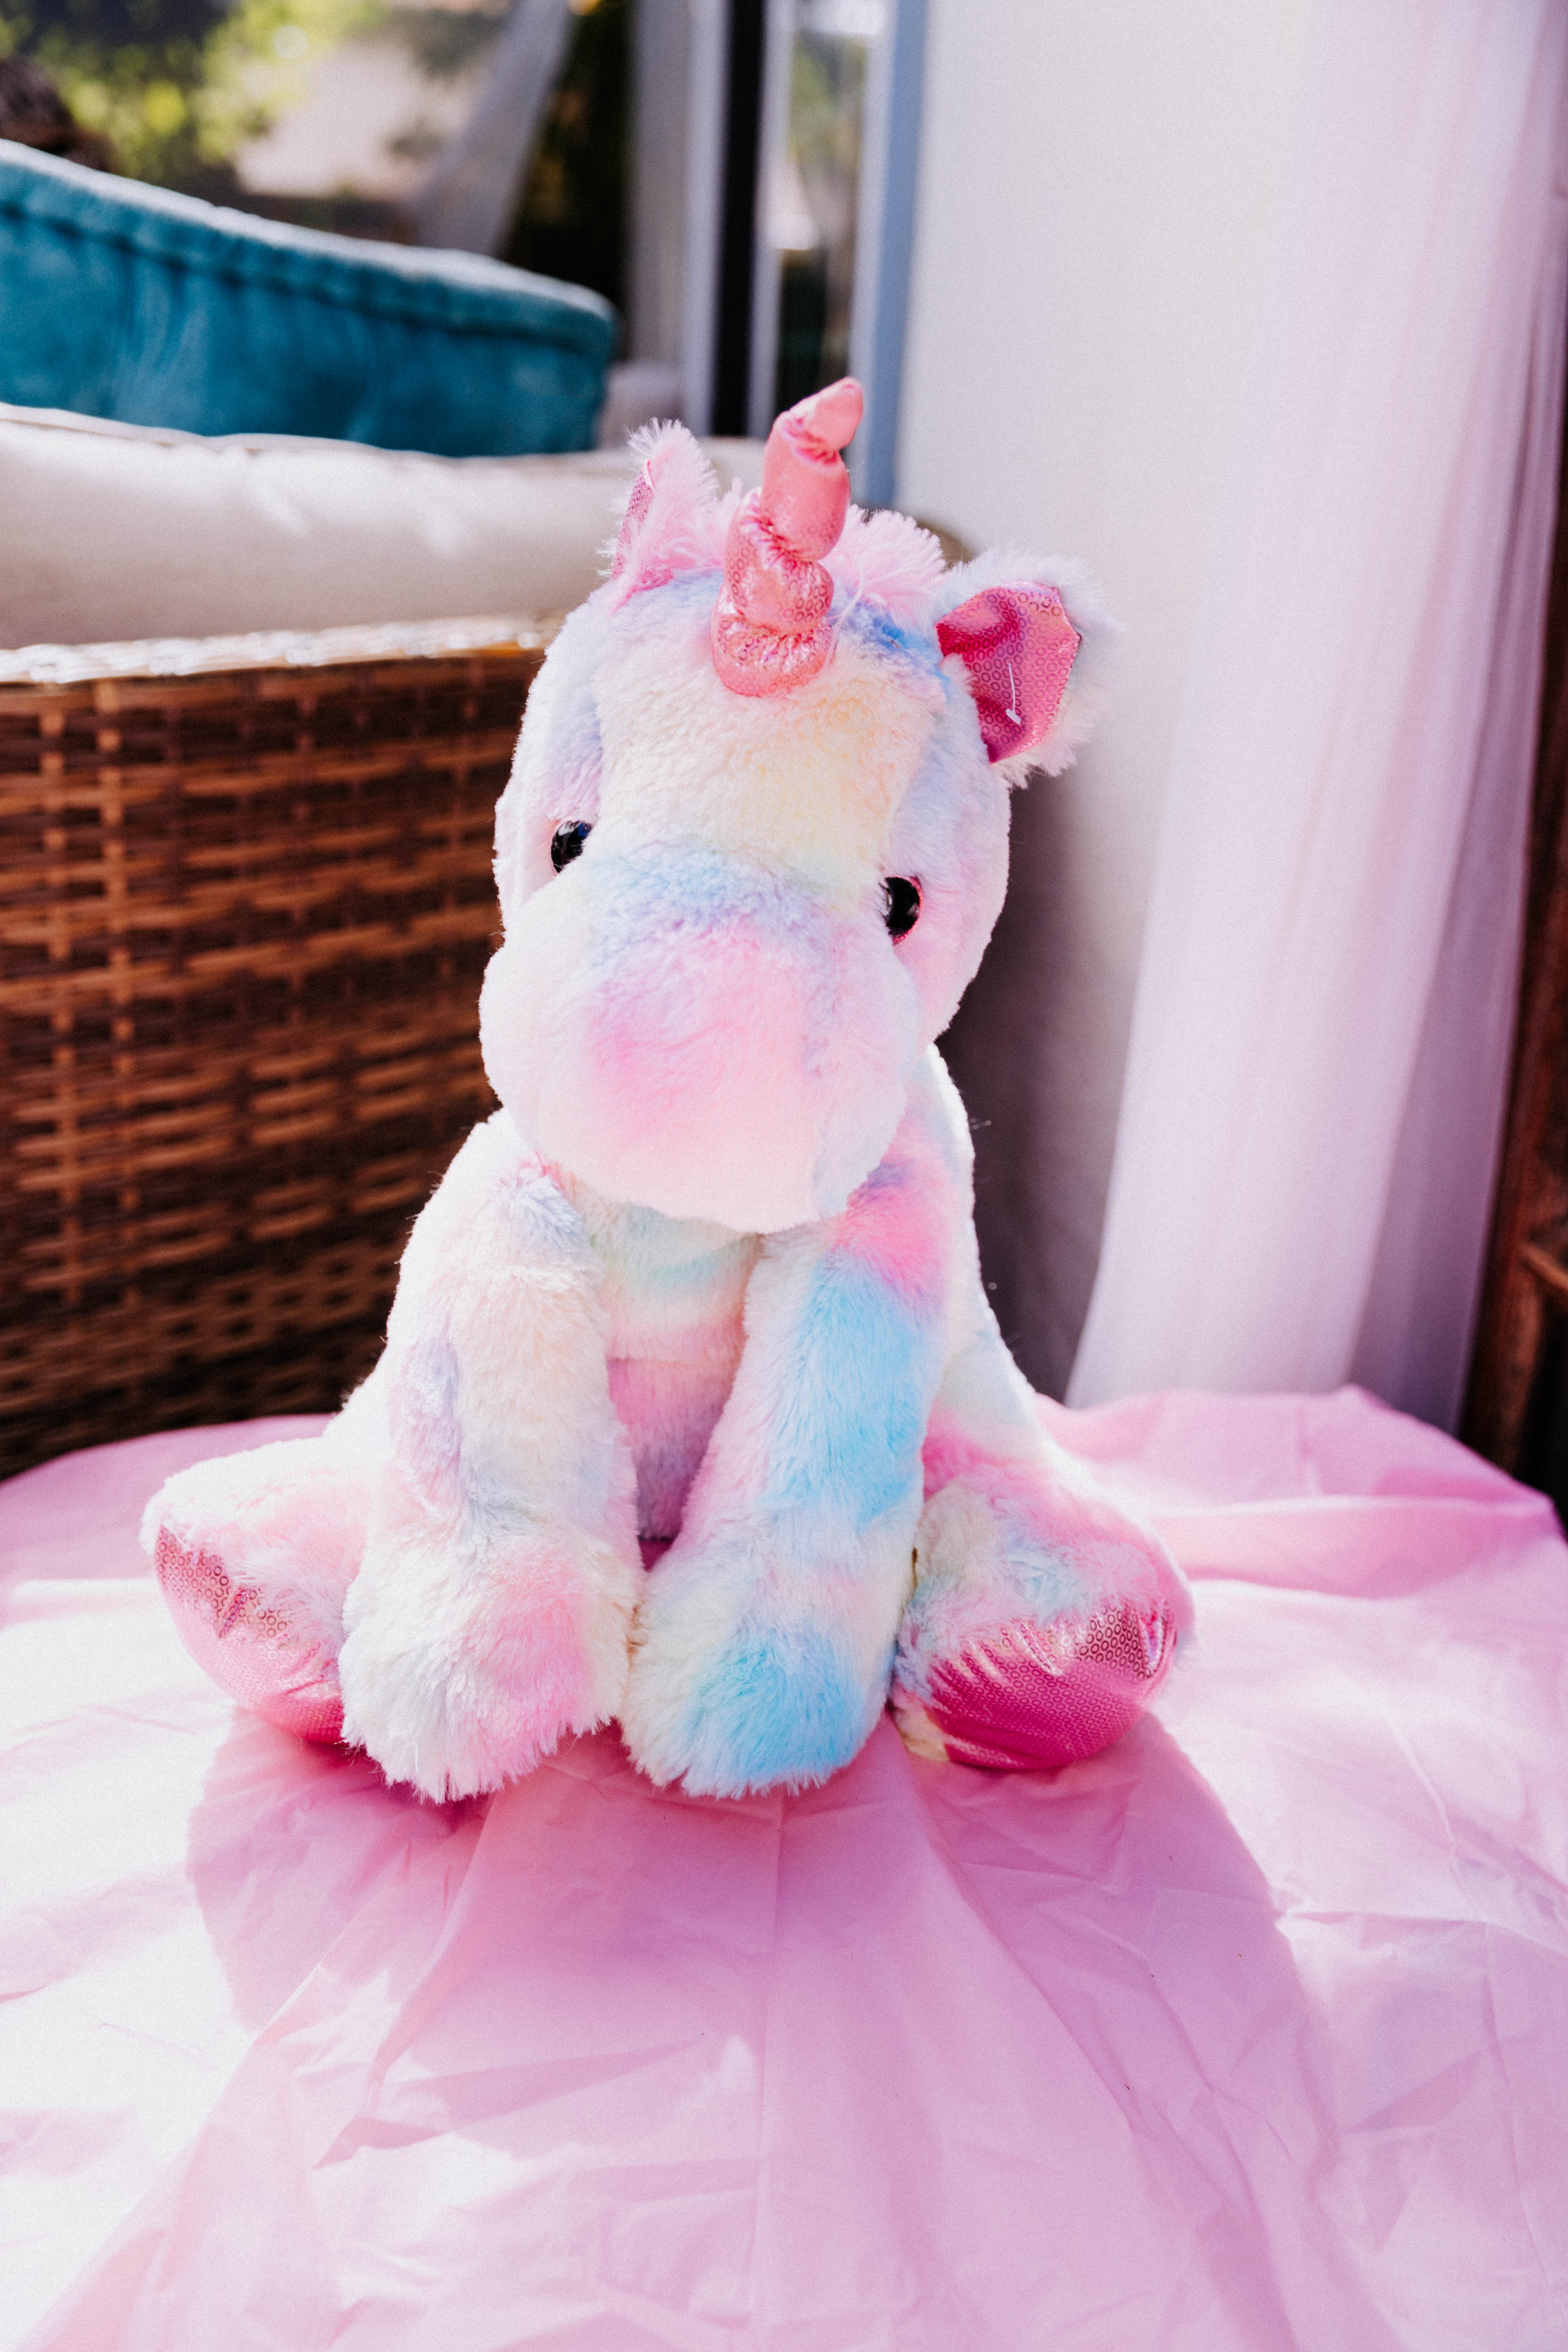
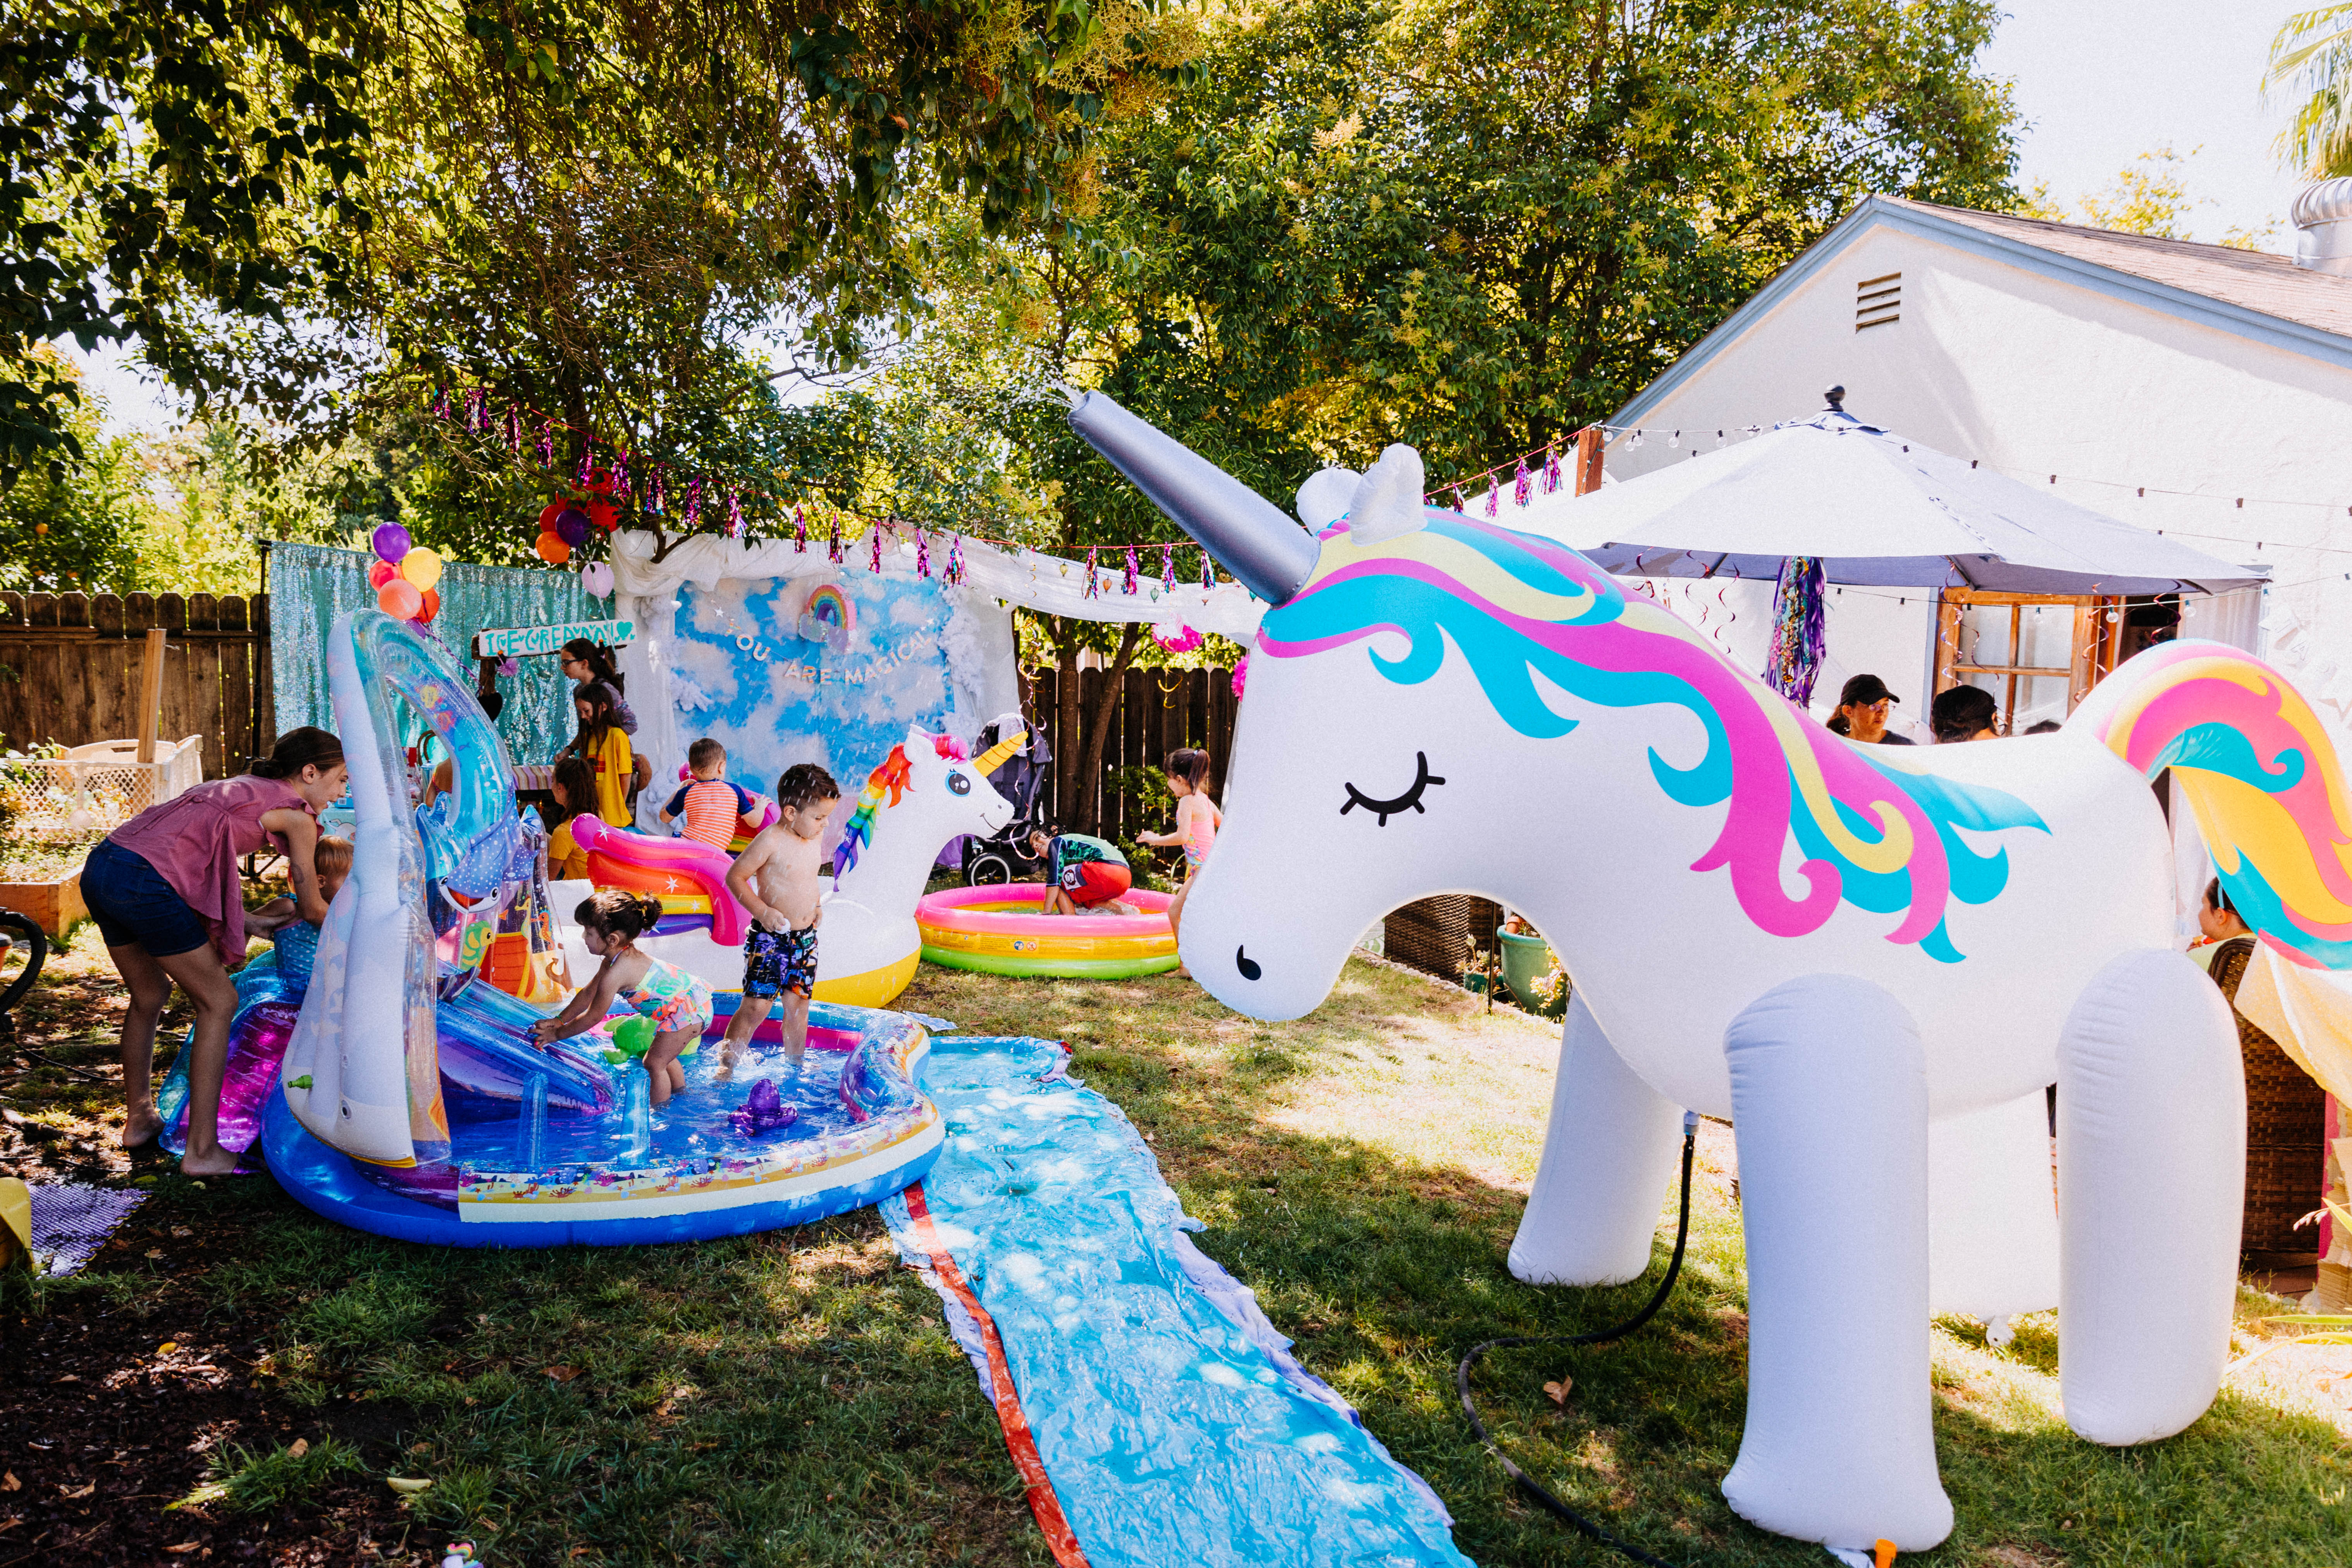
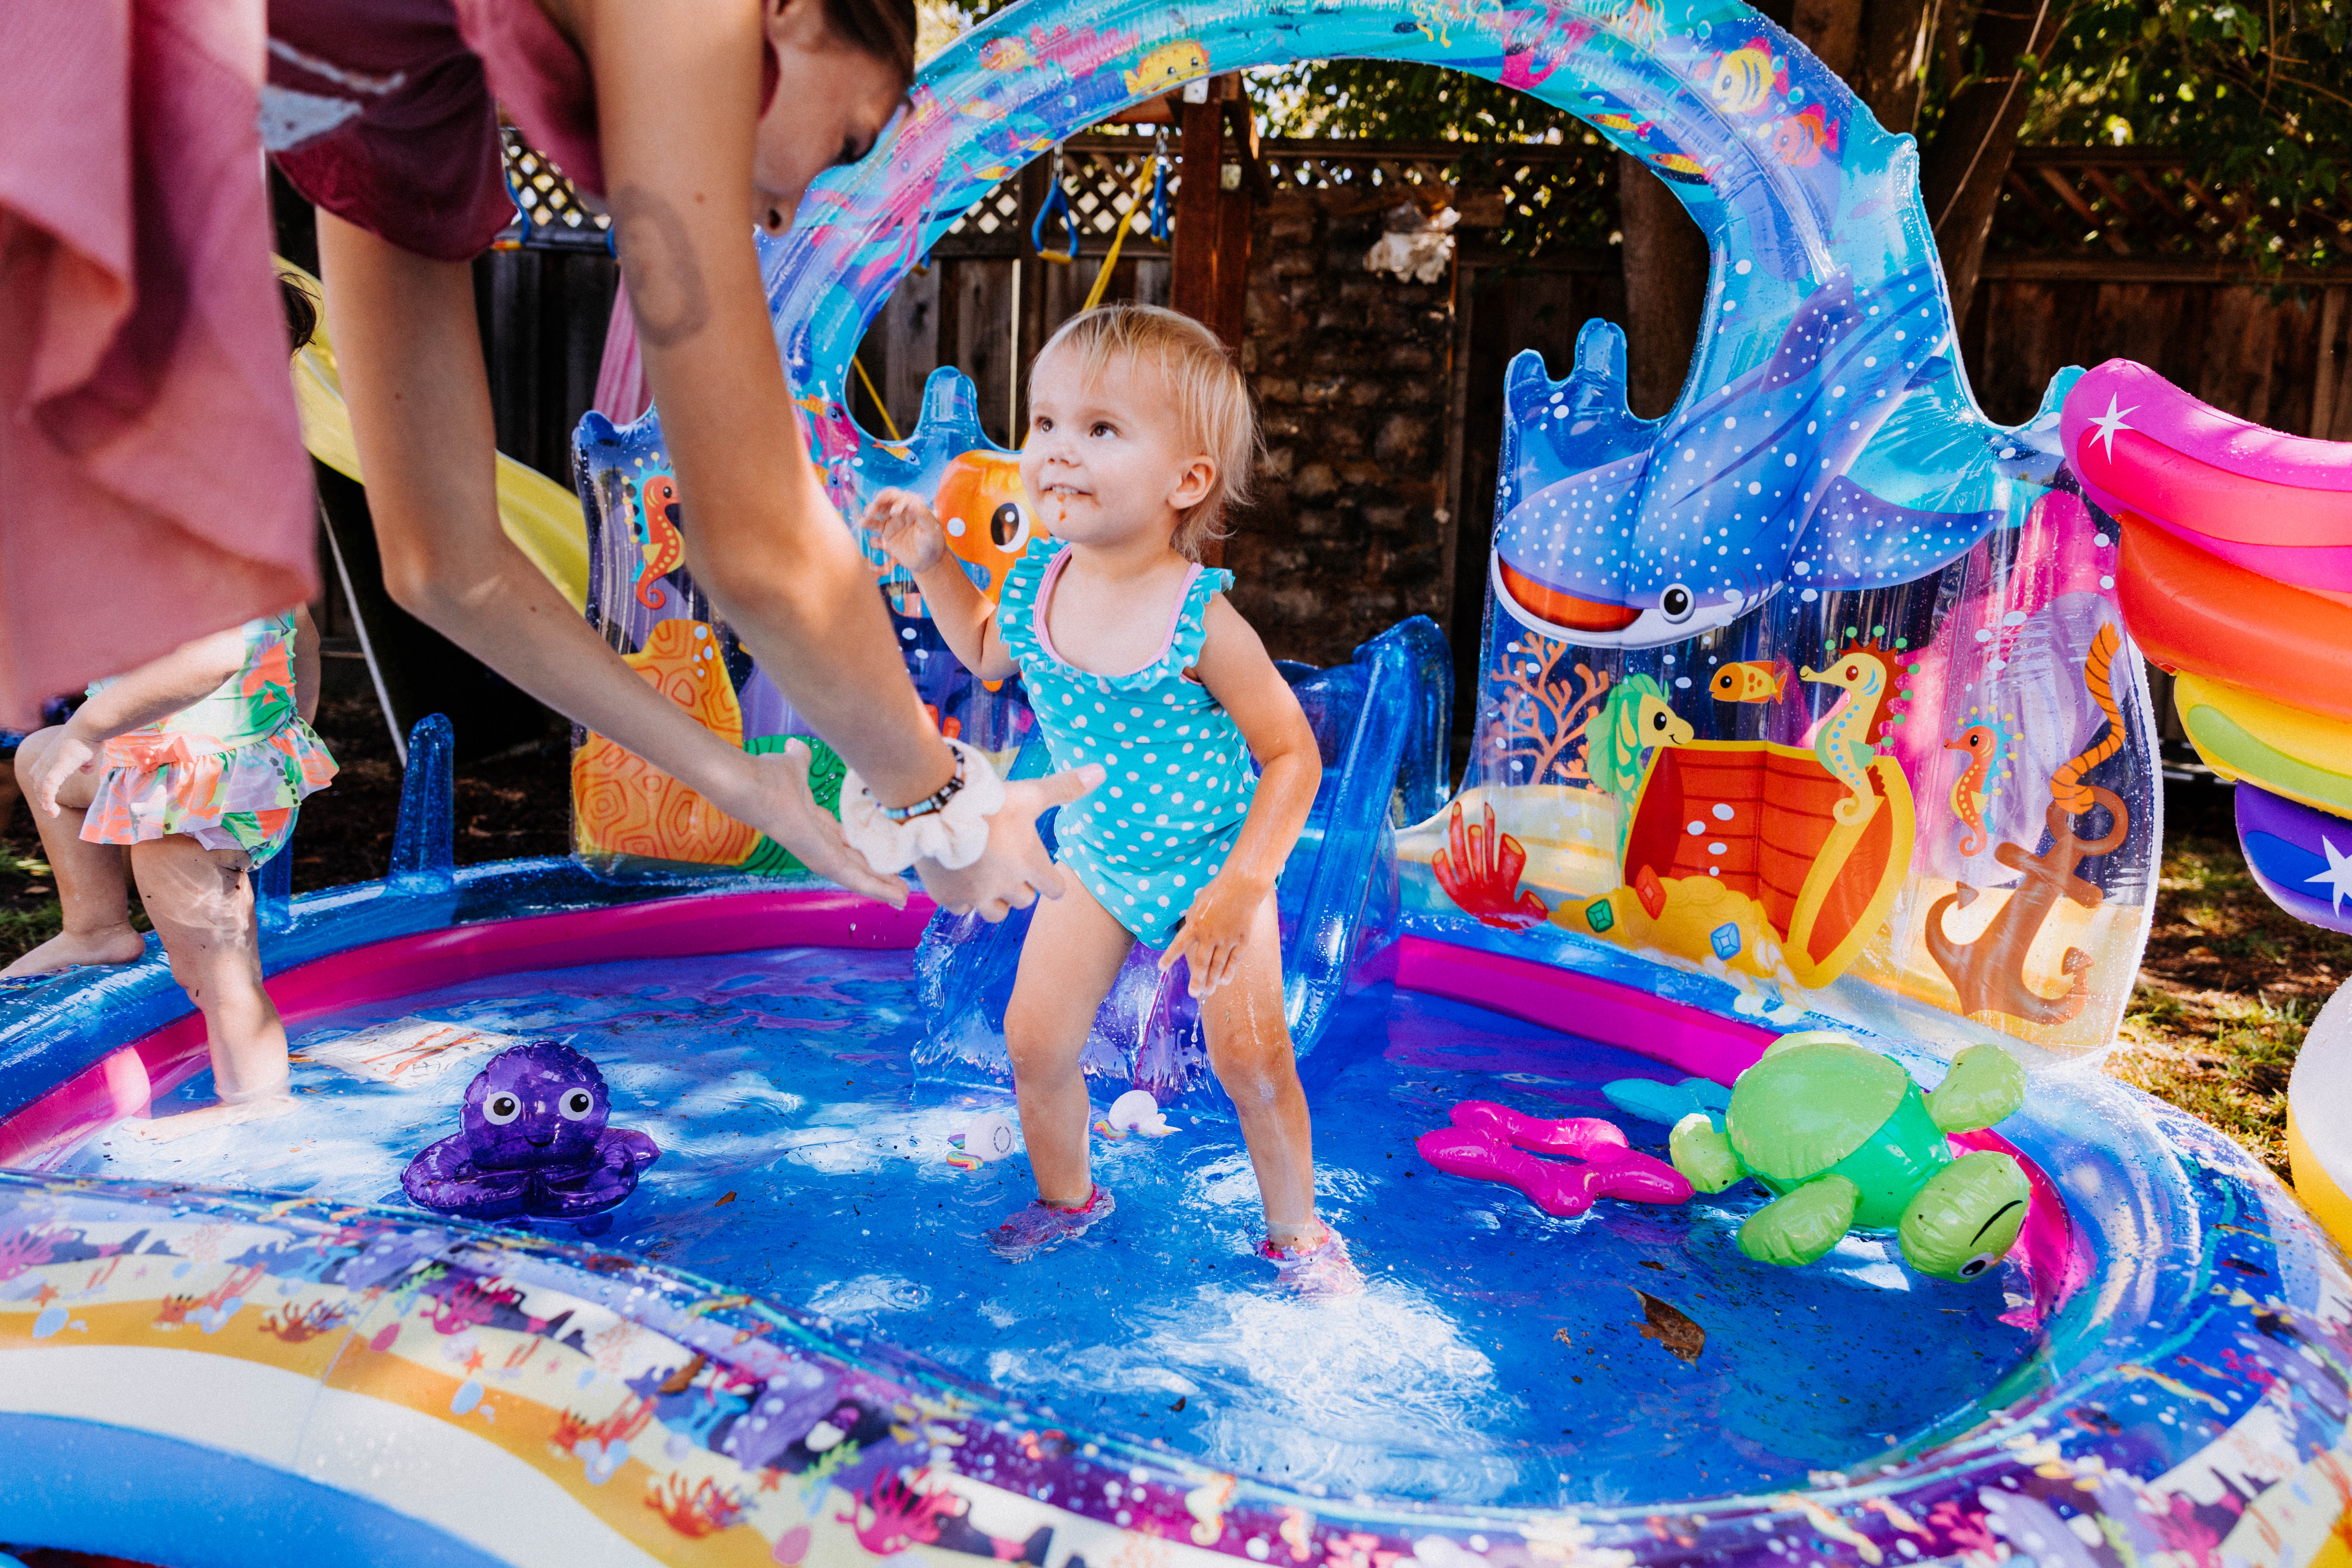
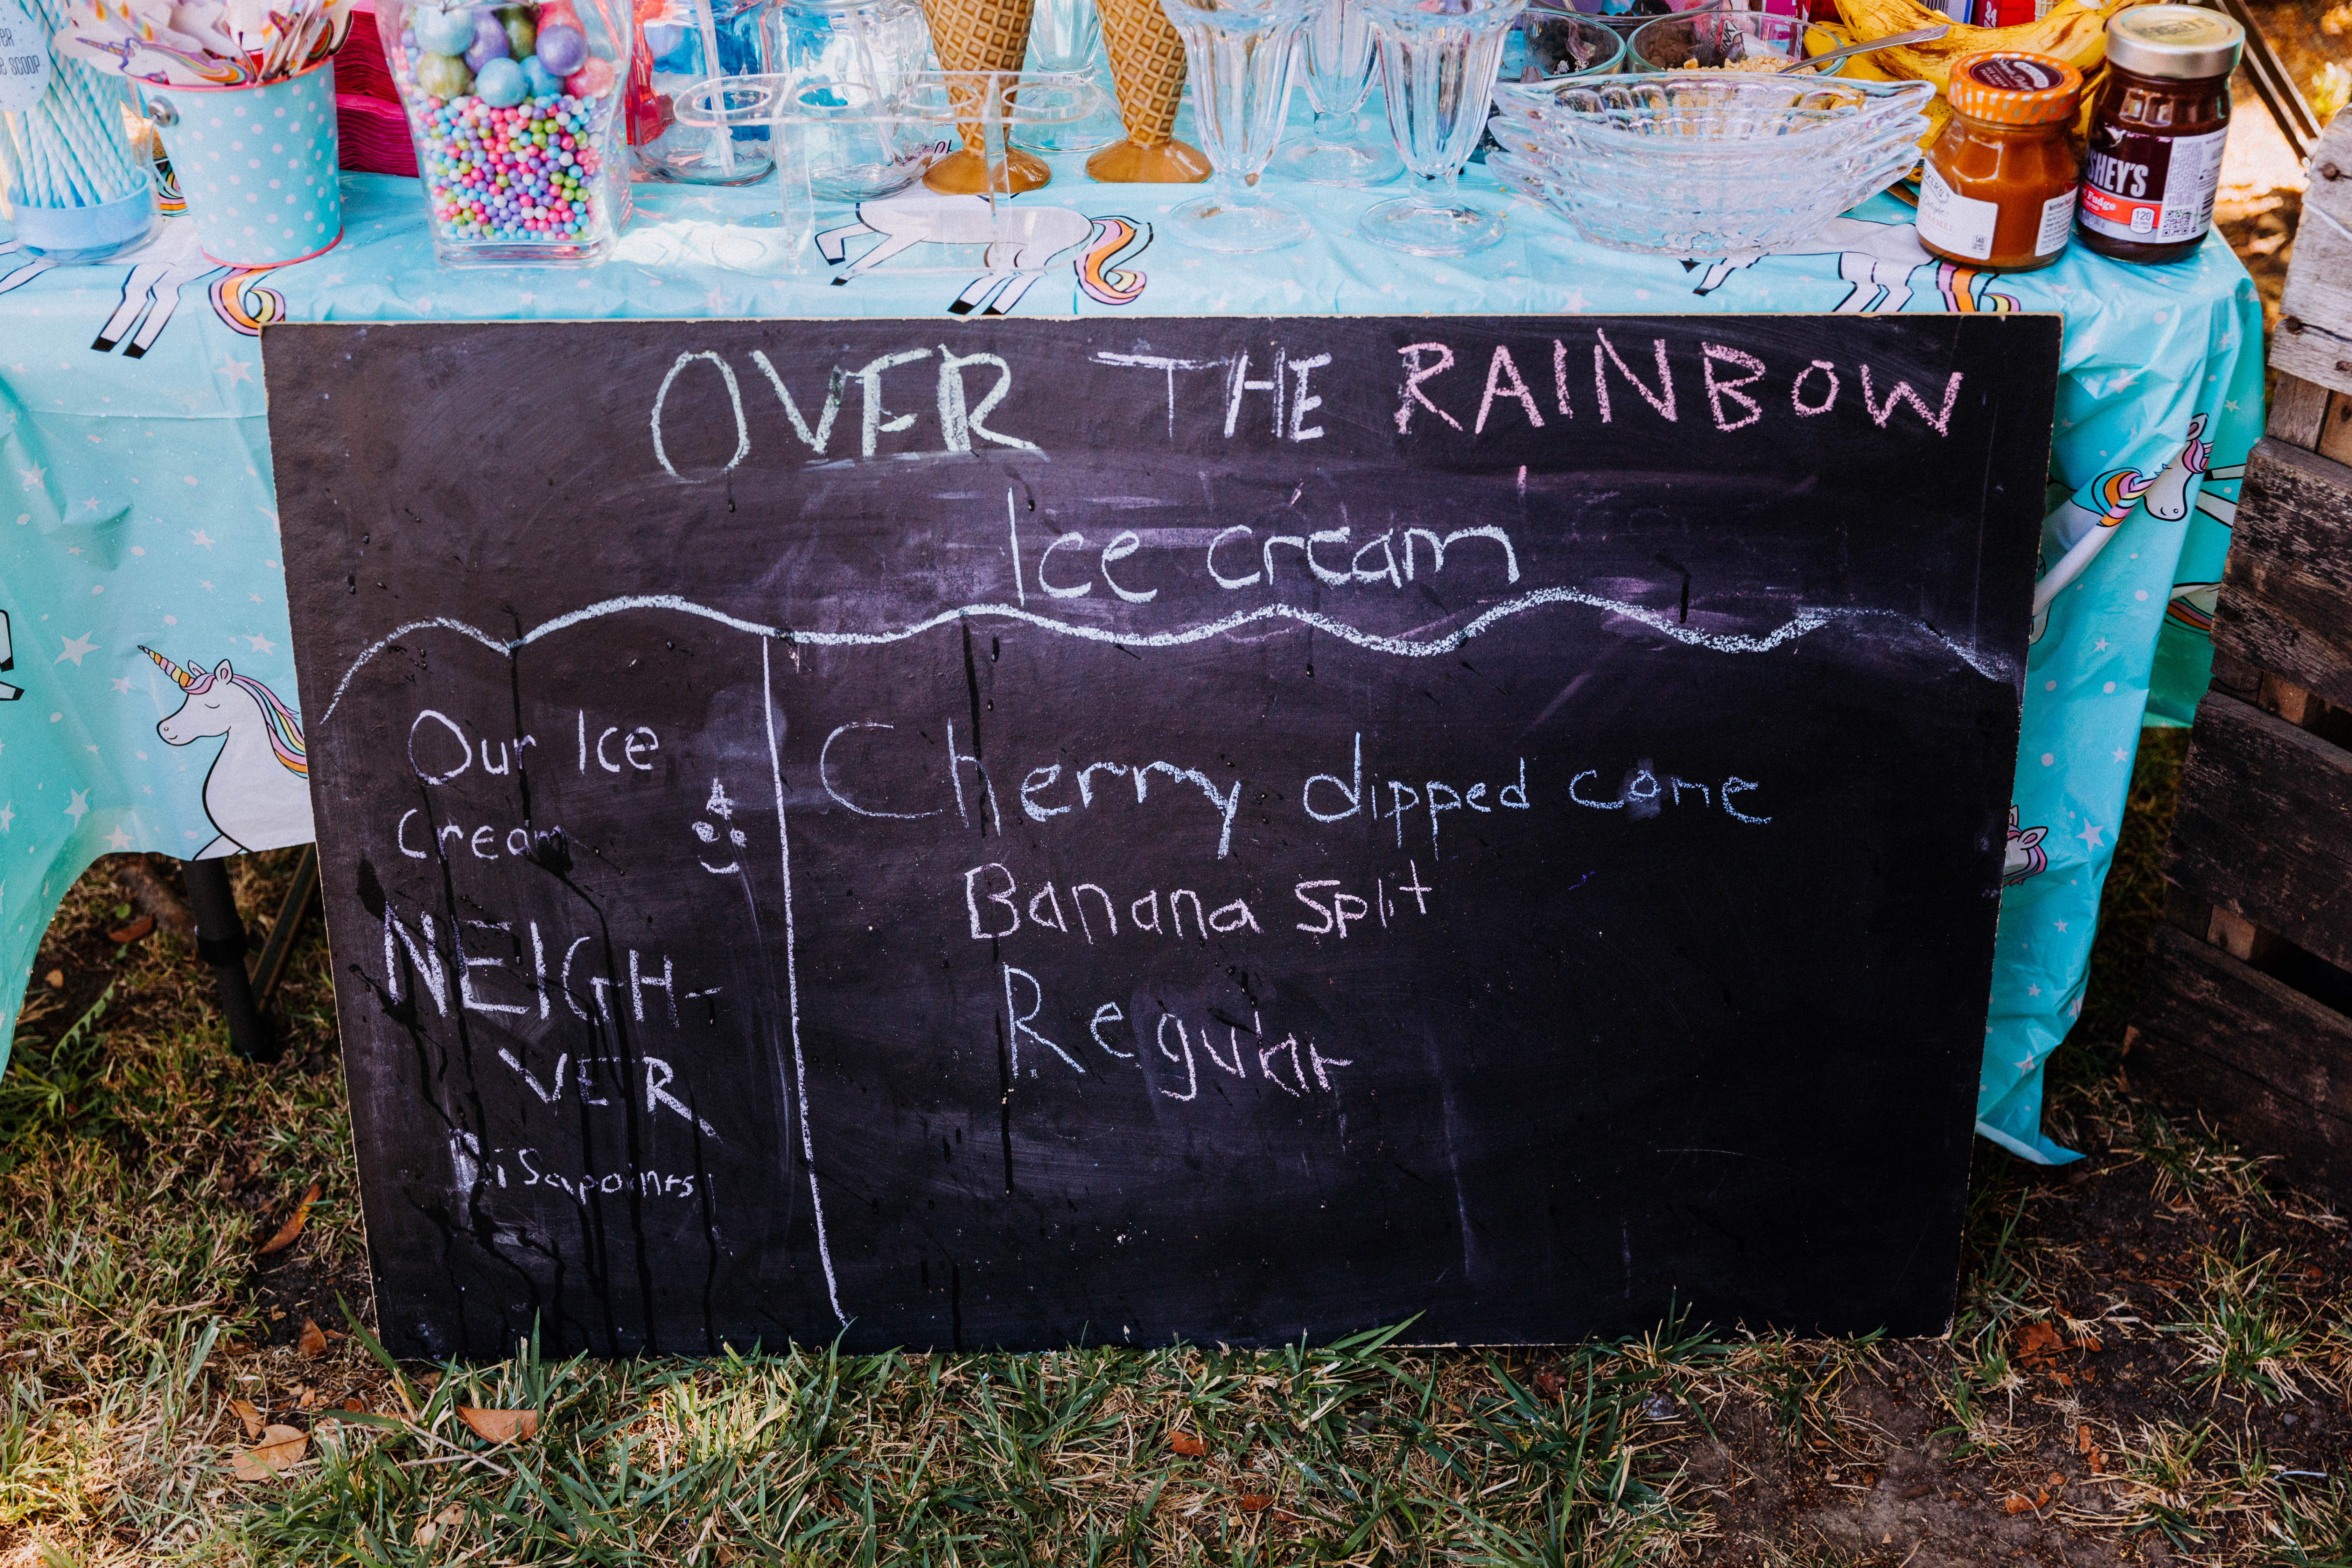
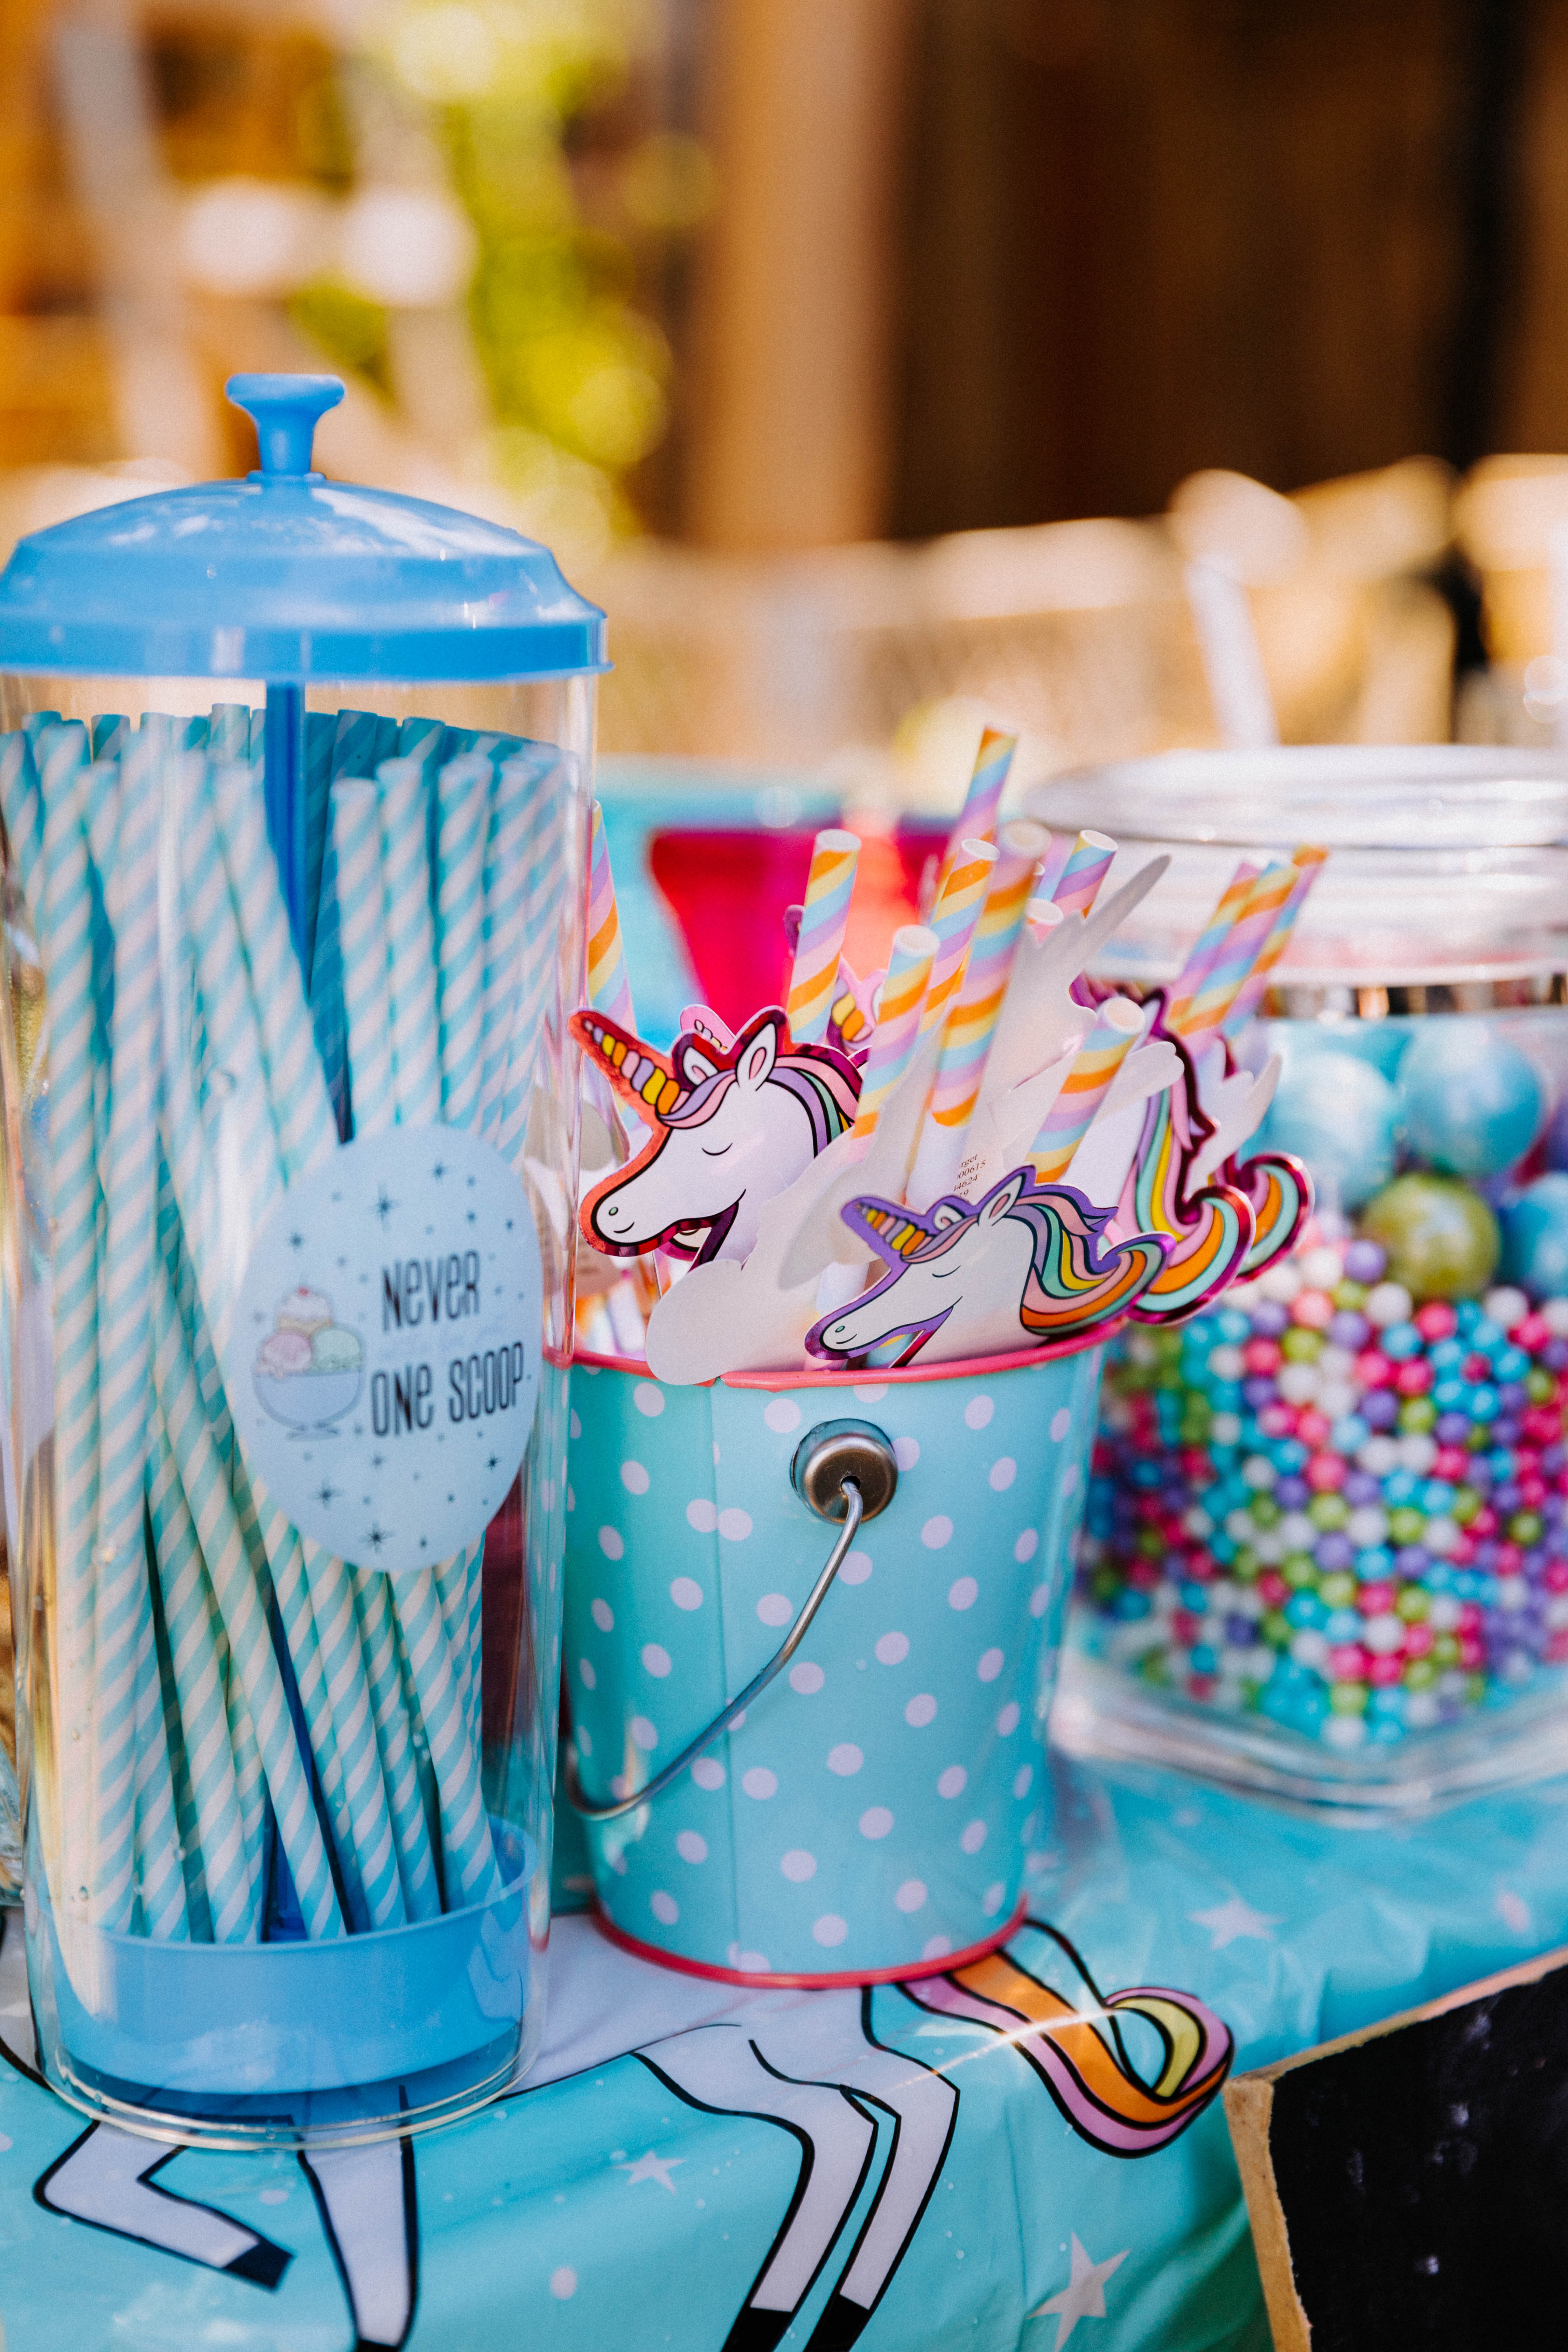
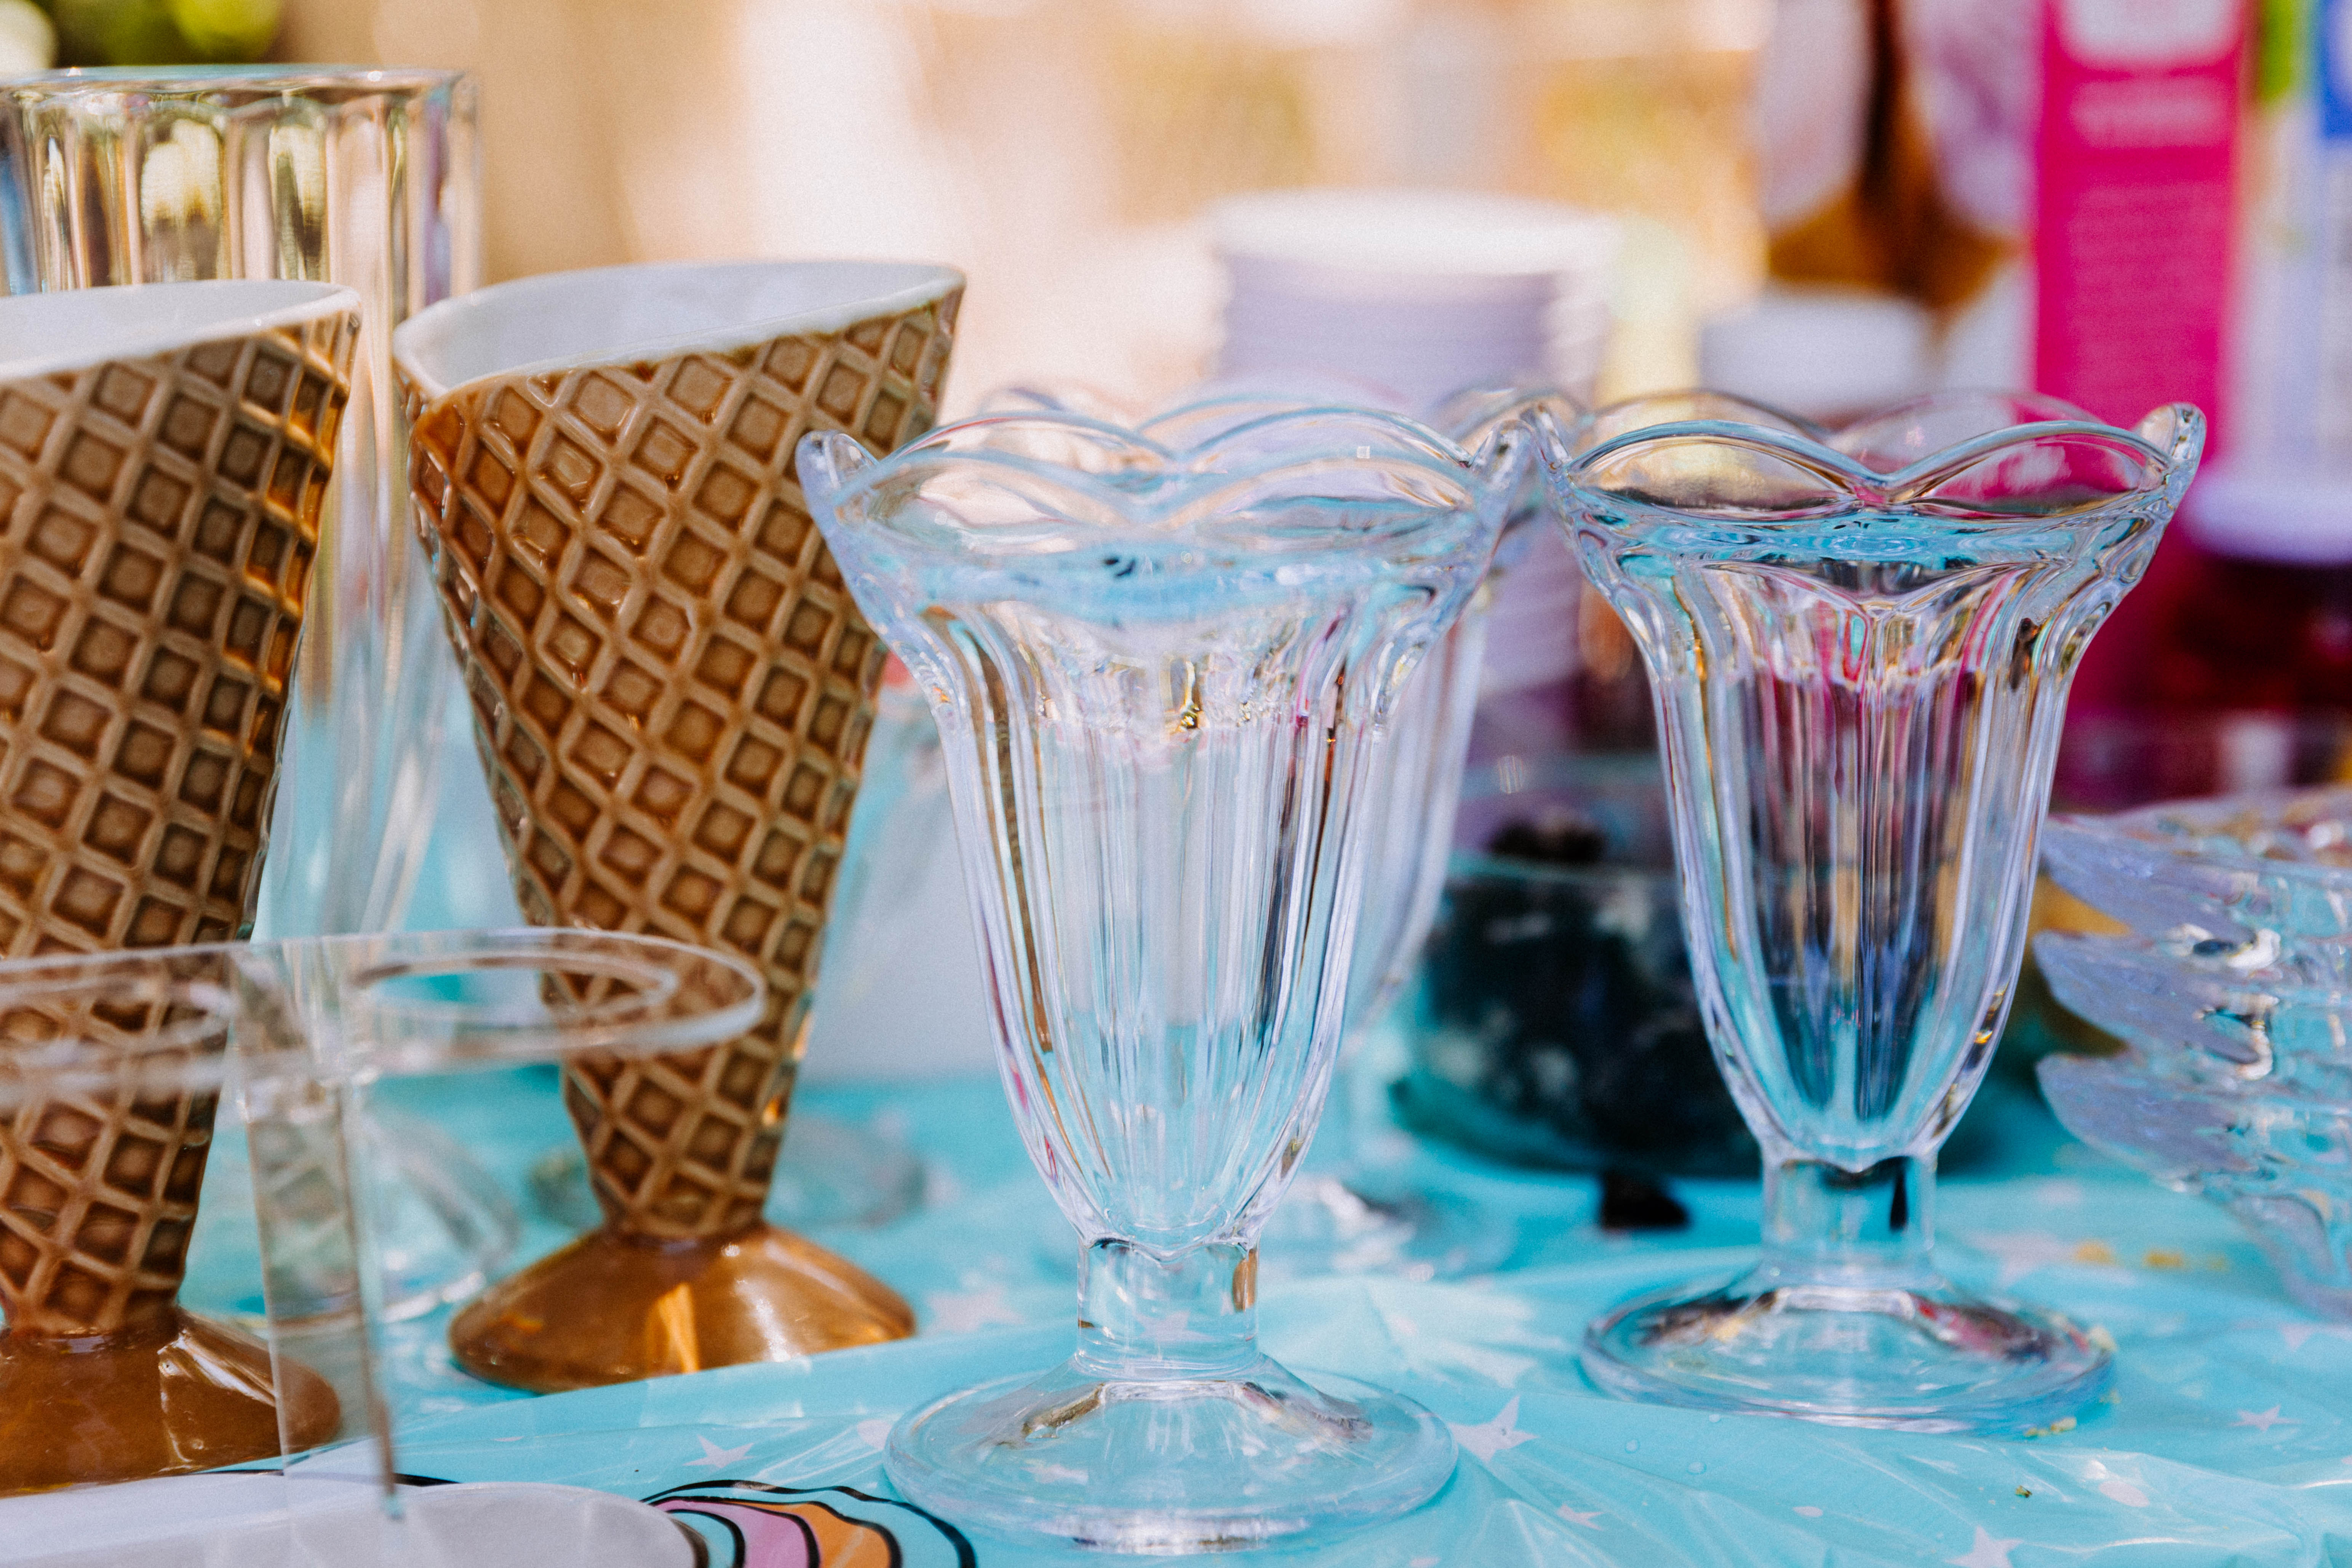
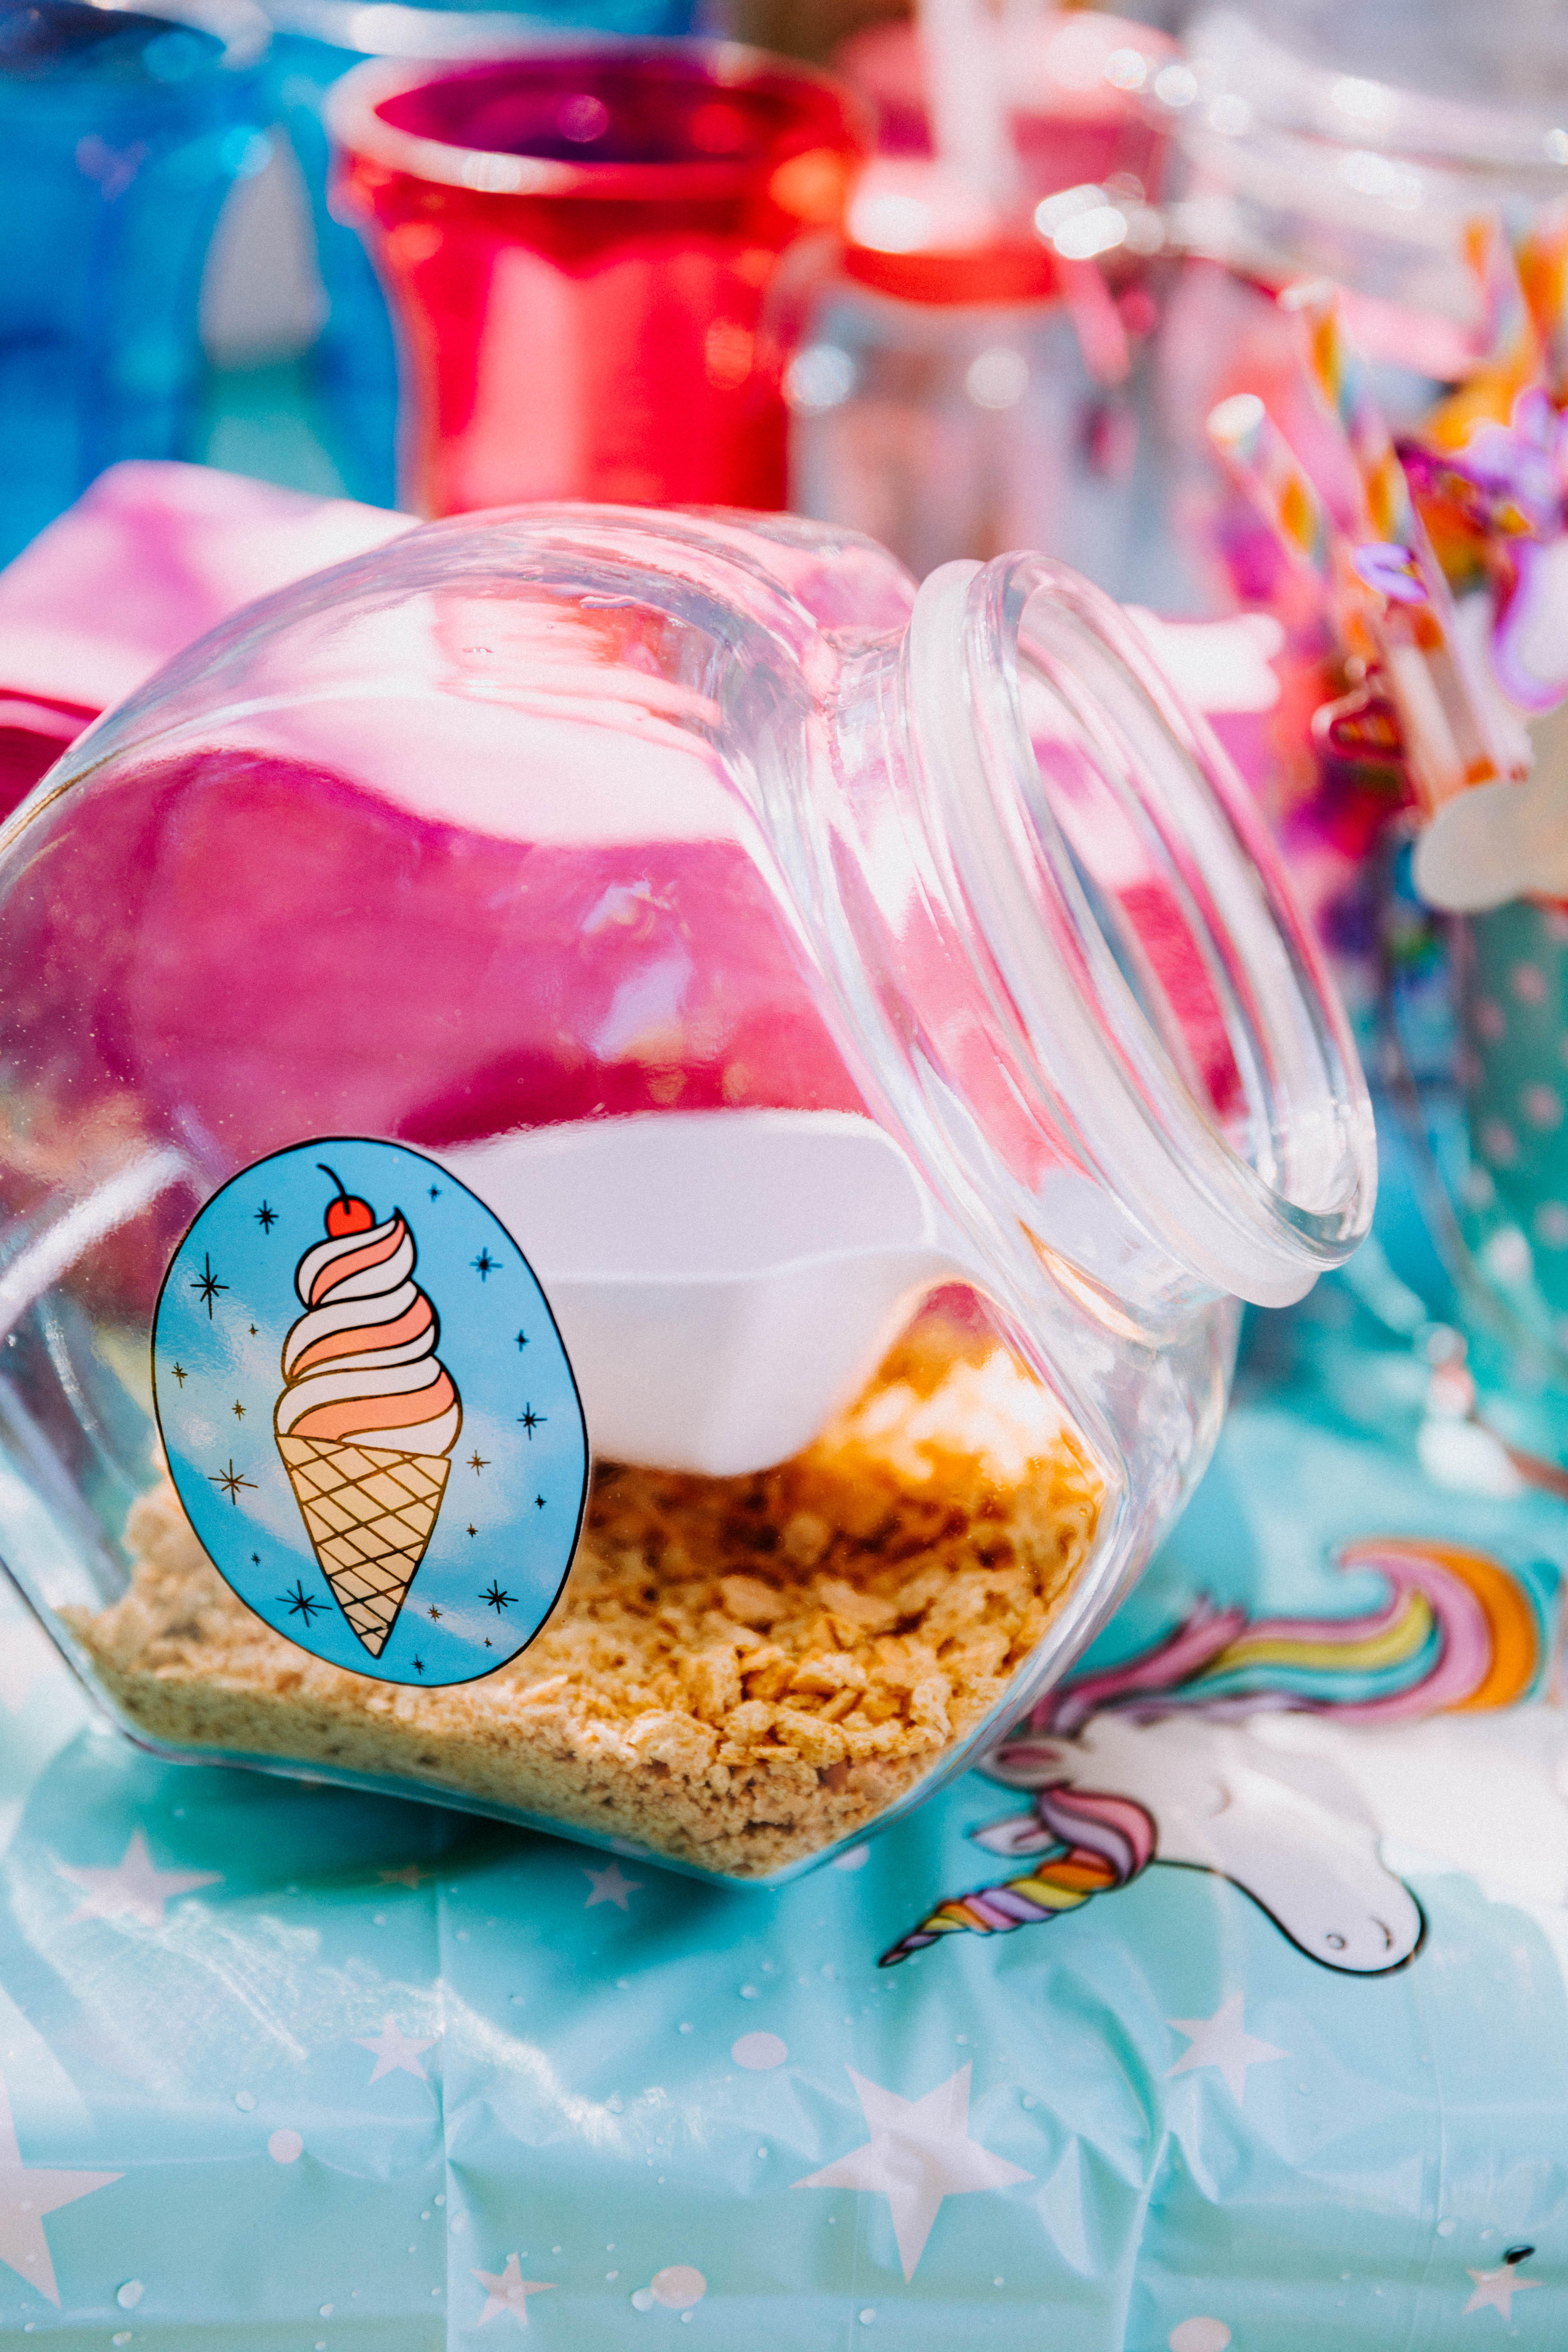
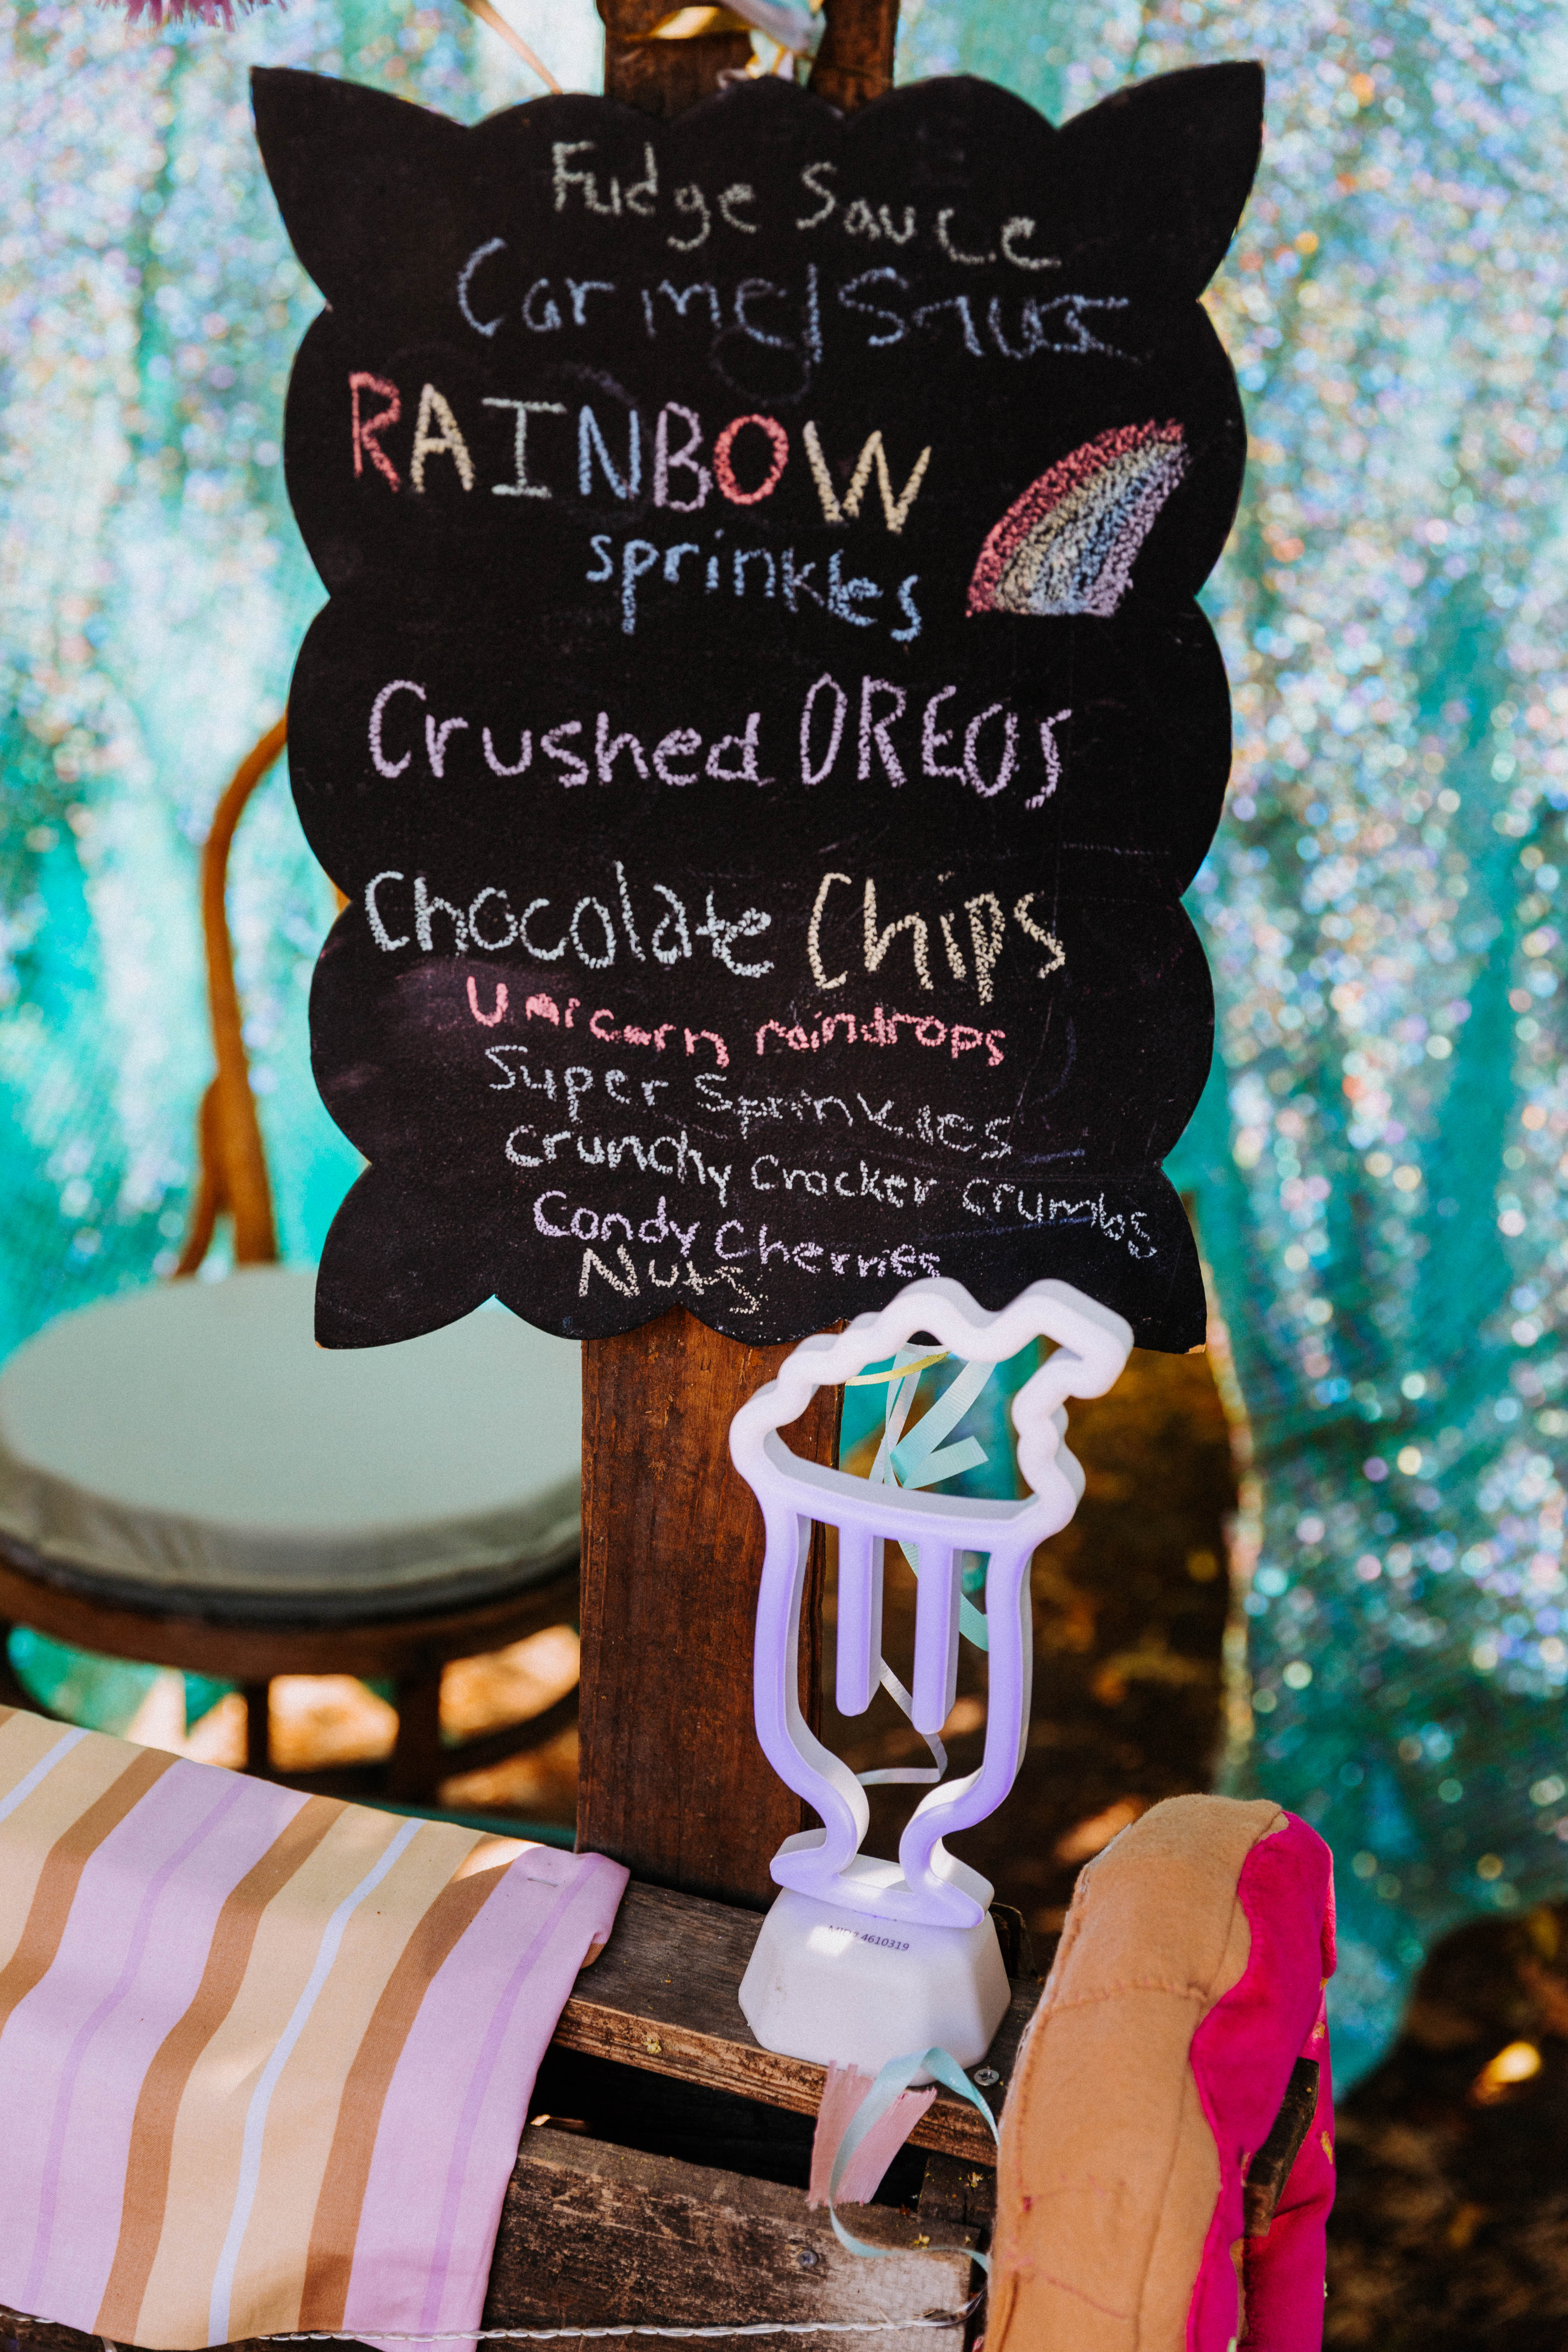
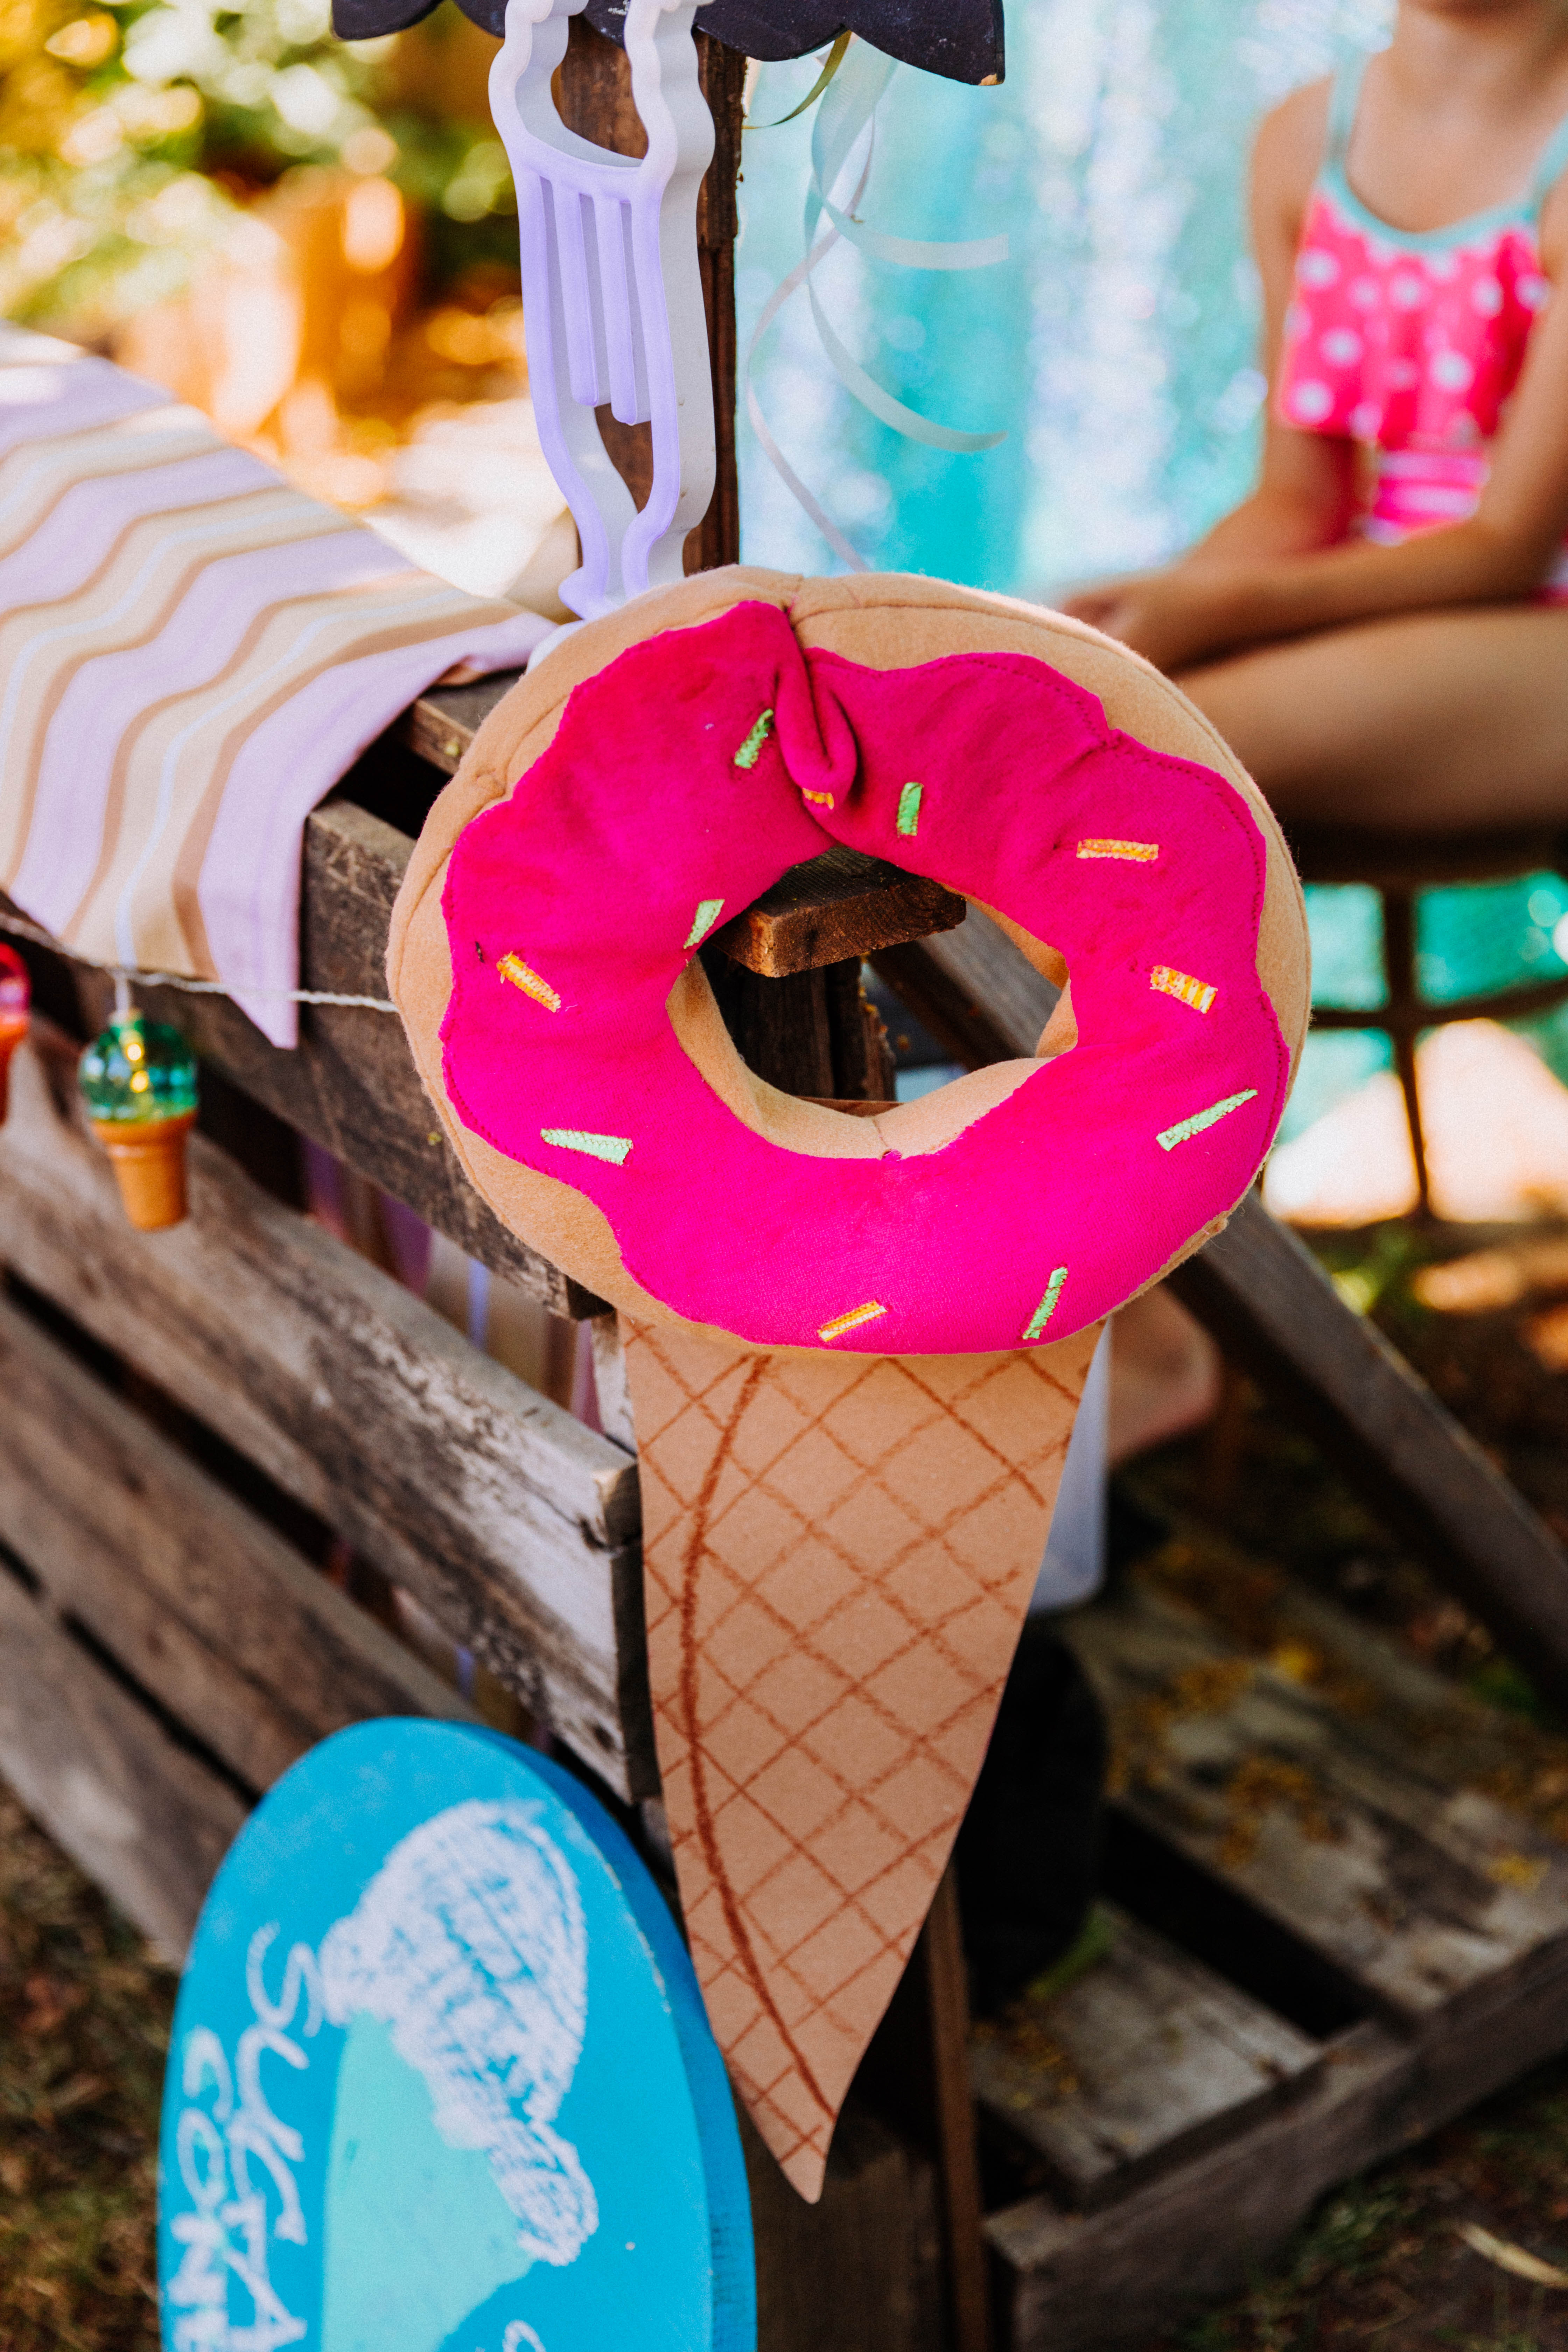
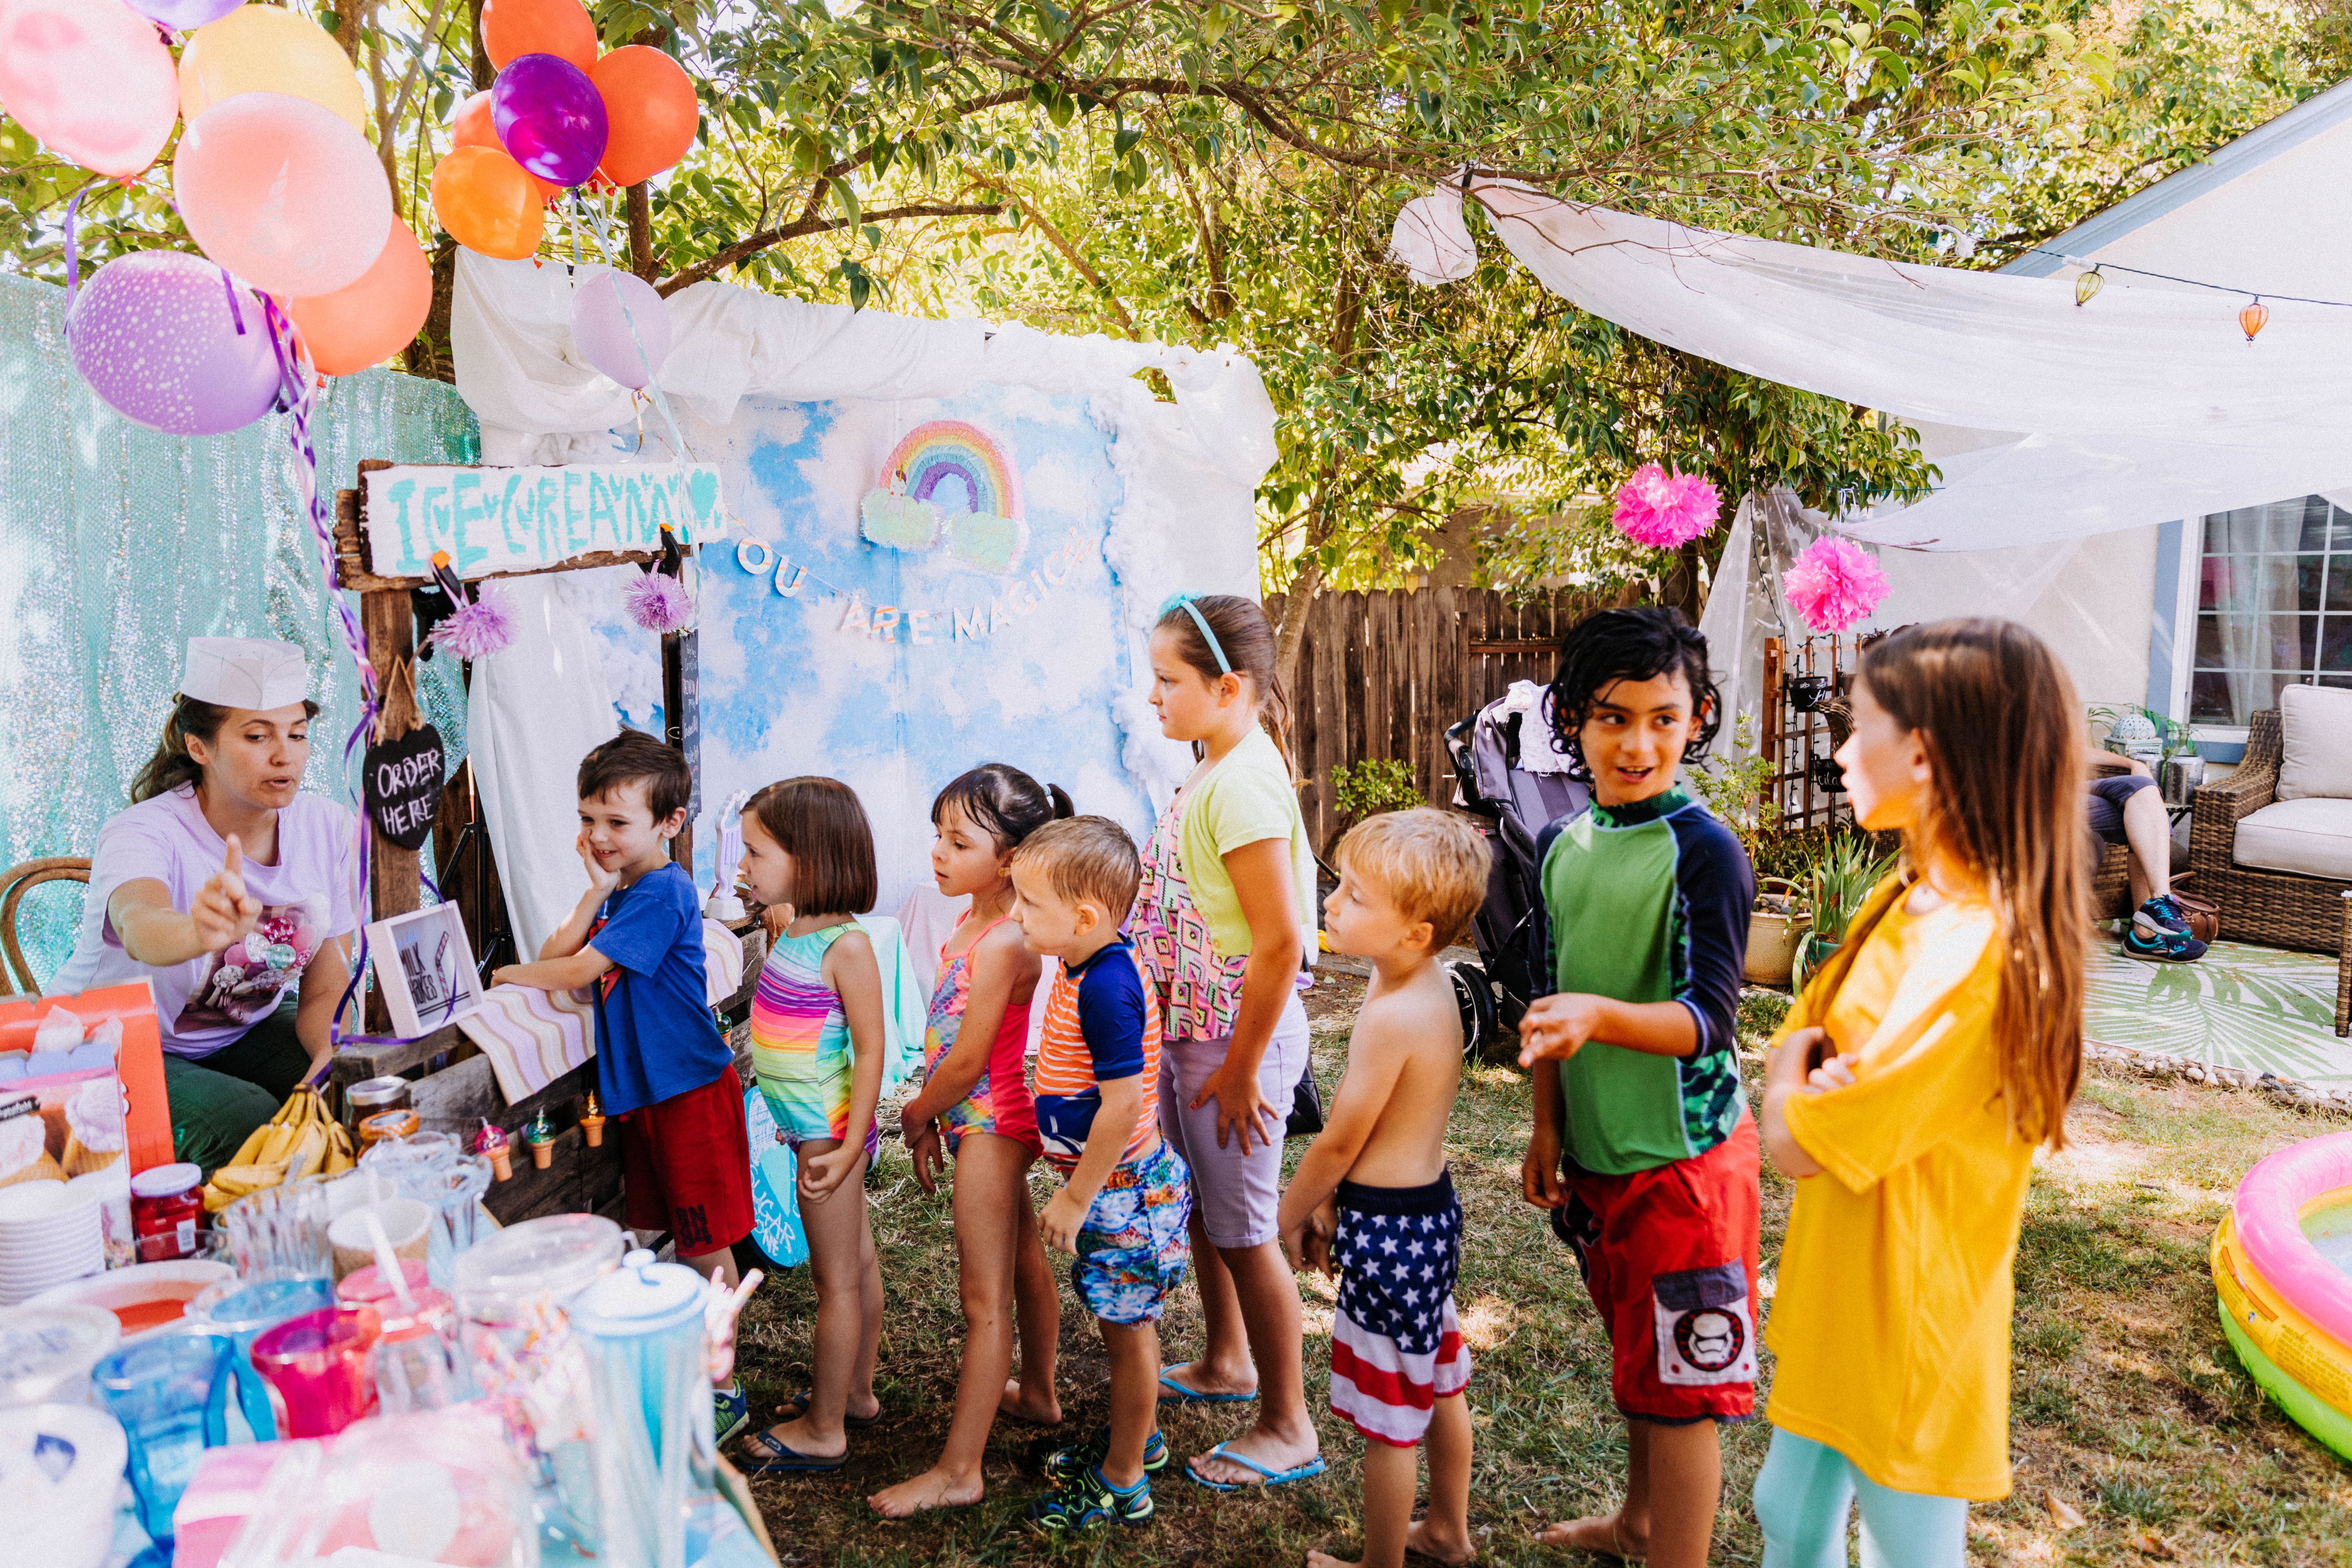
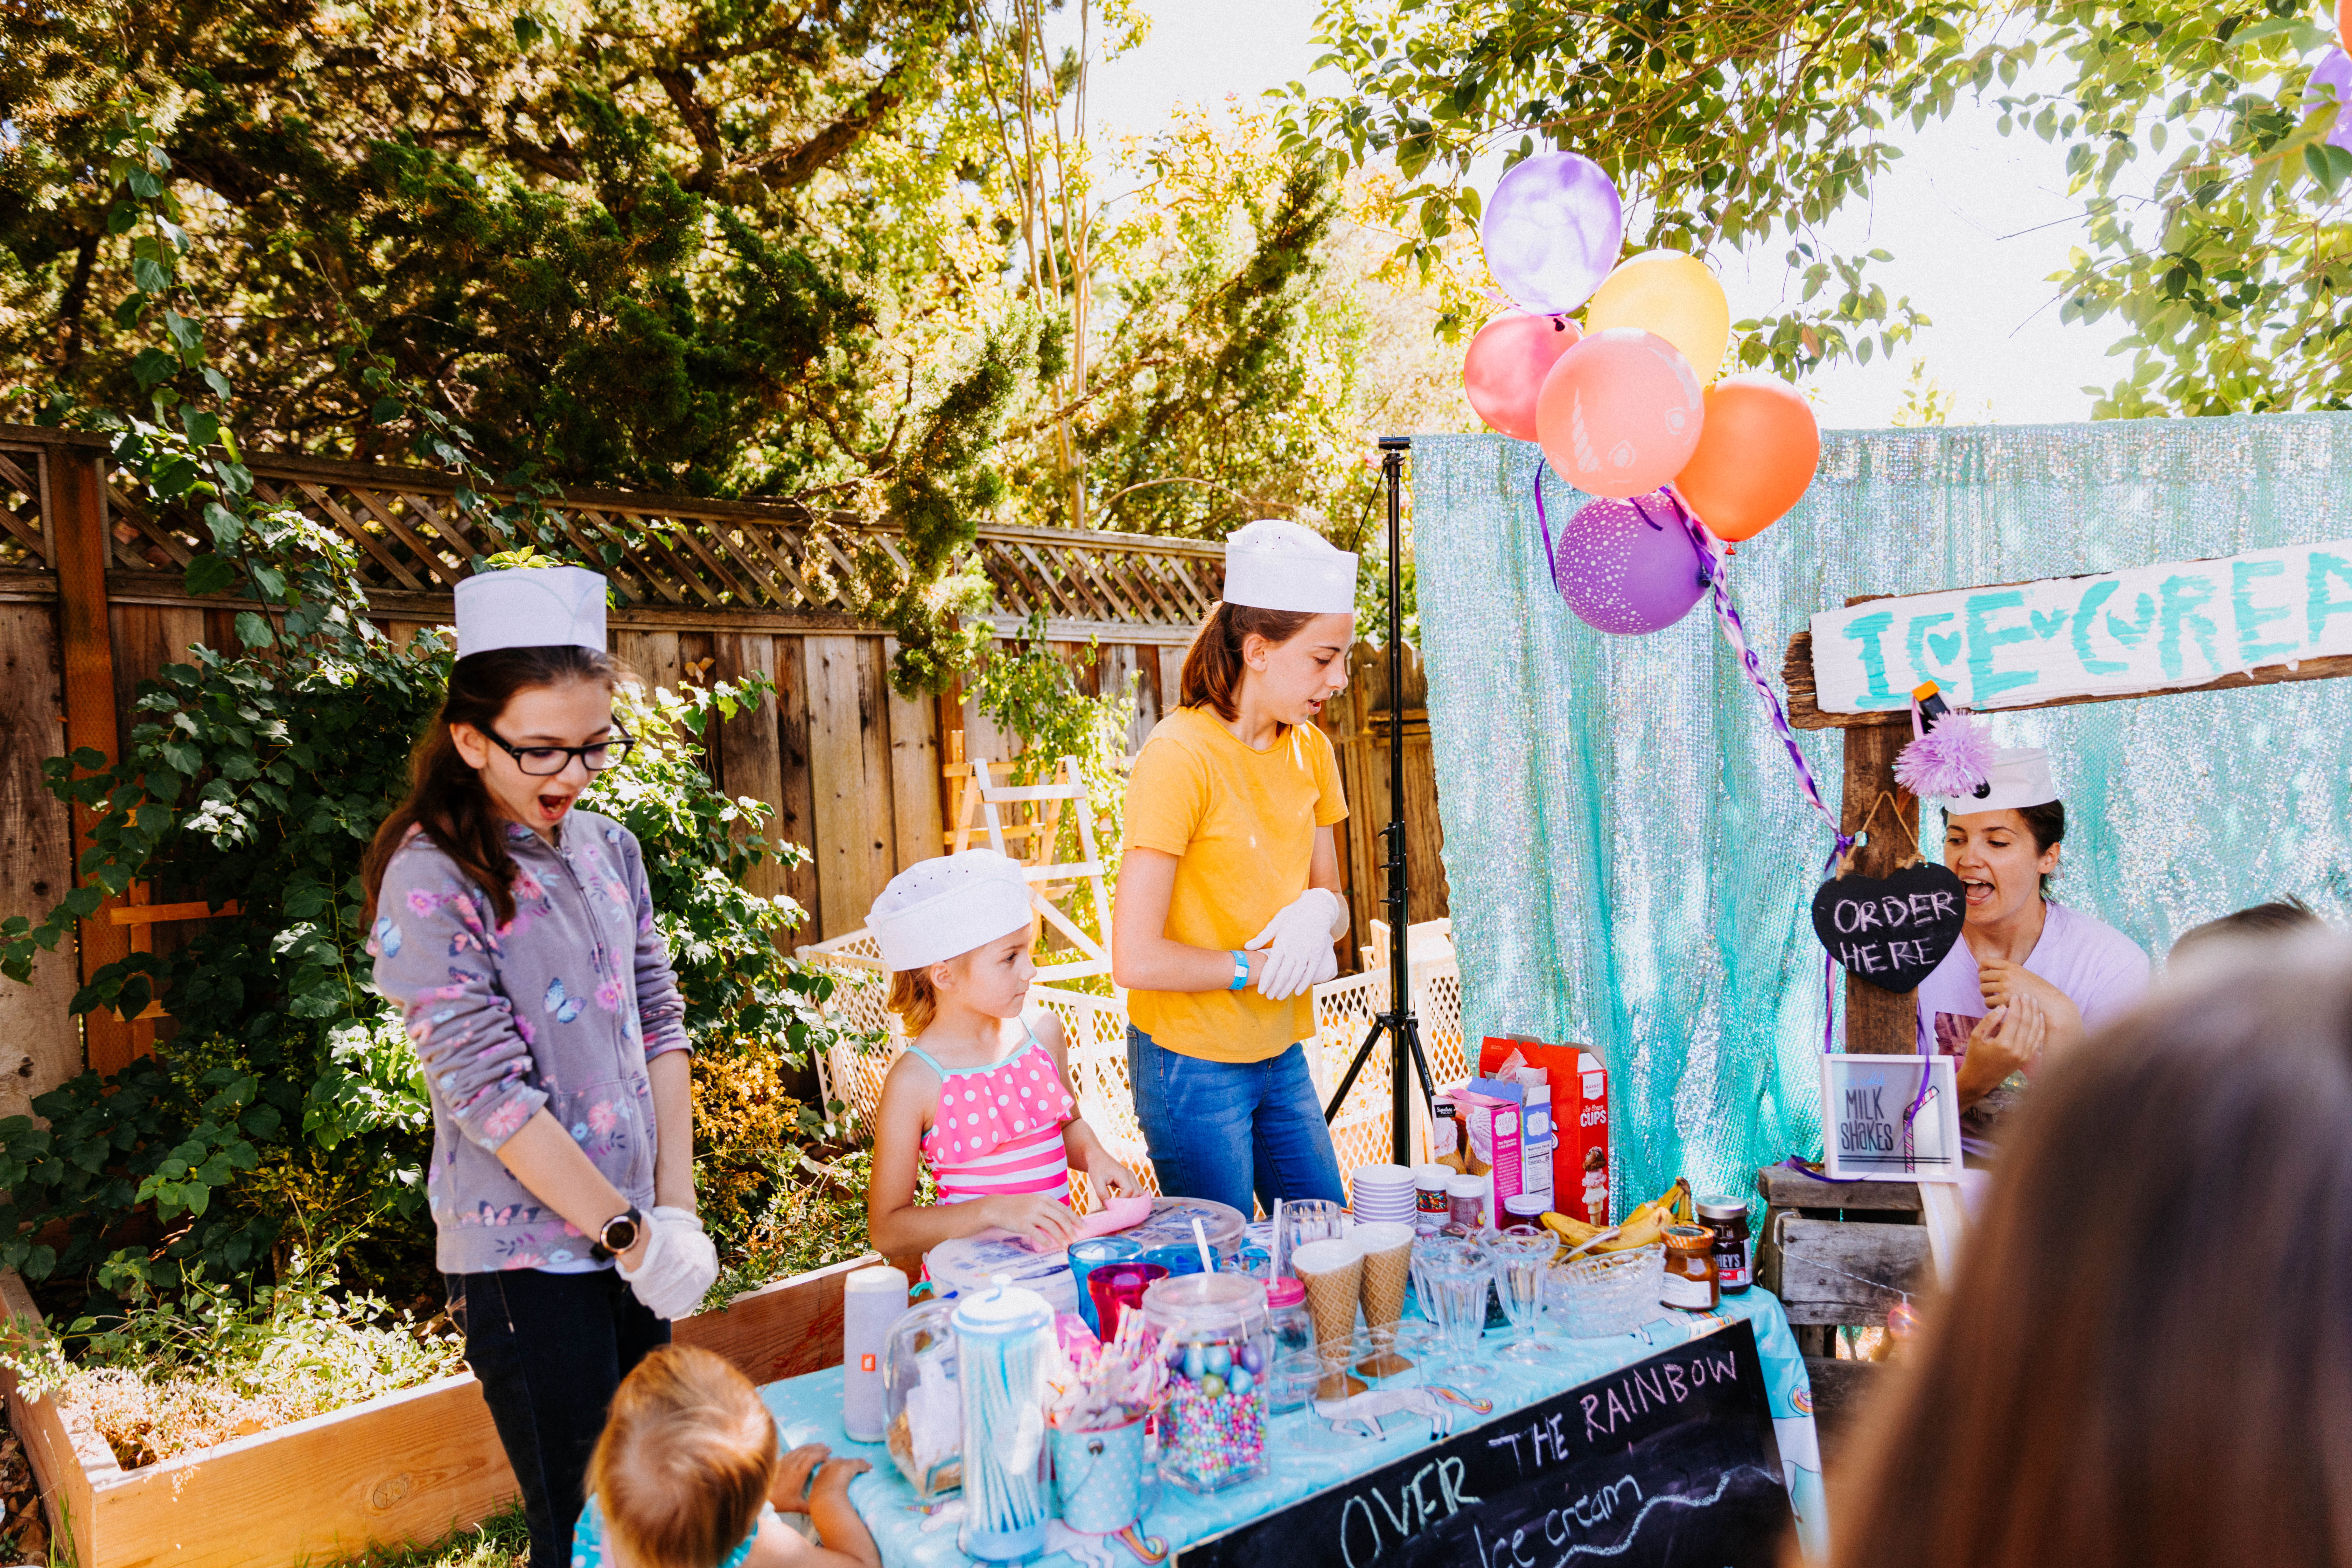
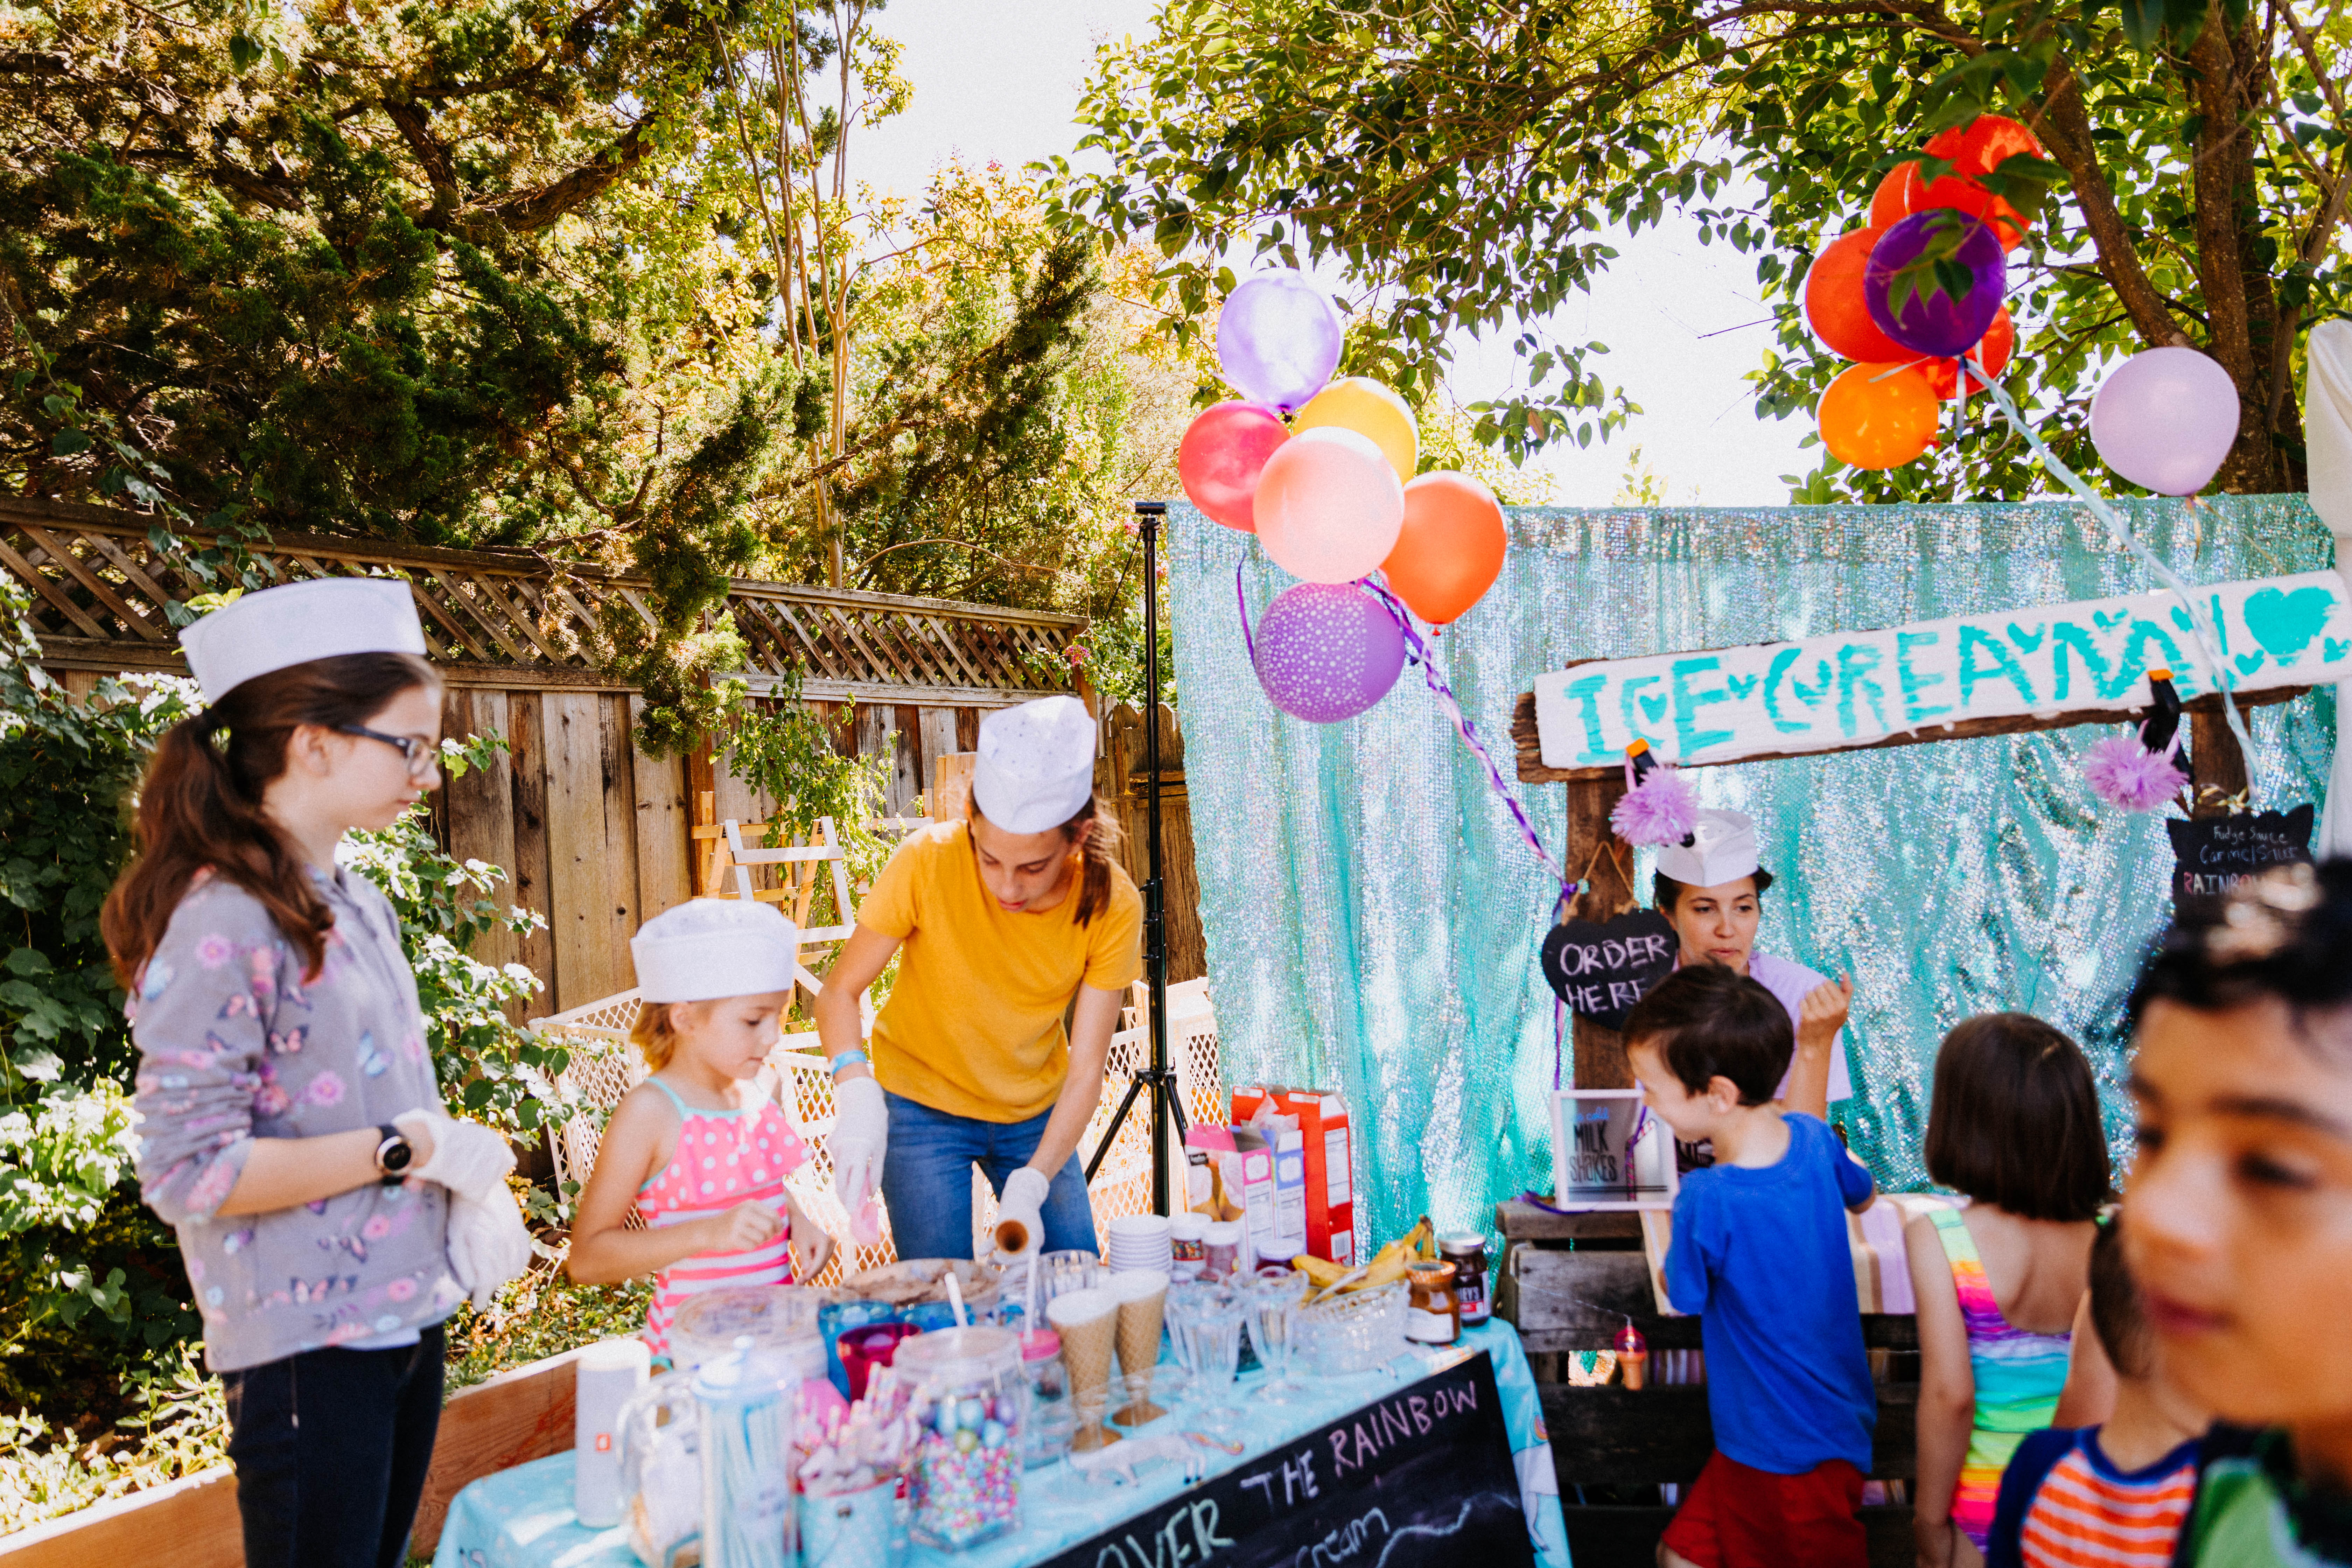
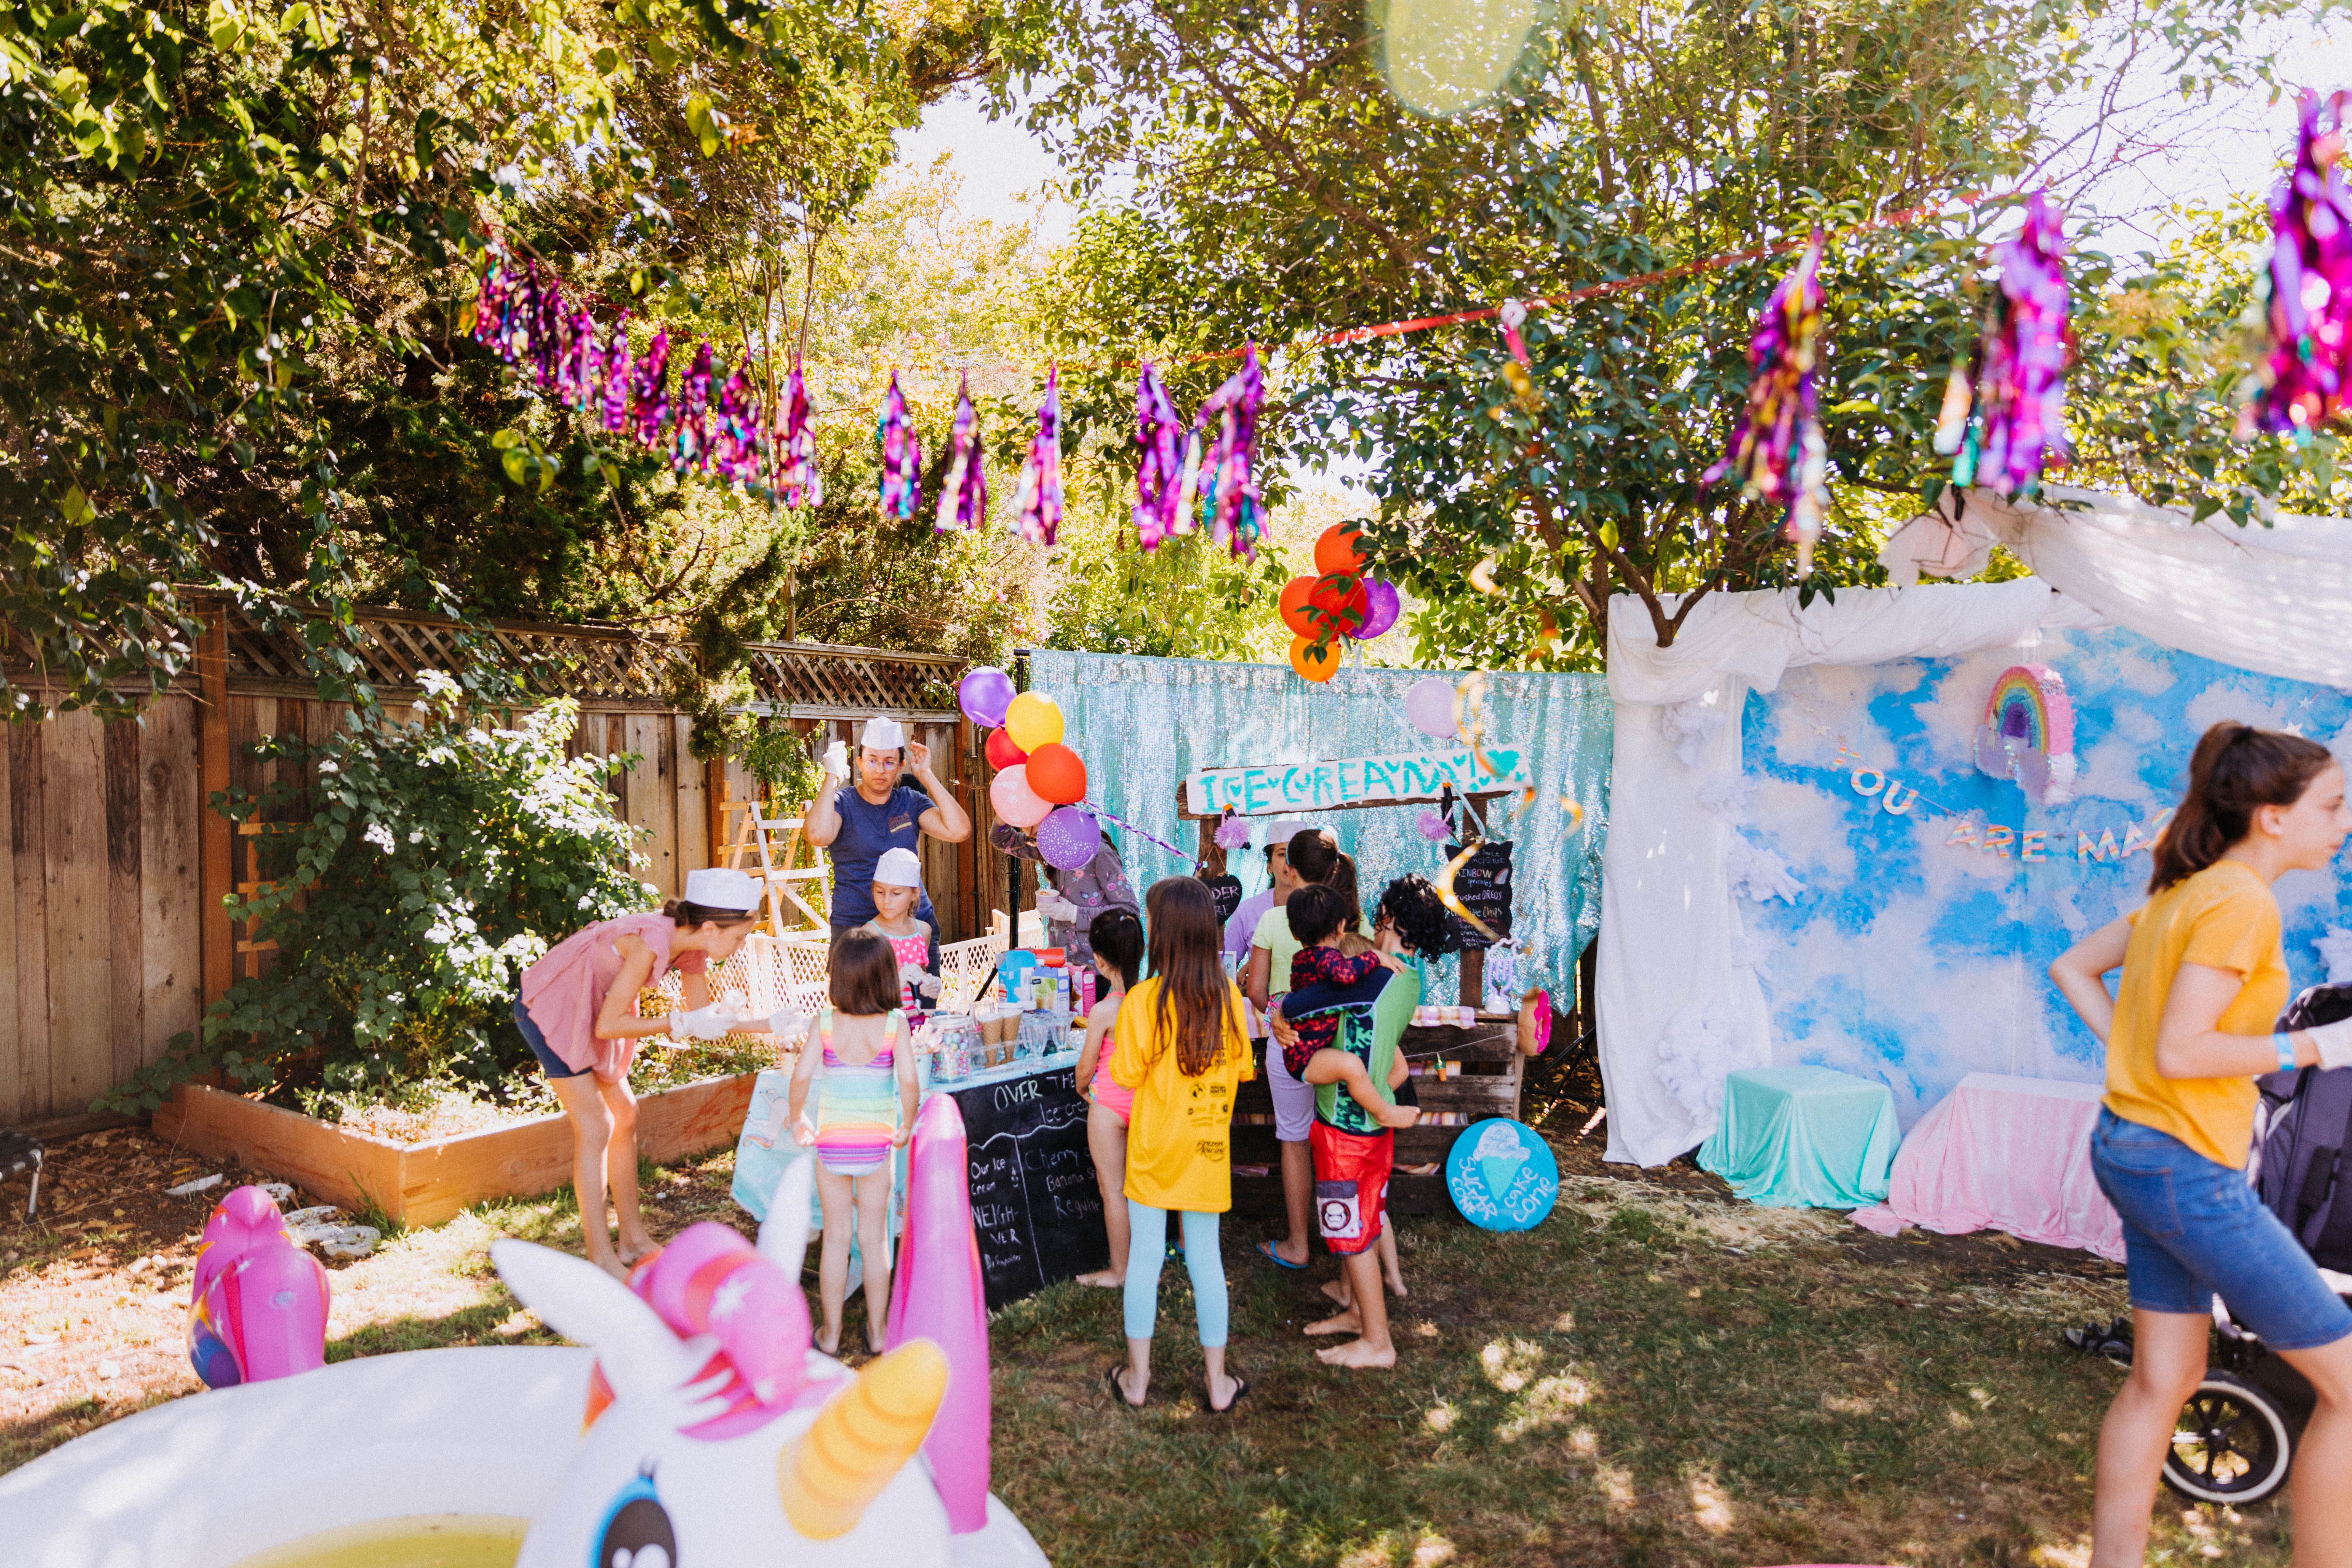
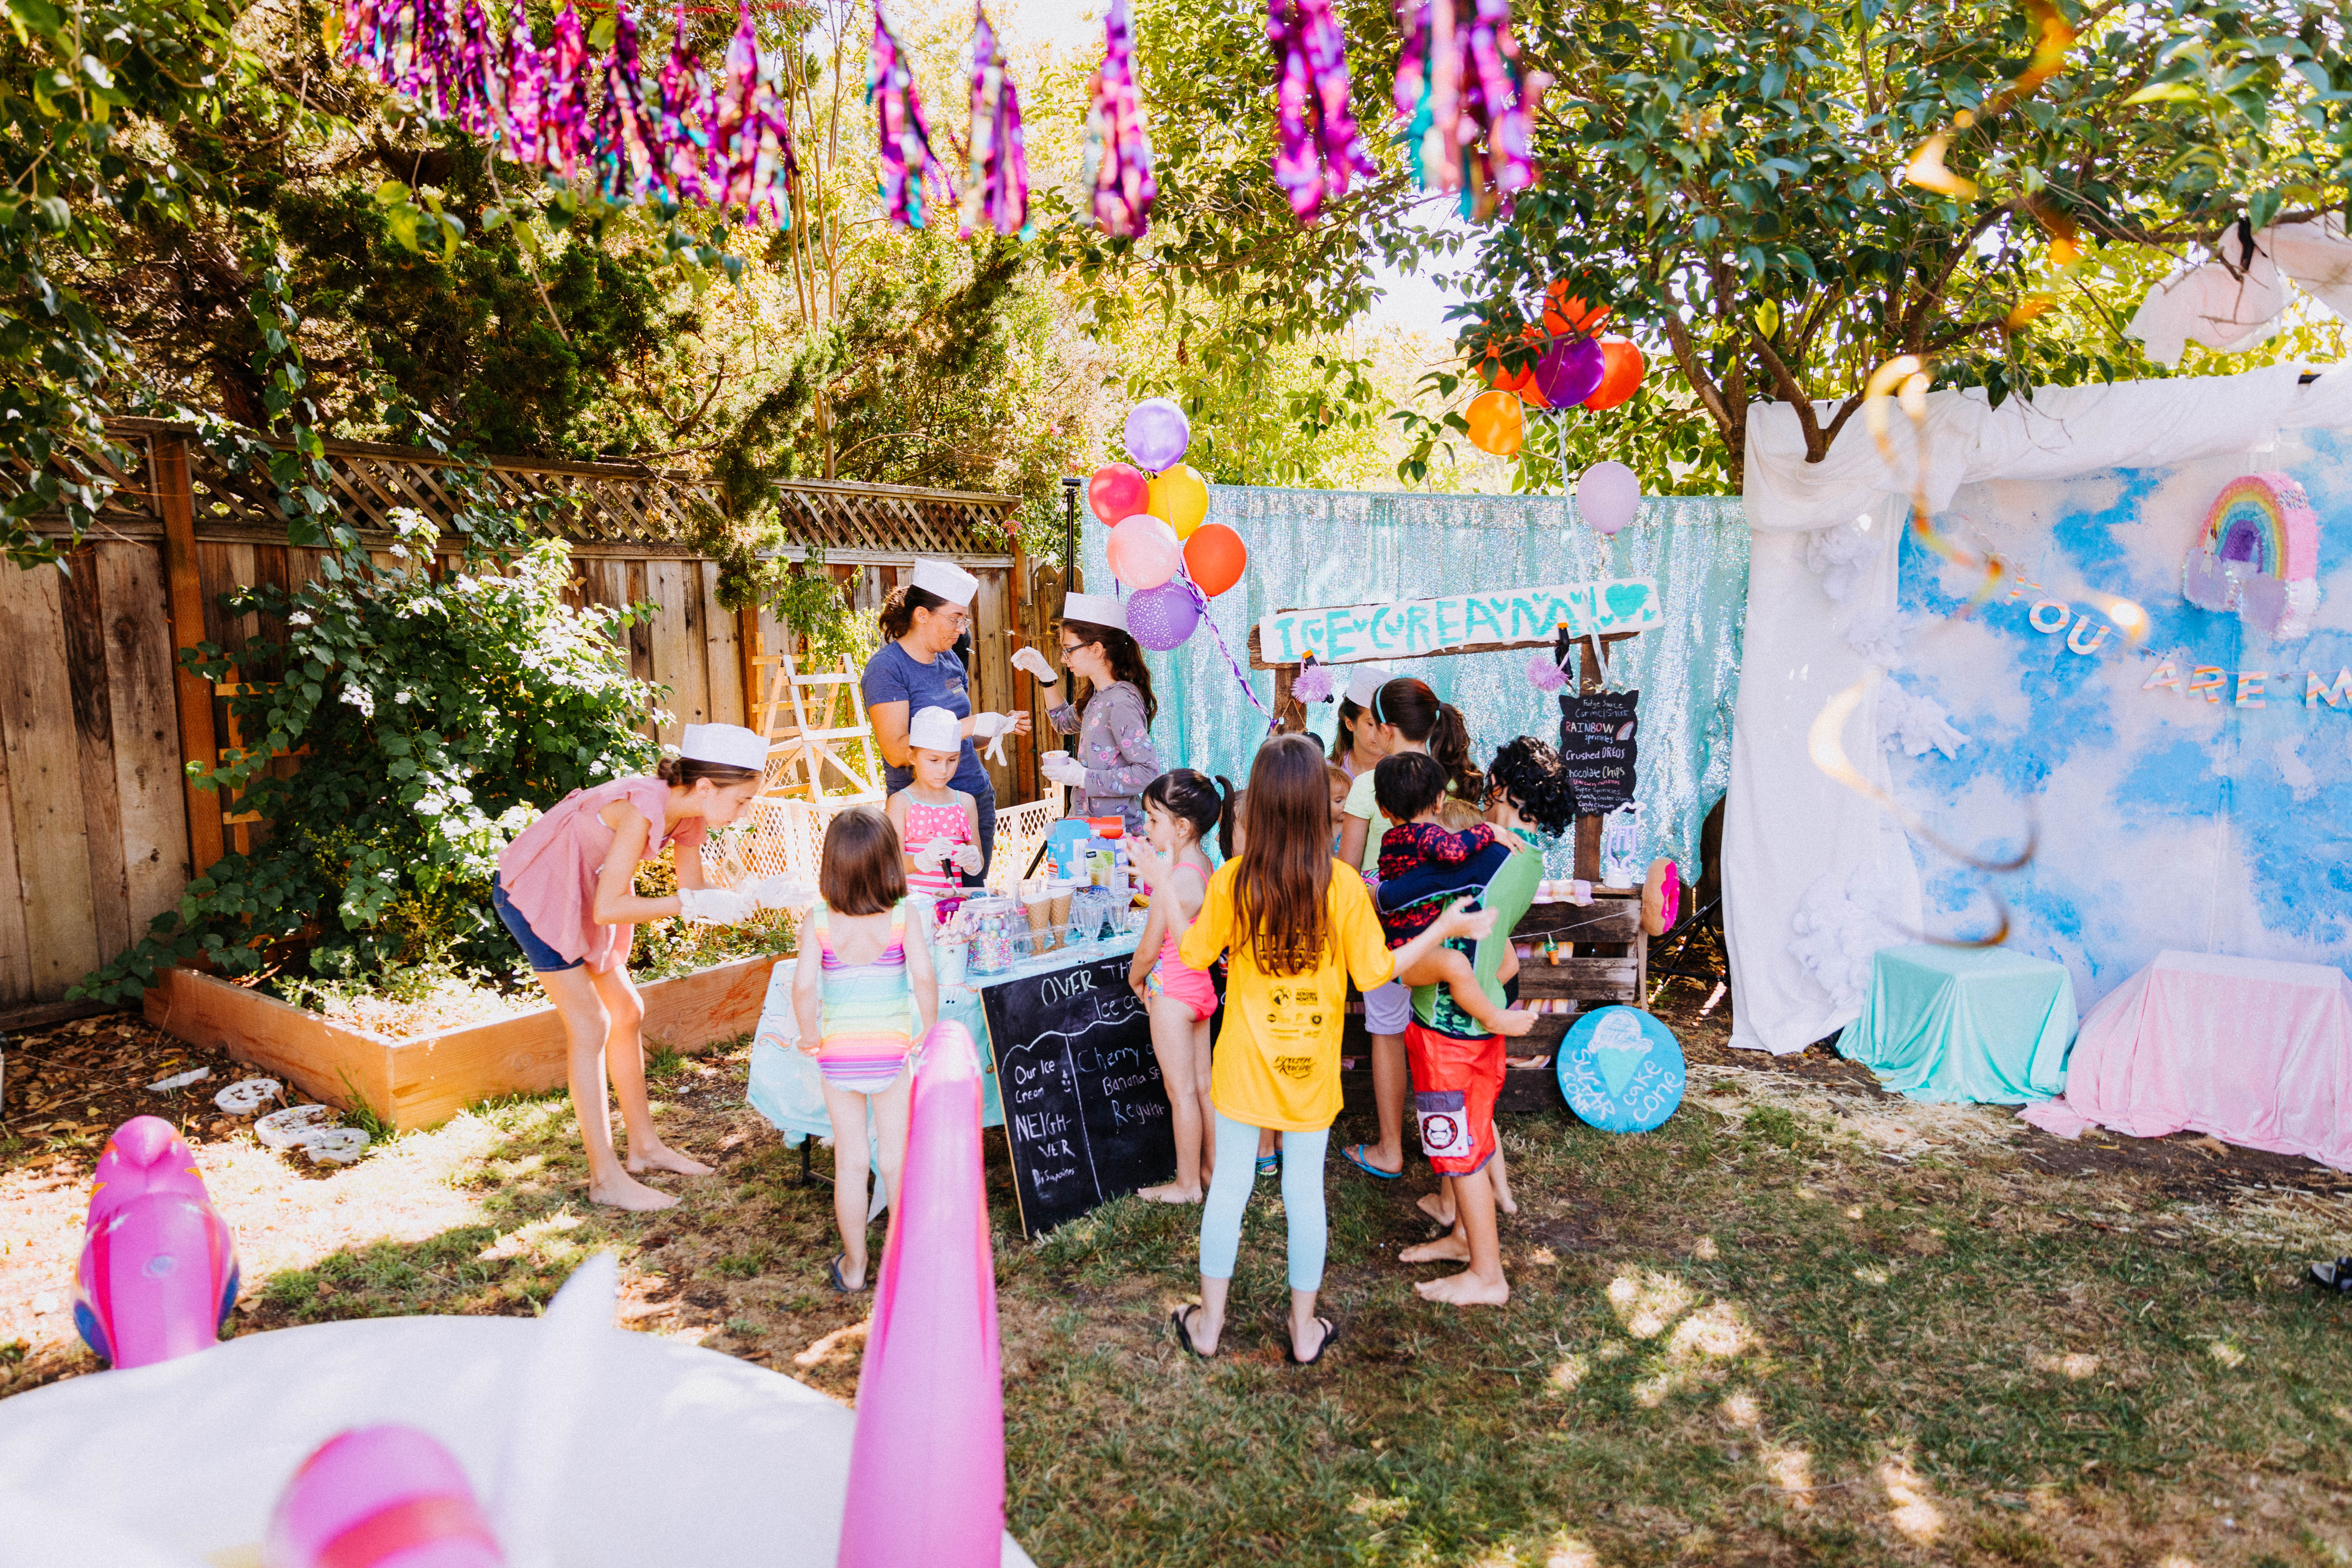
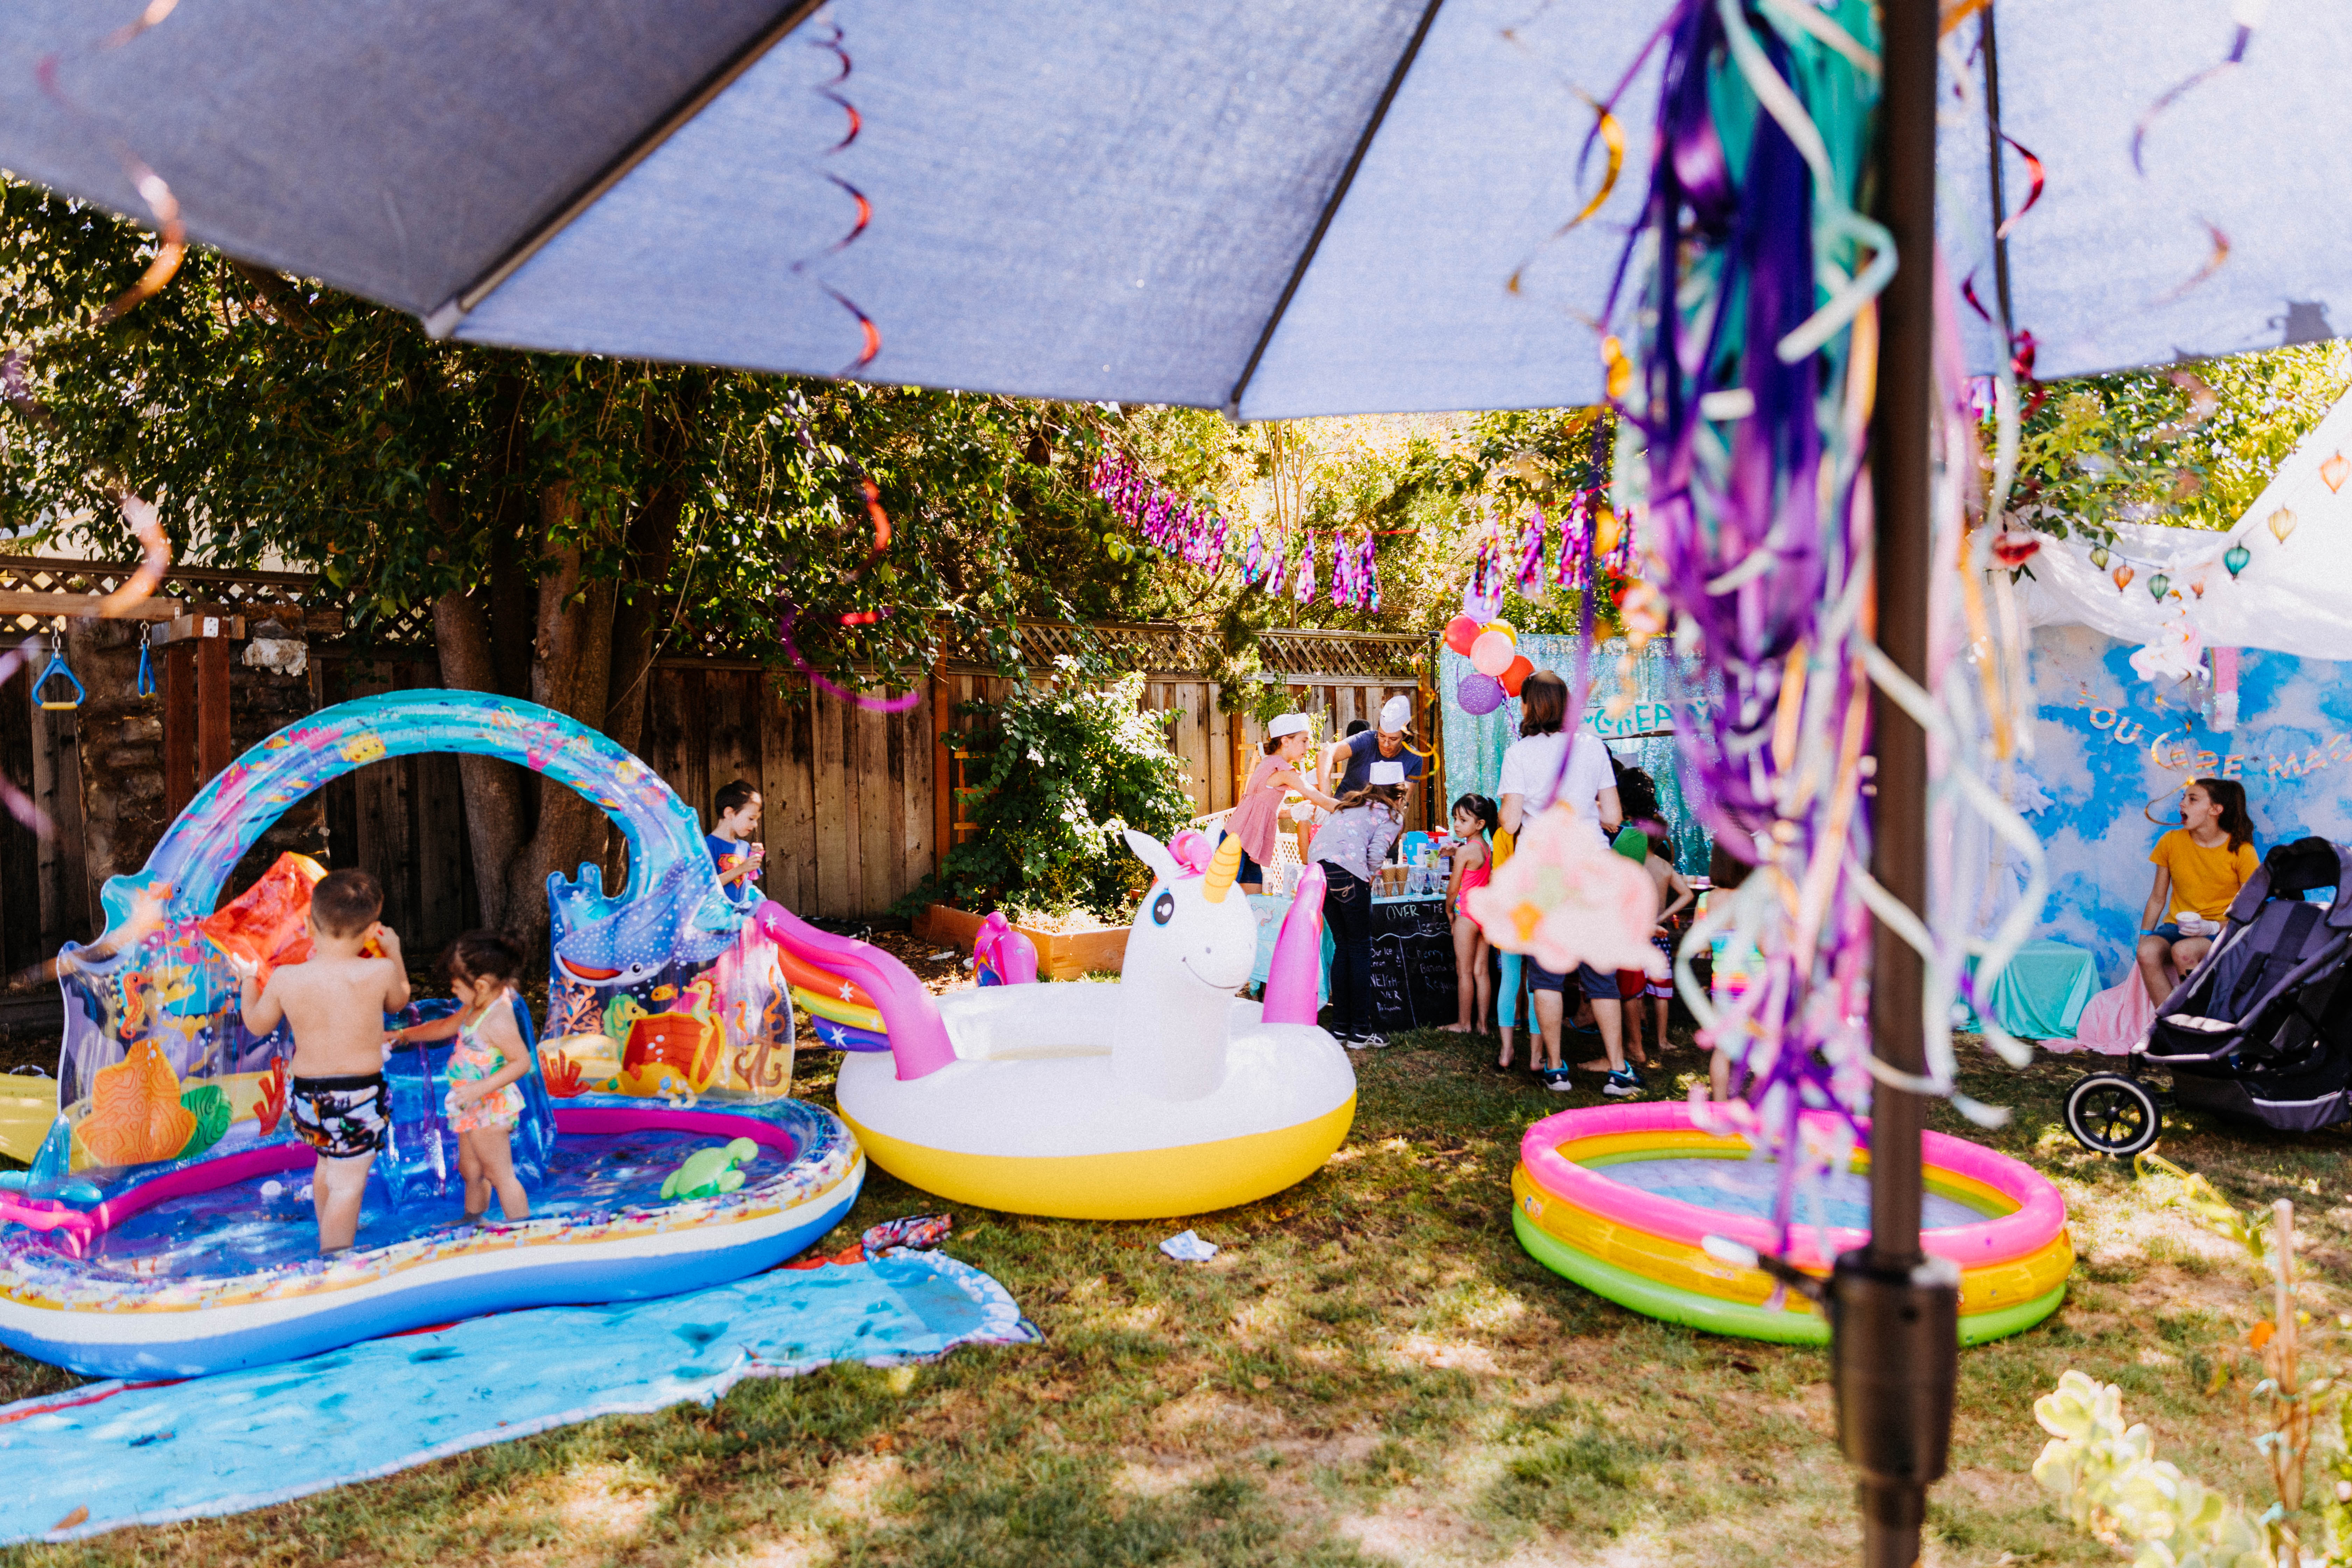
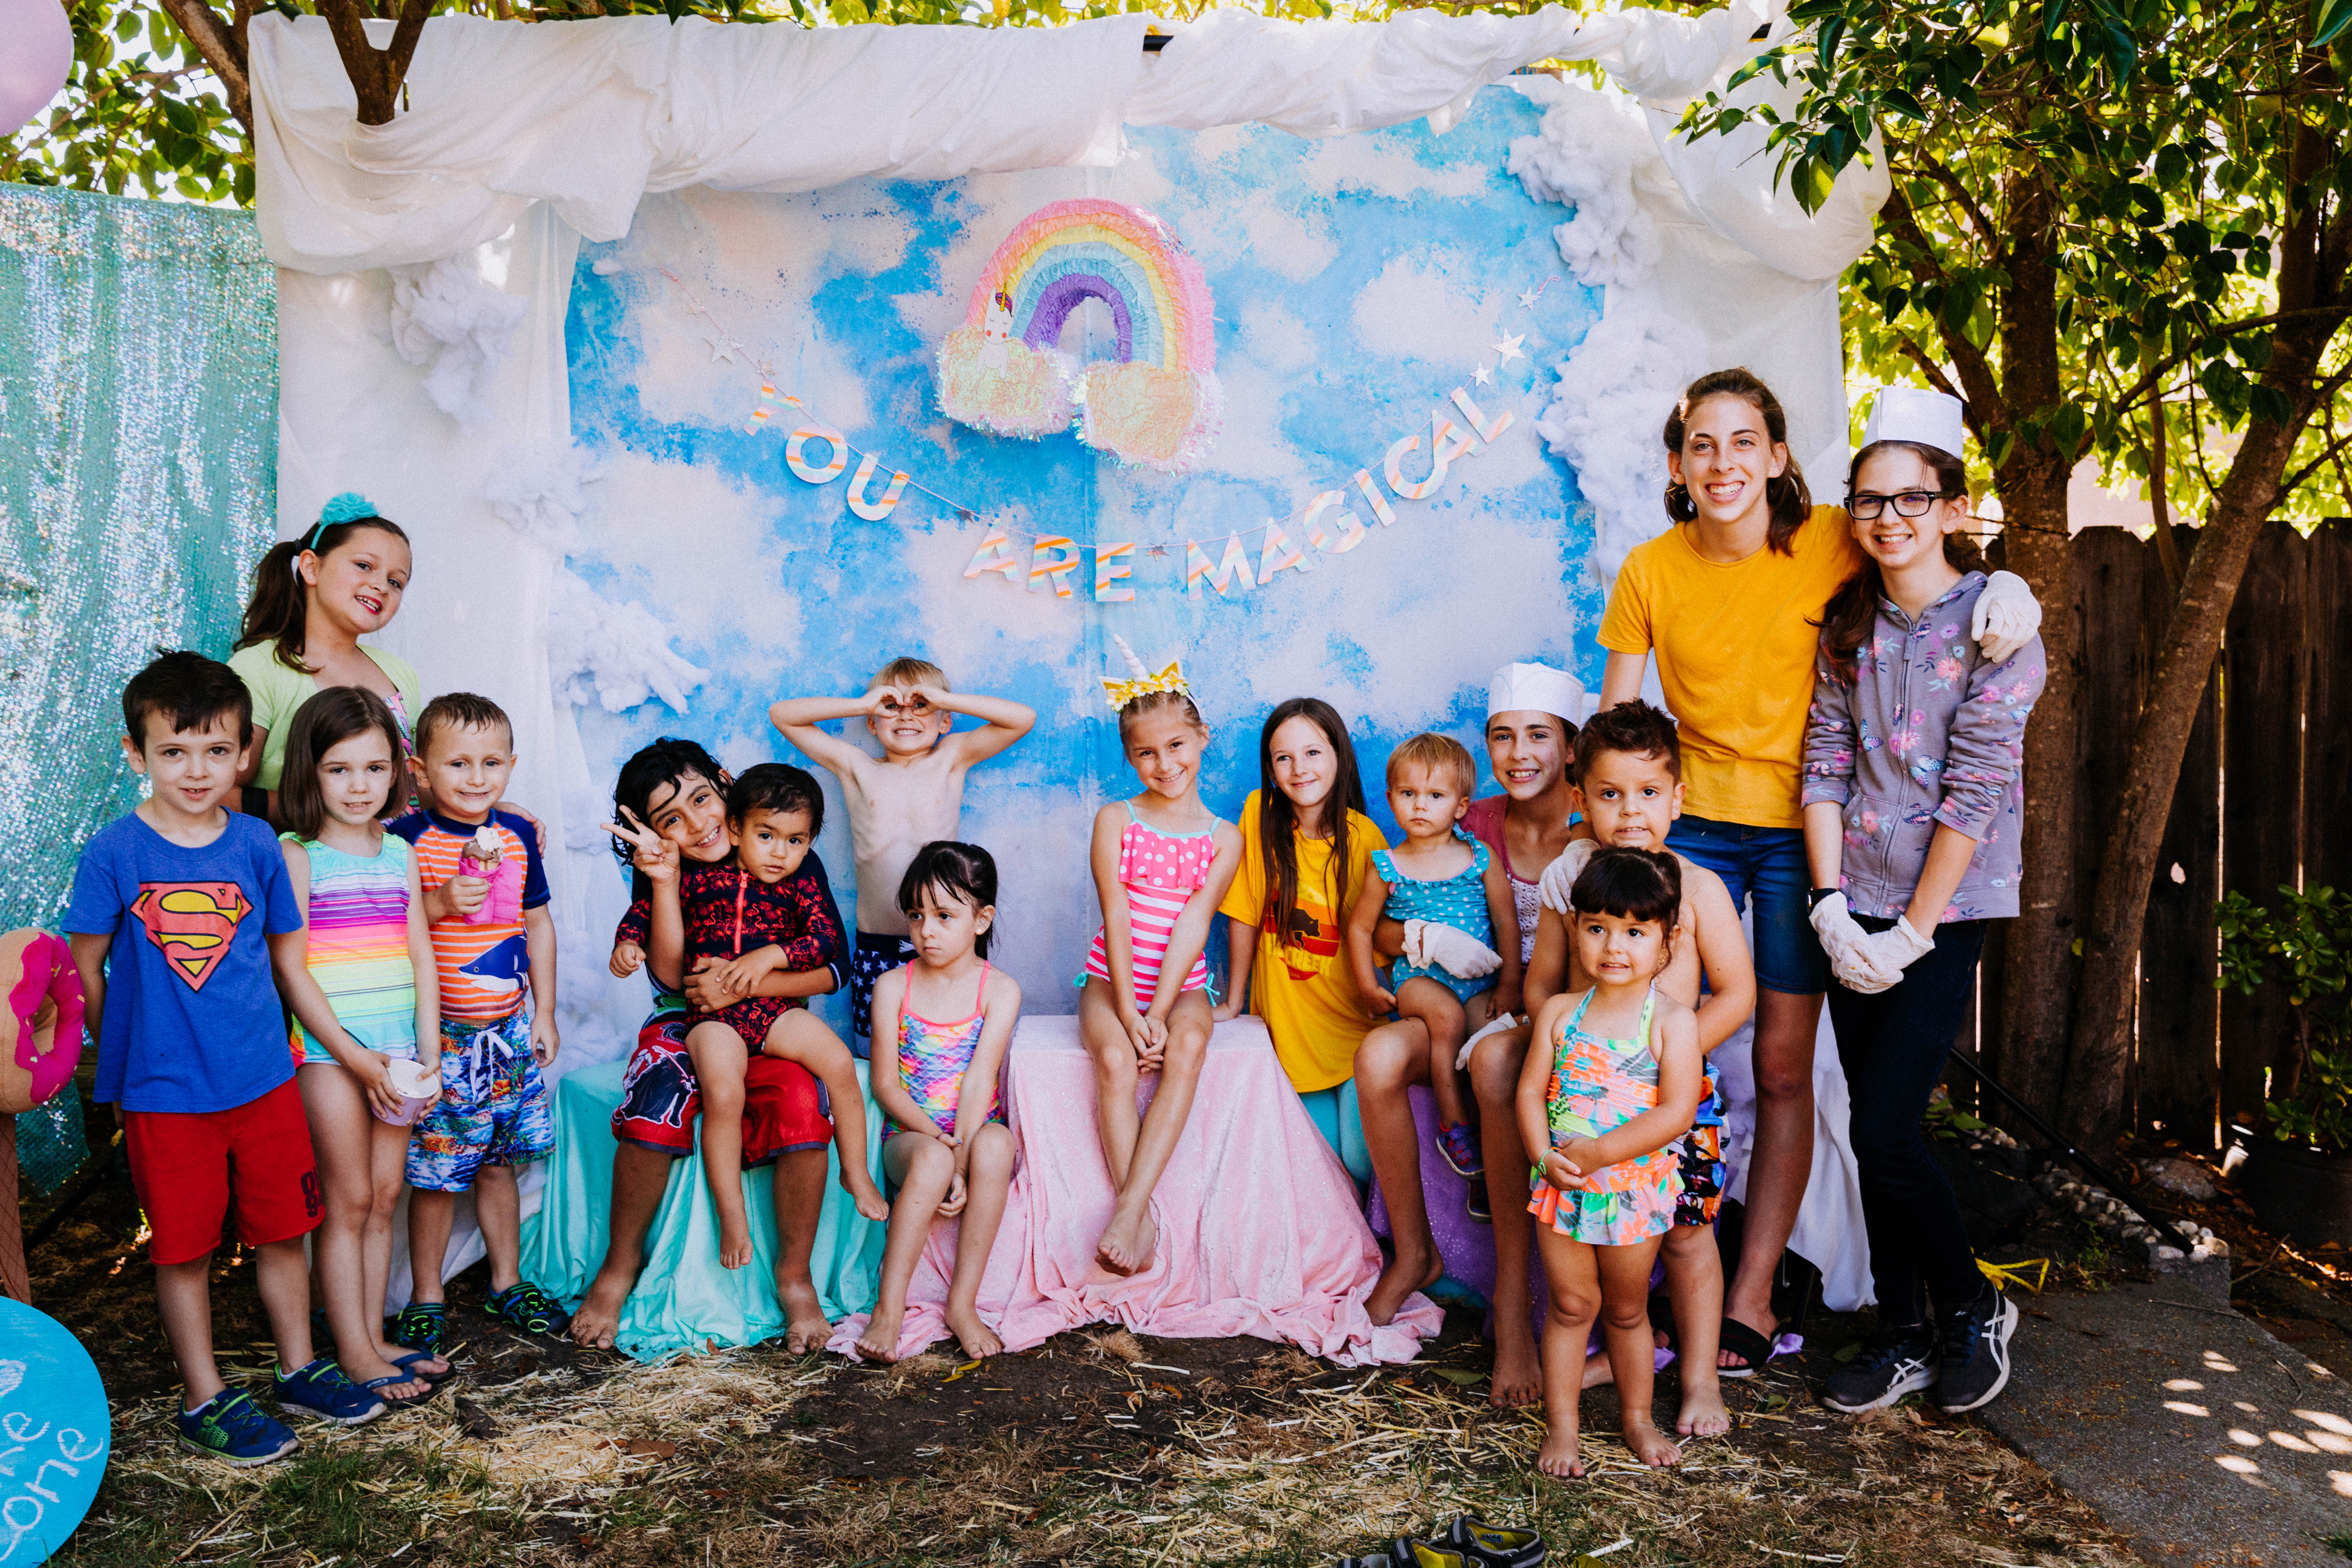
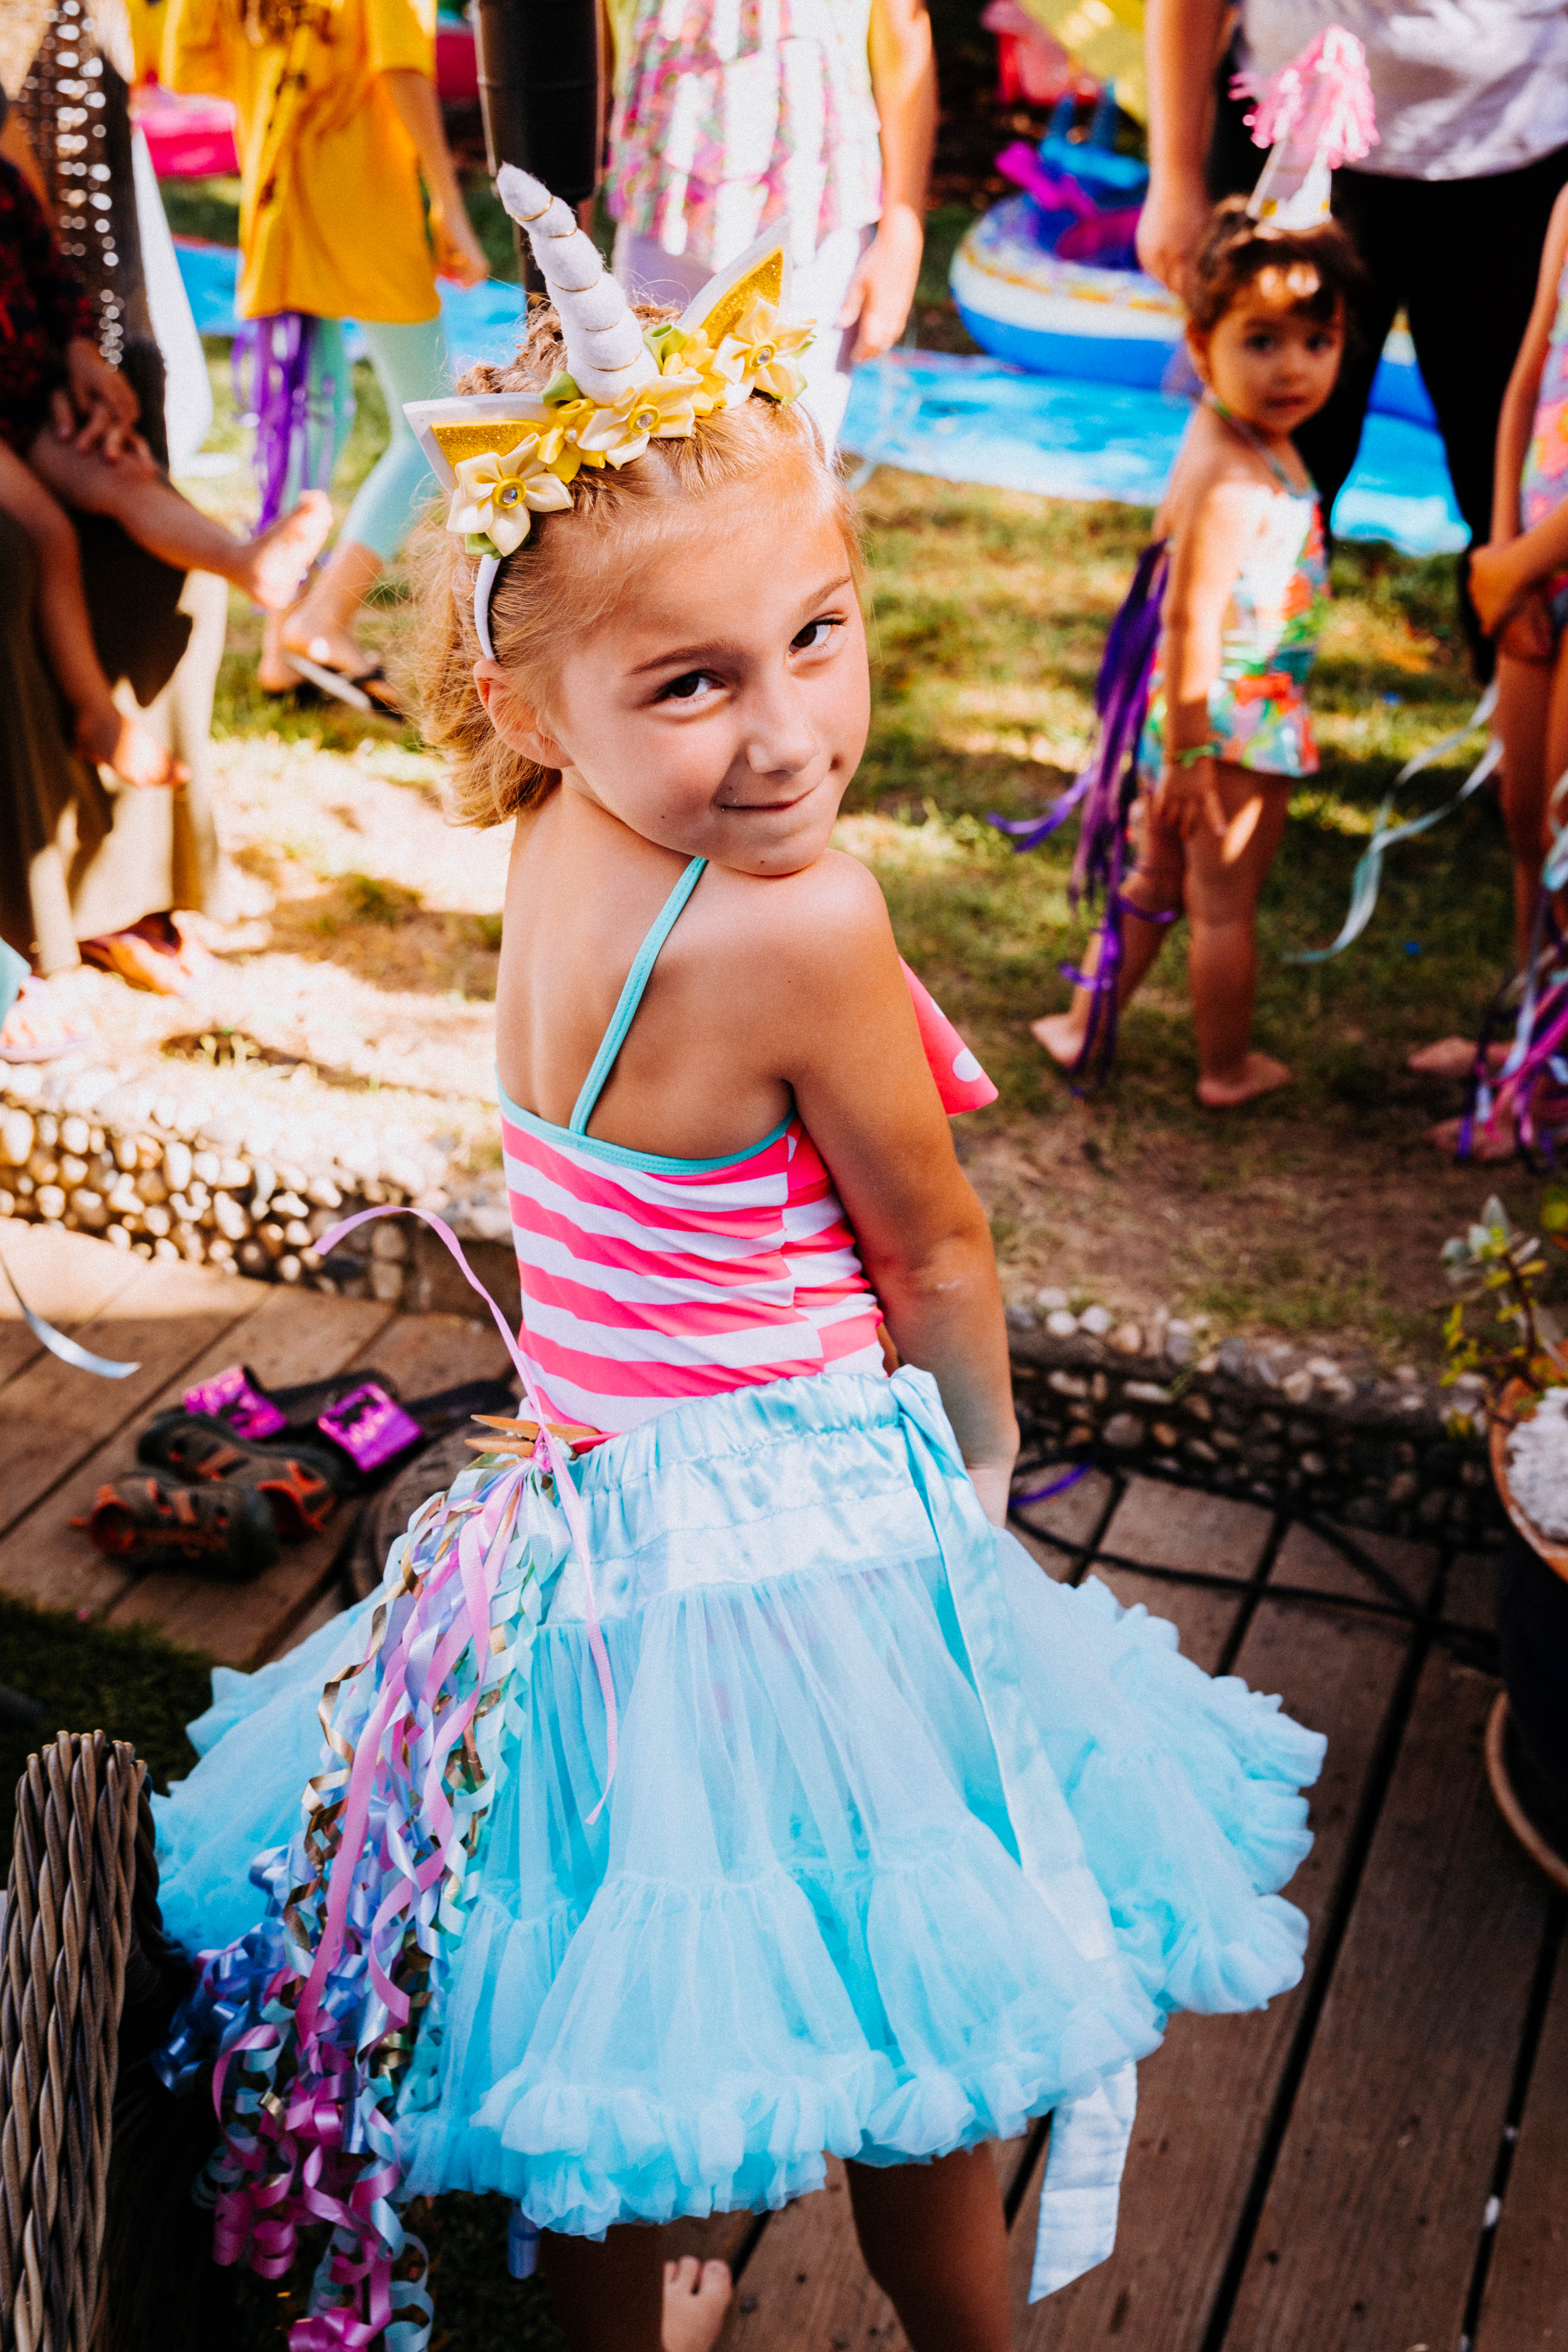
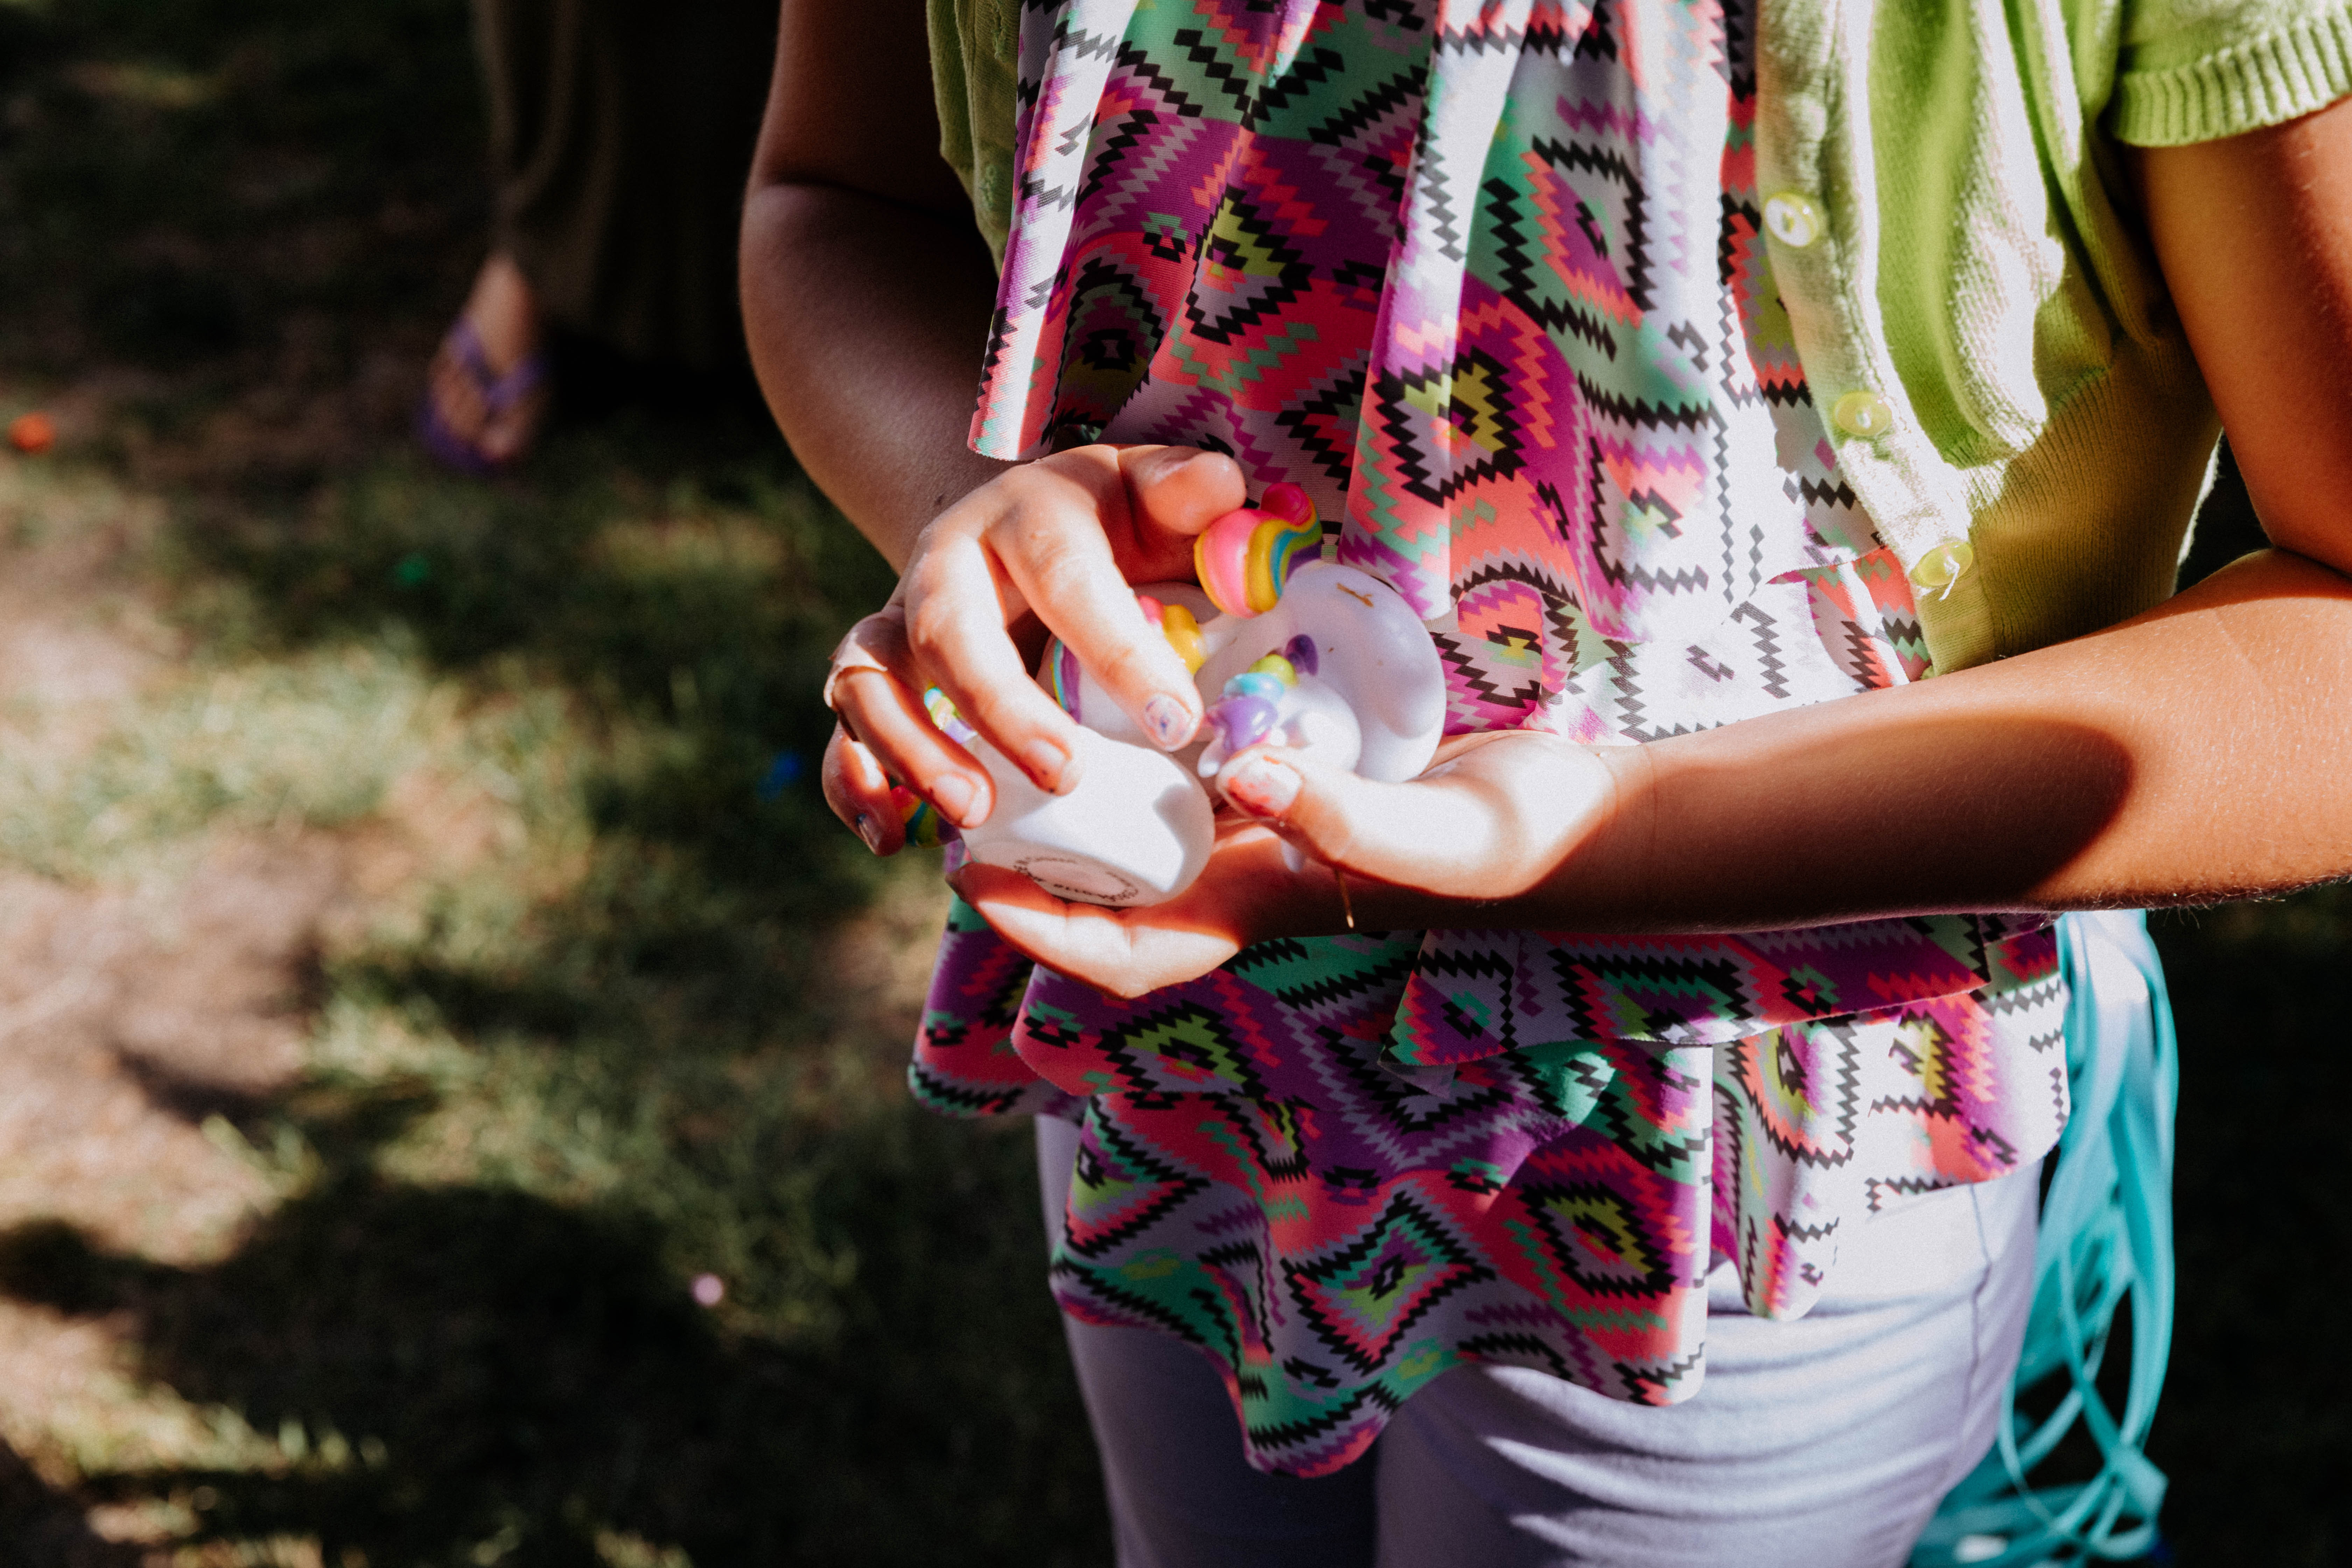
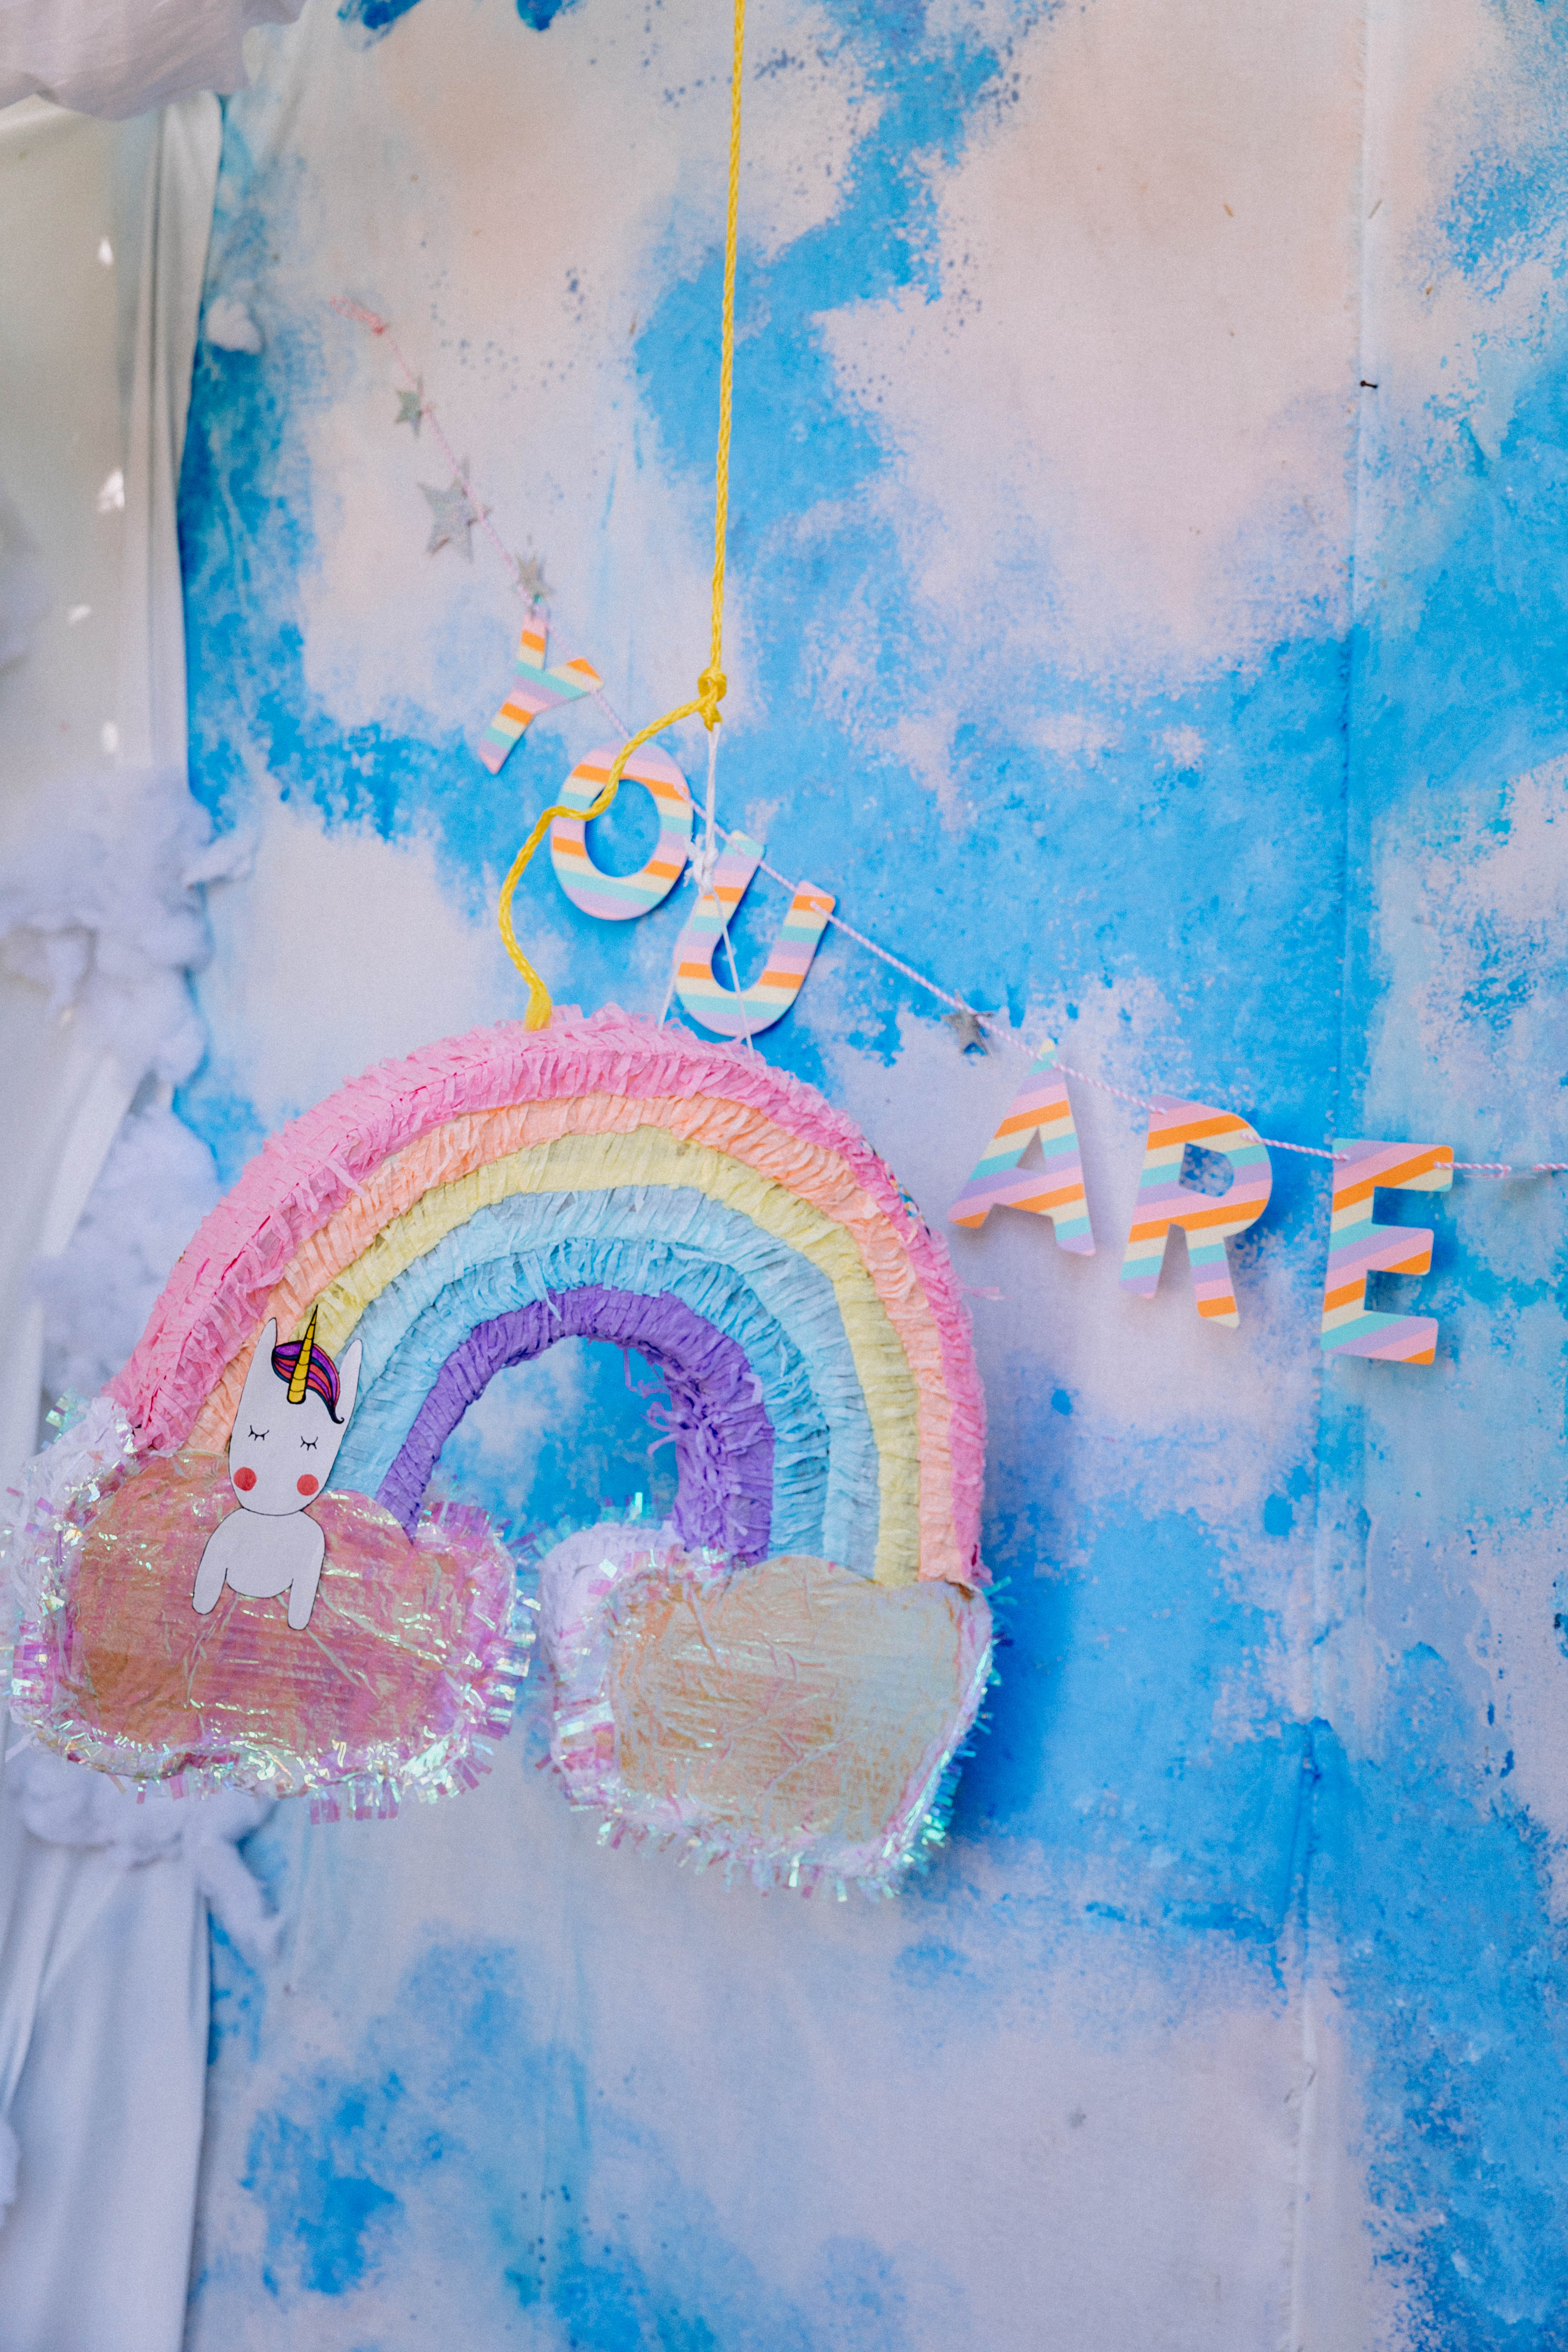
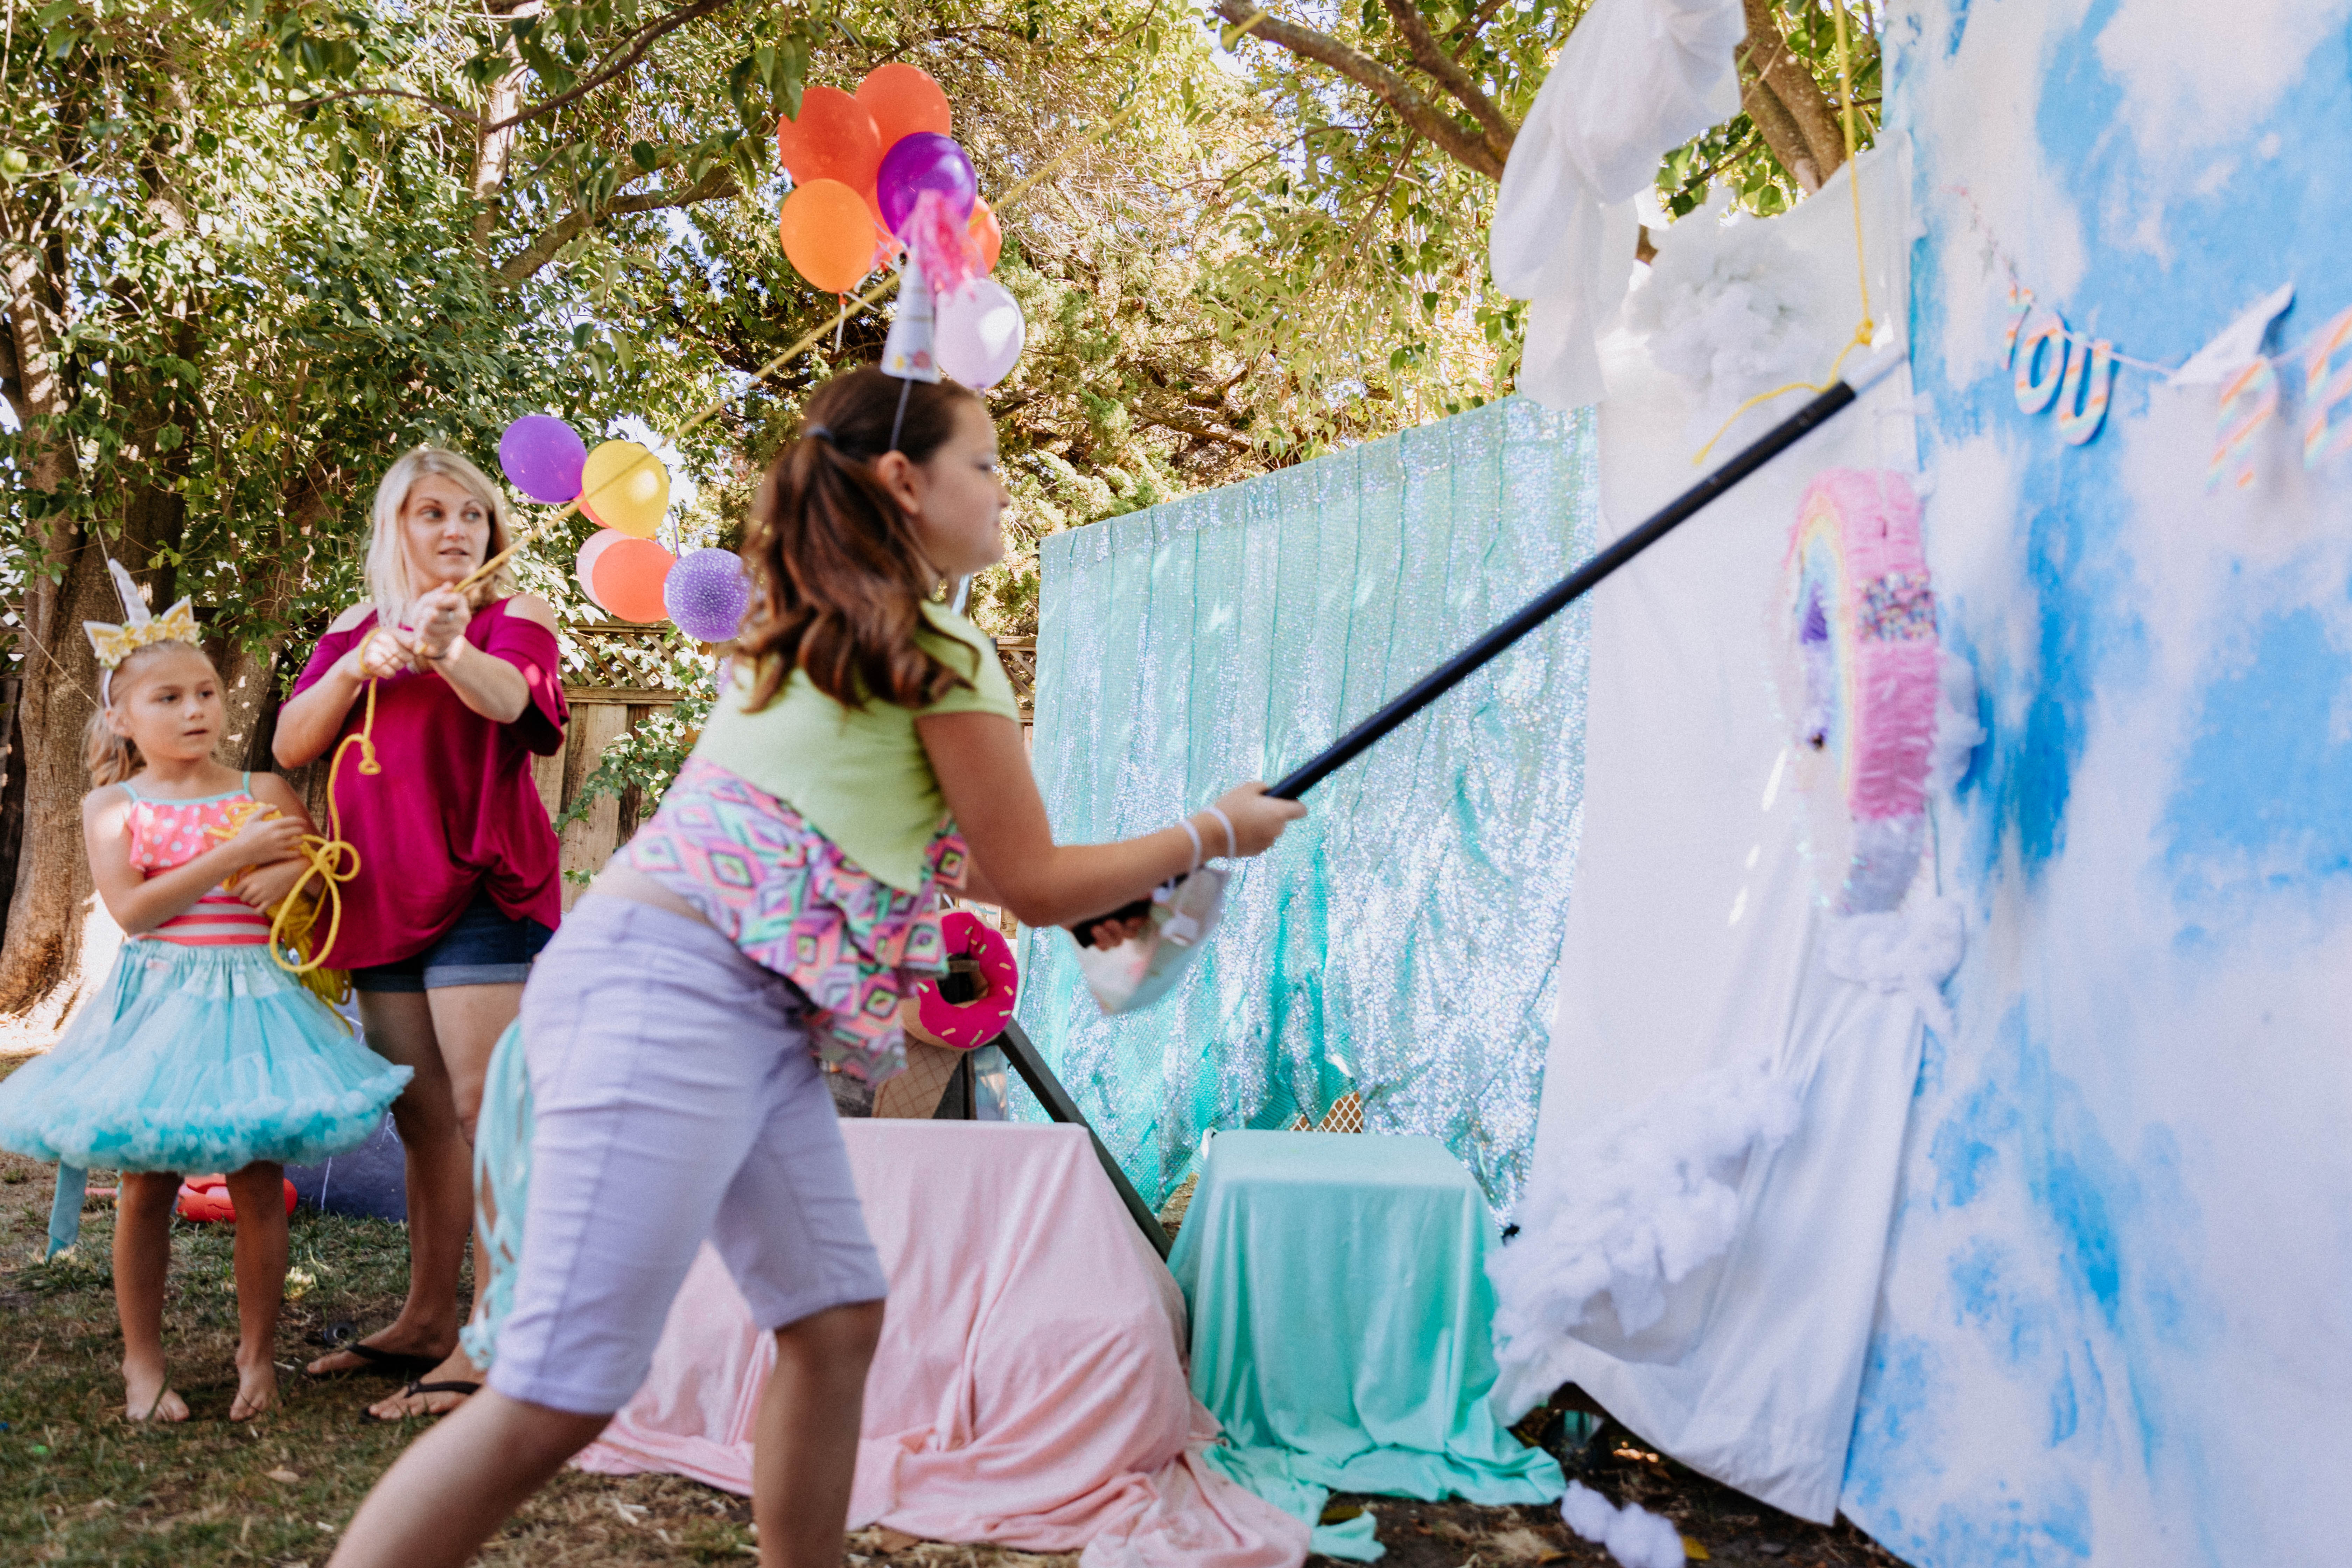
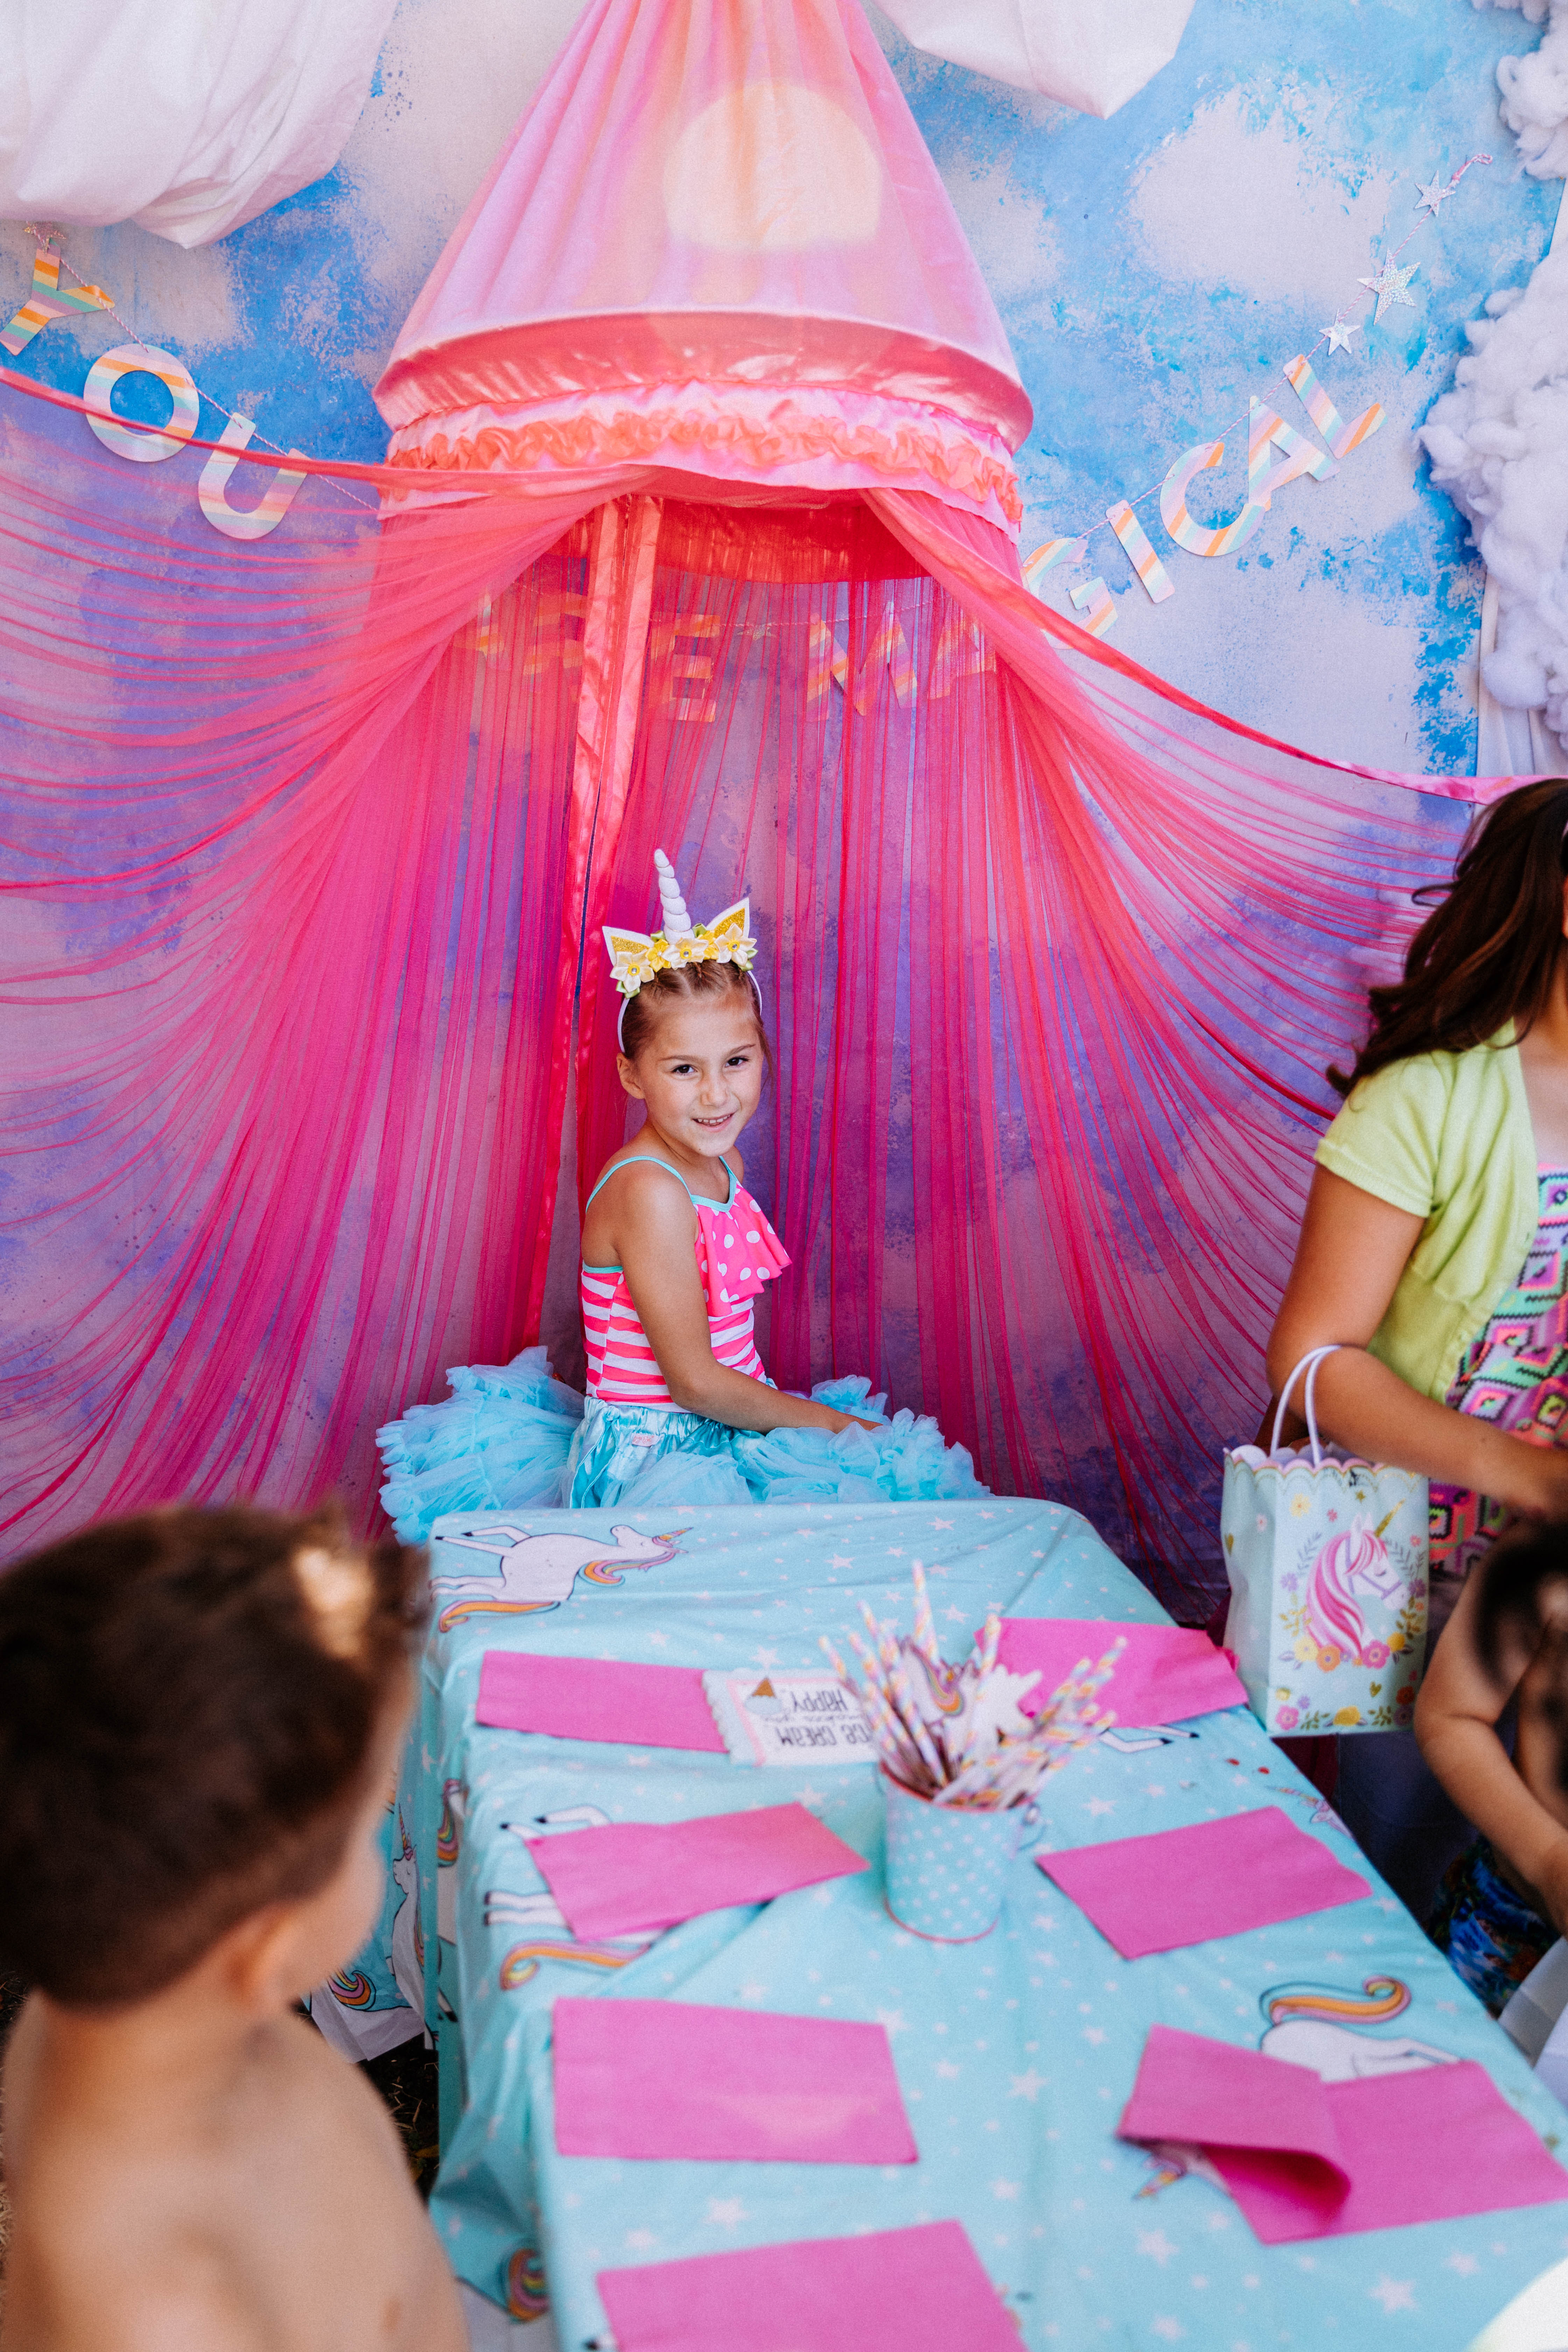
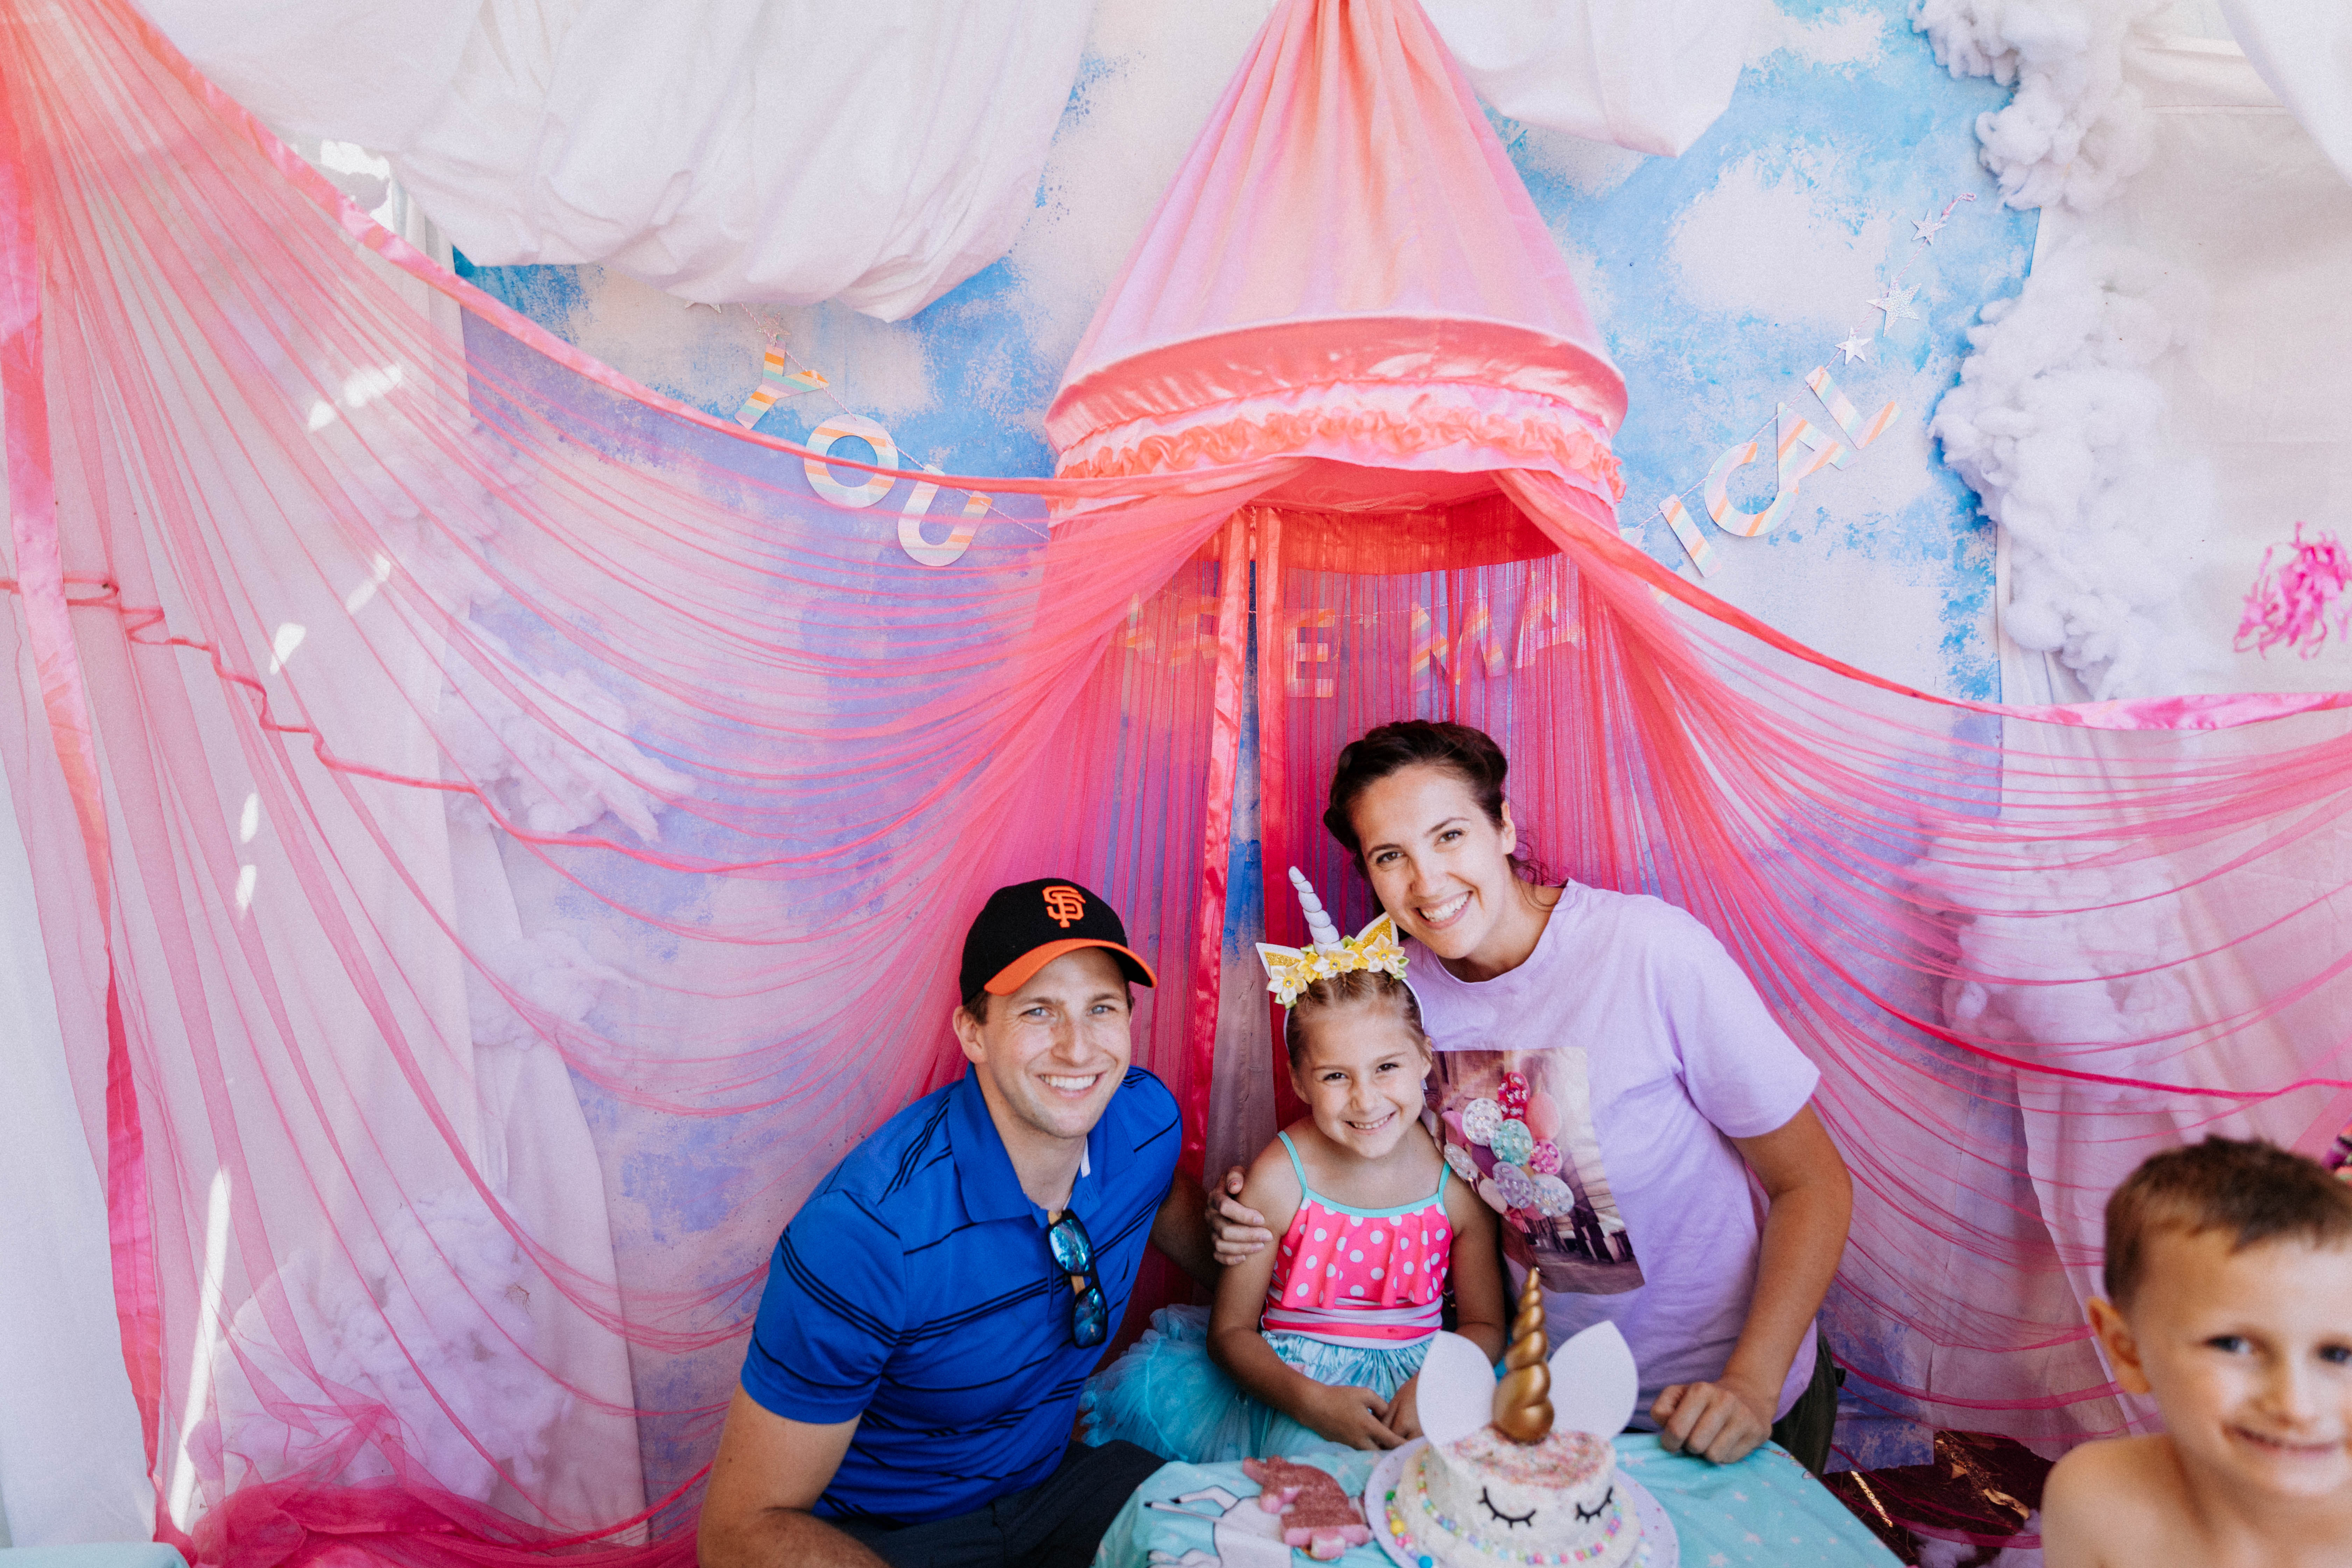
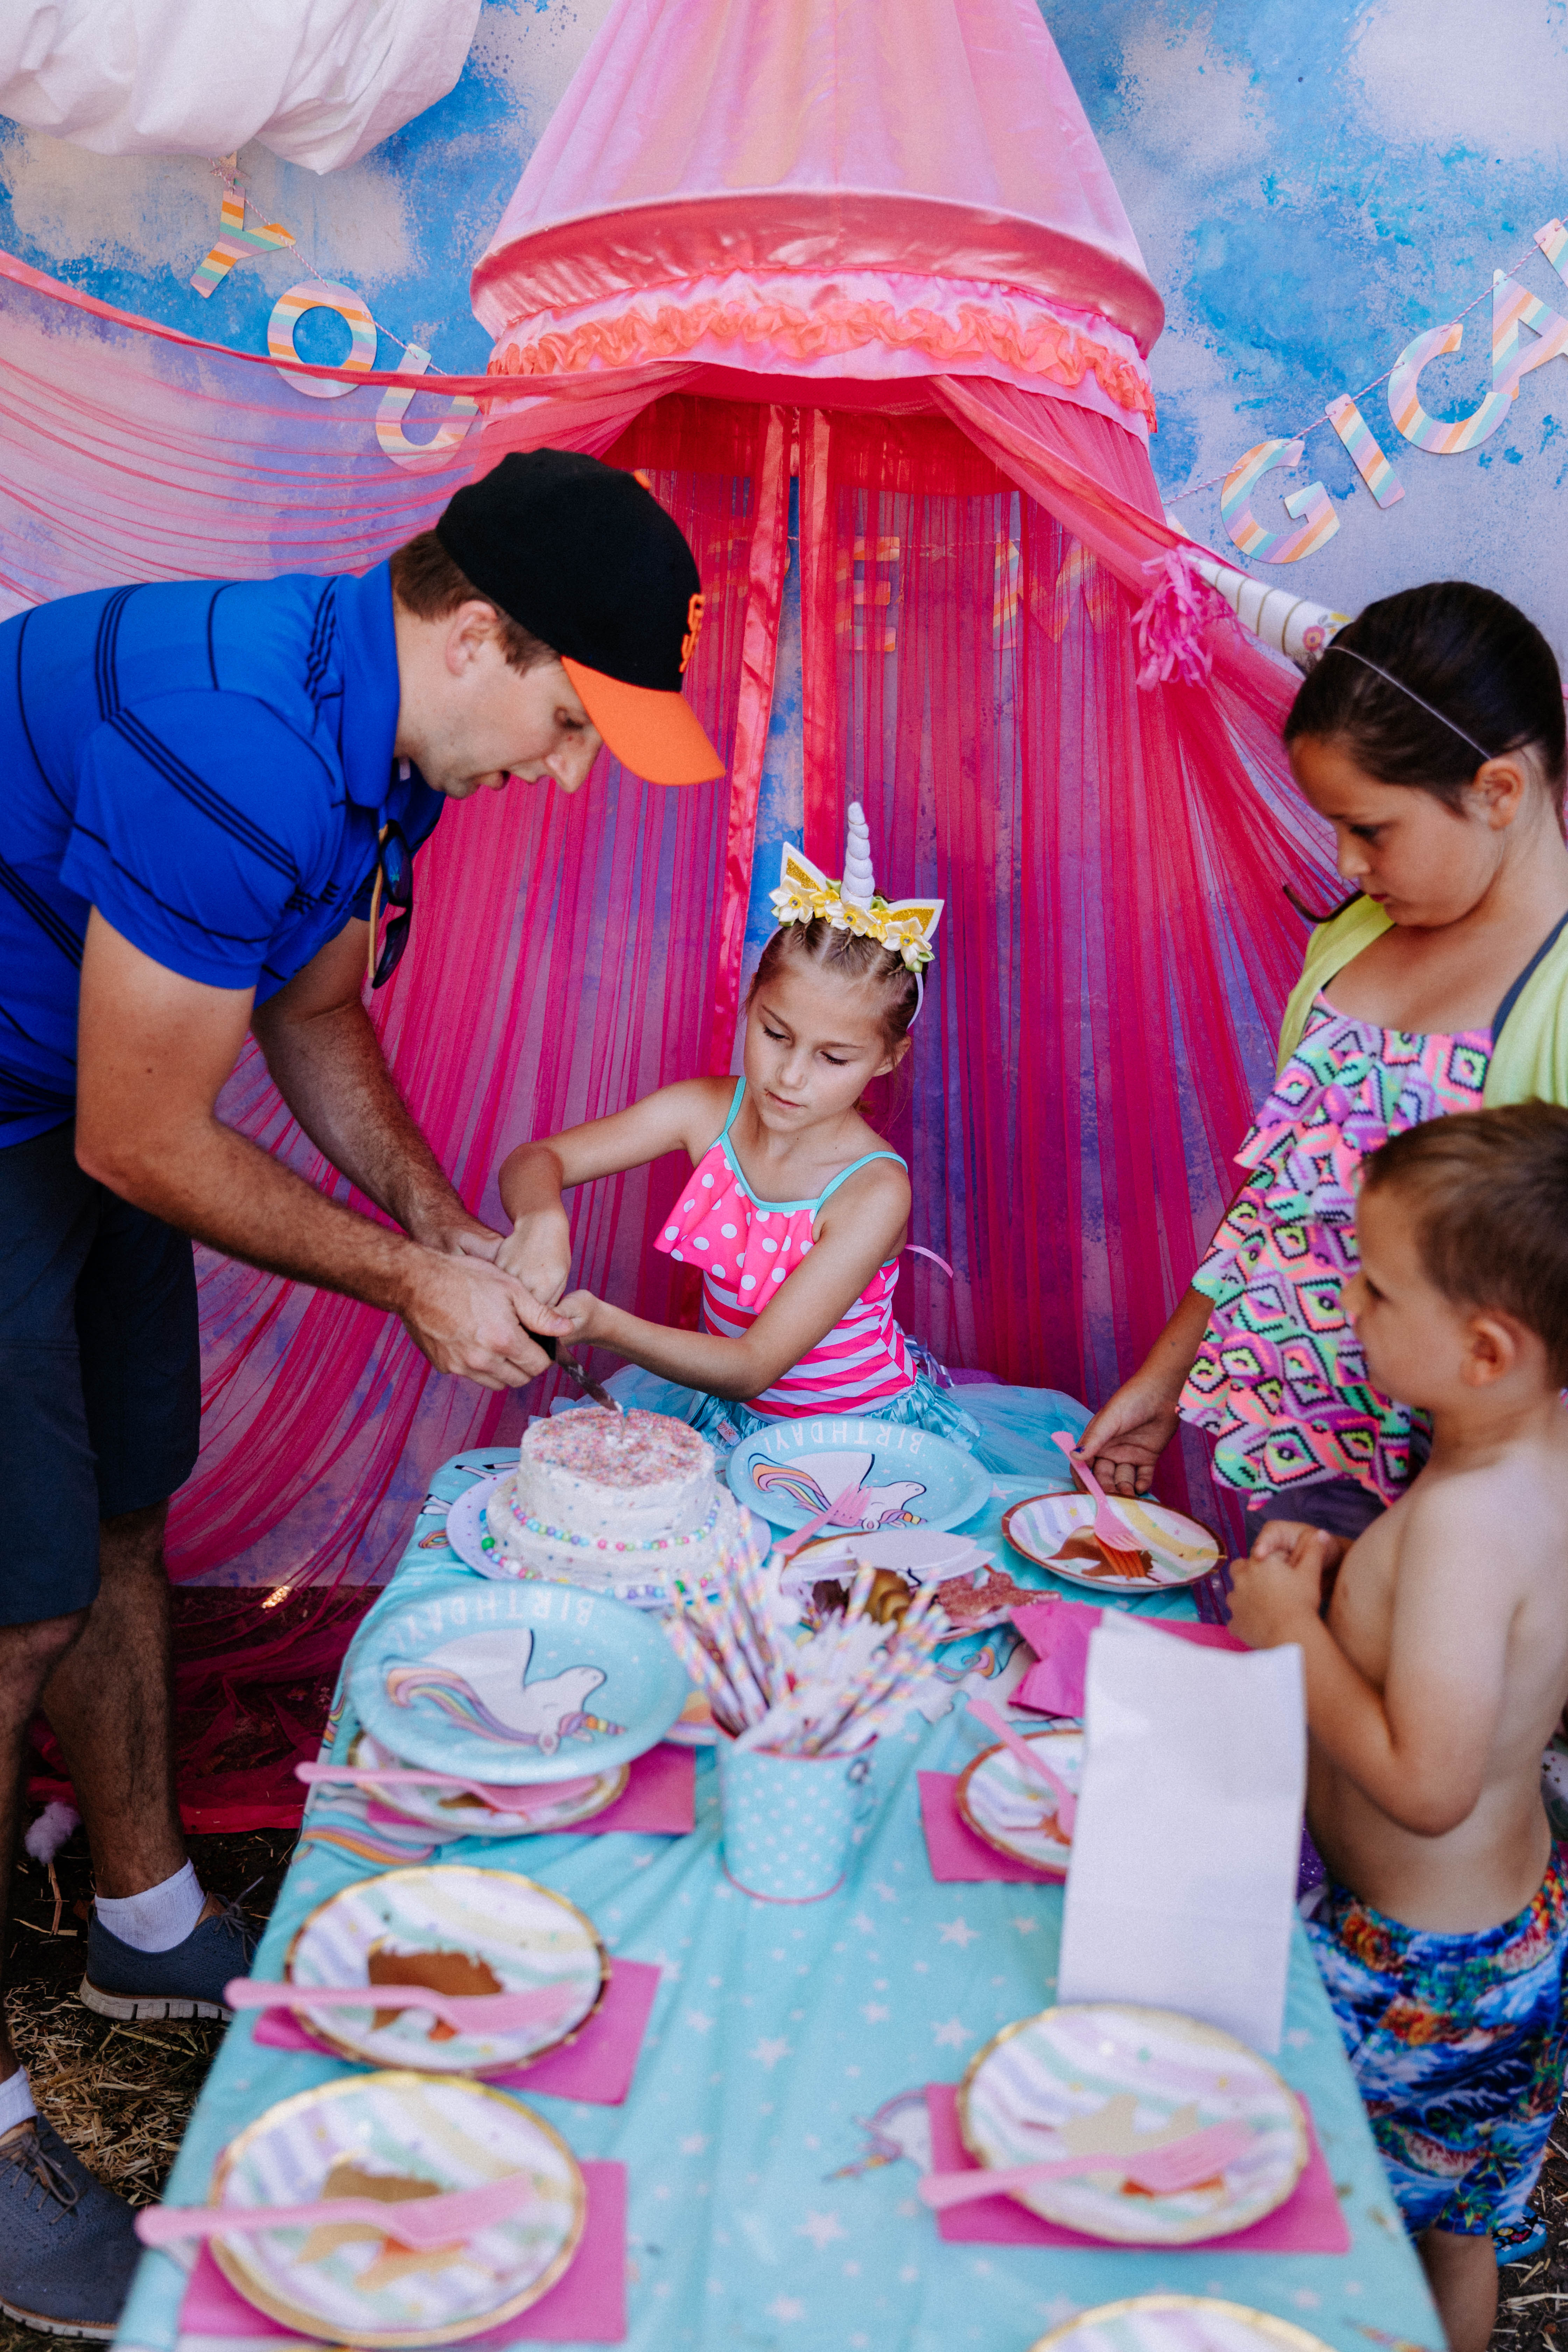
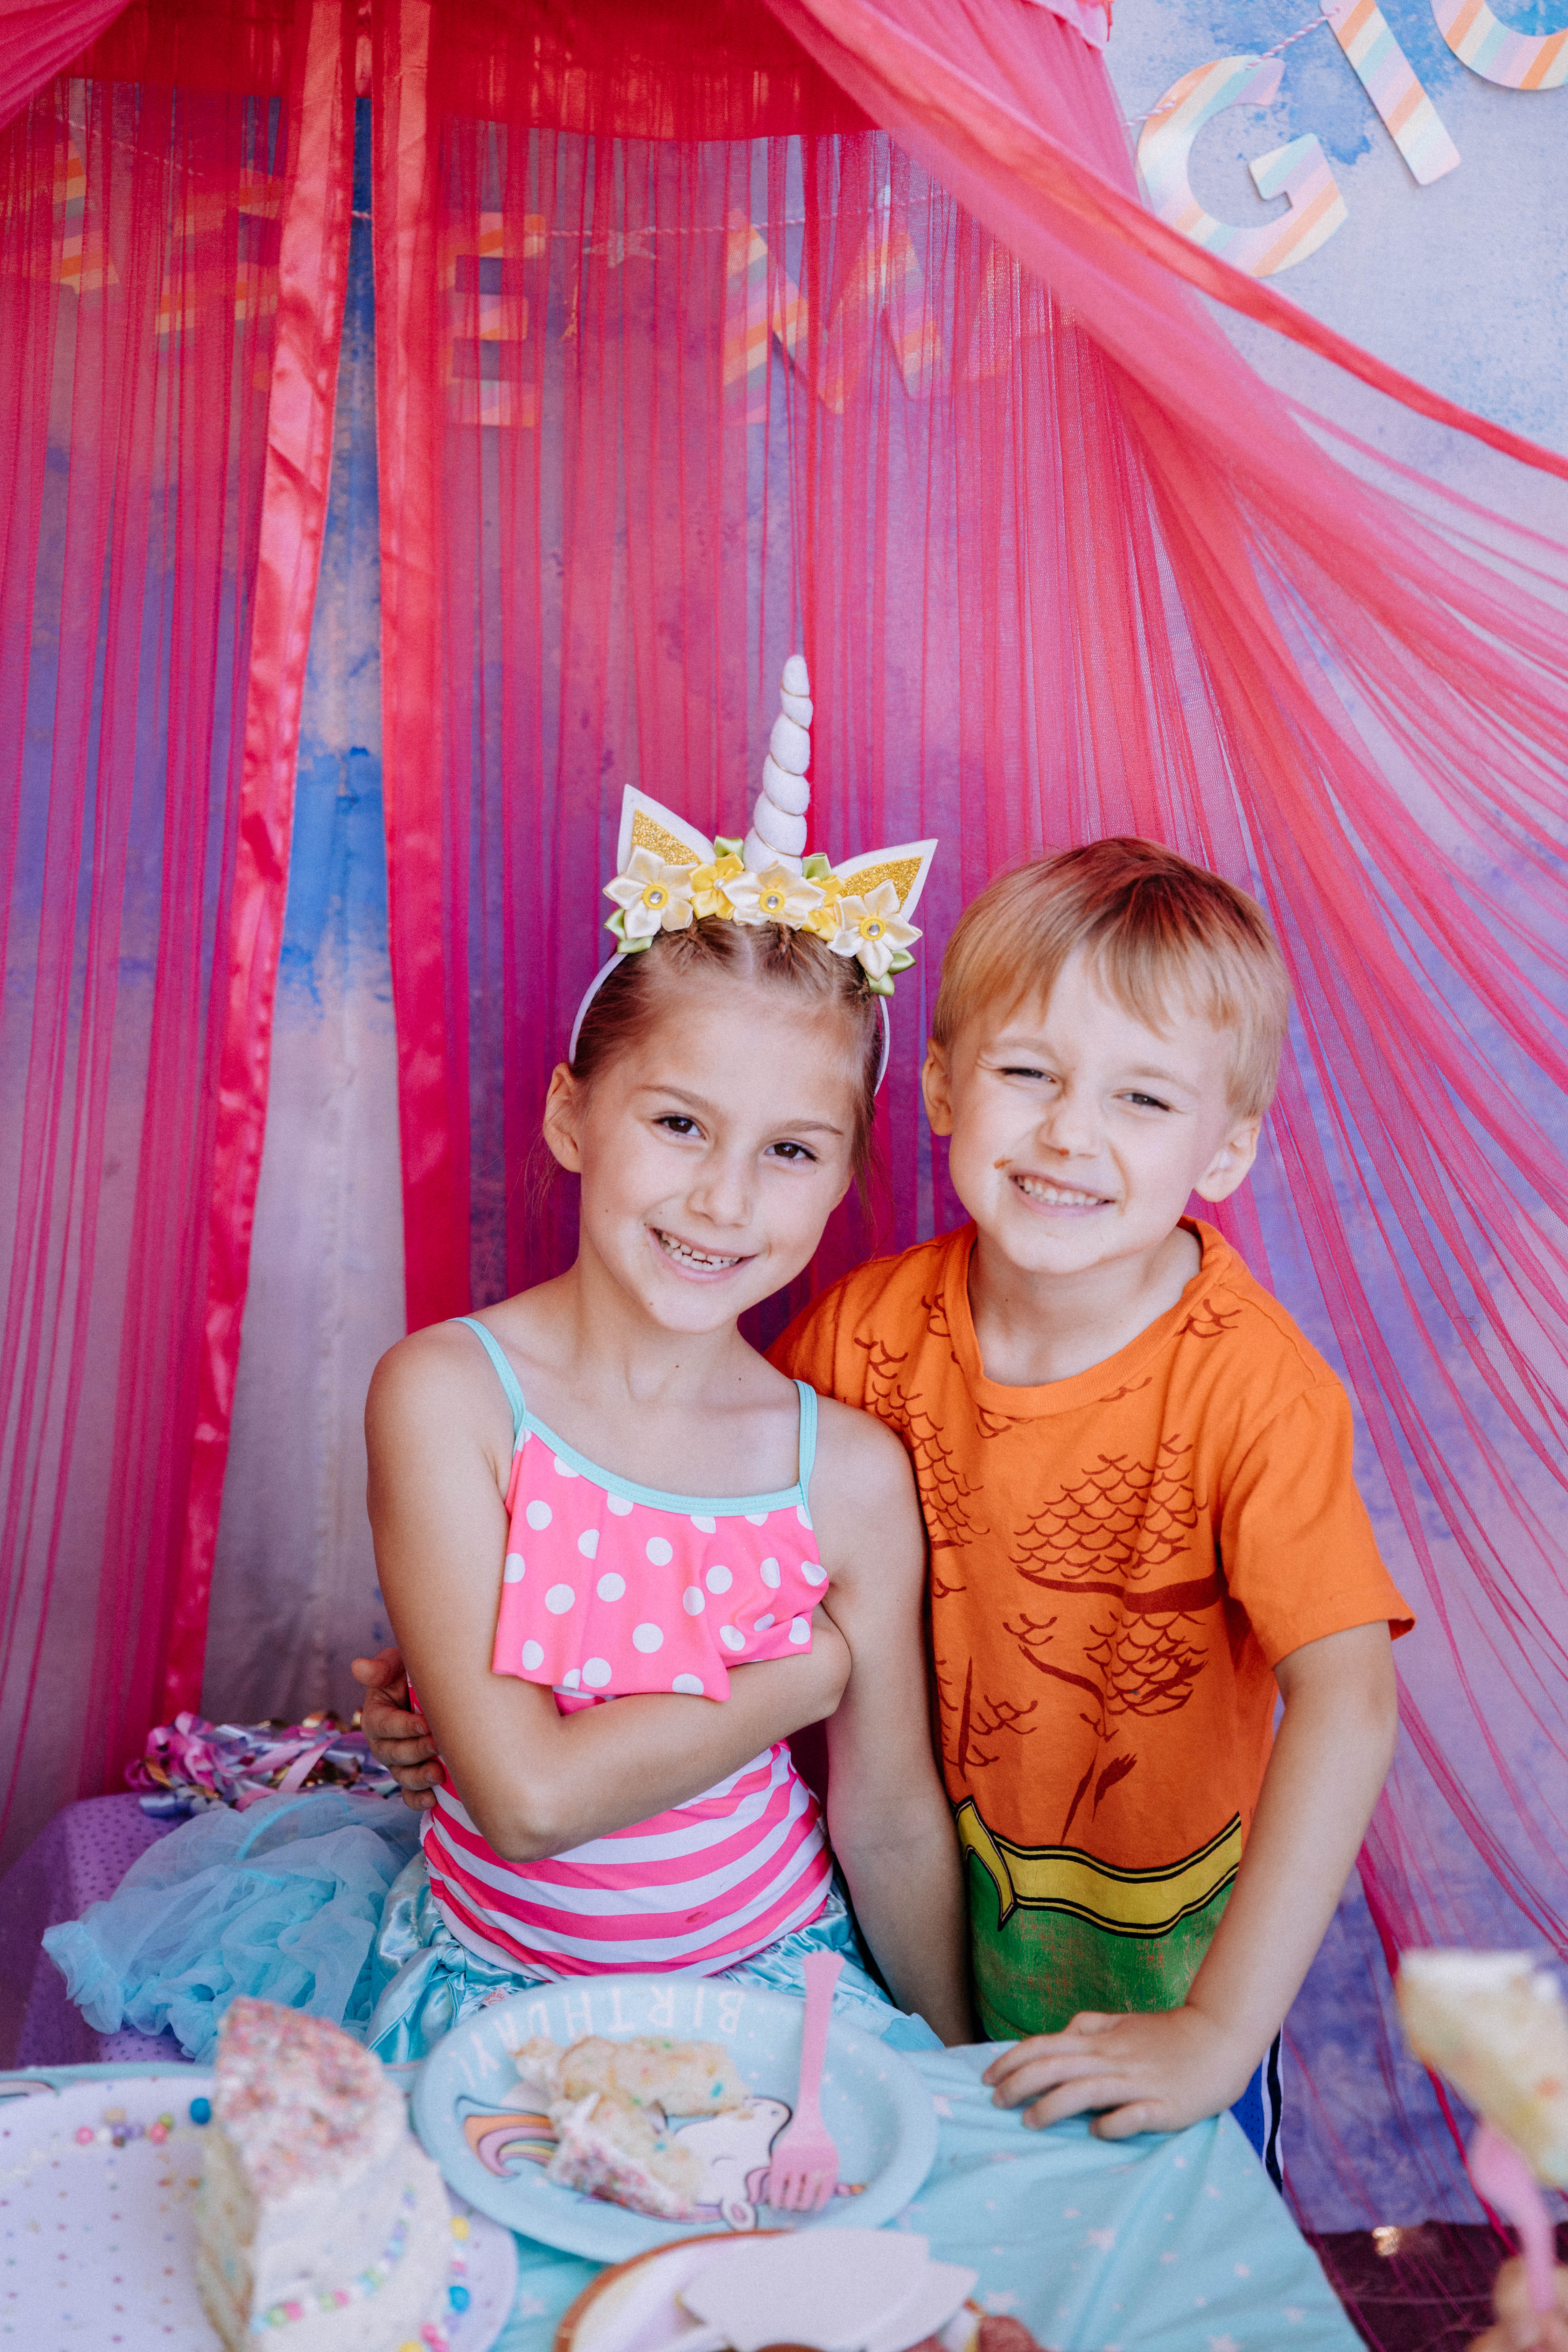
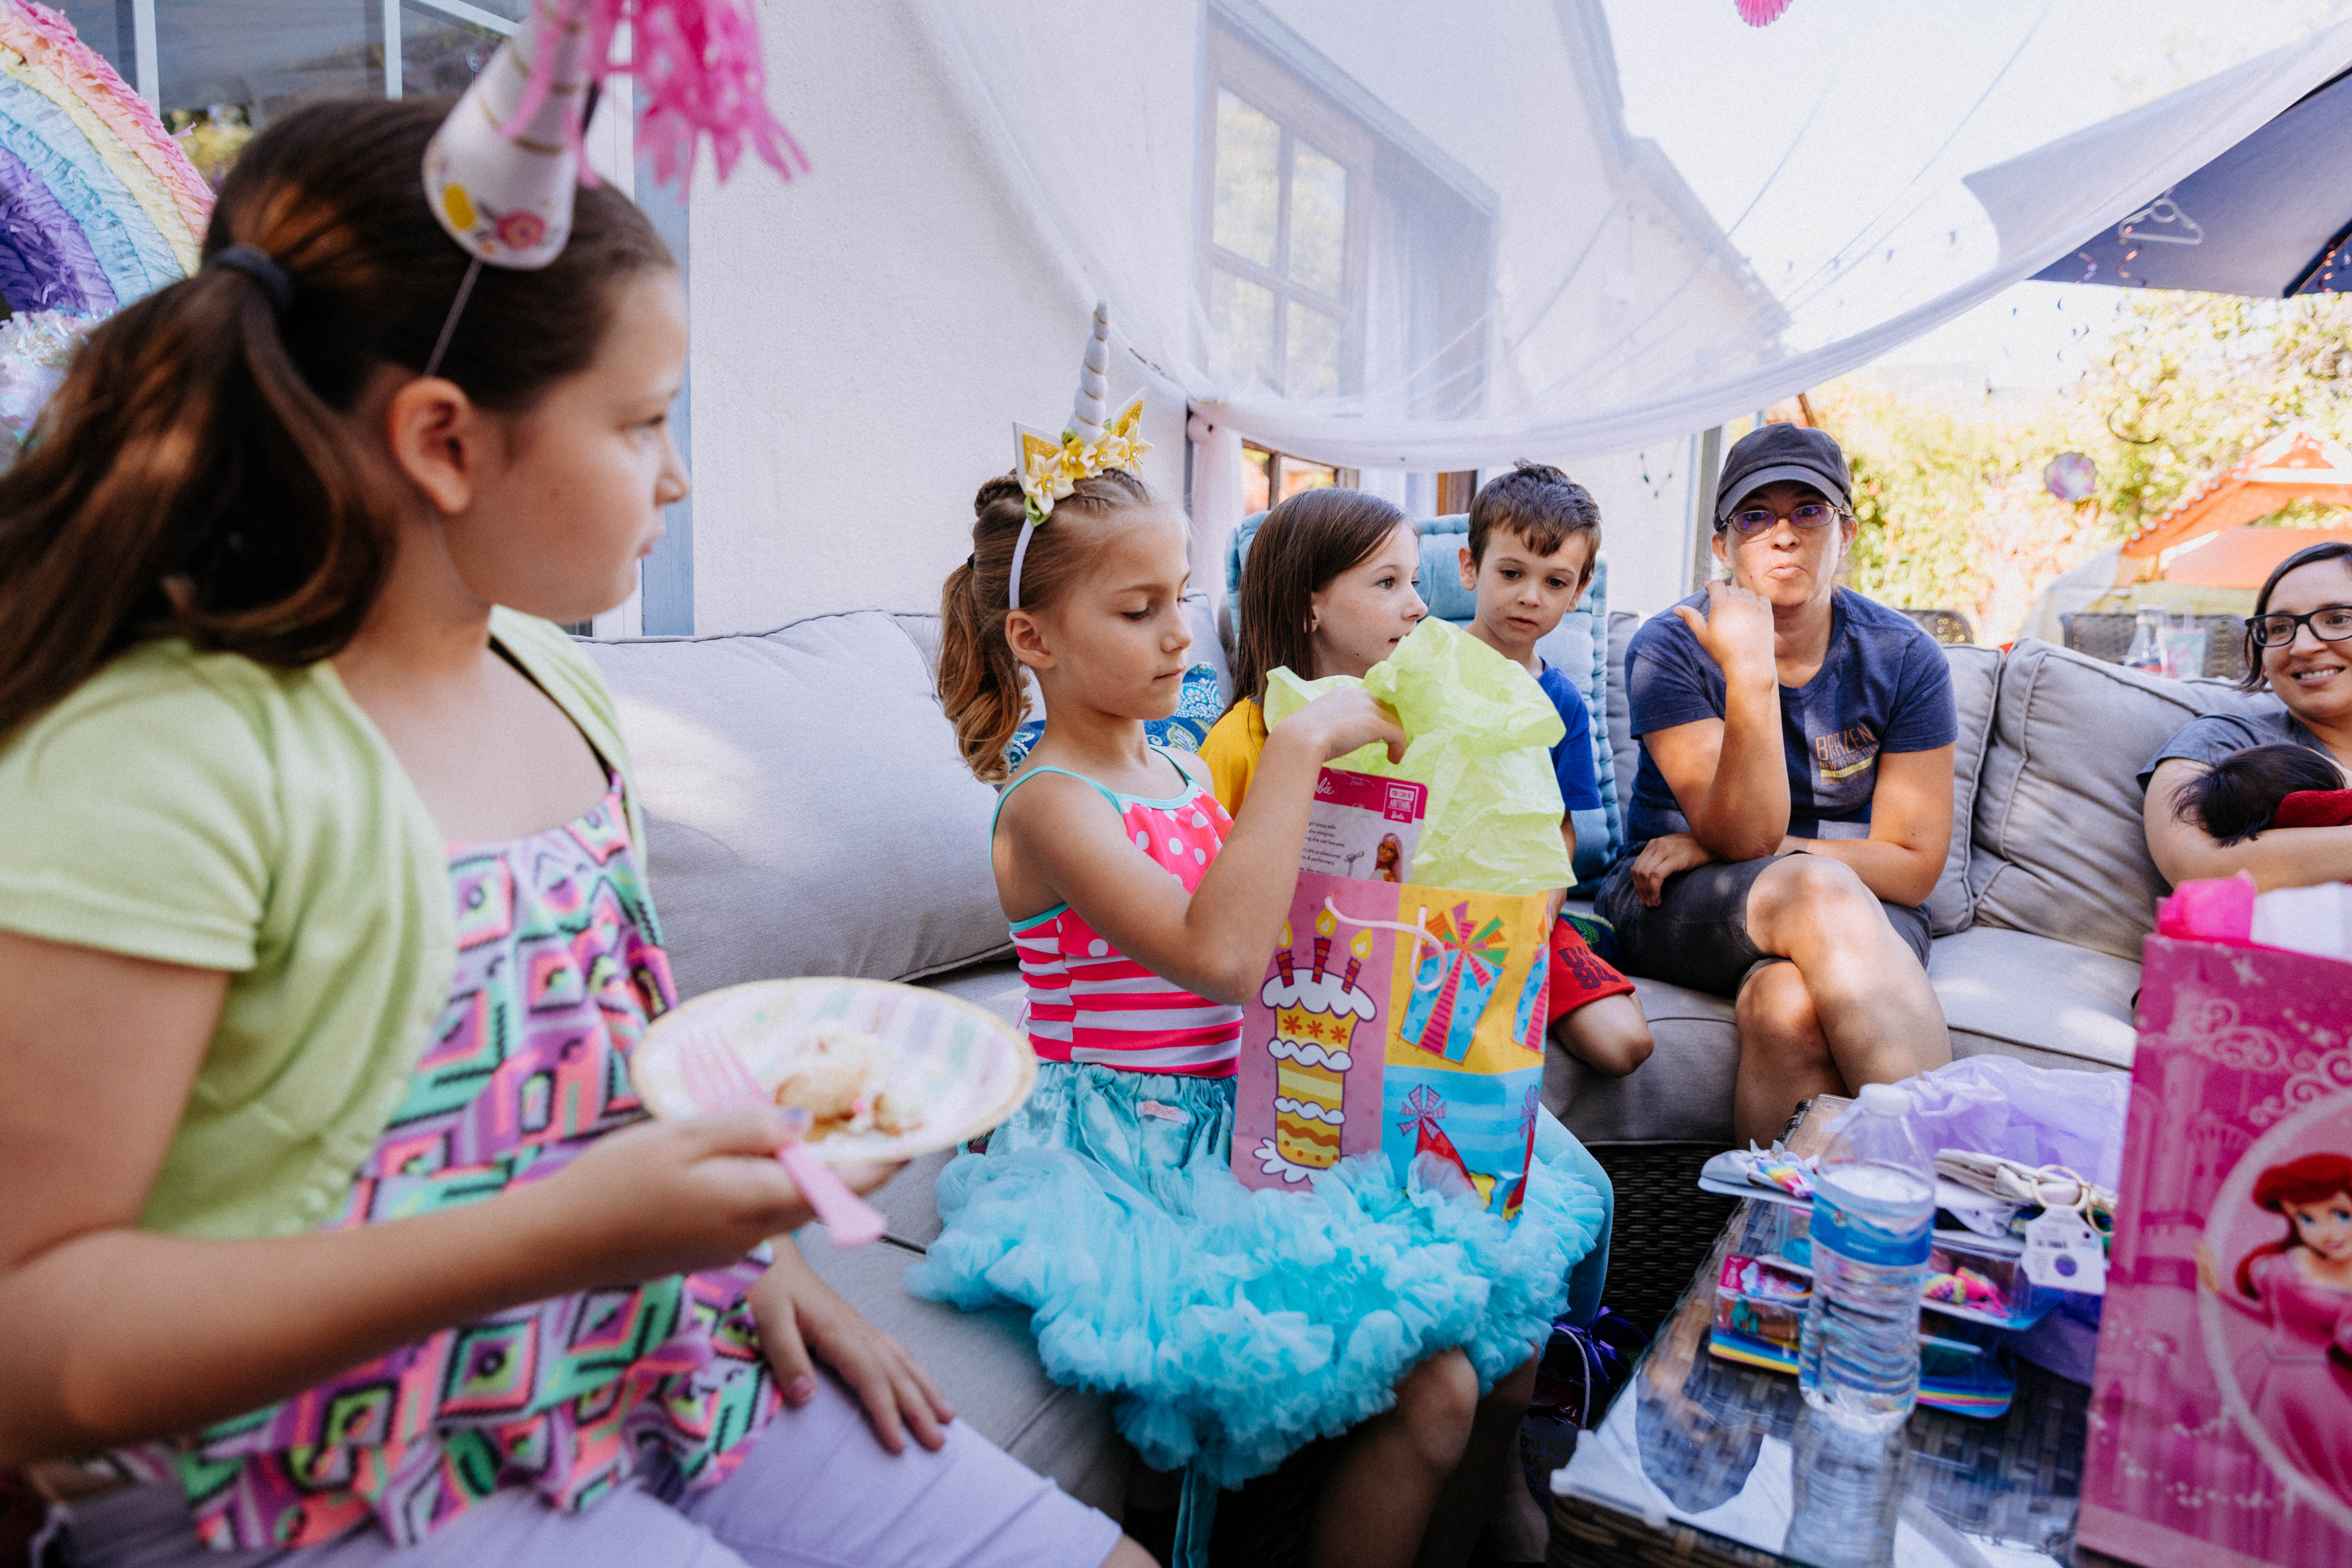
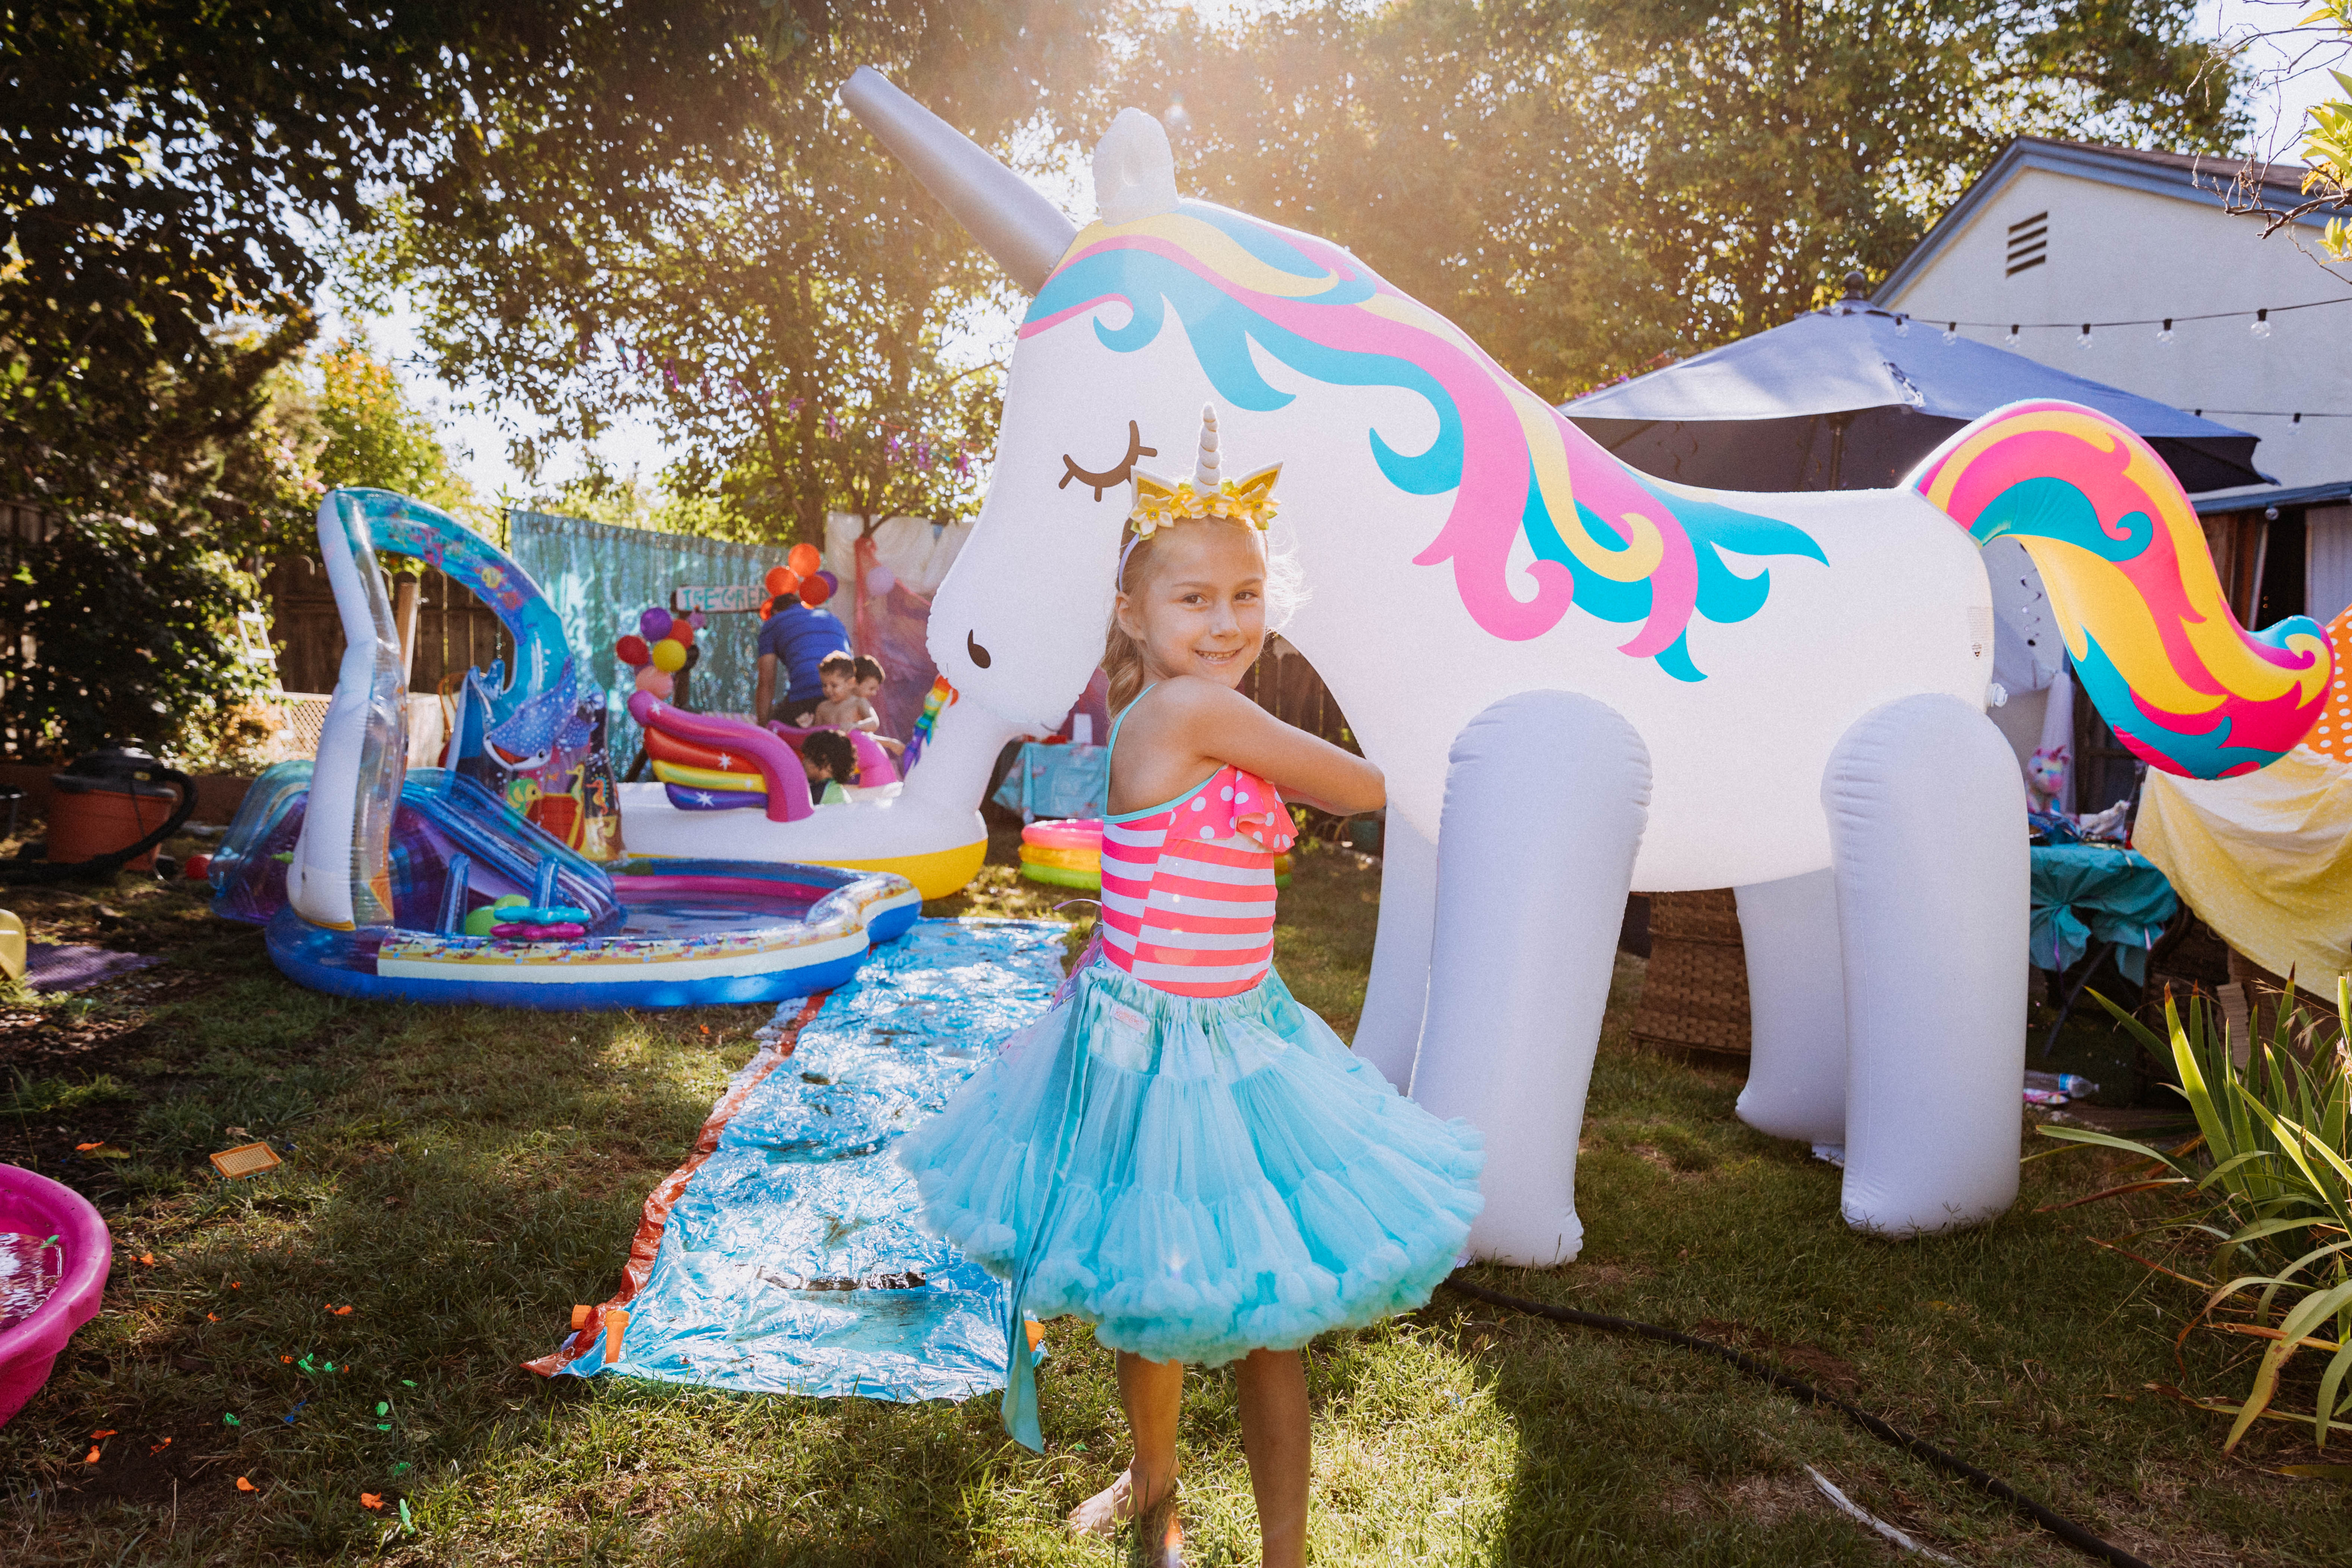
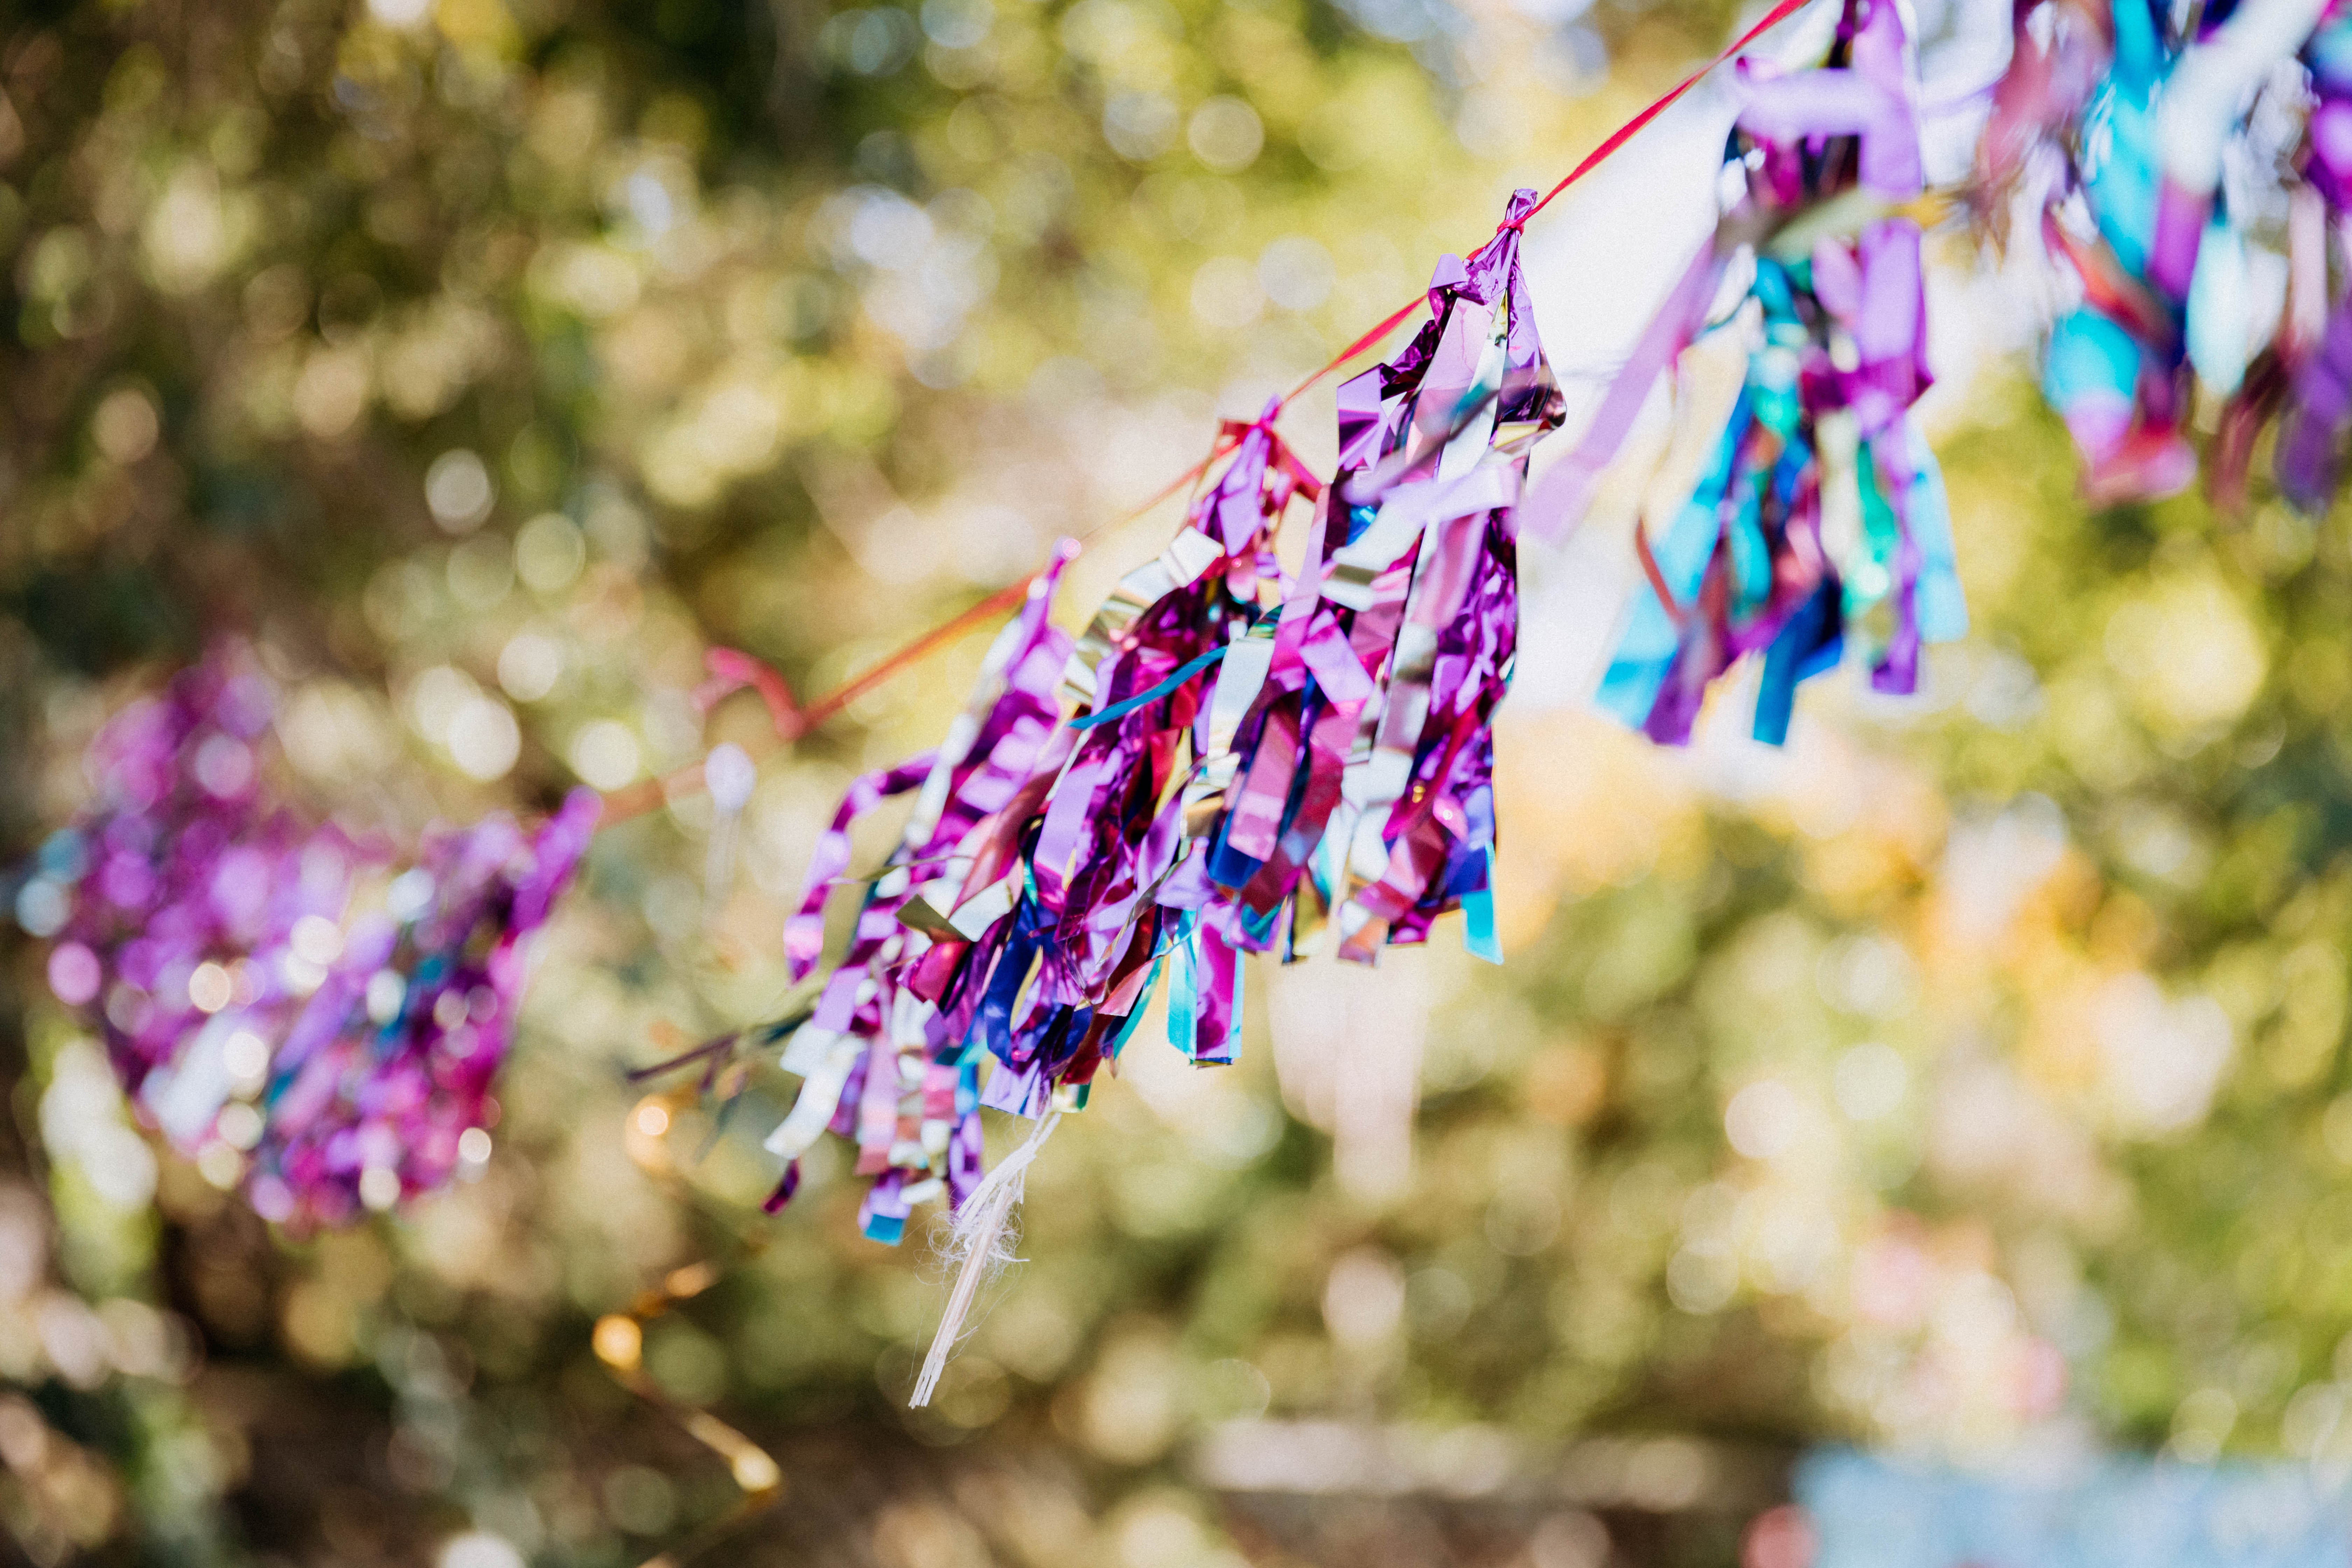
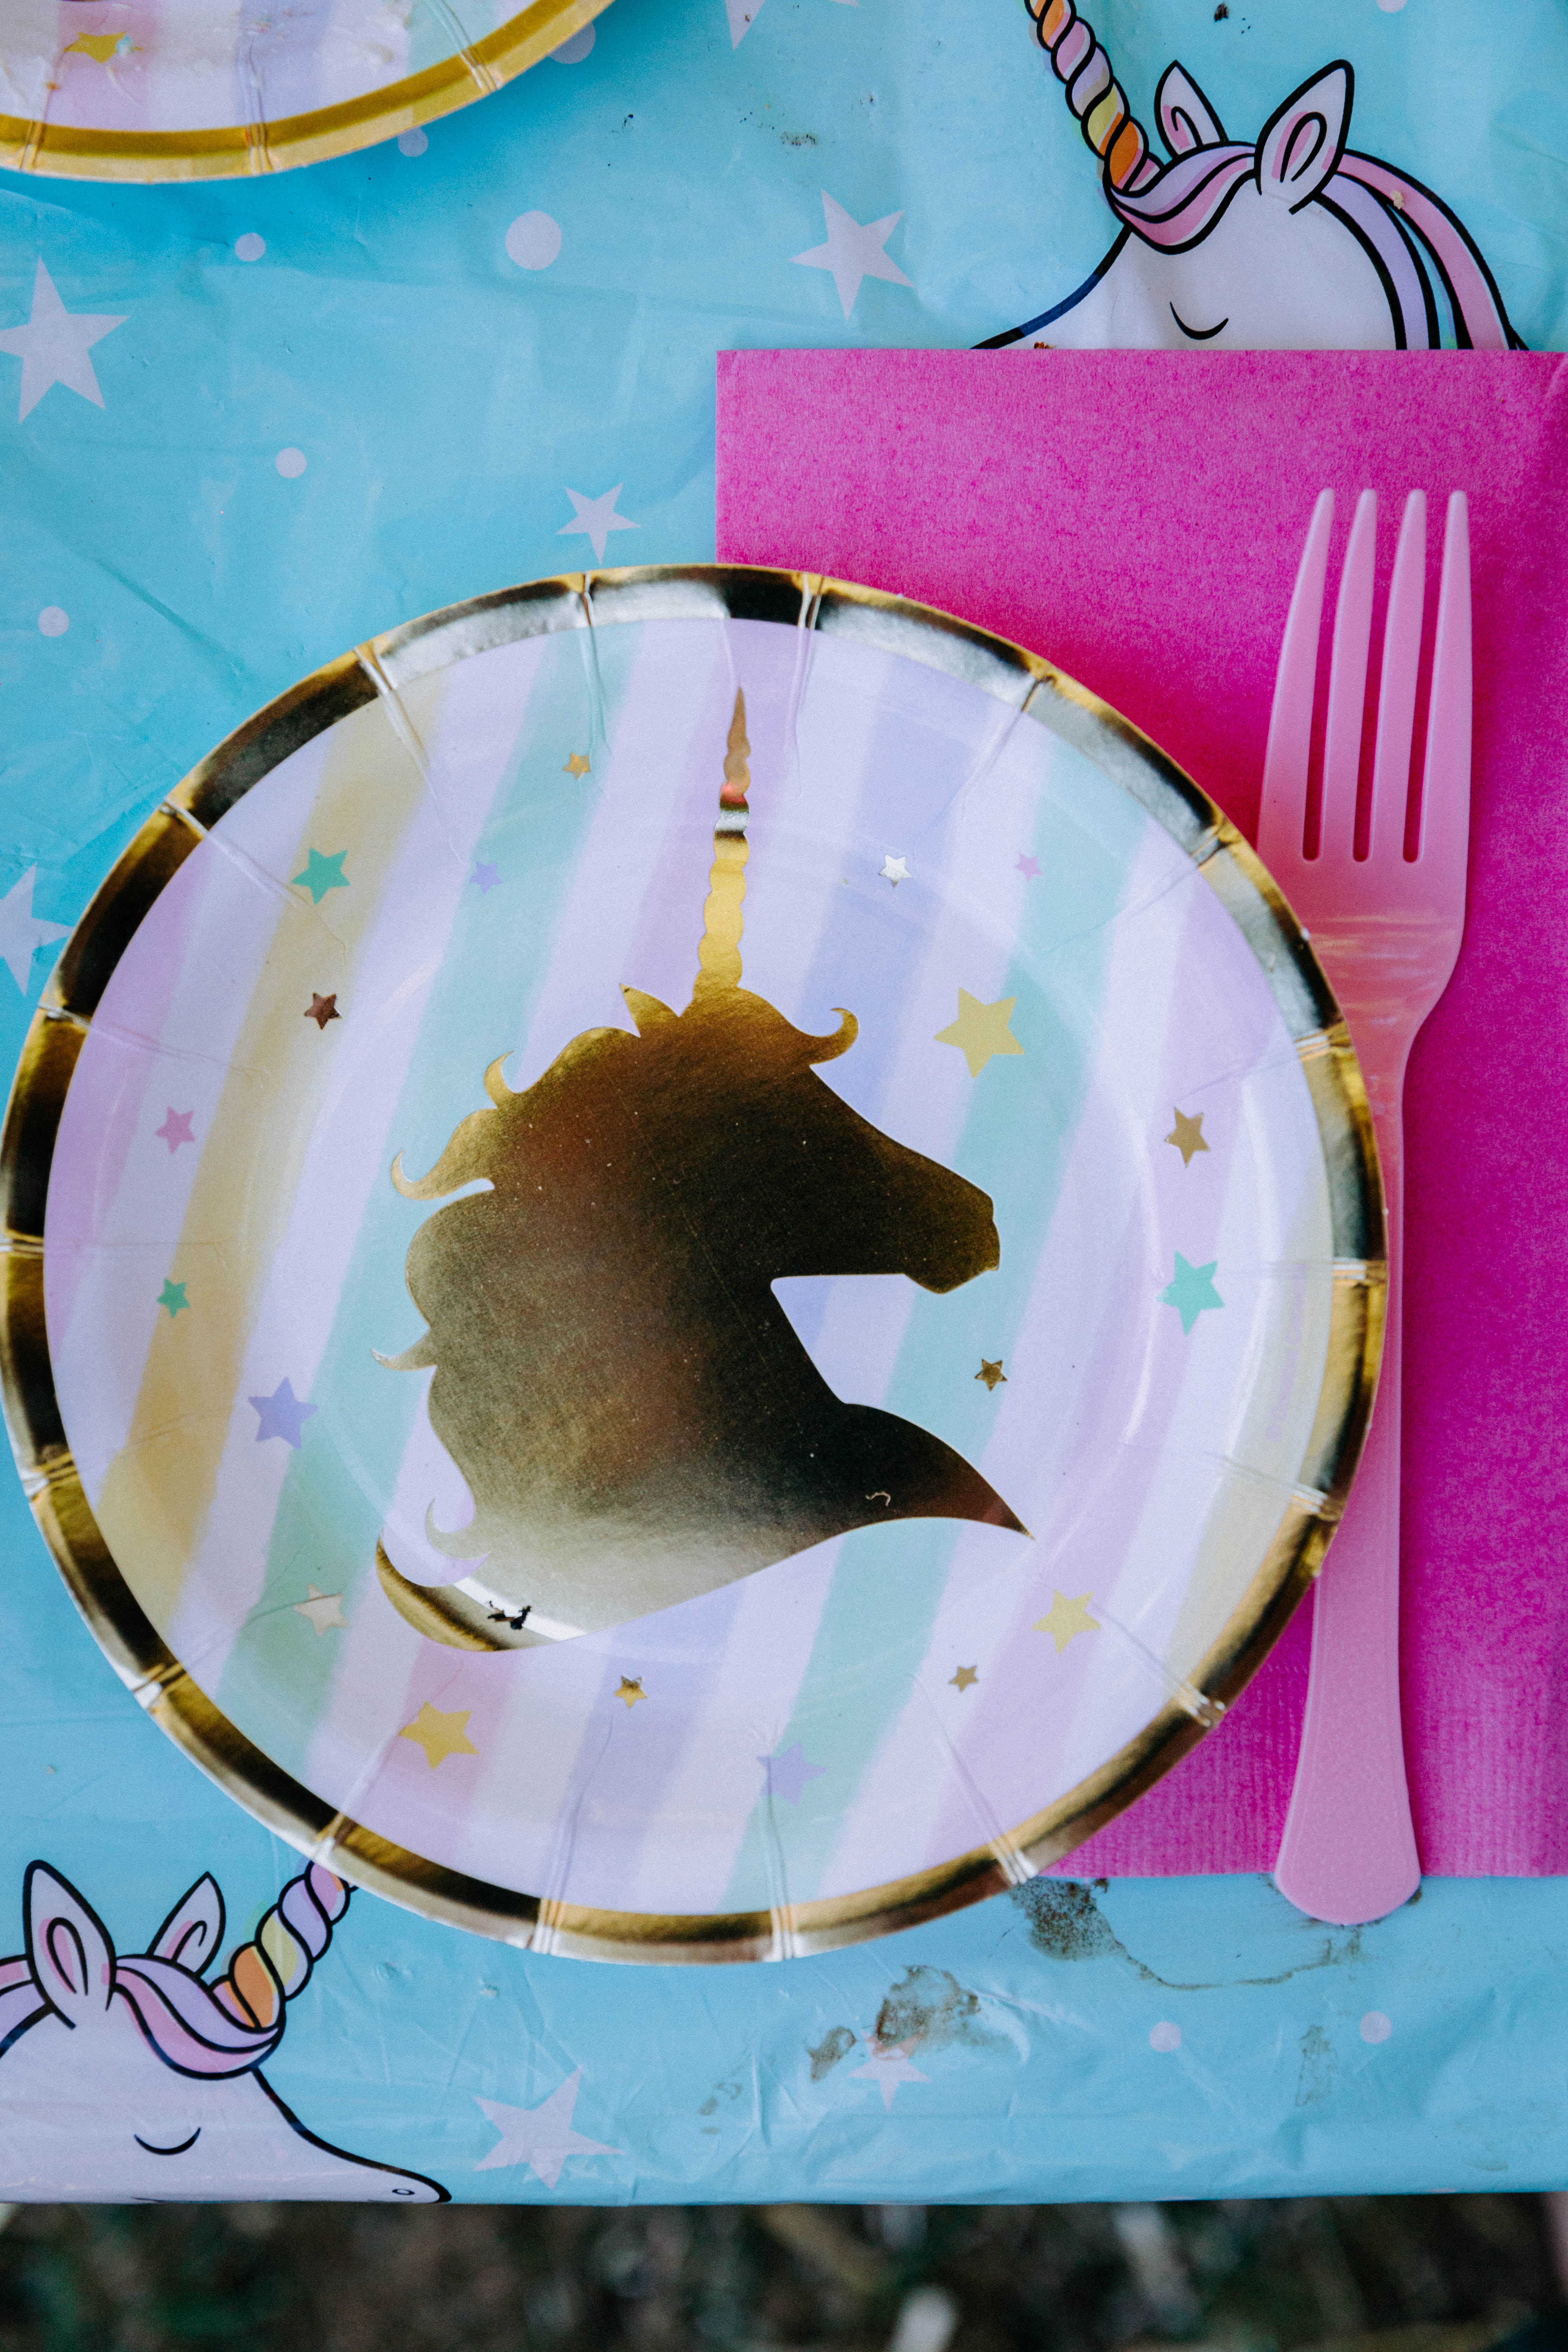
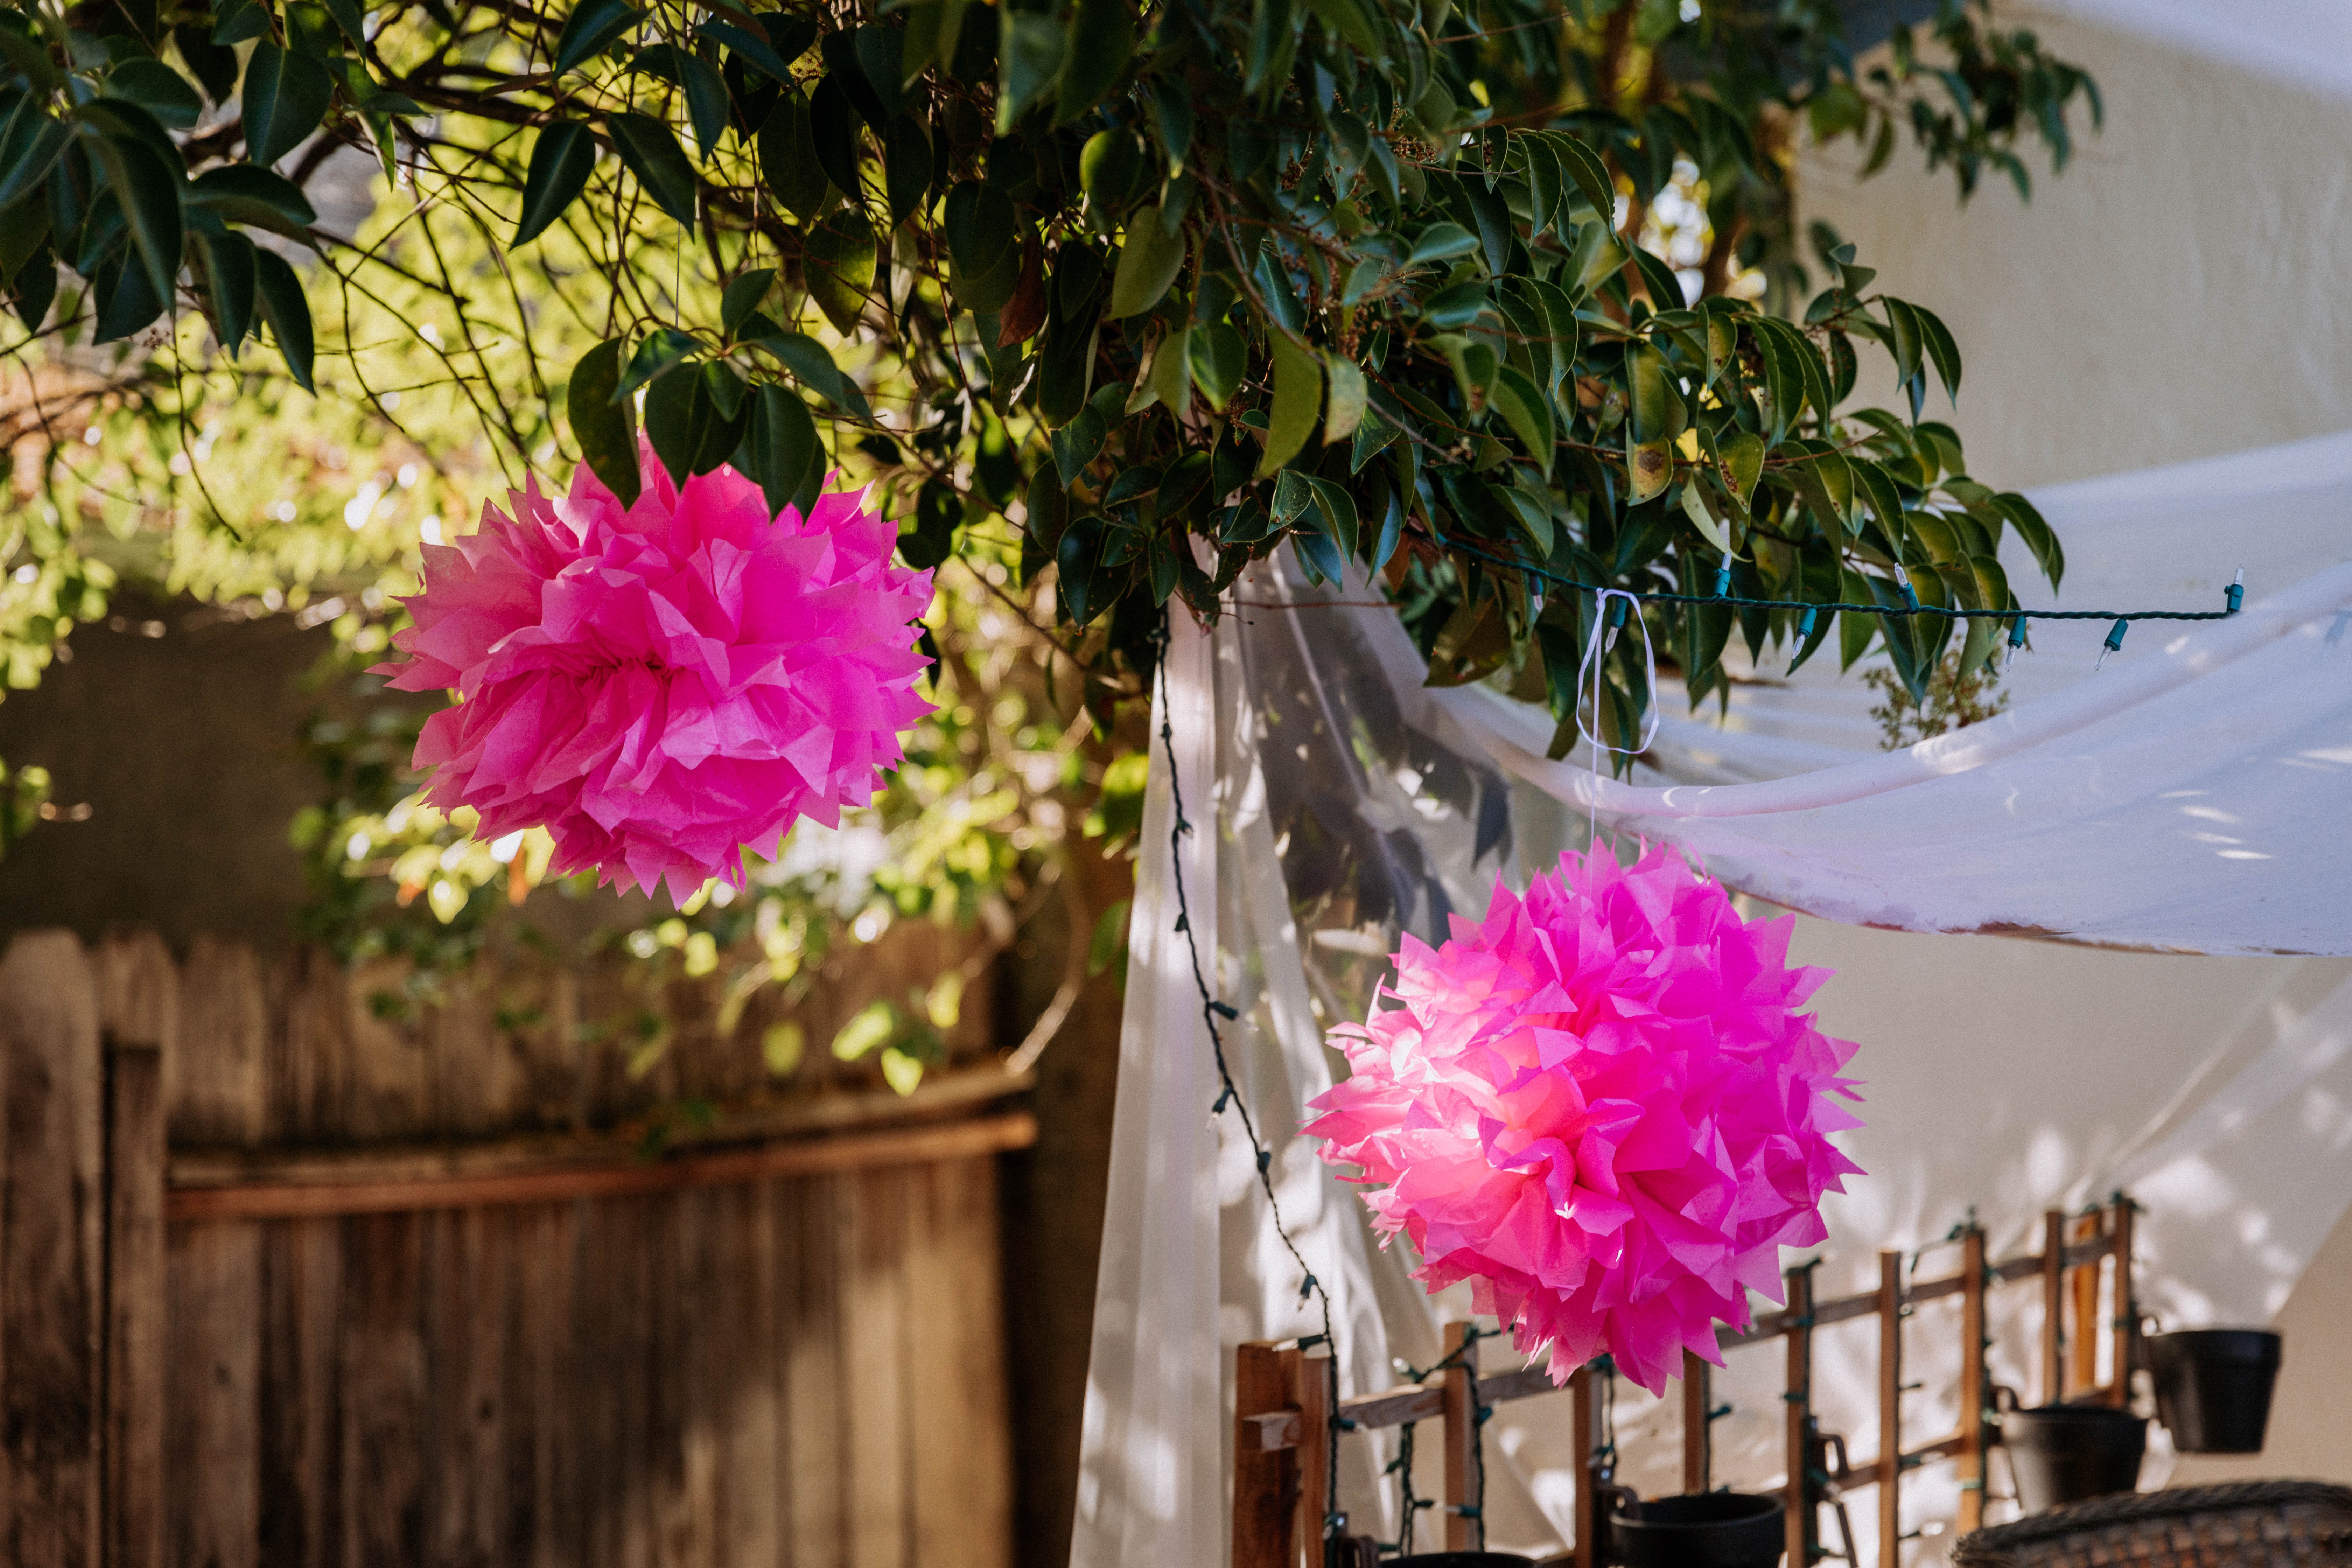
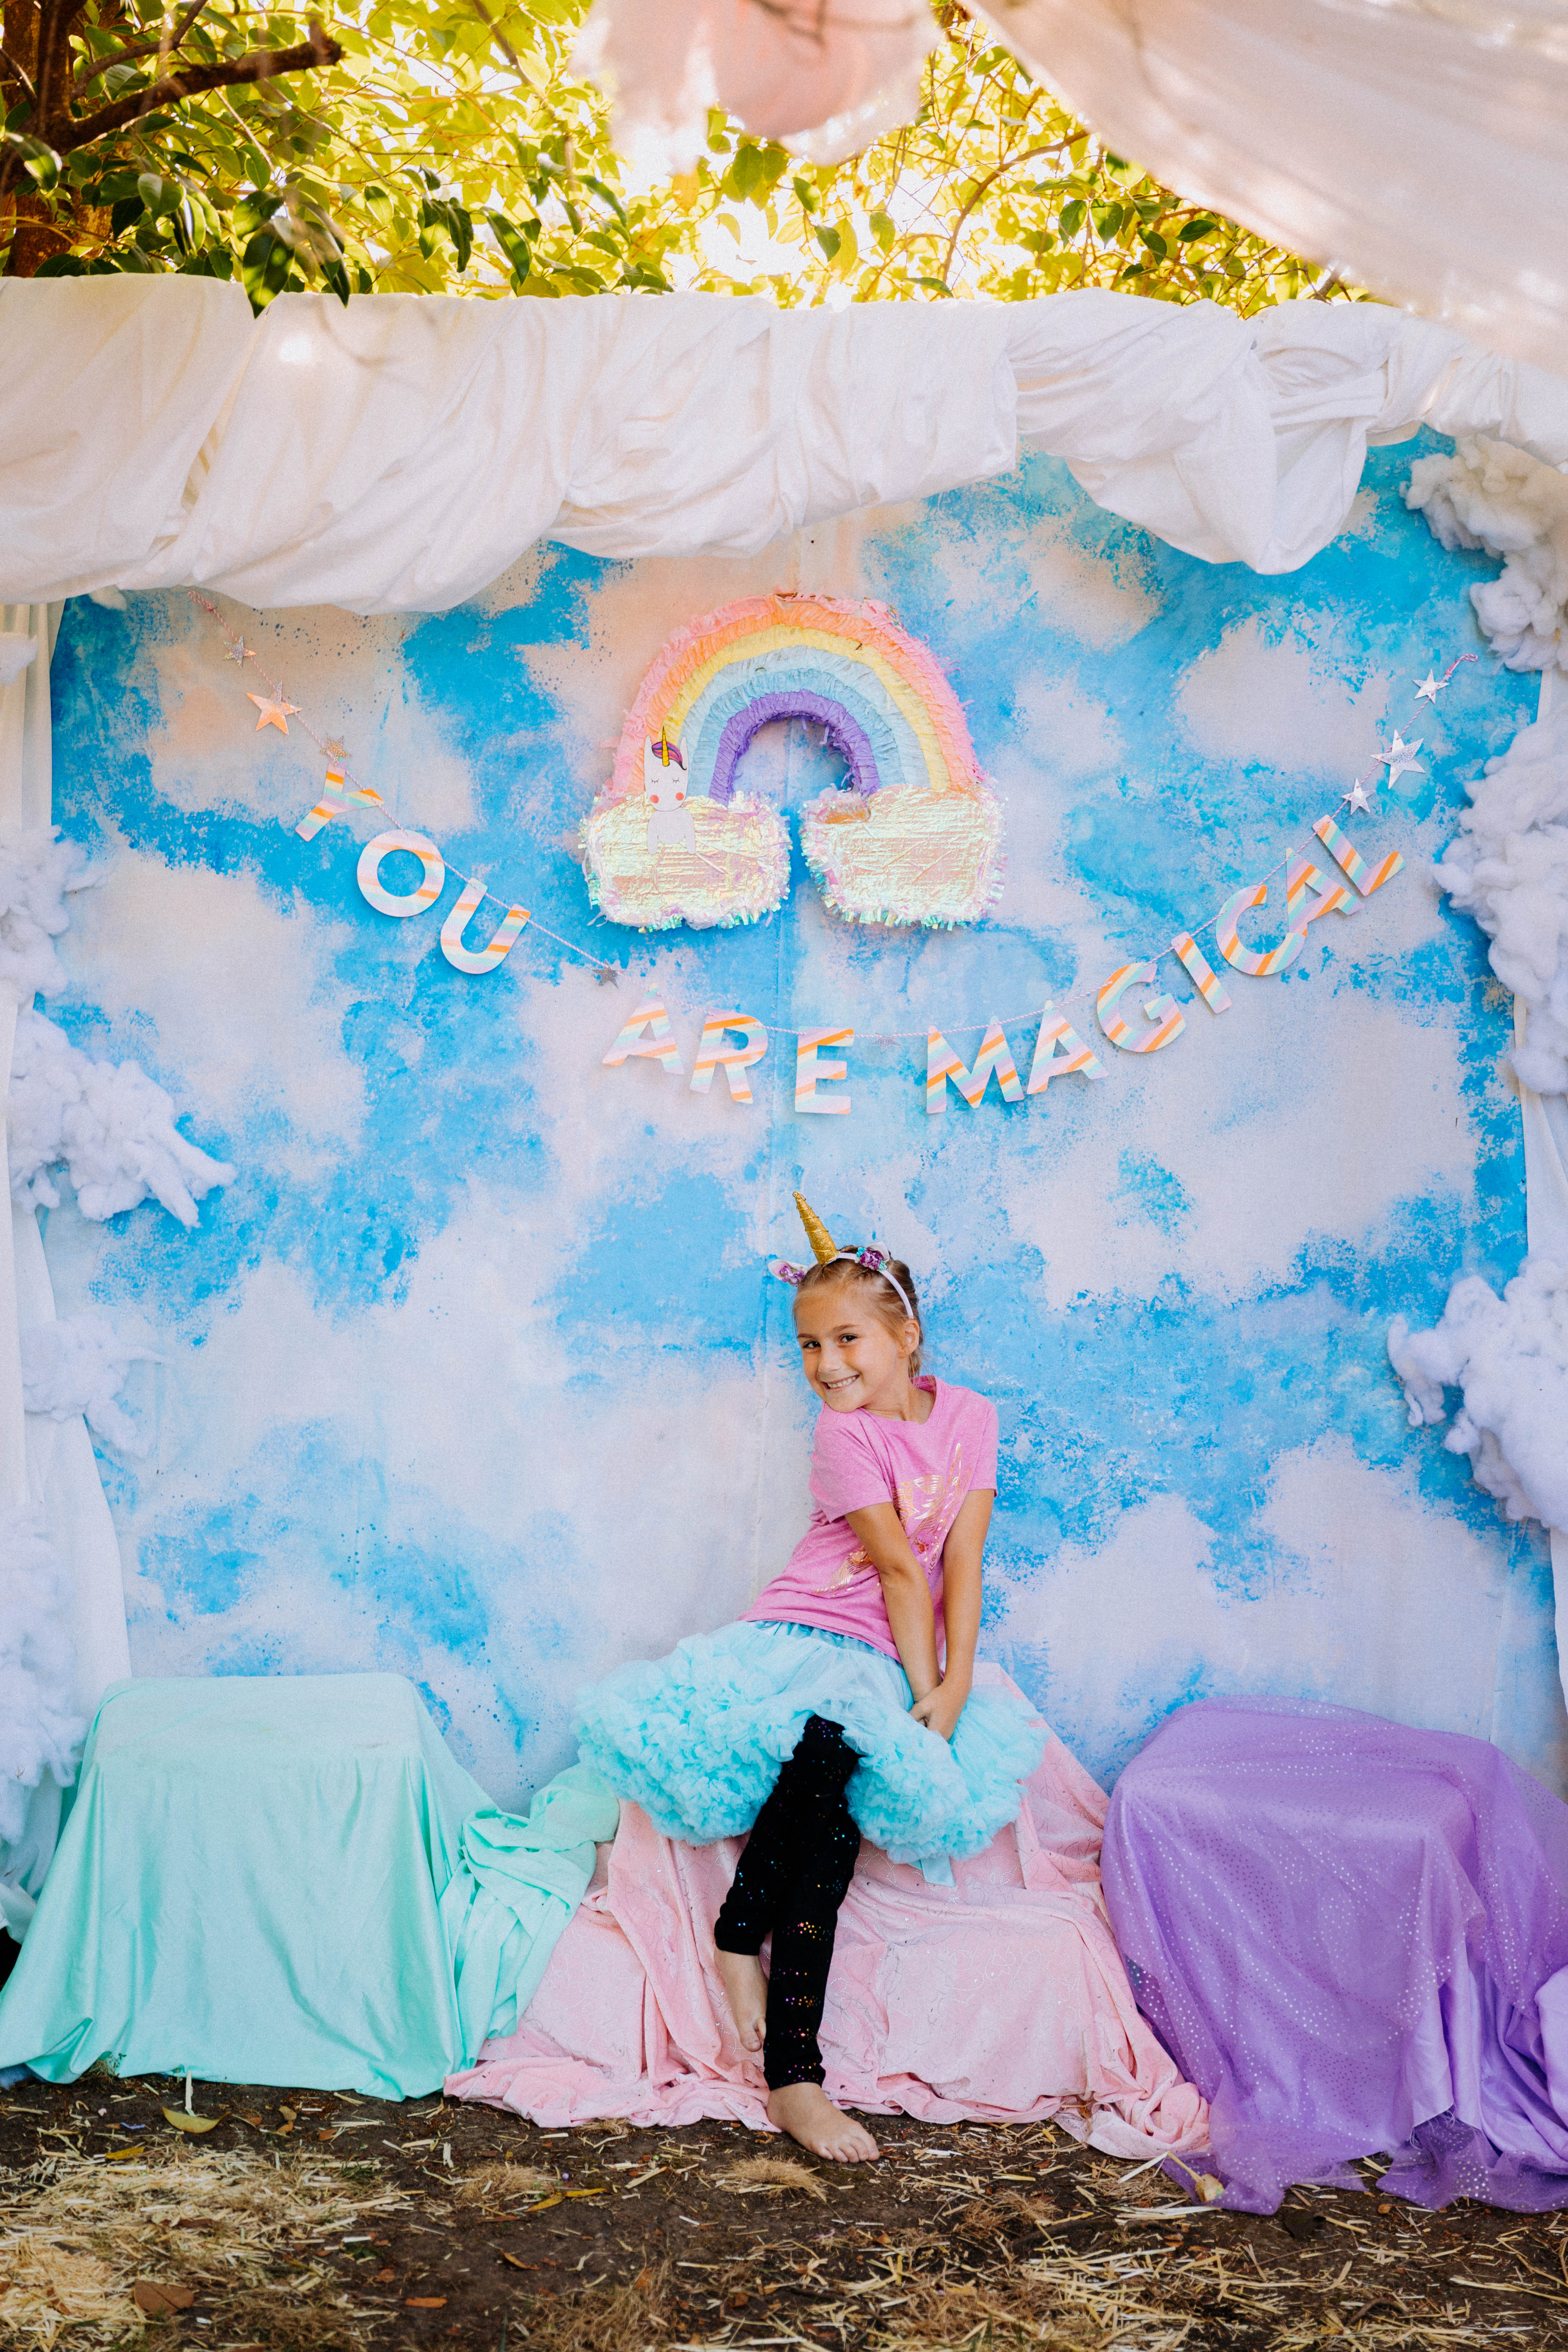
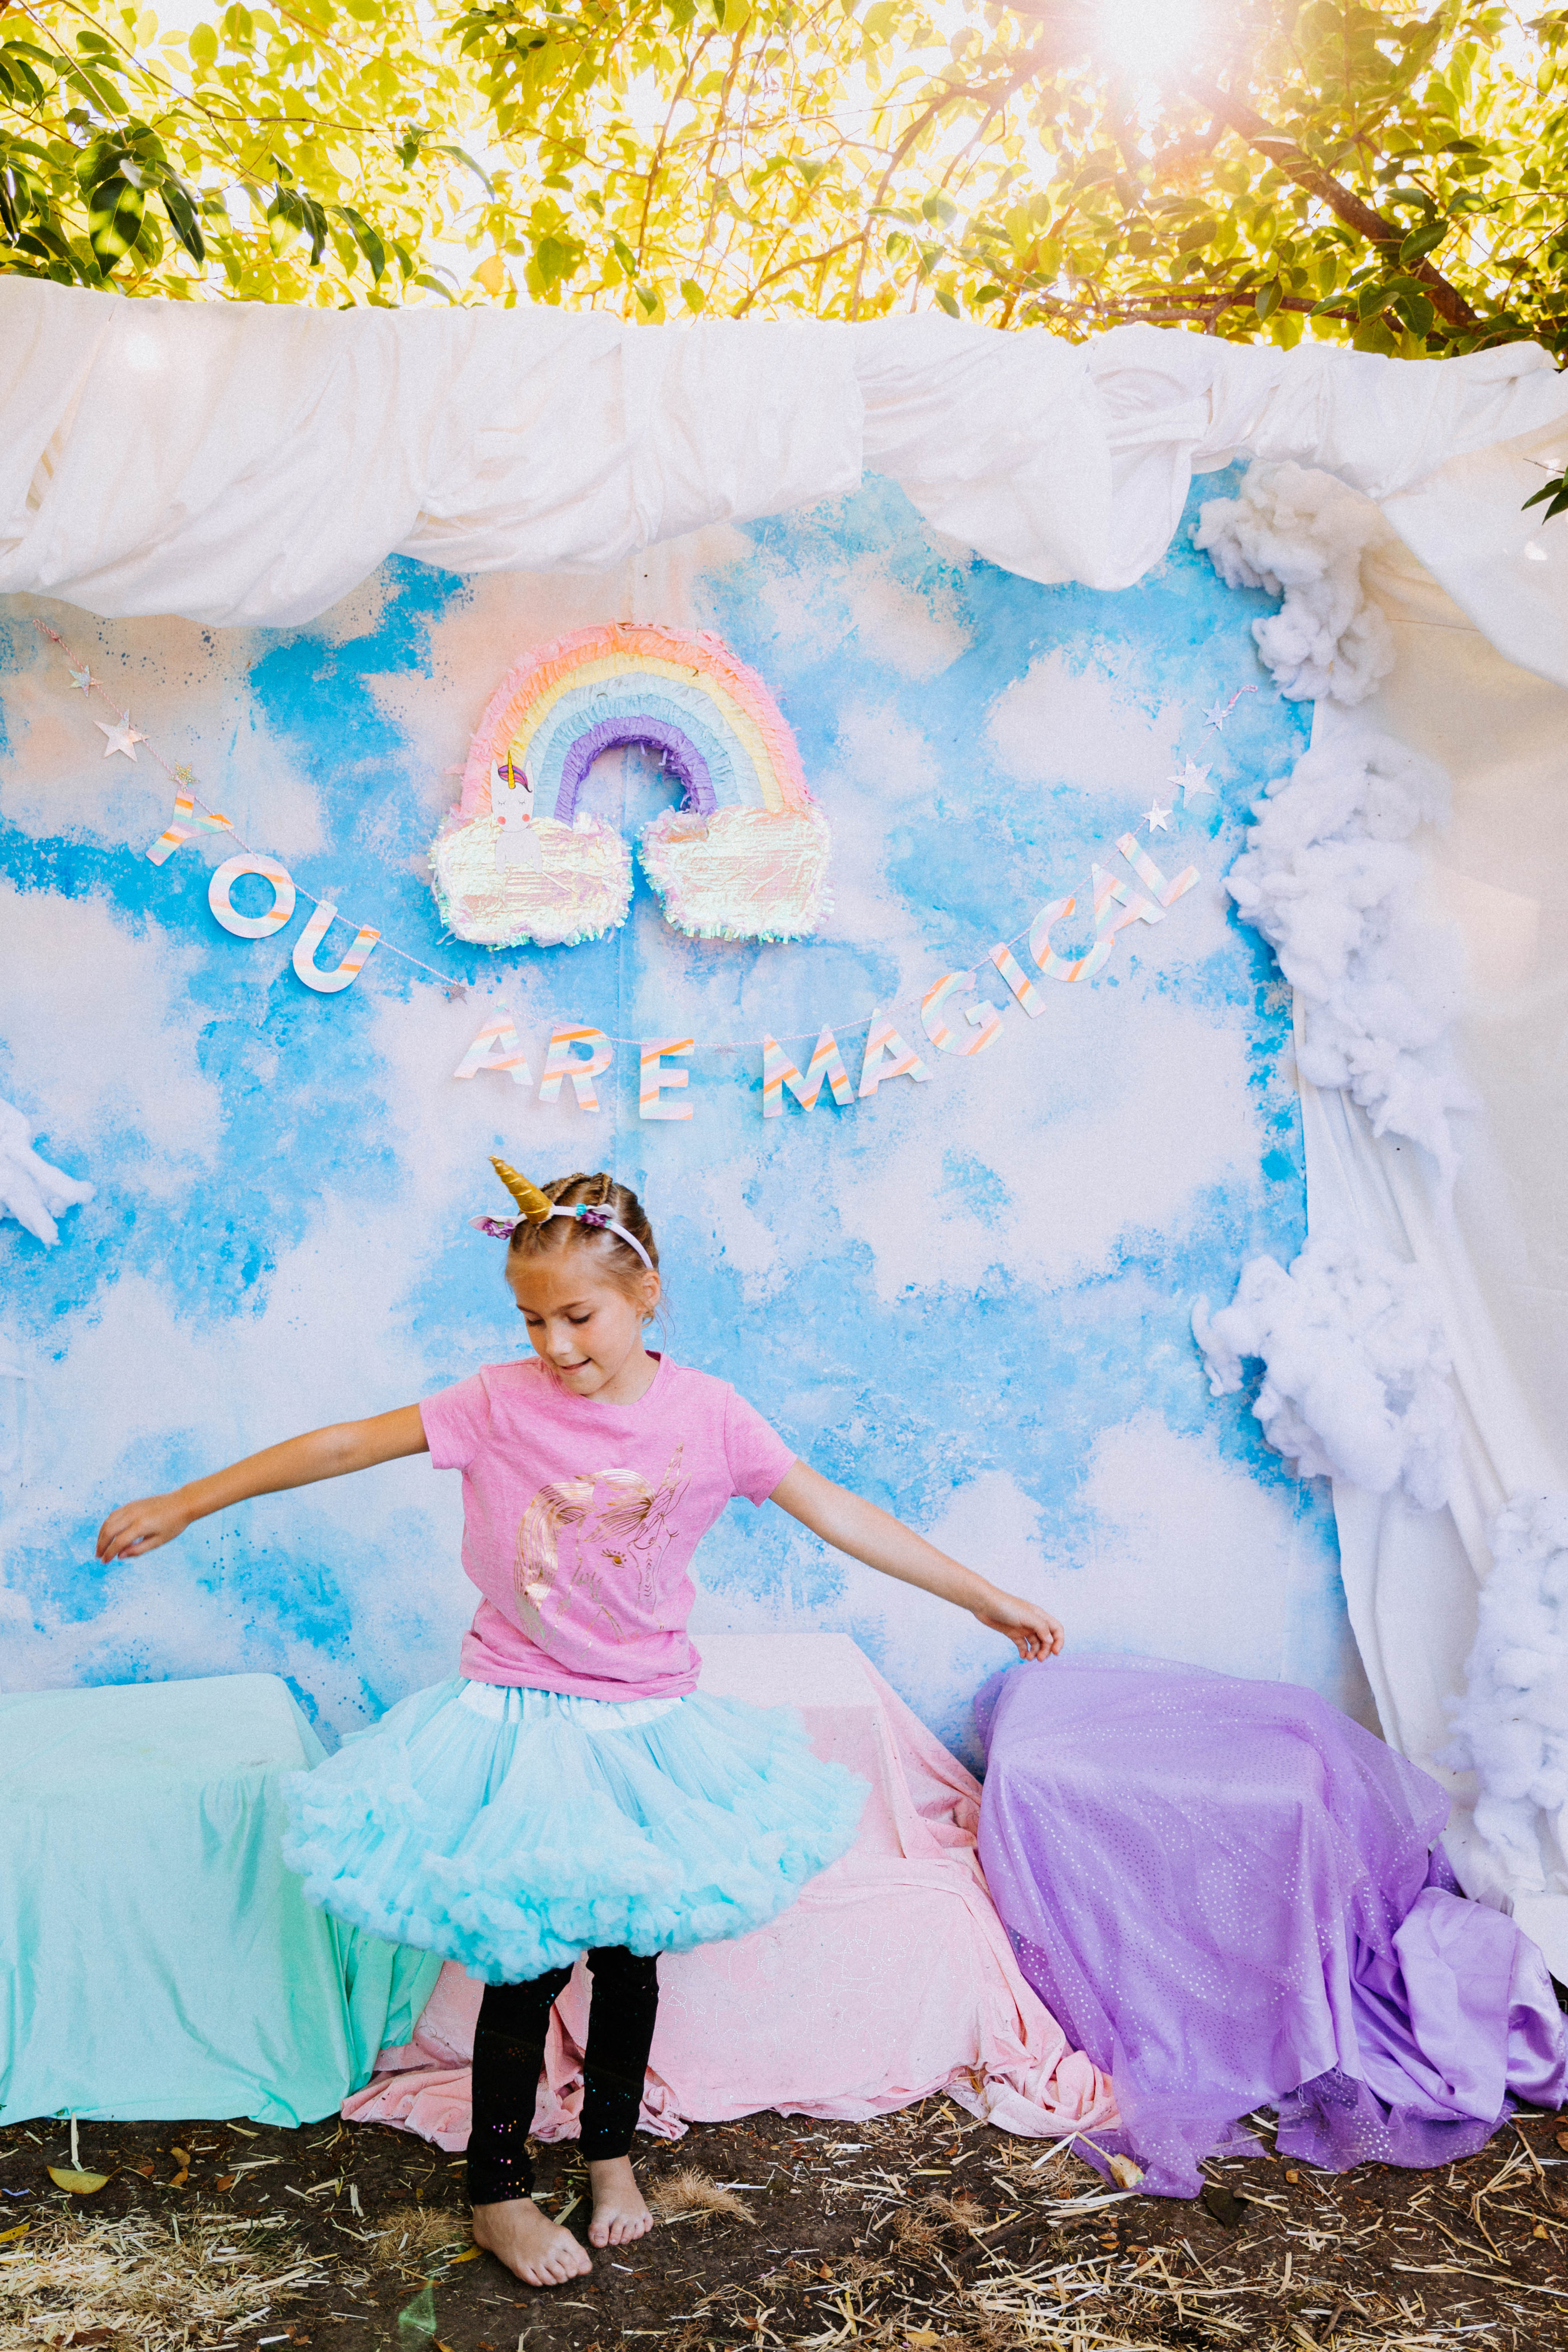
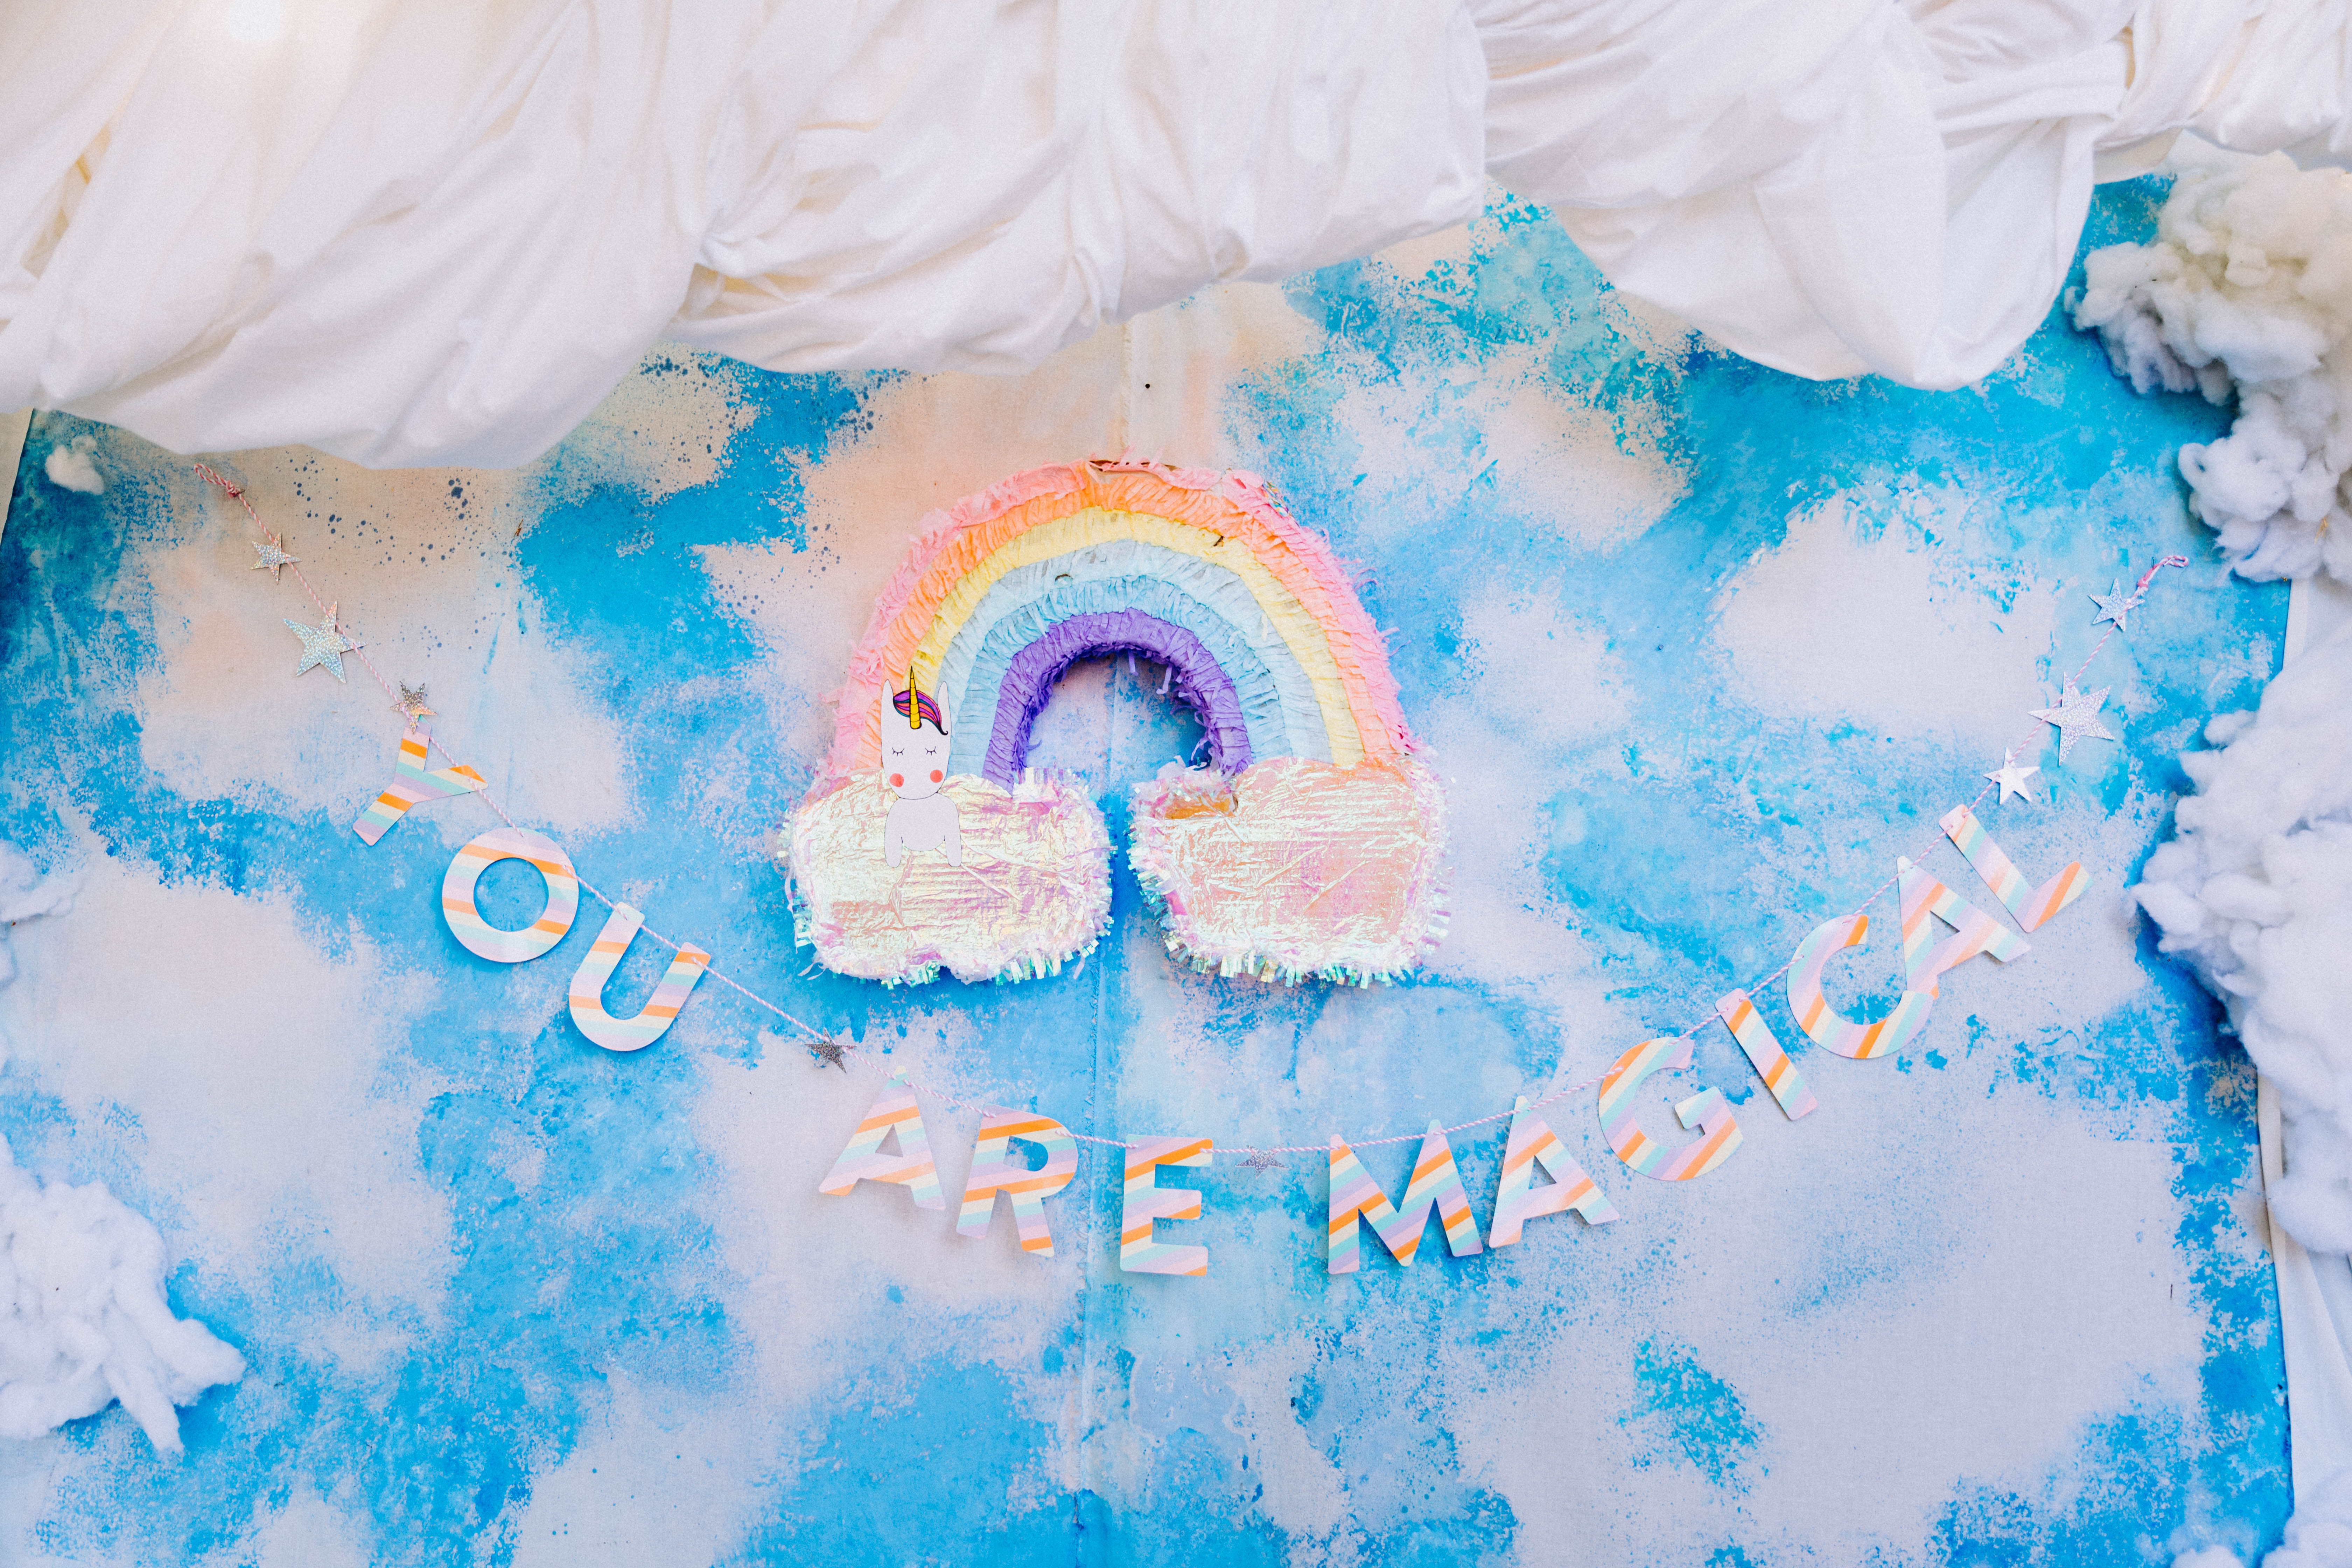
Who isn’t on the Unicorn Cra-cra-zy train lately? We are all for the magical creature at our house. Bring on the glitter and gold, rainbows and sparkles.
My daughter loves unicorns, ice cream and donuts, so we tried to incorporate those things for her birthday!


There is a LOT of pressure in our society to live the perfect life. A serious “Keeping up with the Jones’s” obsession, as they call it. I do not claim to be a super mom crafting professional, but rather, just an artist giving it my best or sometimes just my experimental attempt at projects!
Years ago when we were living in our small 1950’s basement apartment we made gingerbread houses… tried to… from scratch. It was an experiment to say the least. As artists it is important not to kick yourself every time you got something wrong but rather, learn from whatever you did wrong, figure out how you will change it the next time and move on!
That is why I have kept this picture of my fairly pathetic attempt of a gingerbread house. At least we had a good time laughing about how bad it was. As we started to ice the gingerbread house is would droop more and more. Classic Pinterest Failure (and Pinterest wasn’t even around yet!)

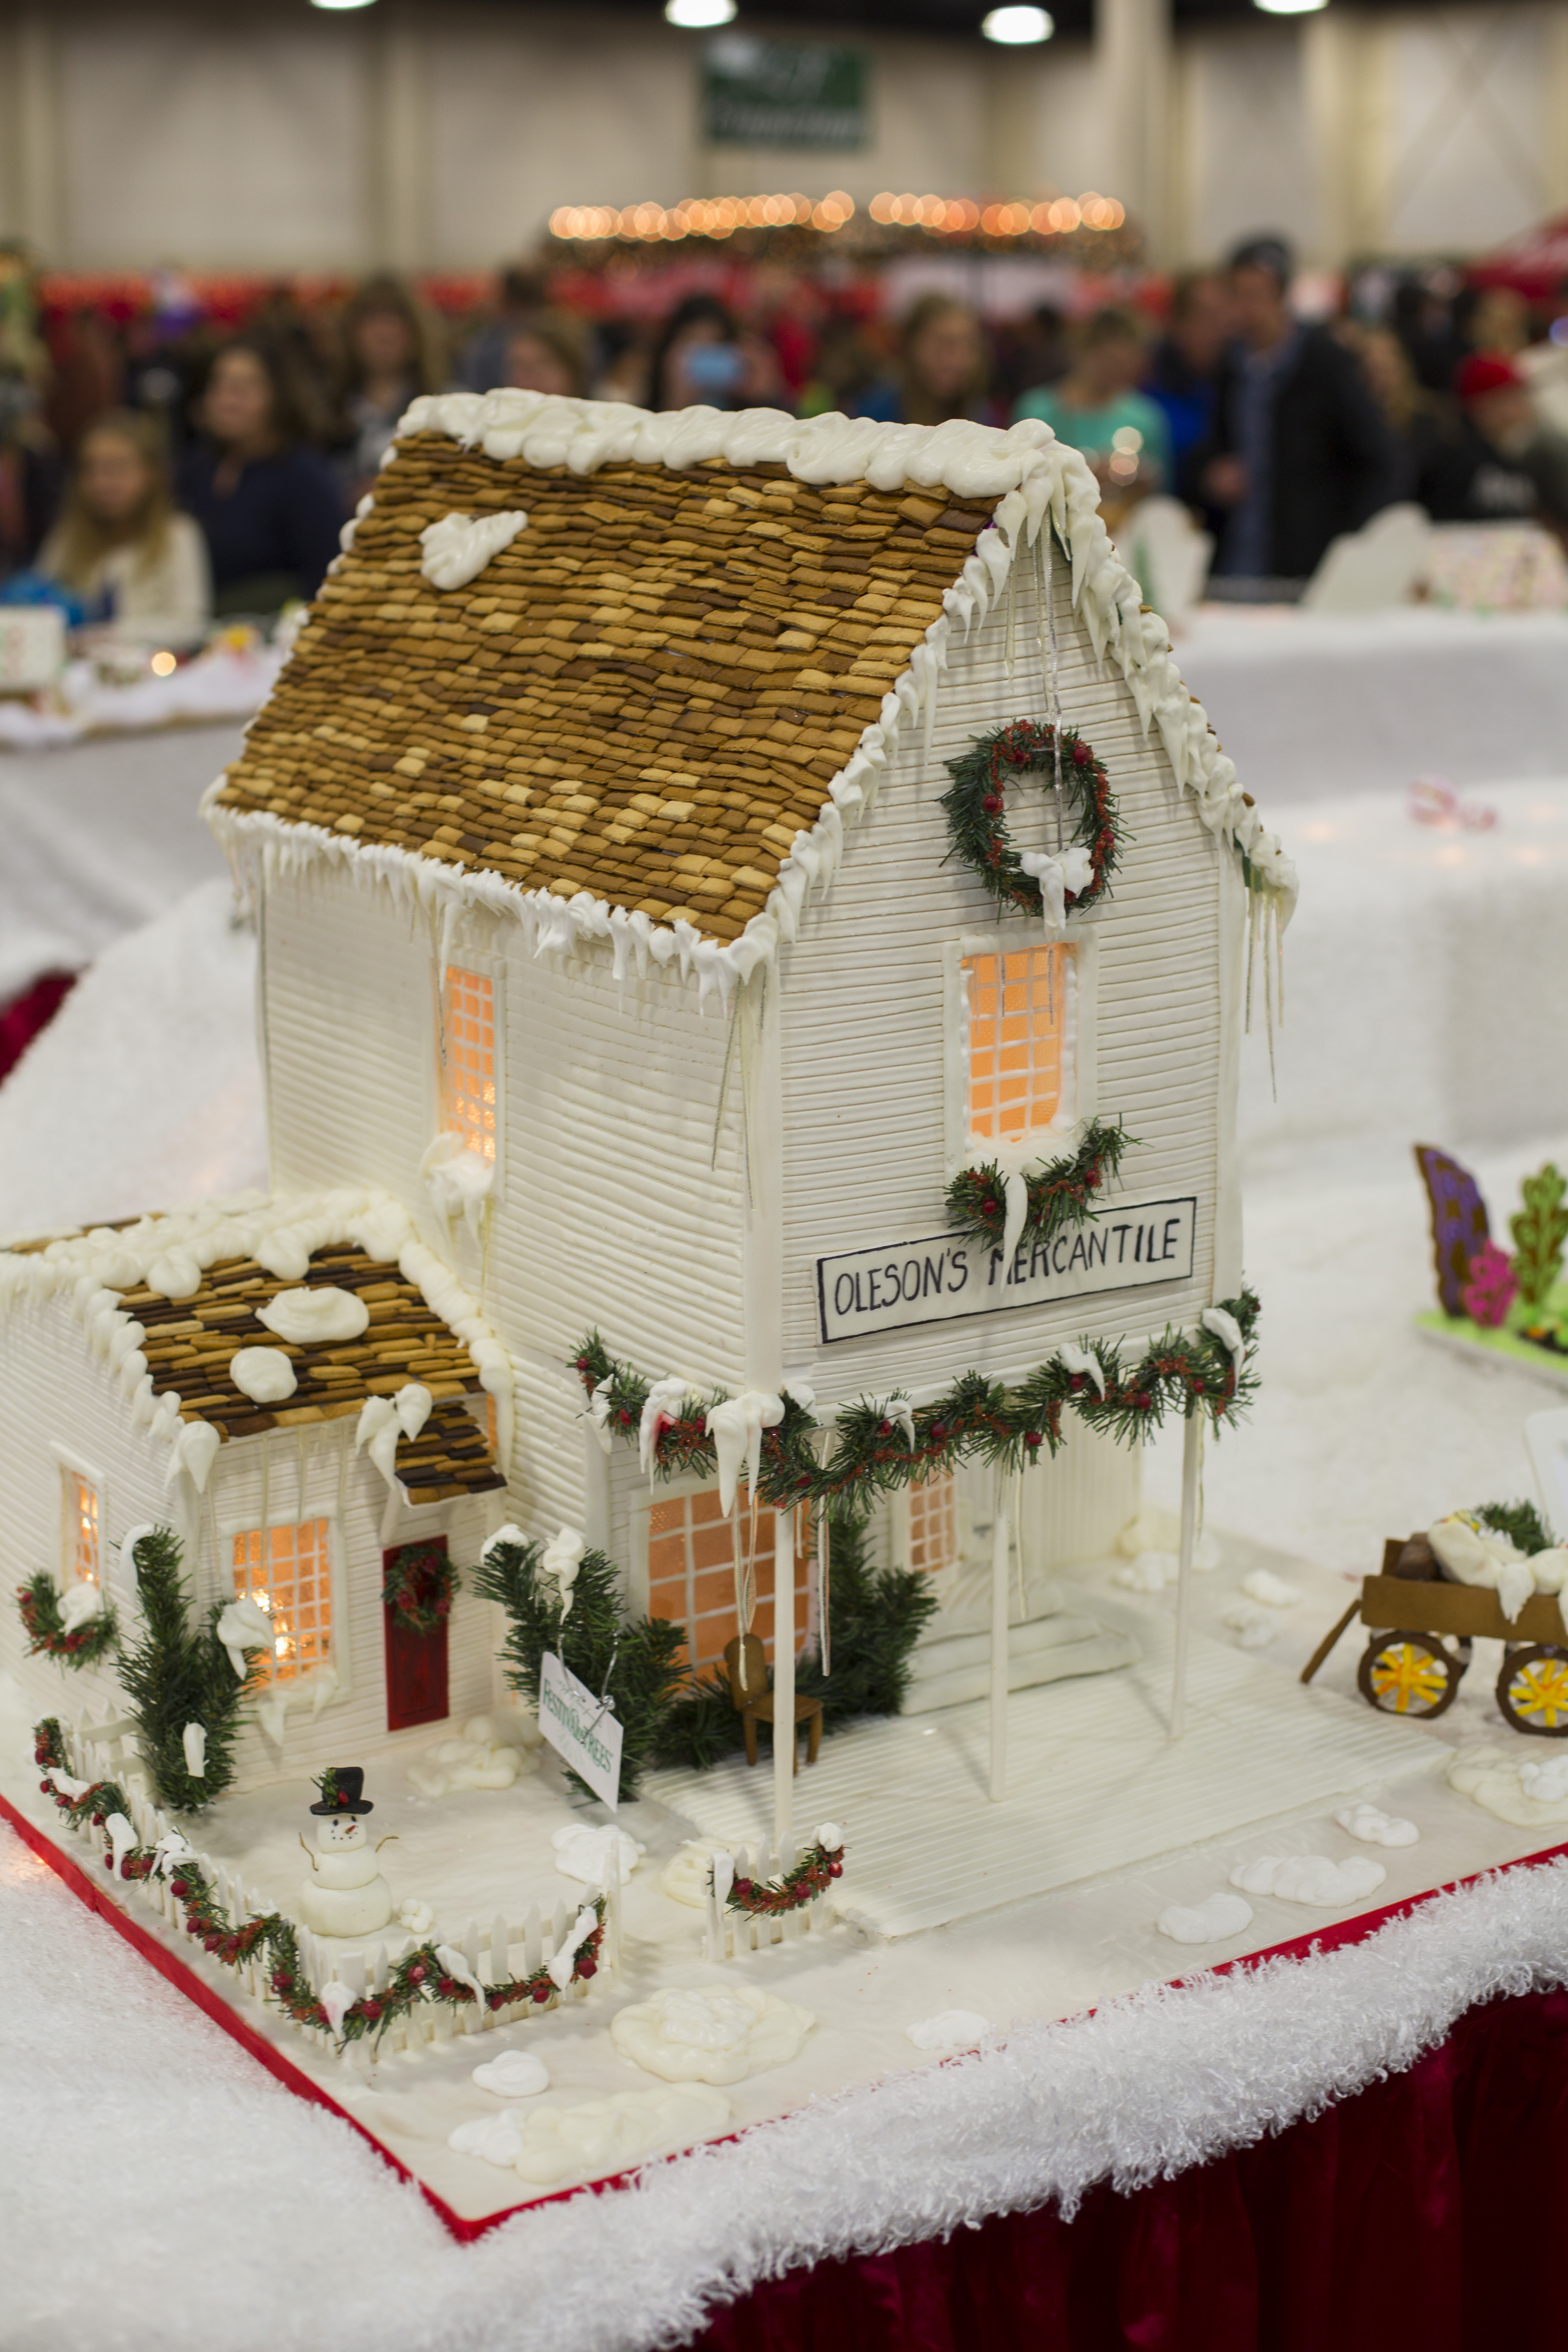
These pictures (below) are from our visit to the Festival of Trees in Sandy, UT. It is a benefit for a local children’s hospital. This is what true professional gingerbread building skill looks like.
I love the cozy log cabin look. What better combination for the frosted icing snow.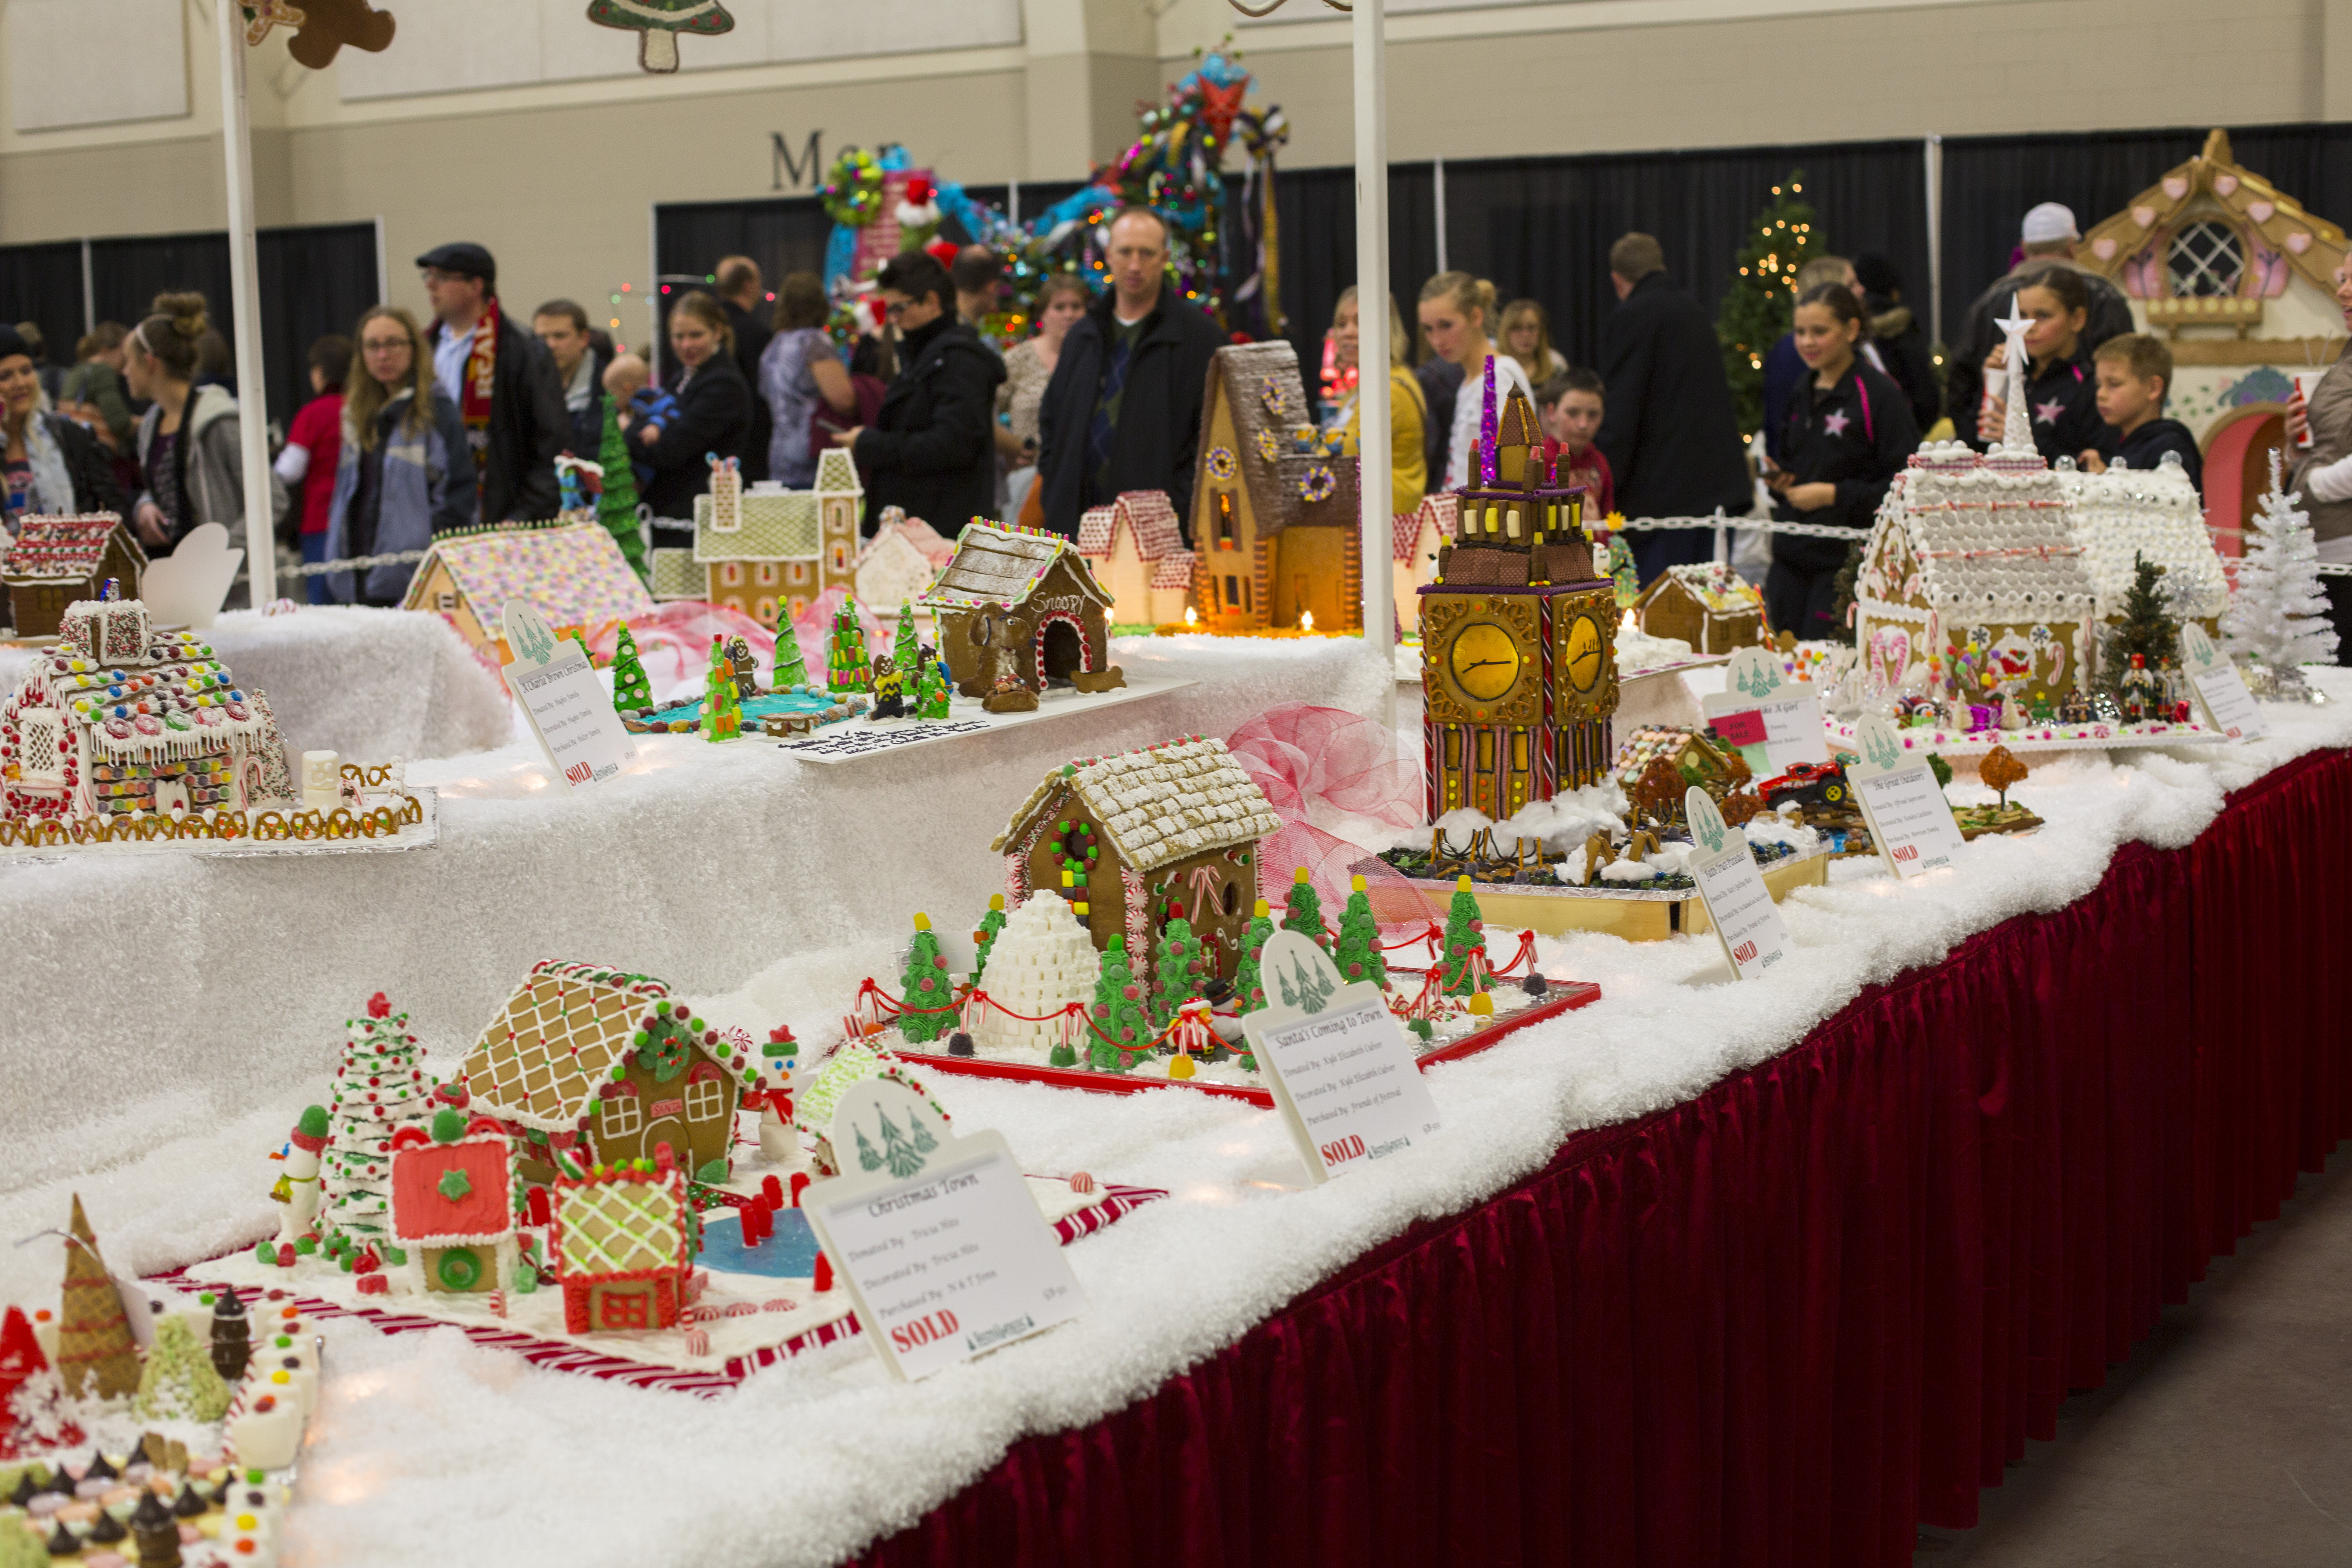

An adorable street of the Minions house from Despicable Me
The log cabin look (below) was made with stick pretzels and I loved the colorful candy cane sticks use for the porch poles. Blueberry and blue raspberry are my favorite!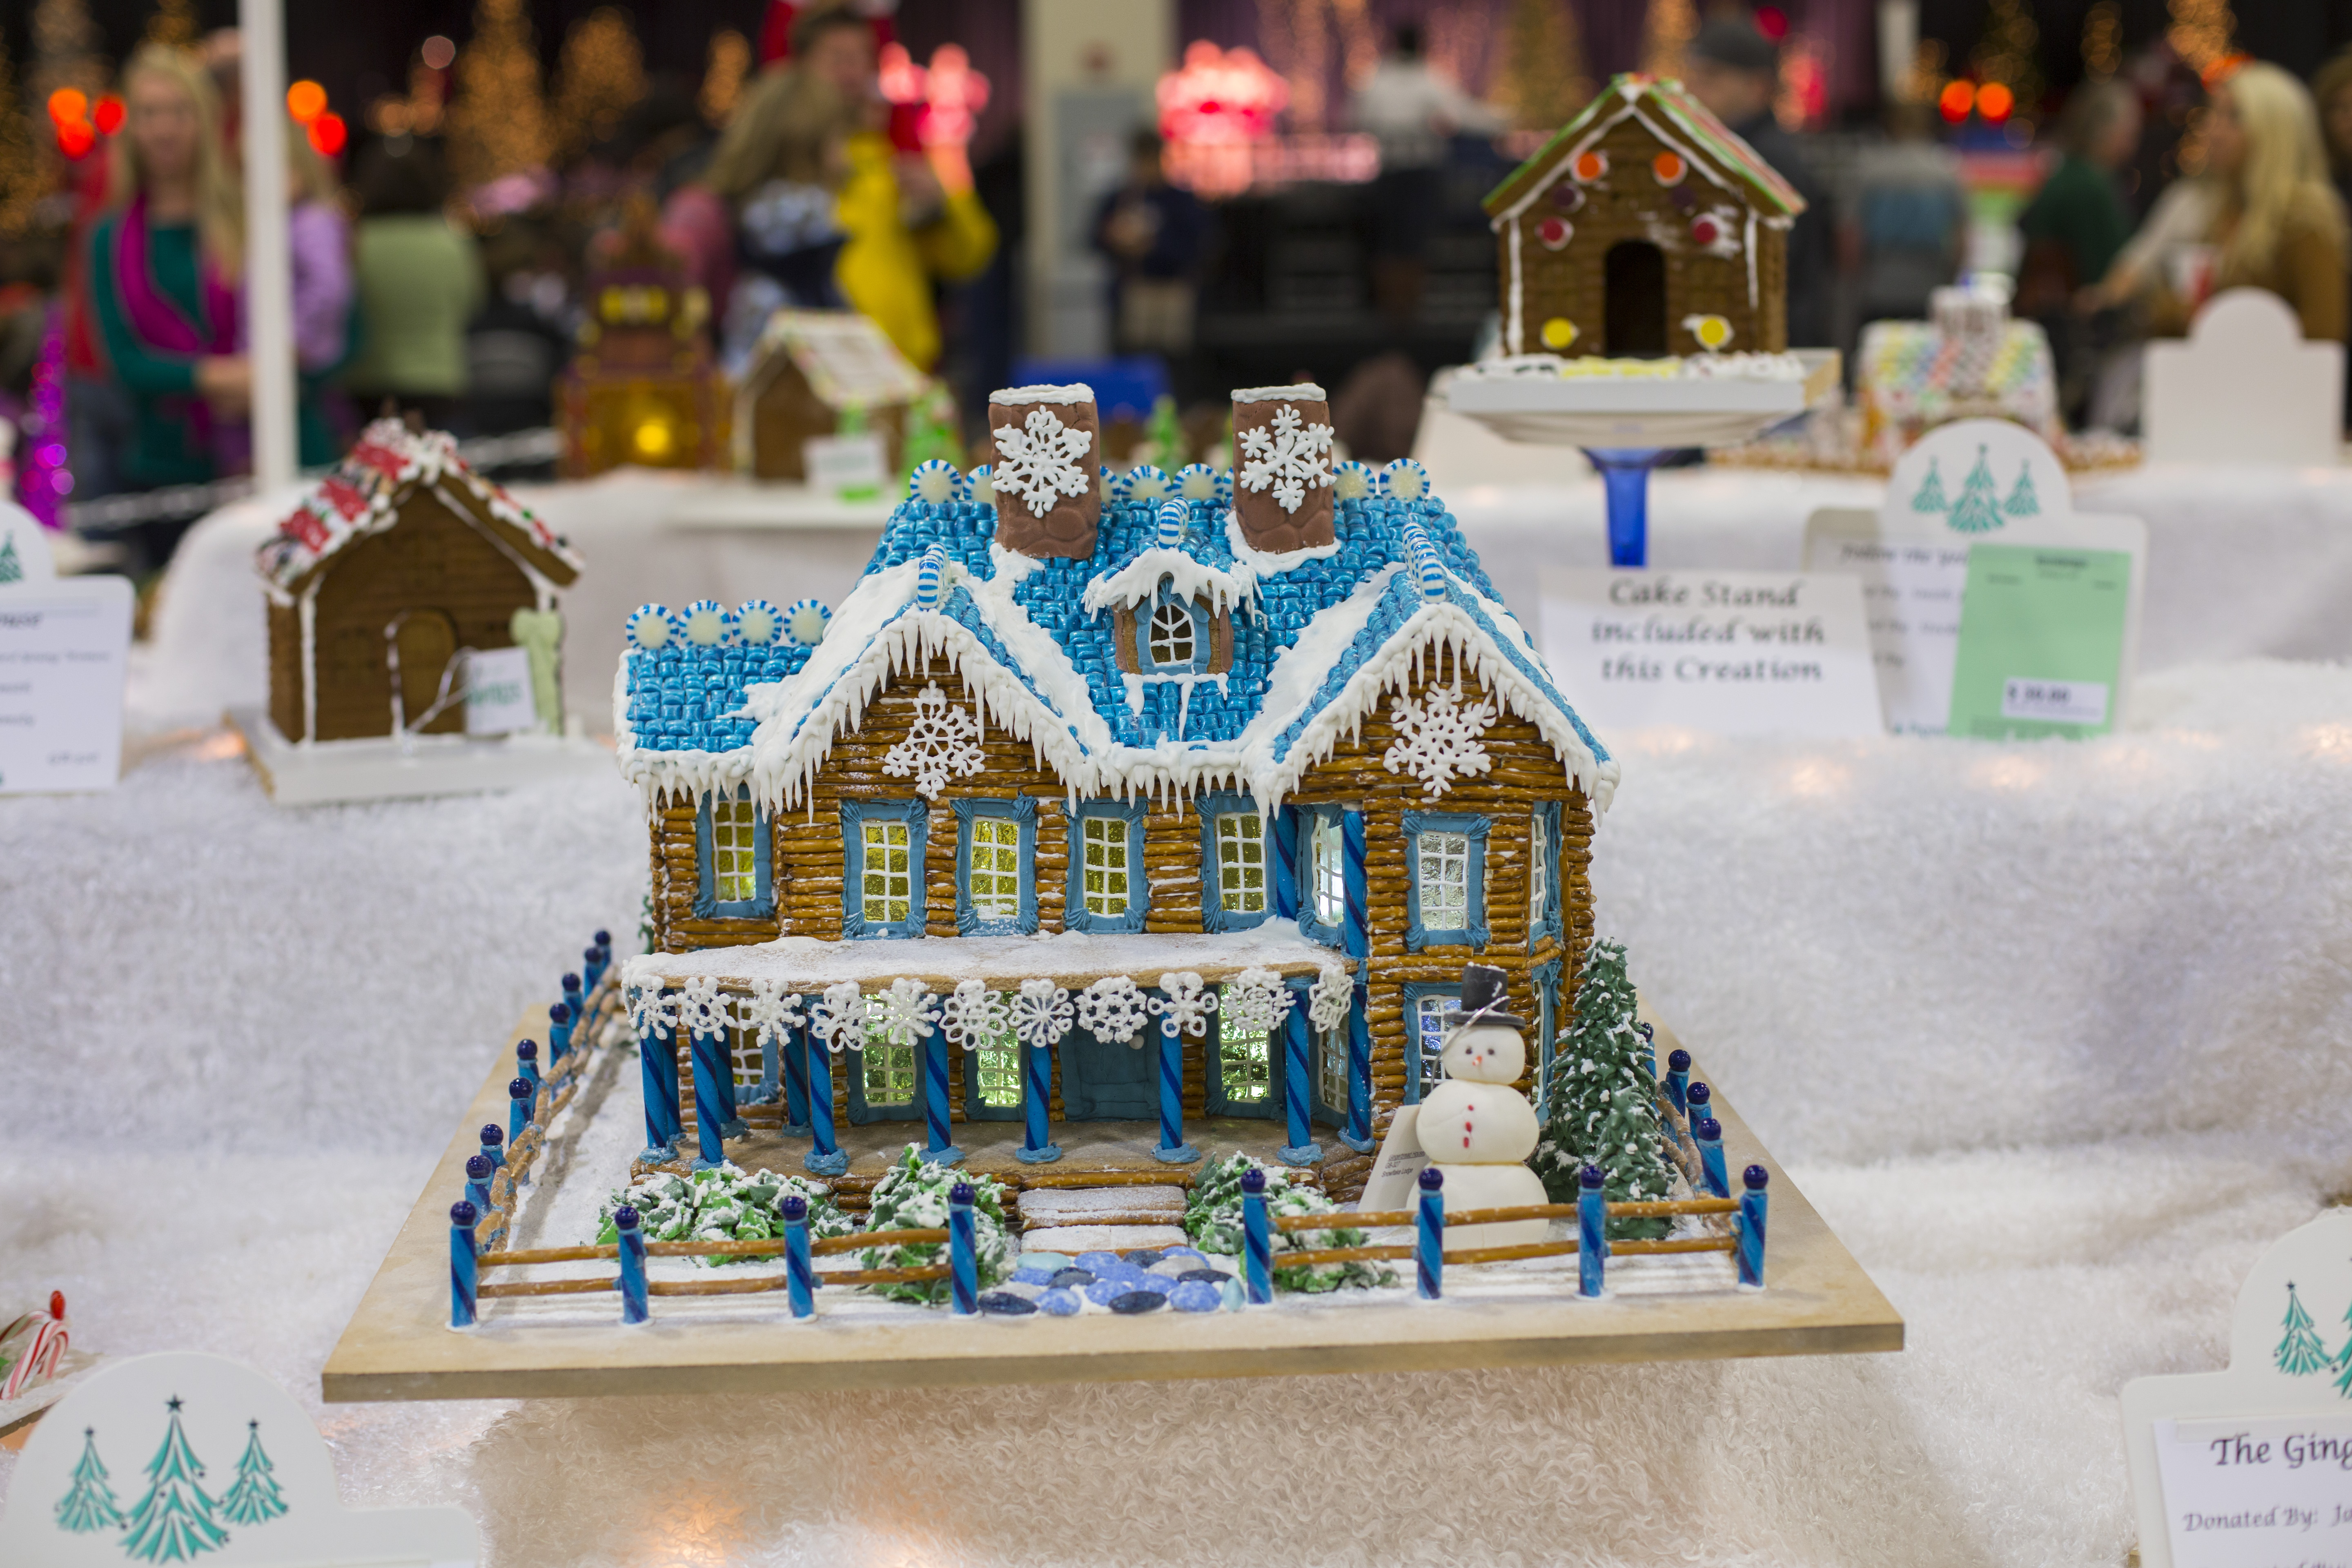
Chex cereal was used for this gingerbread house roof. I also like the dollops of melting snow piles made from icing. Has a more realistic flair.
An out of the box Hawaiian styled gingerbread house.
Flat sticks of gum for the gingerbread roof was a cute idea. And the rock candy chimney. Yogurt dipped pretzels for an ornate styled fence.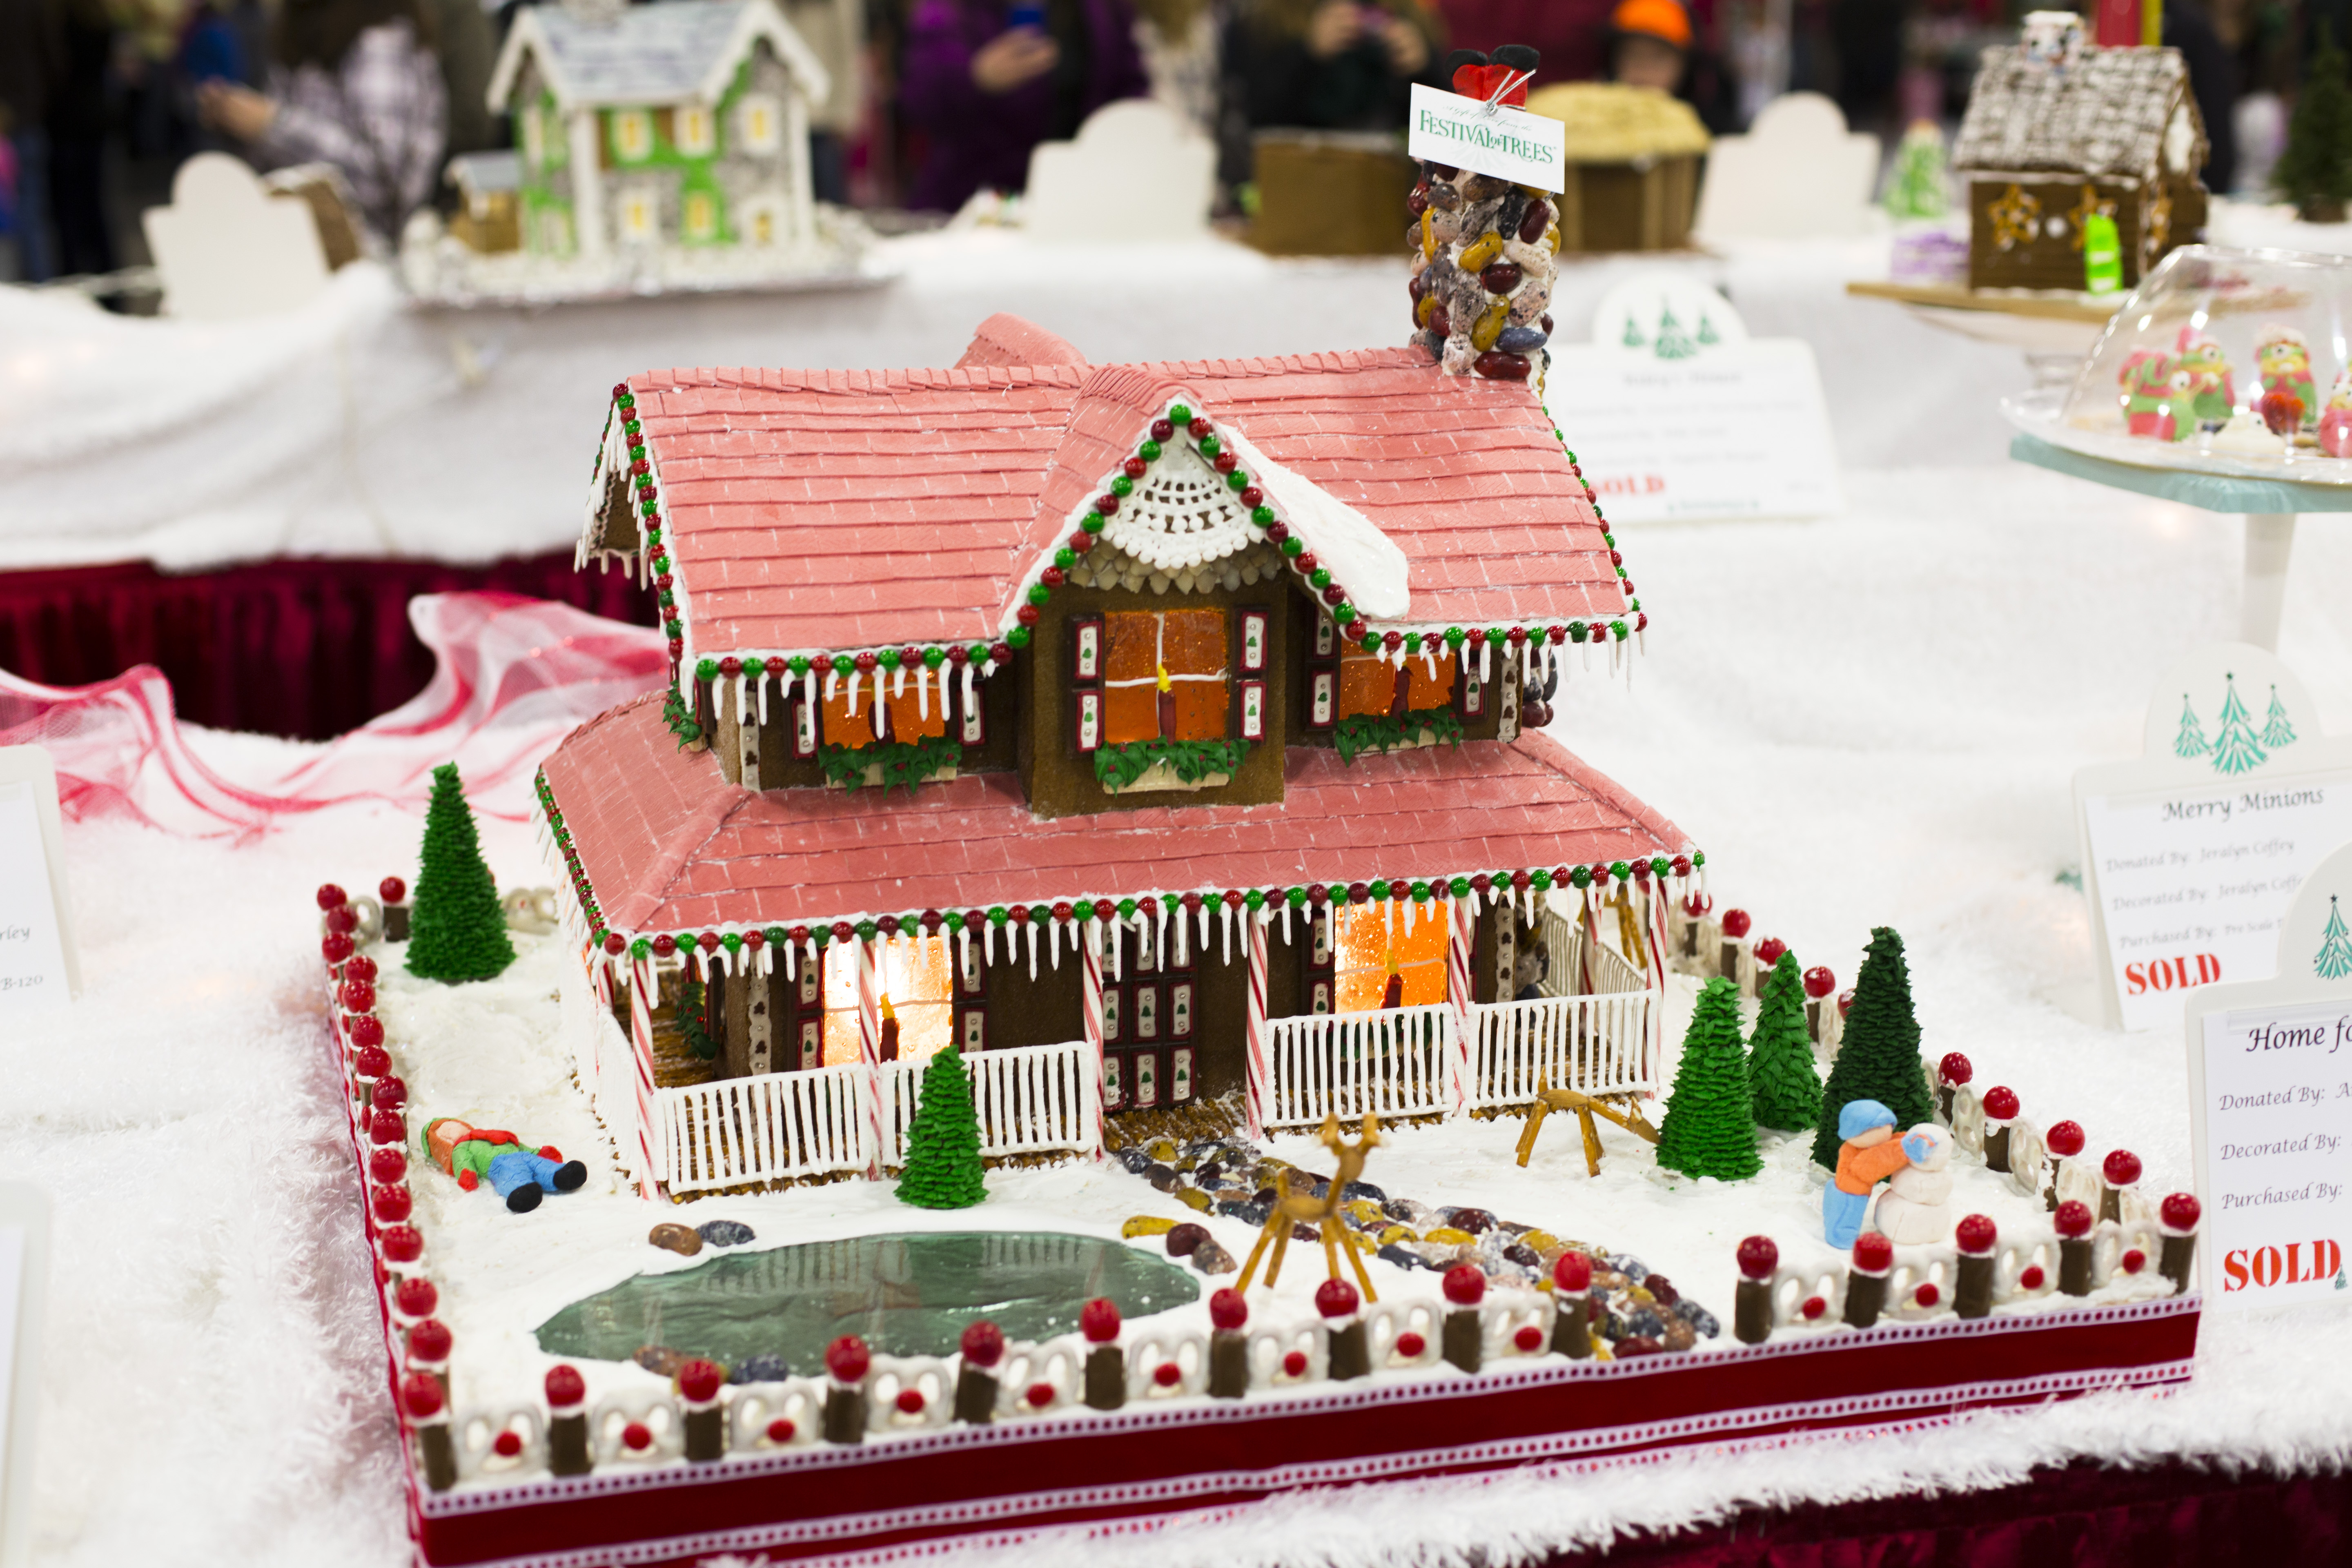
Giving a thumbs up on the job well done to my cousin in law Sarah! Gingerbread house building is a strong holiday tradition with their house.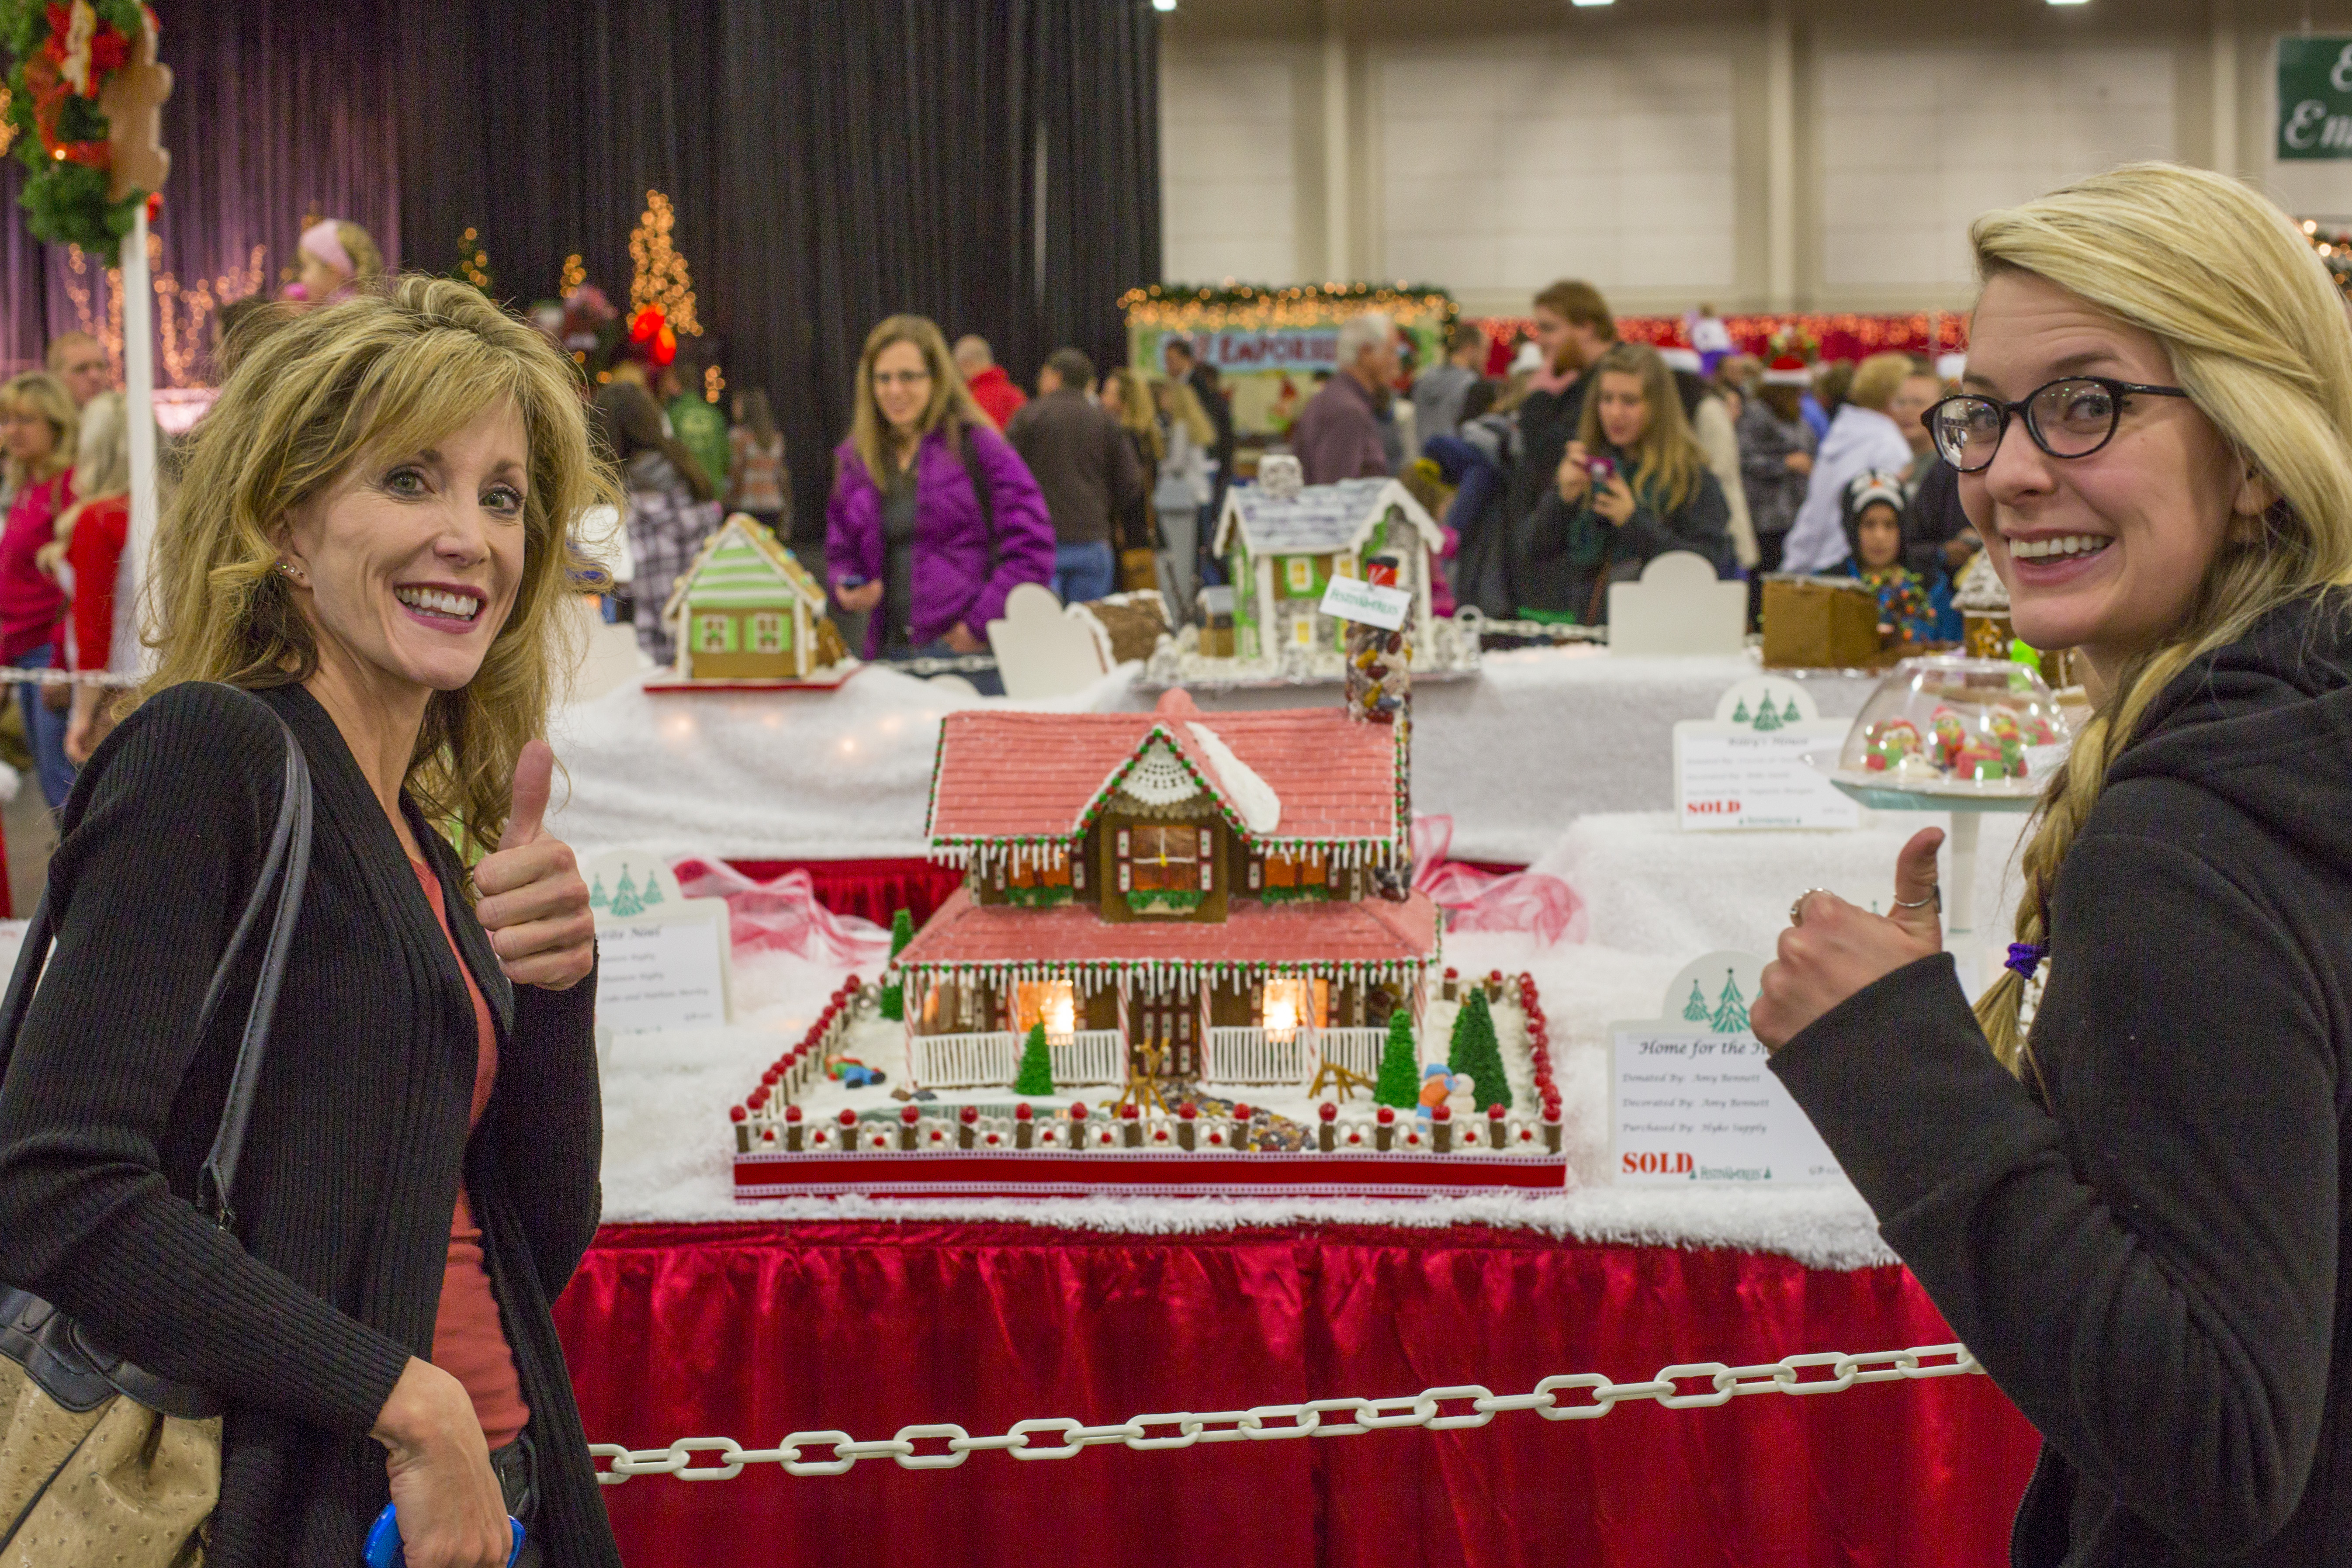
And last but not least, a gingerbread tree house! So fun. I love the artistry of this one.

Photography by: http://effervescentmediaworks.com
Why I love the art of gingerbread house making: When I was a child, my neighbor across the street invited me over to make a gingerbread house. I looked forward to it all week. When that Saturday came, I was invited in and saw the crazy effort it can take to create gingerbread houses from scratch. She had spent the entire day preparing the many walls and roofs and chimney parts for us to assemble and put together. I remember feeling very special that she would take the time to prepare this activity for me to be a part of. The holiday craft is one that is socially fun and a wonderful tradition as families gather around the table decorating their individual or group gingerbread house, sharing the bowls of candy and snitching a few tastes along the way. And they are a fun little treat to last throughout the season as my cousin in law and his wife know as my 1 and 3-year-old kept sneaking snitches off their gingerbread houses:)
Have you had Pinterest failures? AKA craft attempts that turned out less than impressive! Please share them in a comment below! On the other hand, have you created a Gingerbread house that you are proud of? Share your results!
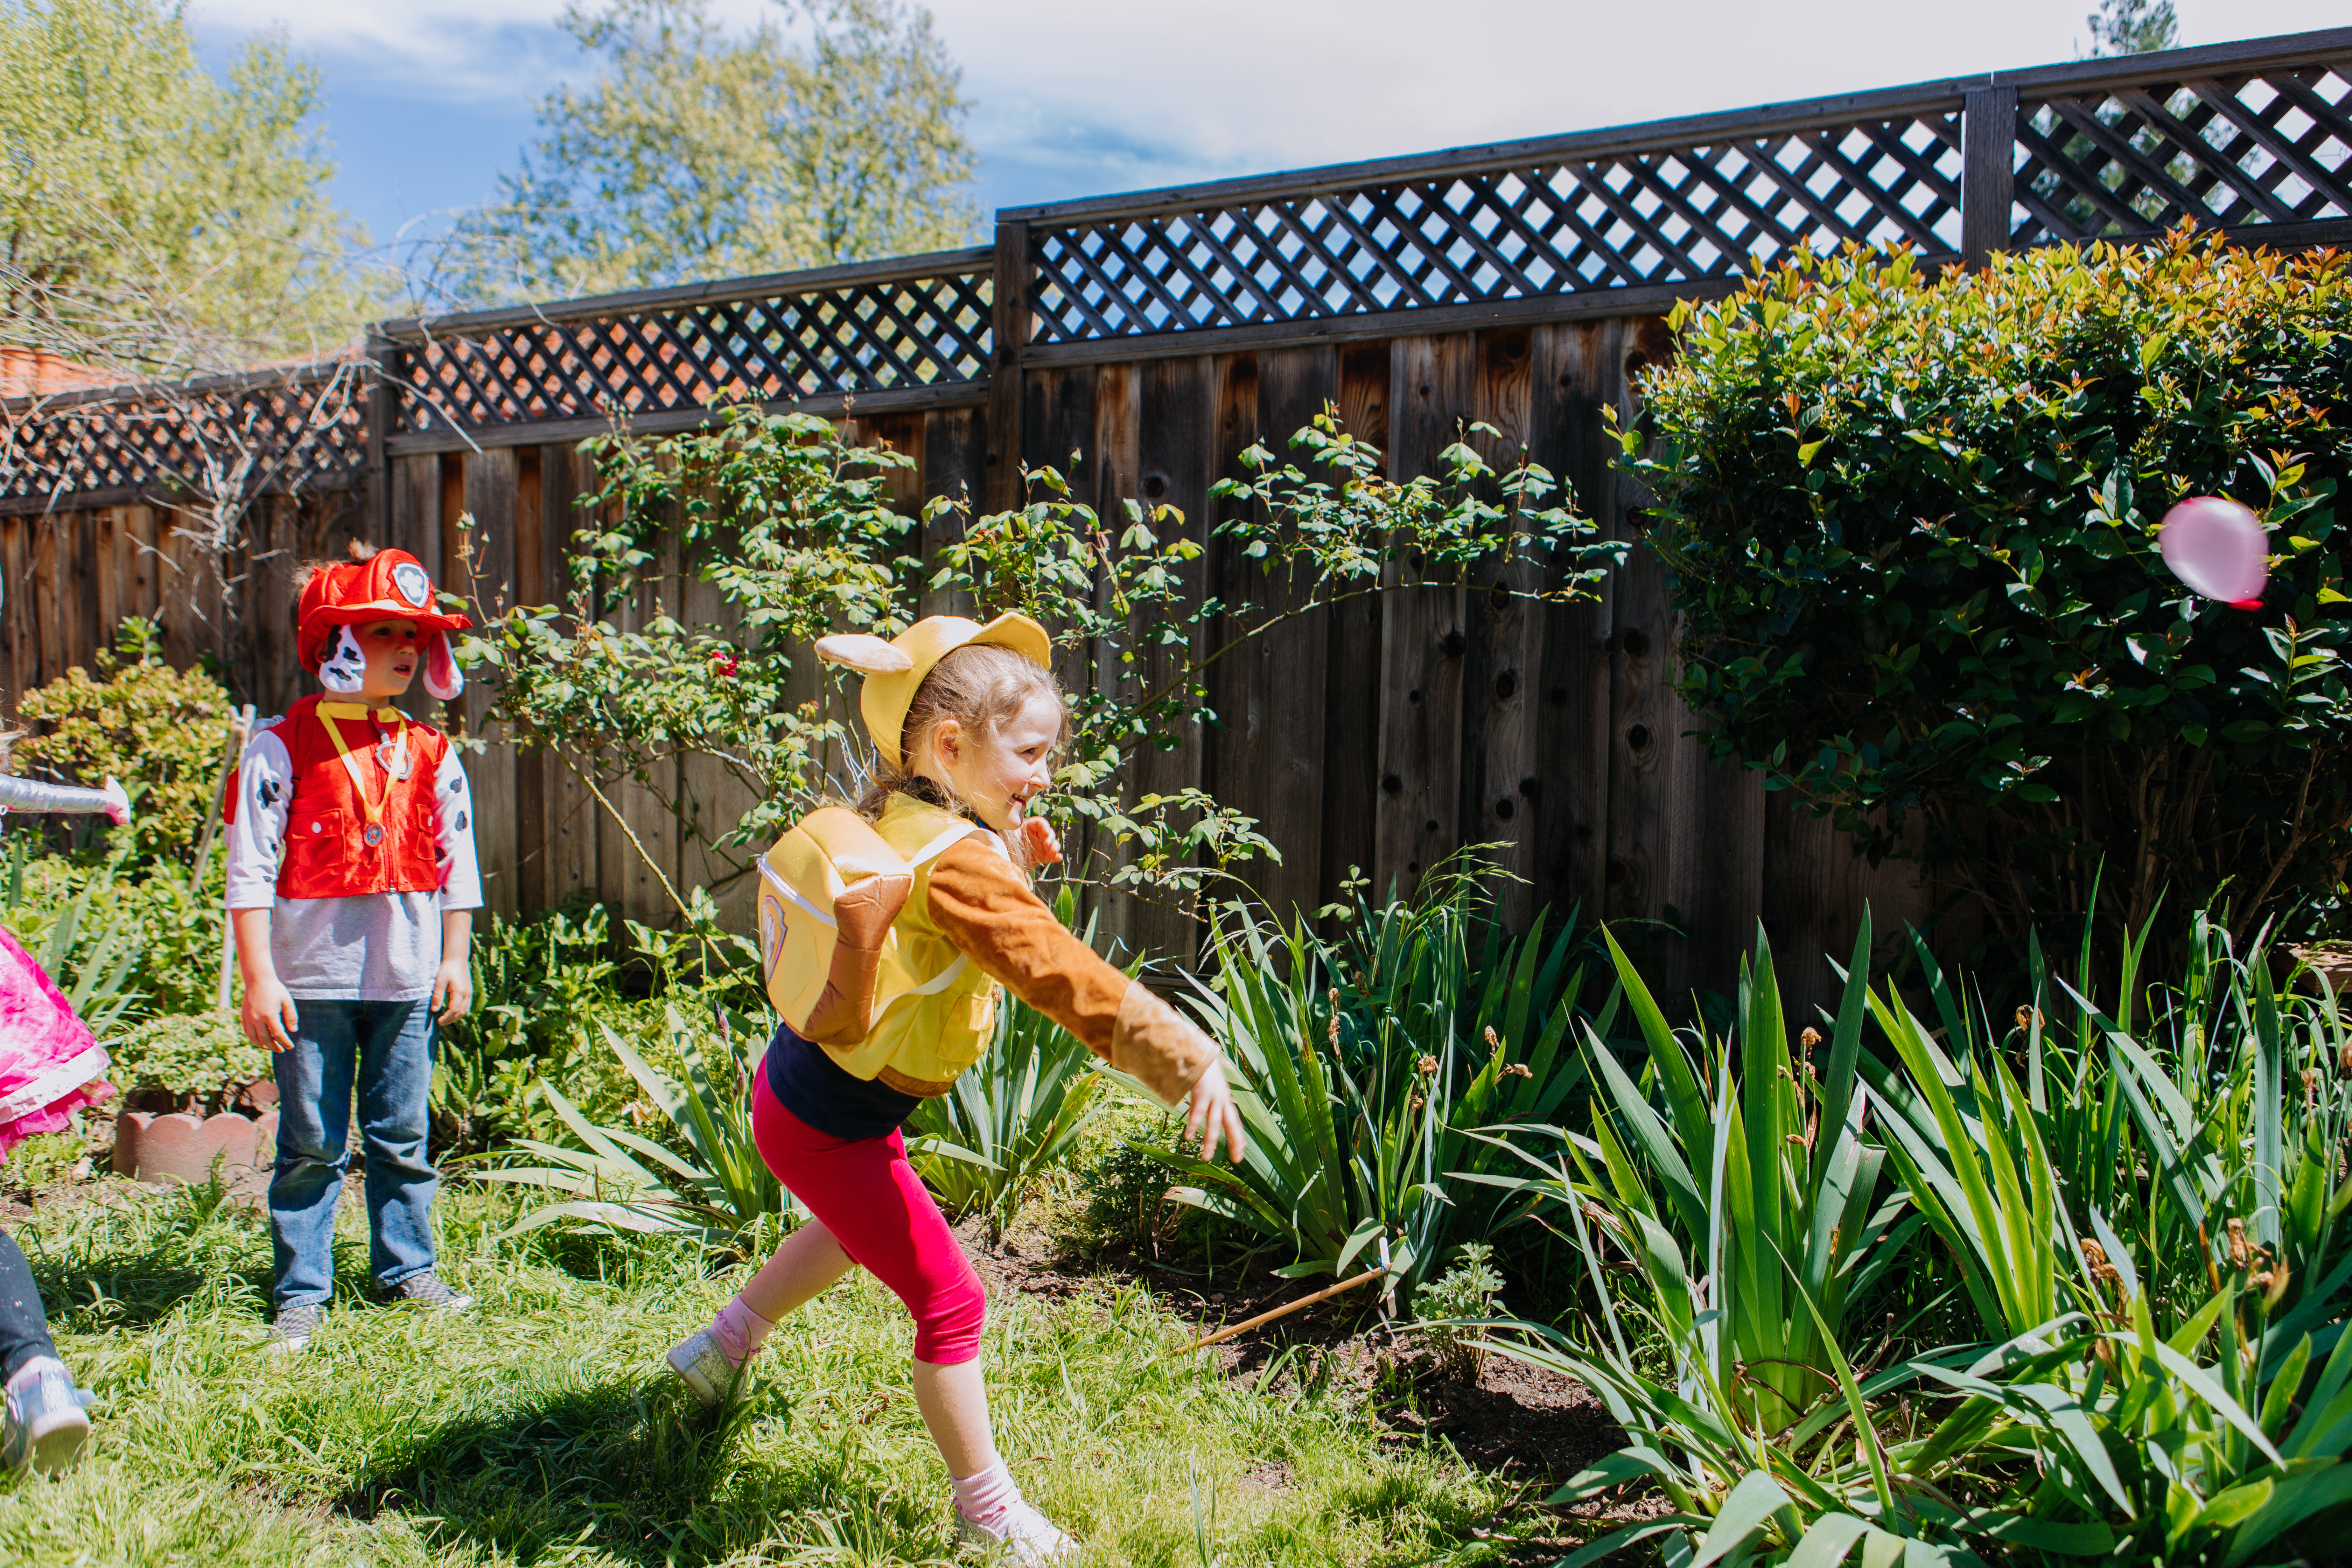
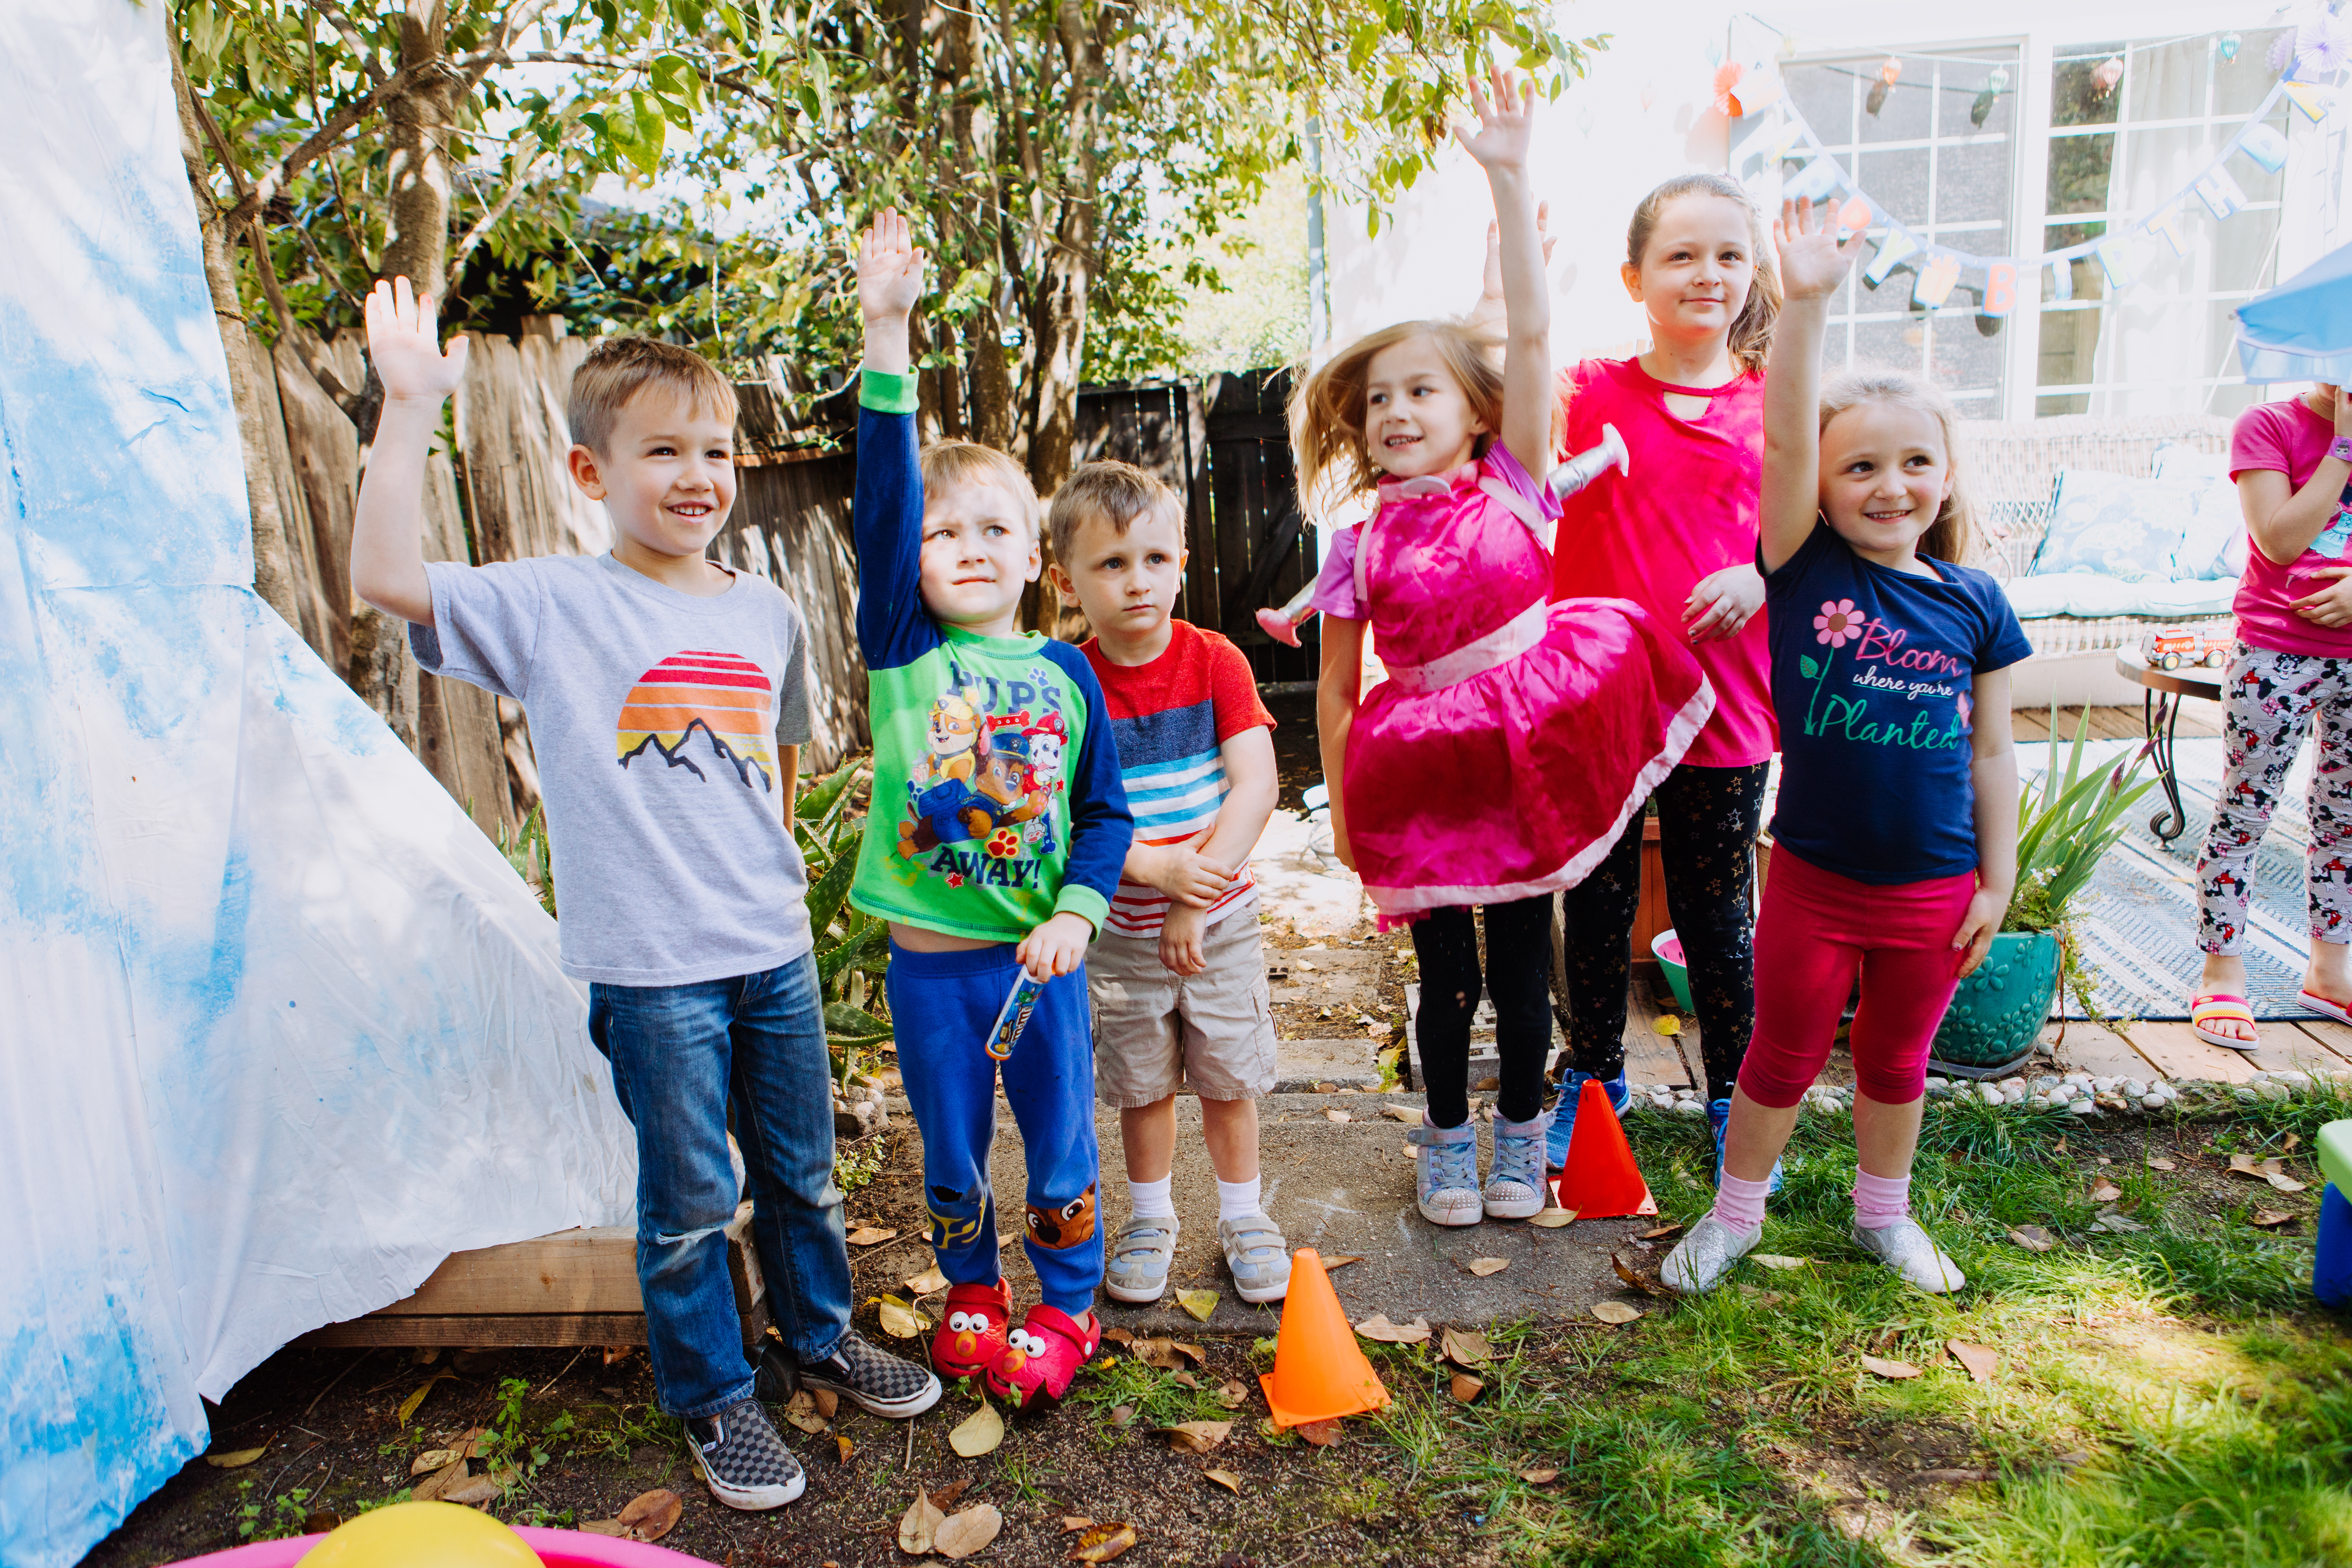
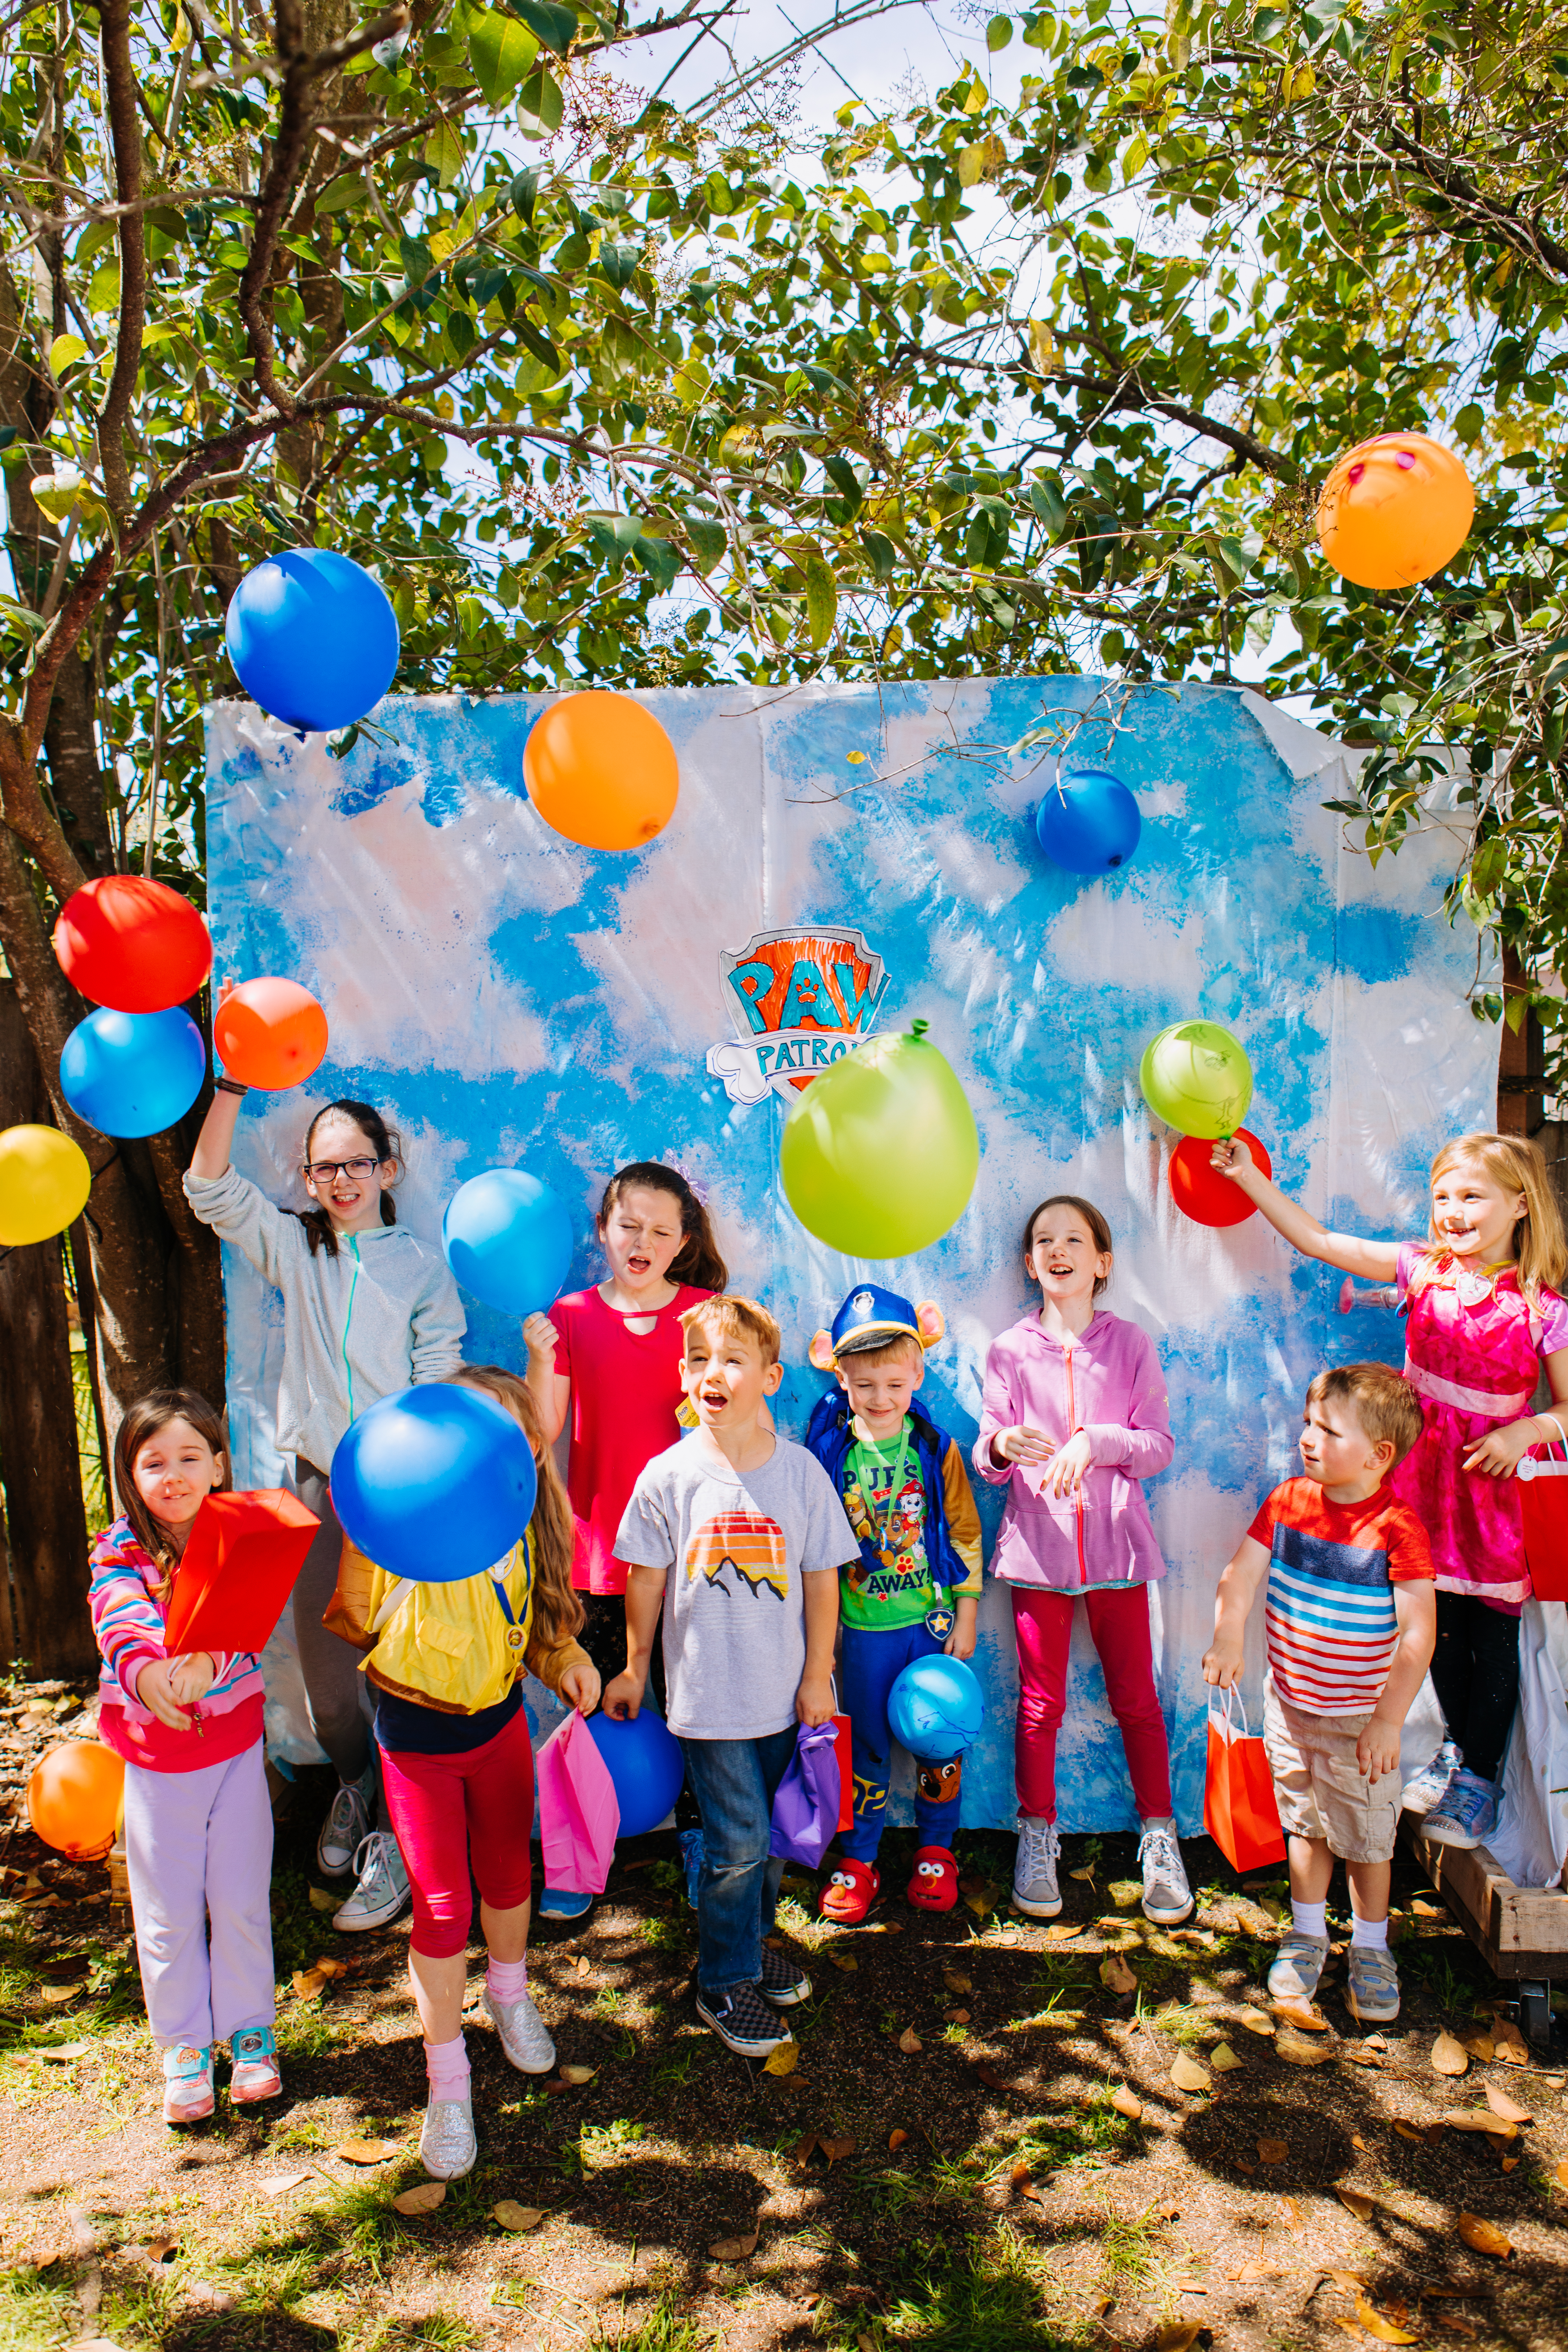
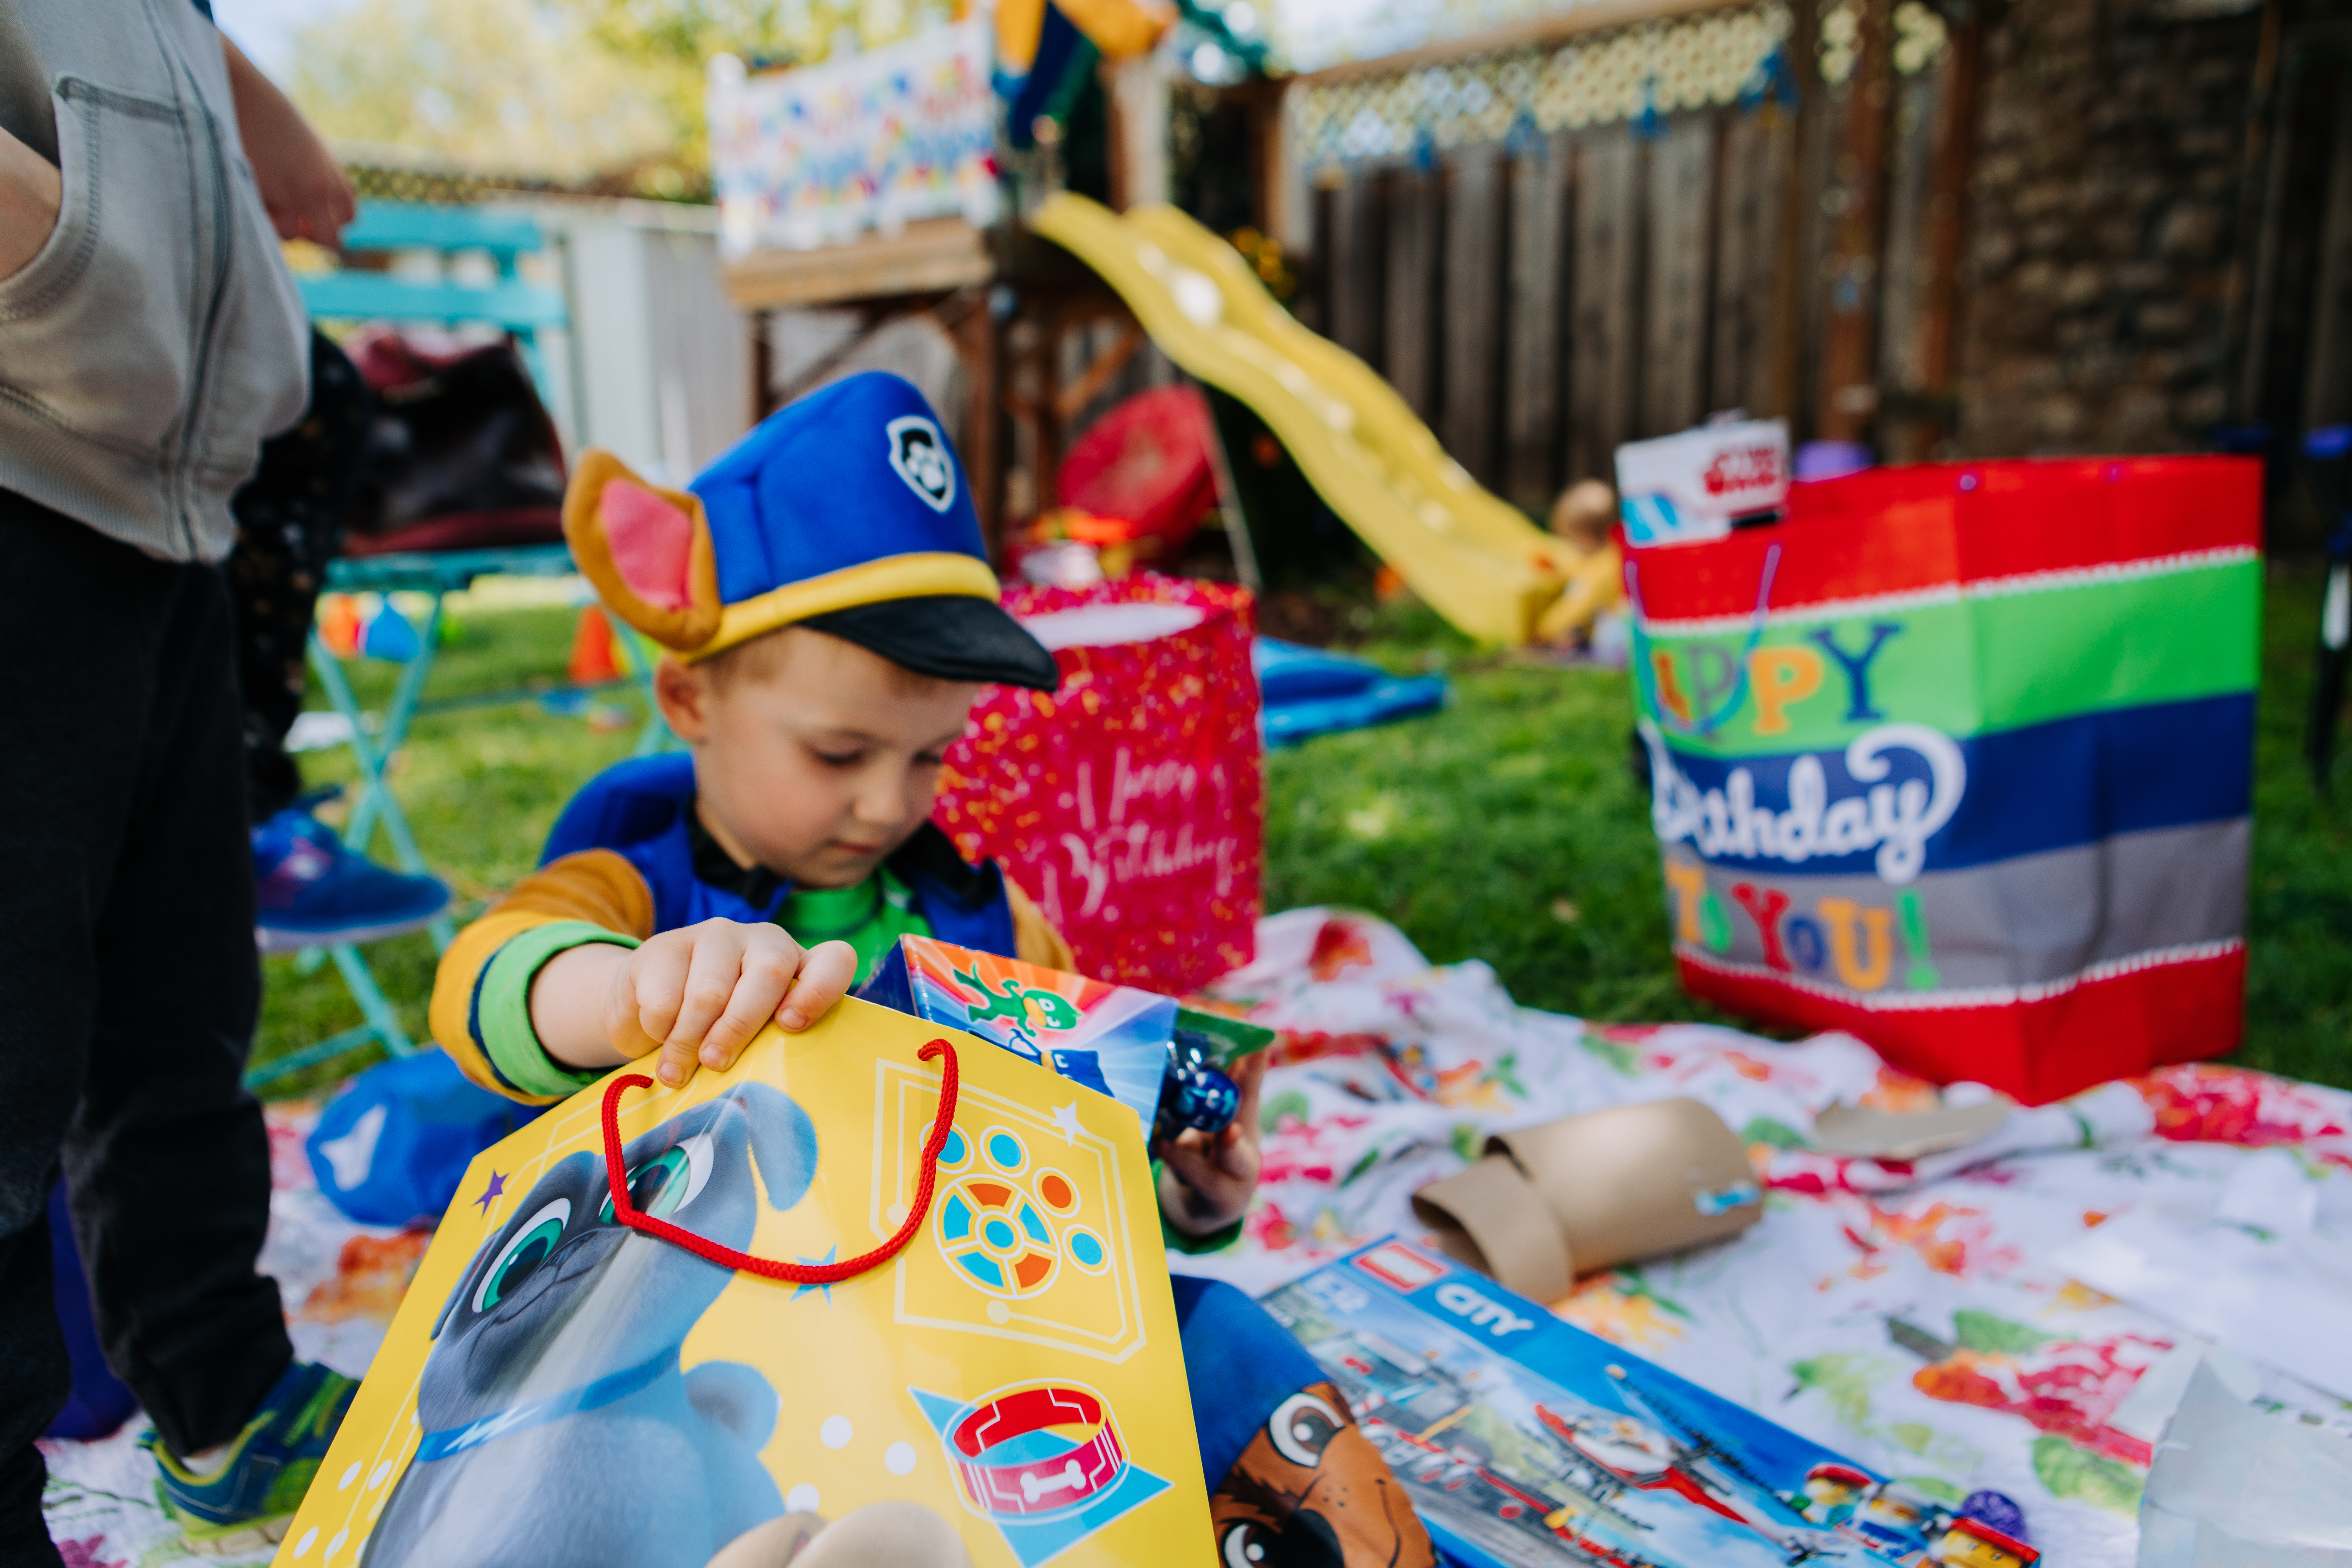
This is the second Paw Patrol party we have thrown for my five-year-old. We did the same theme last year, only it was more aqua Paw Patrol themed and we held it at an indoor waterpark which was a blast, but anyway, this year we had his party in our backyard had just enough children over to make it a grand time without being too crazy.
I was catching up with a mom friend that couldn’t make it and one of the things she mentioned she loved about our parties is all of the activities we do. It’s not just well decorated and sitting around eating she said.
While this party may not have been the most Pinterest perfect in all the details, our focus was to make it a blast for the kids with a lot of fun activities.
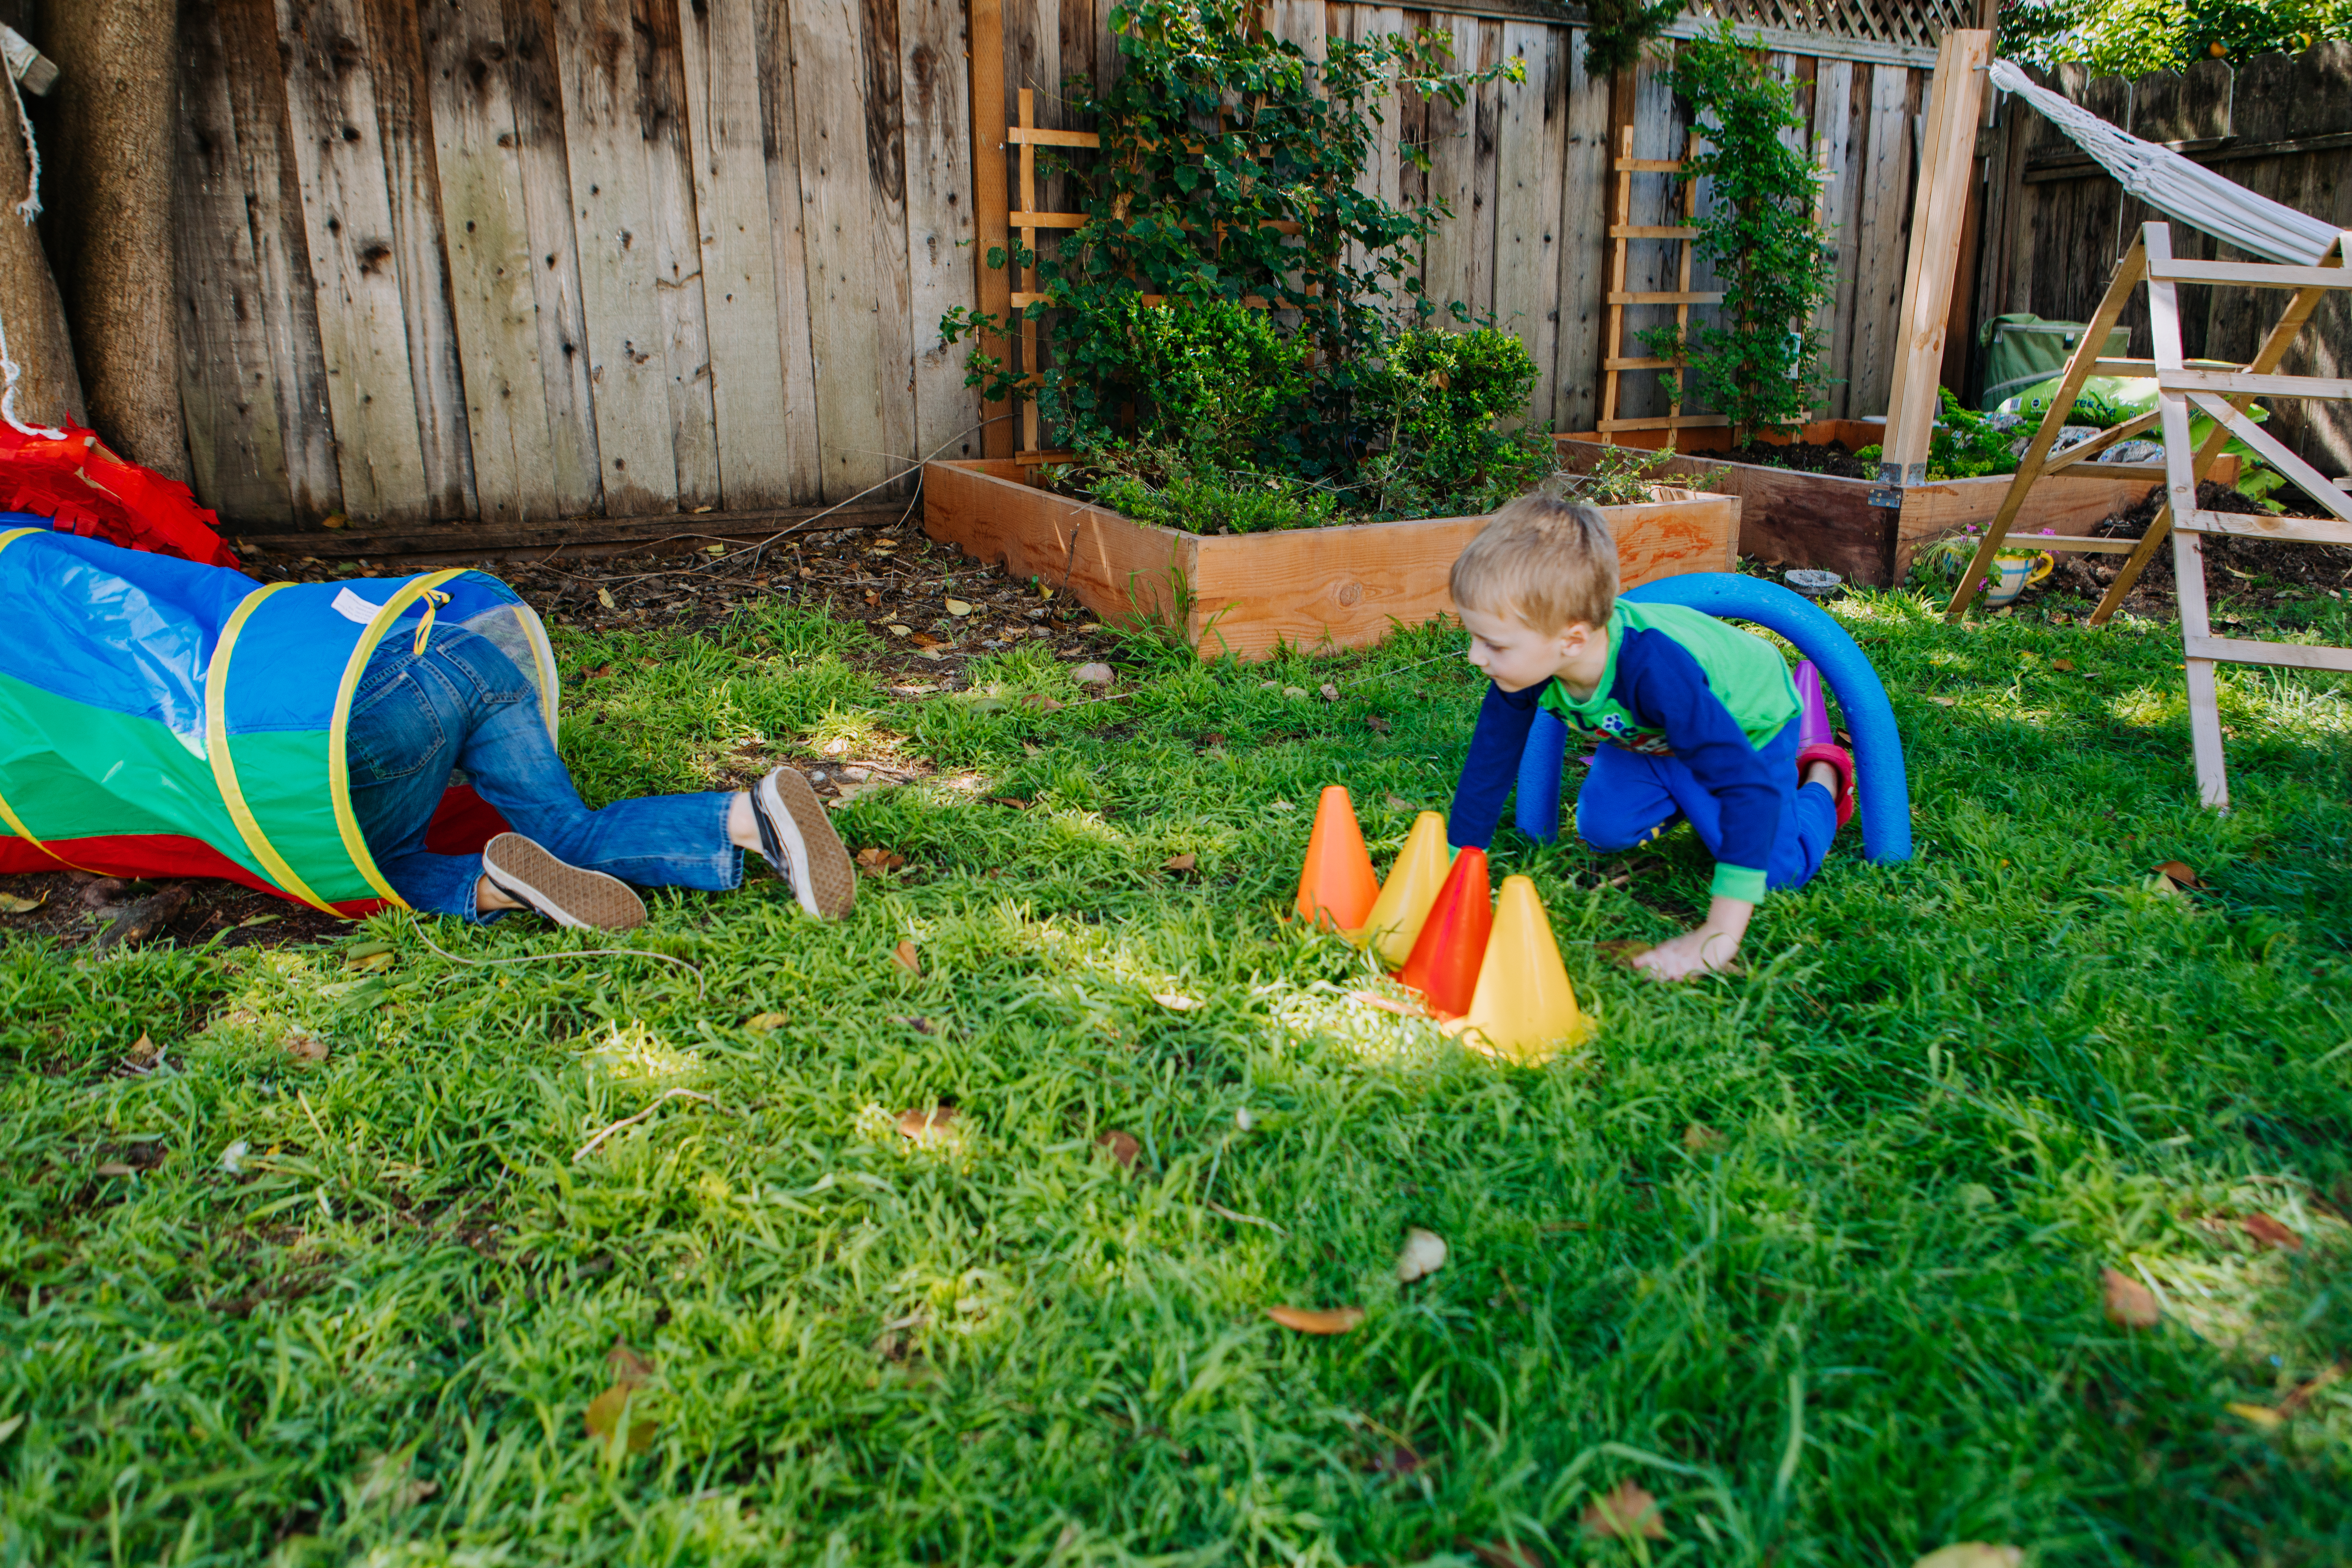
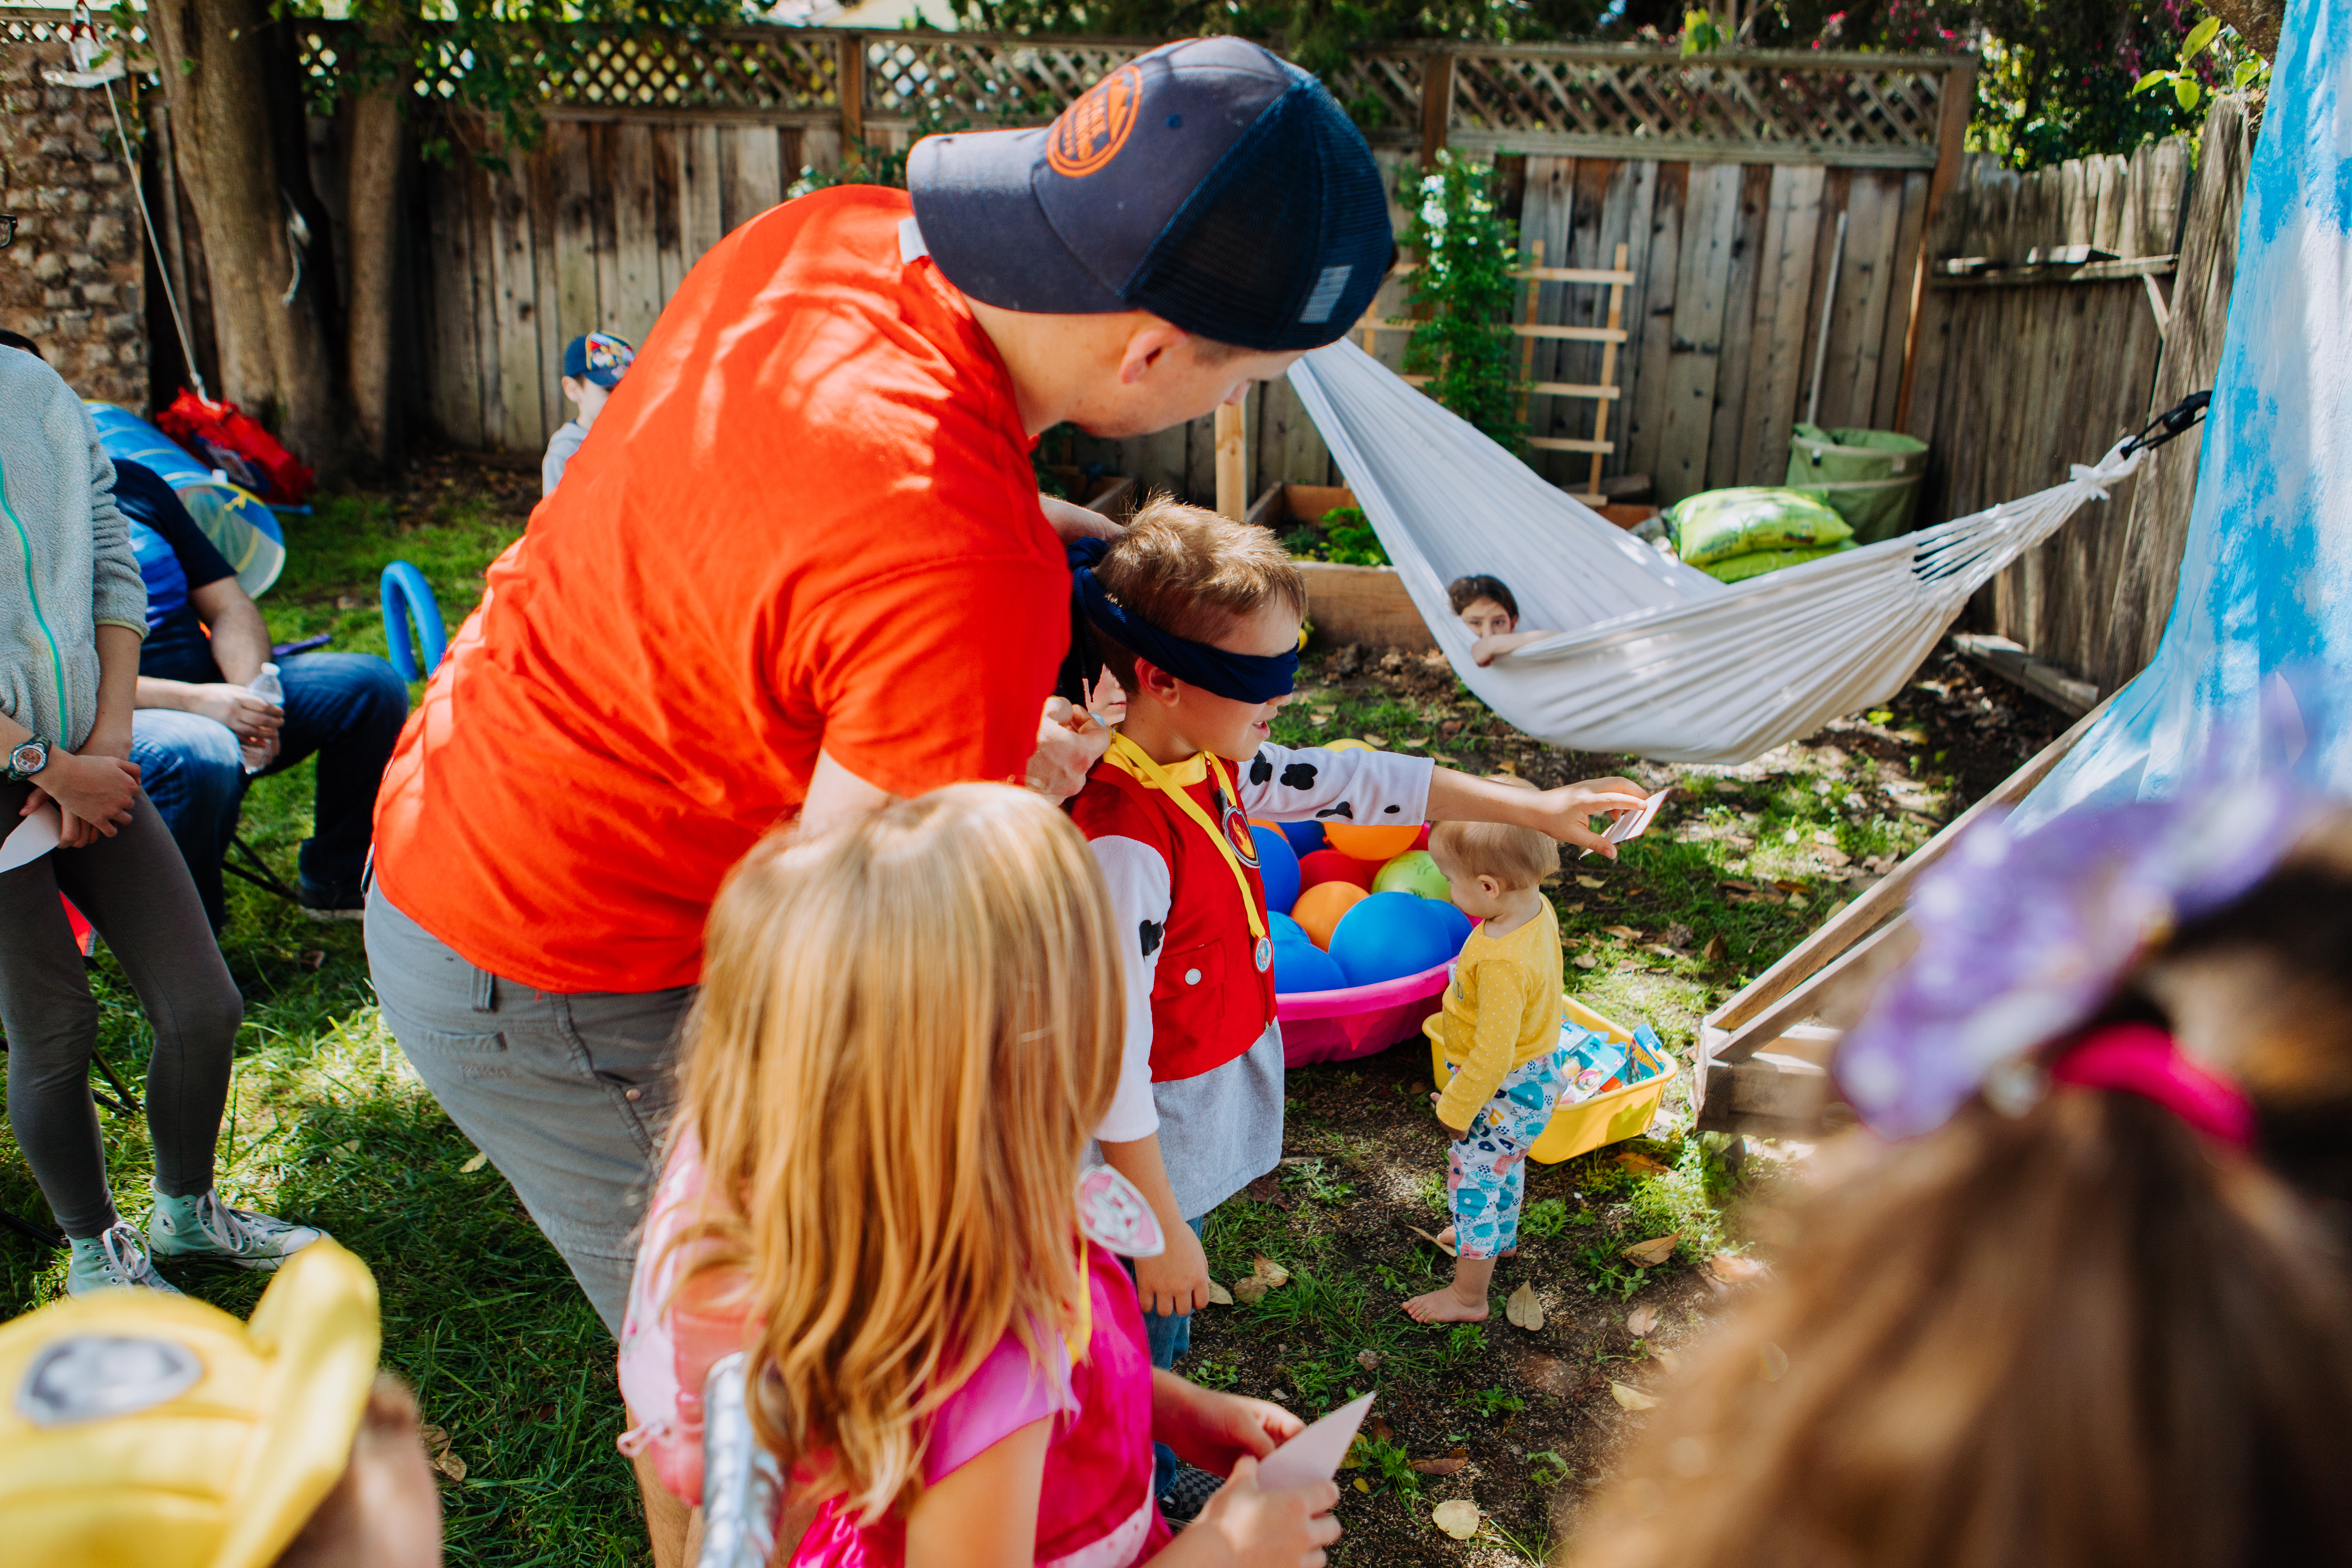
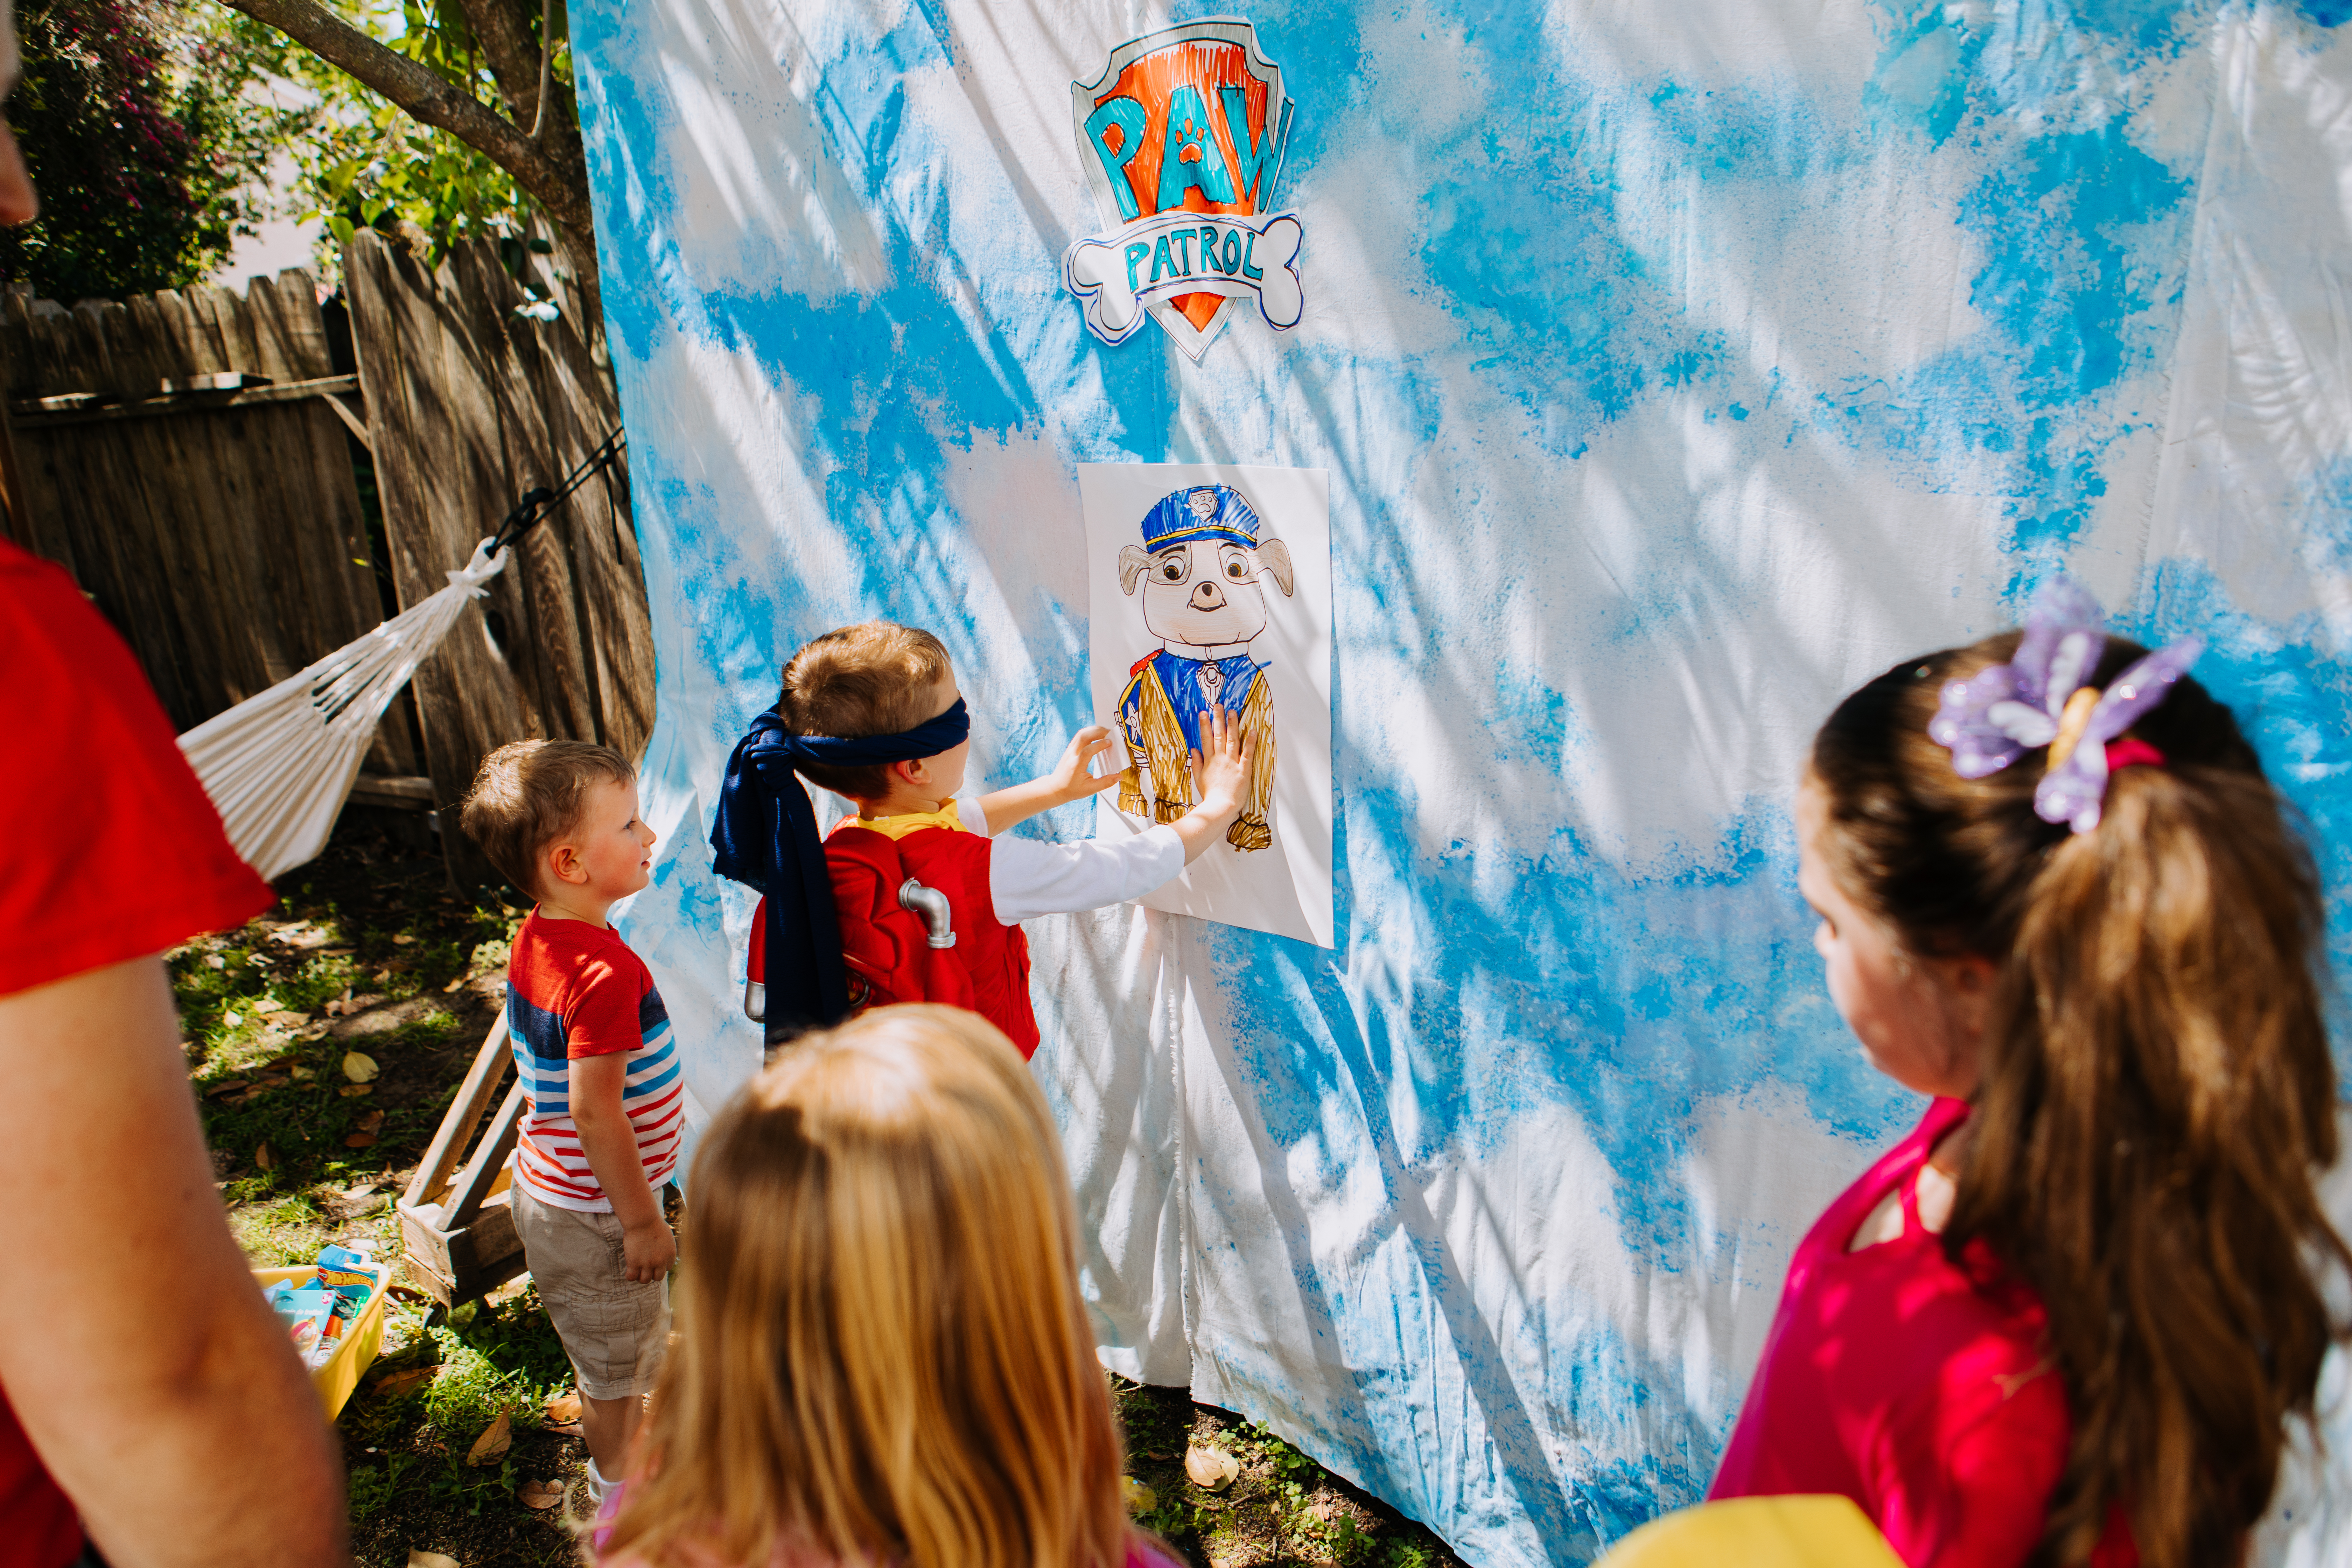
The activities included:
- Dress Up! We are big on dress up around here so we already had the bin with all the varieties of characters including this fun one of Sky.
- Cardboard DIY and toy vehicles. We have the adventure, it seems for several birthdays of creating something unique out of cardboard and duct tape. Milo is pretty sure that when he grows up he wants to be a superhero and an upcycle engineer, “Don’t lose it! Reuse it!” So we saved many am Amazon Prime packaging and put our brains together to make come vehicles. We did have overall straps at first but I didn’t secure that one enough so Milo didn’t care to have them on. If this was a party where adults were invited too, it would be fun to have each family have to create their own vehicle and then have a prize for the best one. I’m all for putting use of recycled goods.

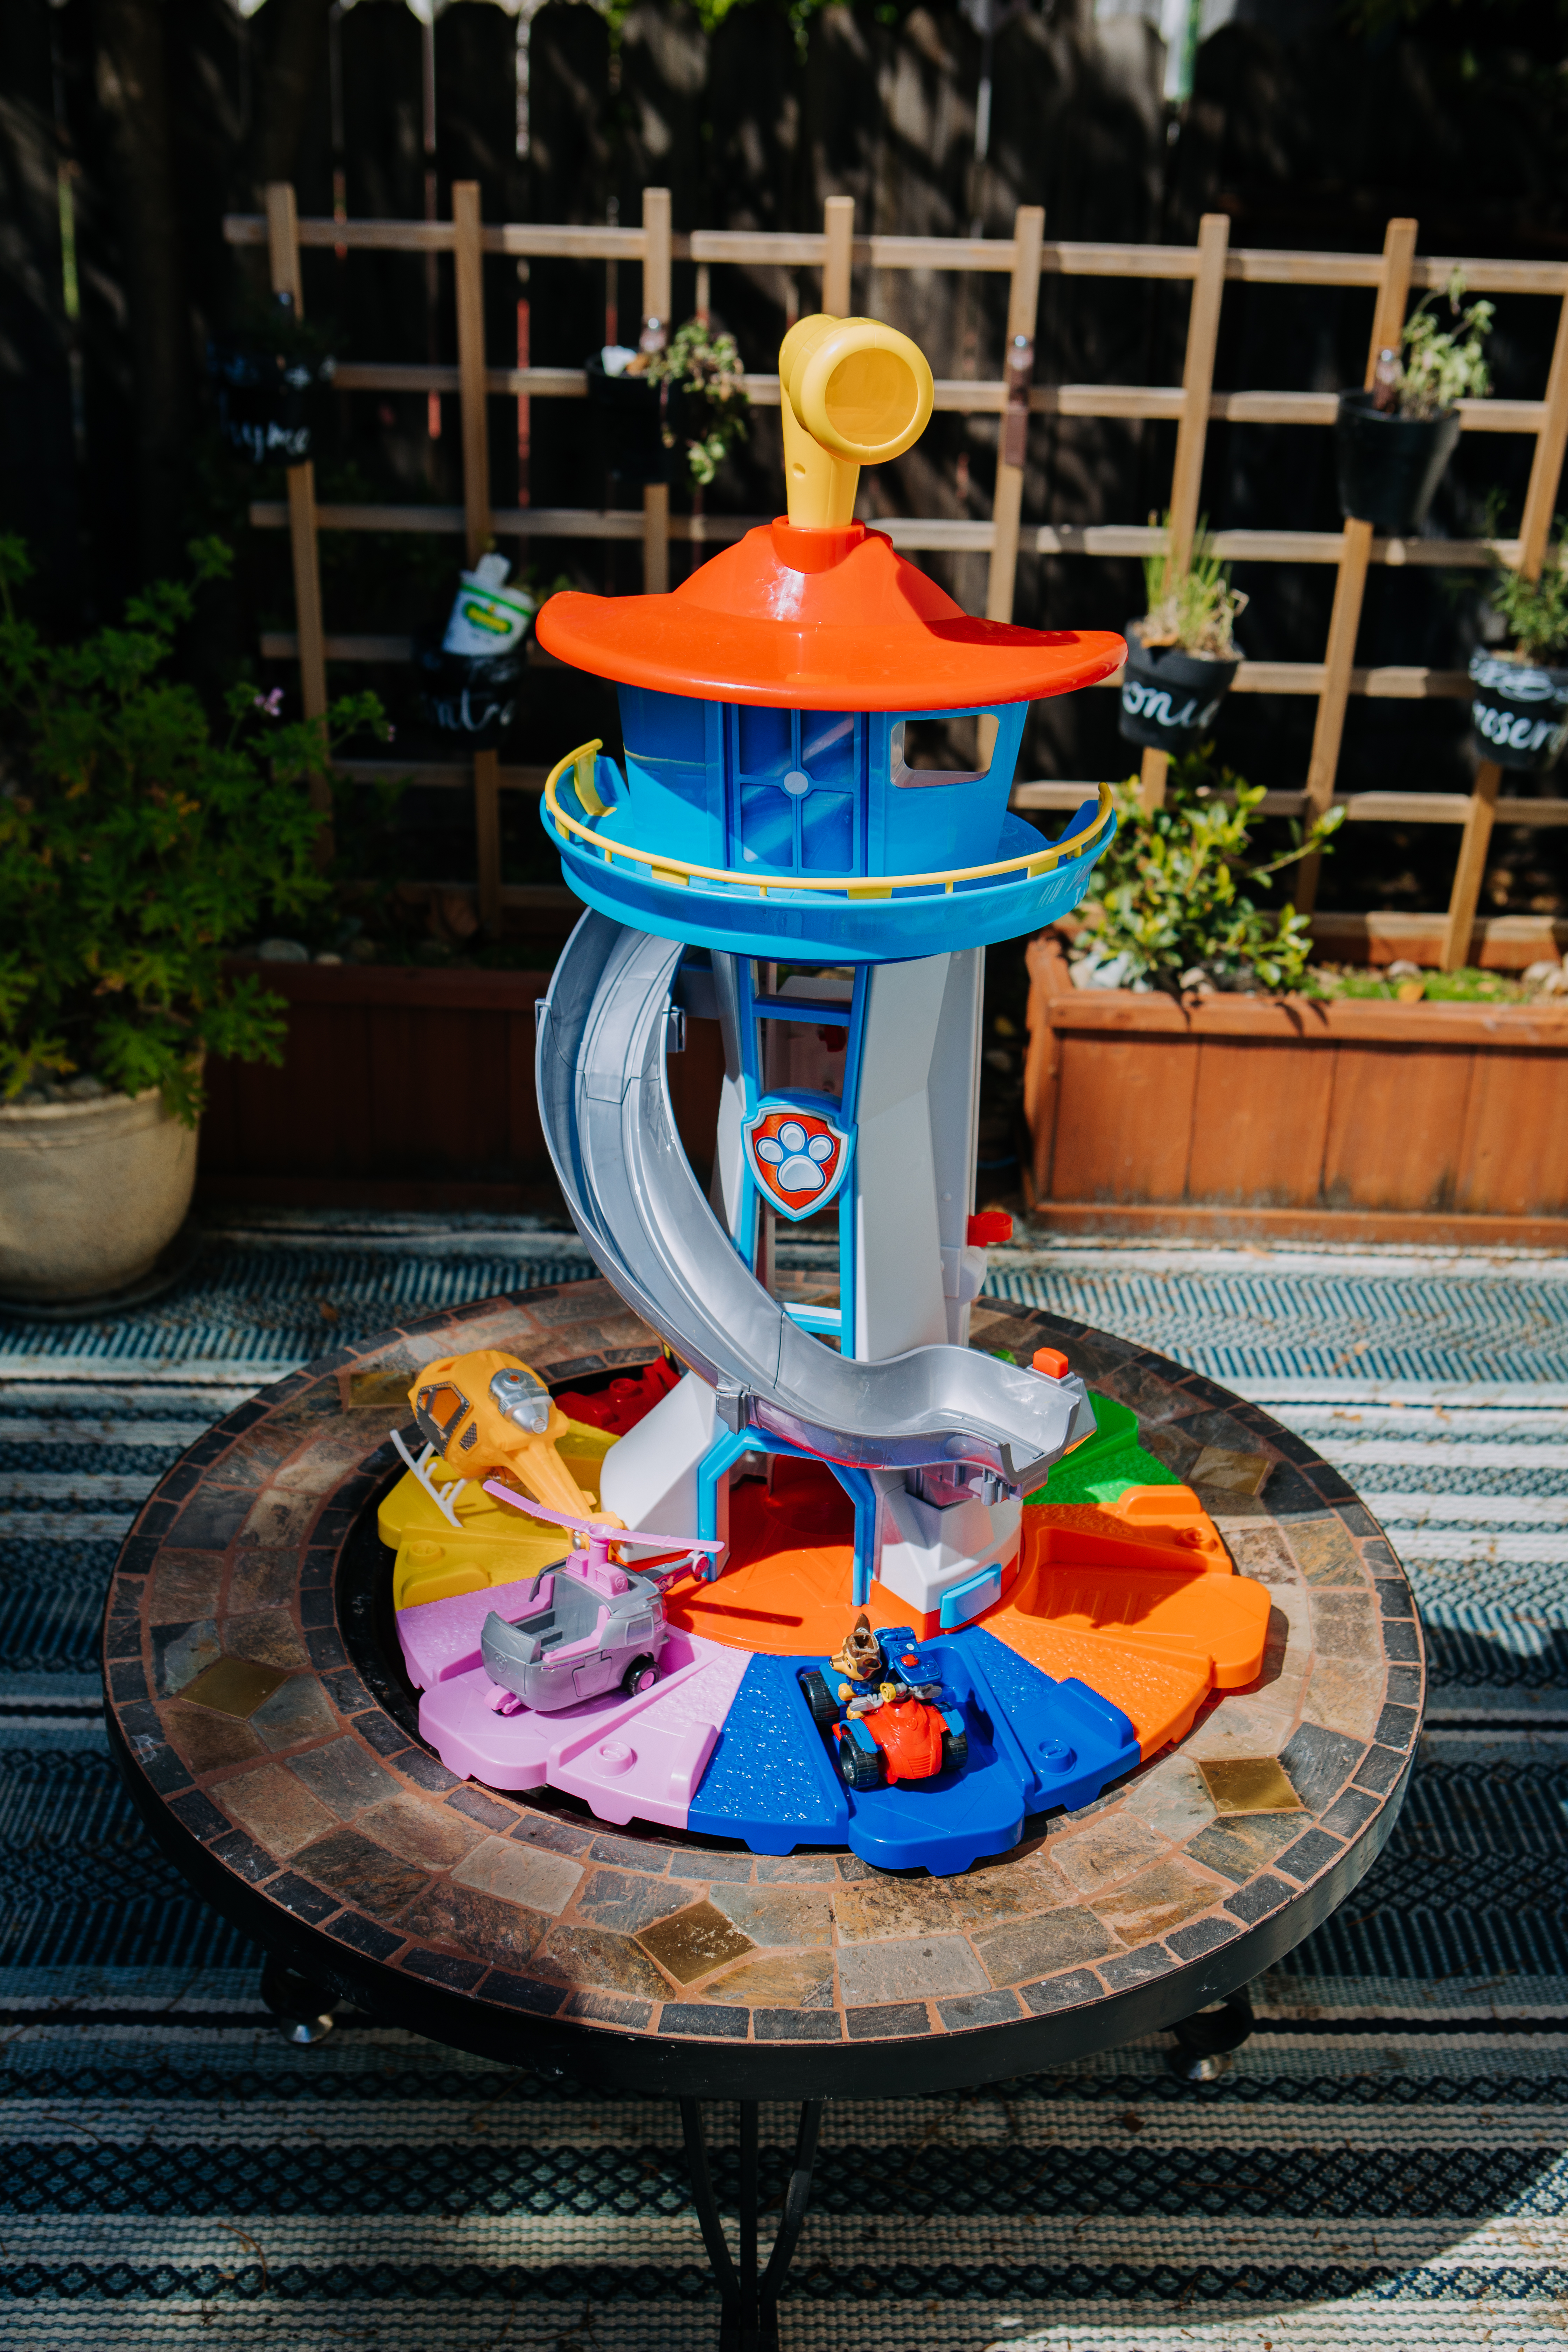
- Tabletop toy fun. As kids were arriving we had this Paw Patrol Tower set ready to go for the little ones to play with til we were set to go with our obstacle course.
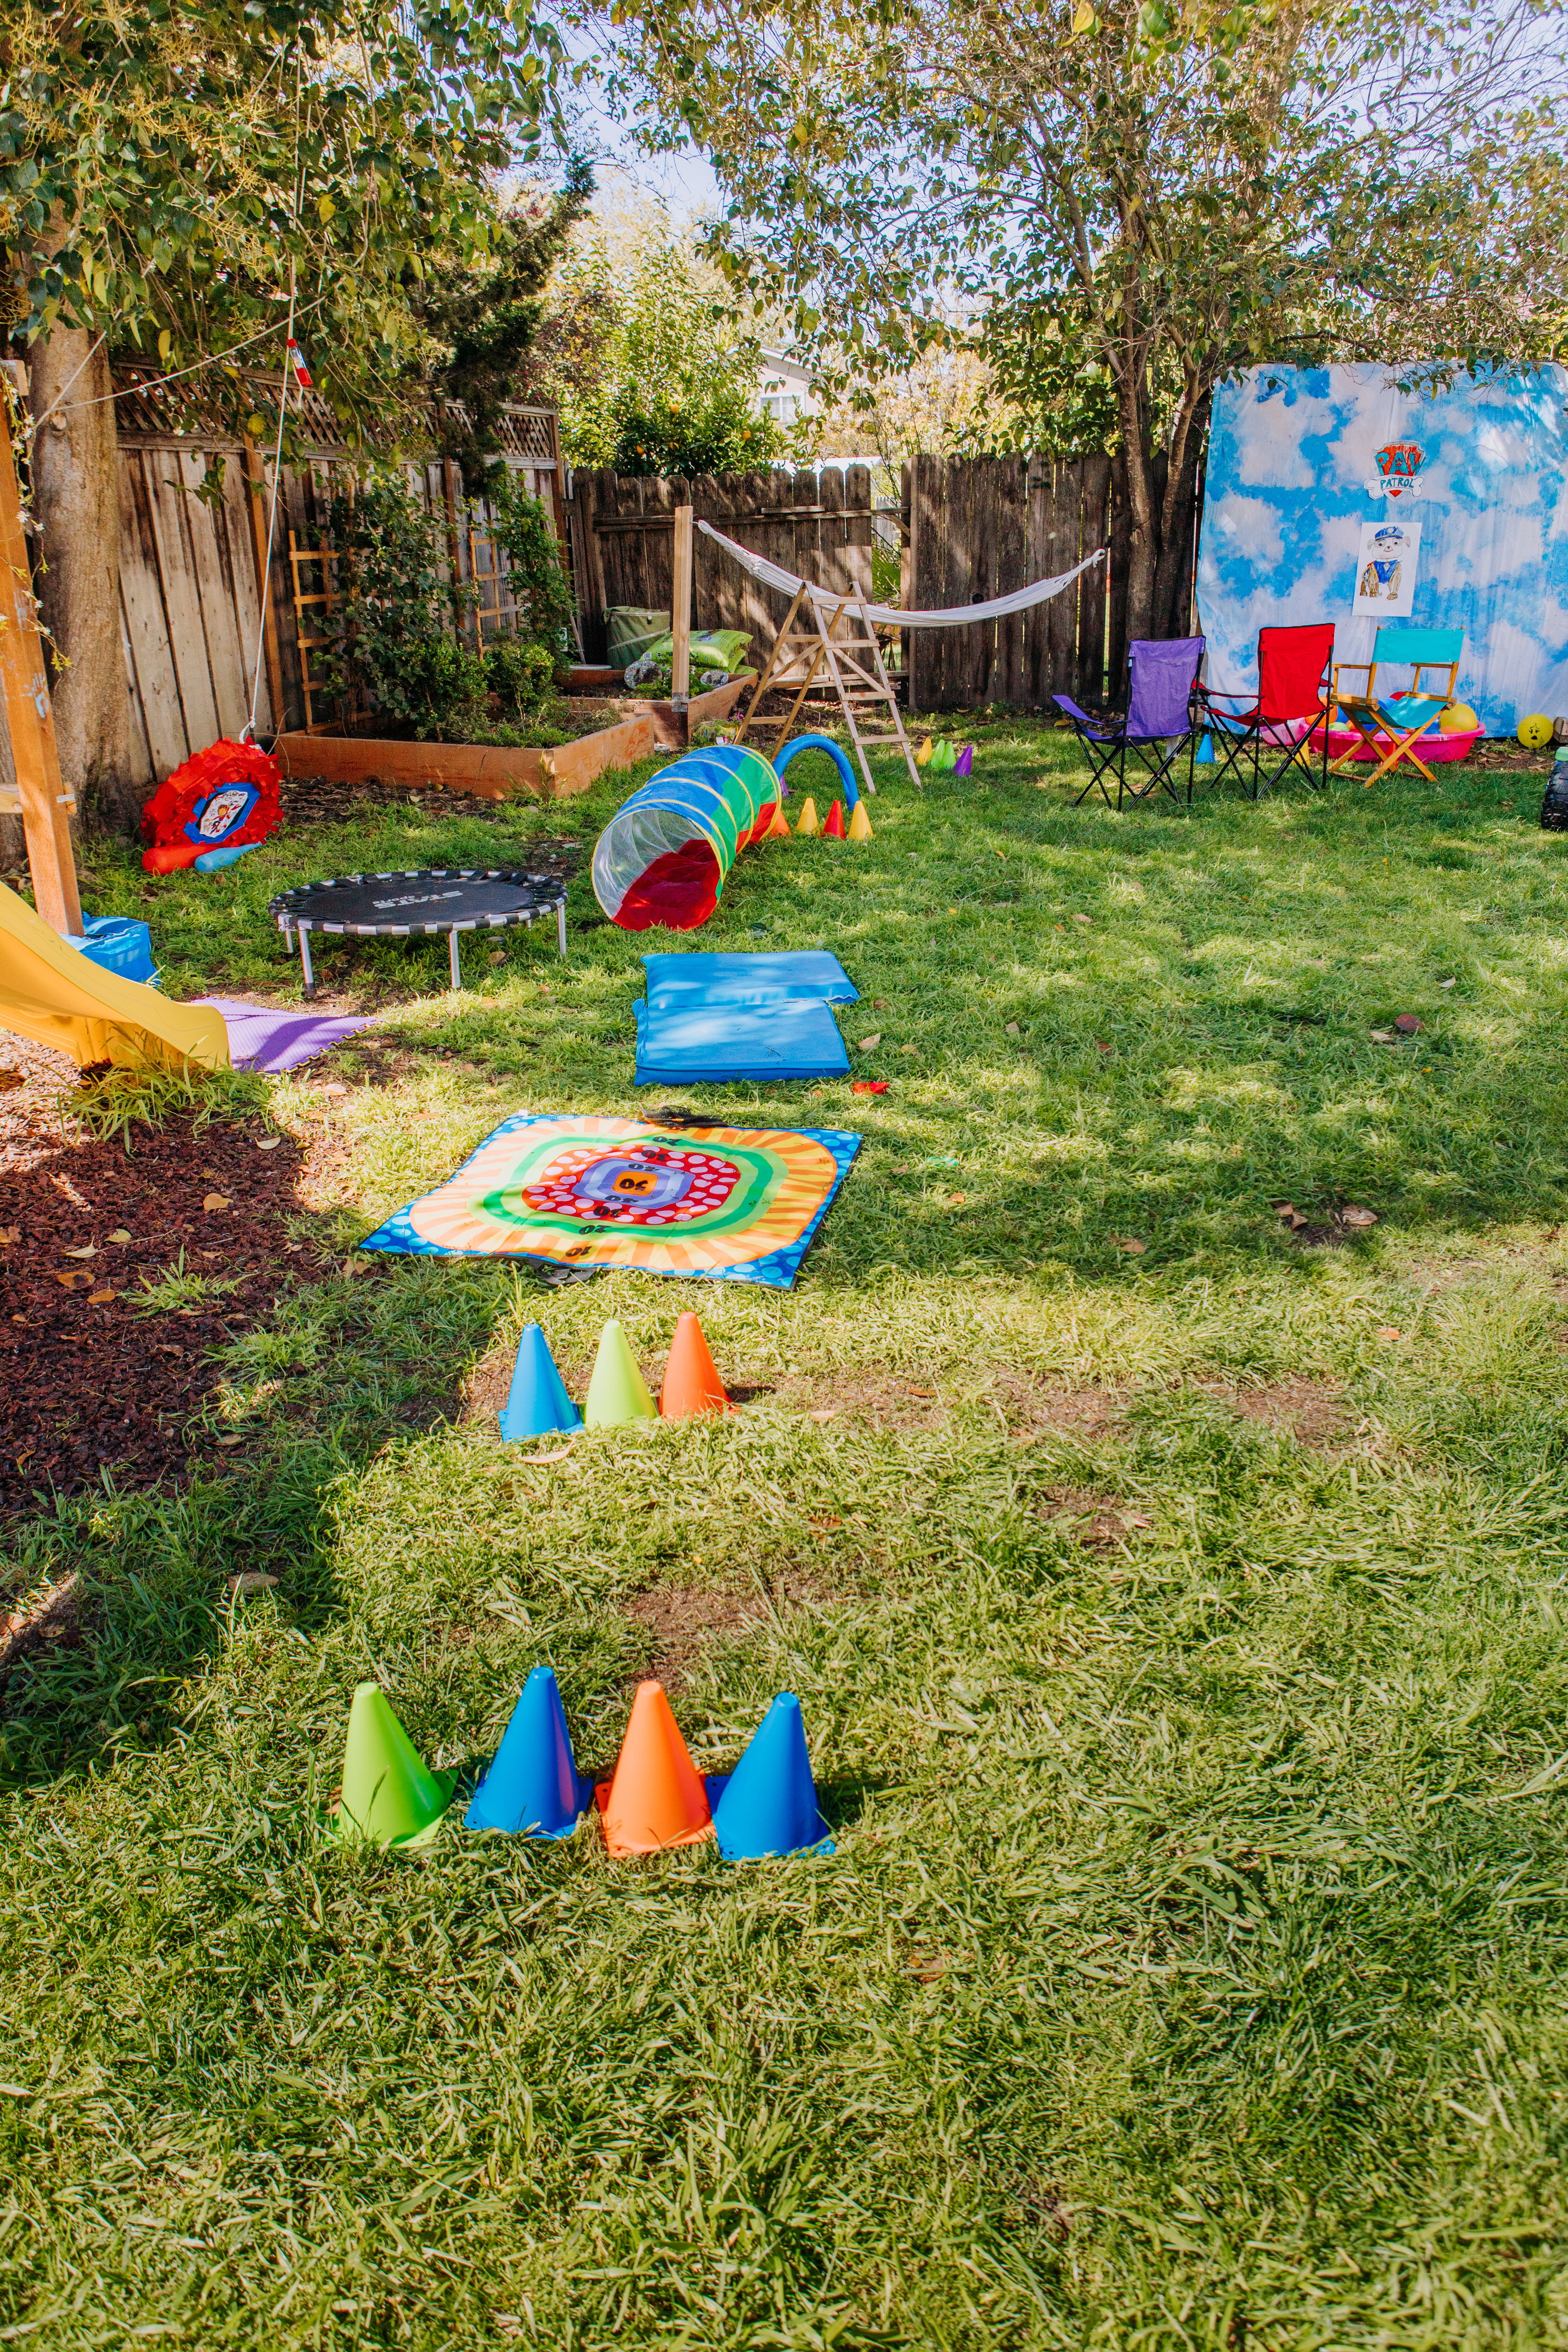
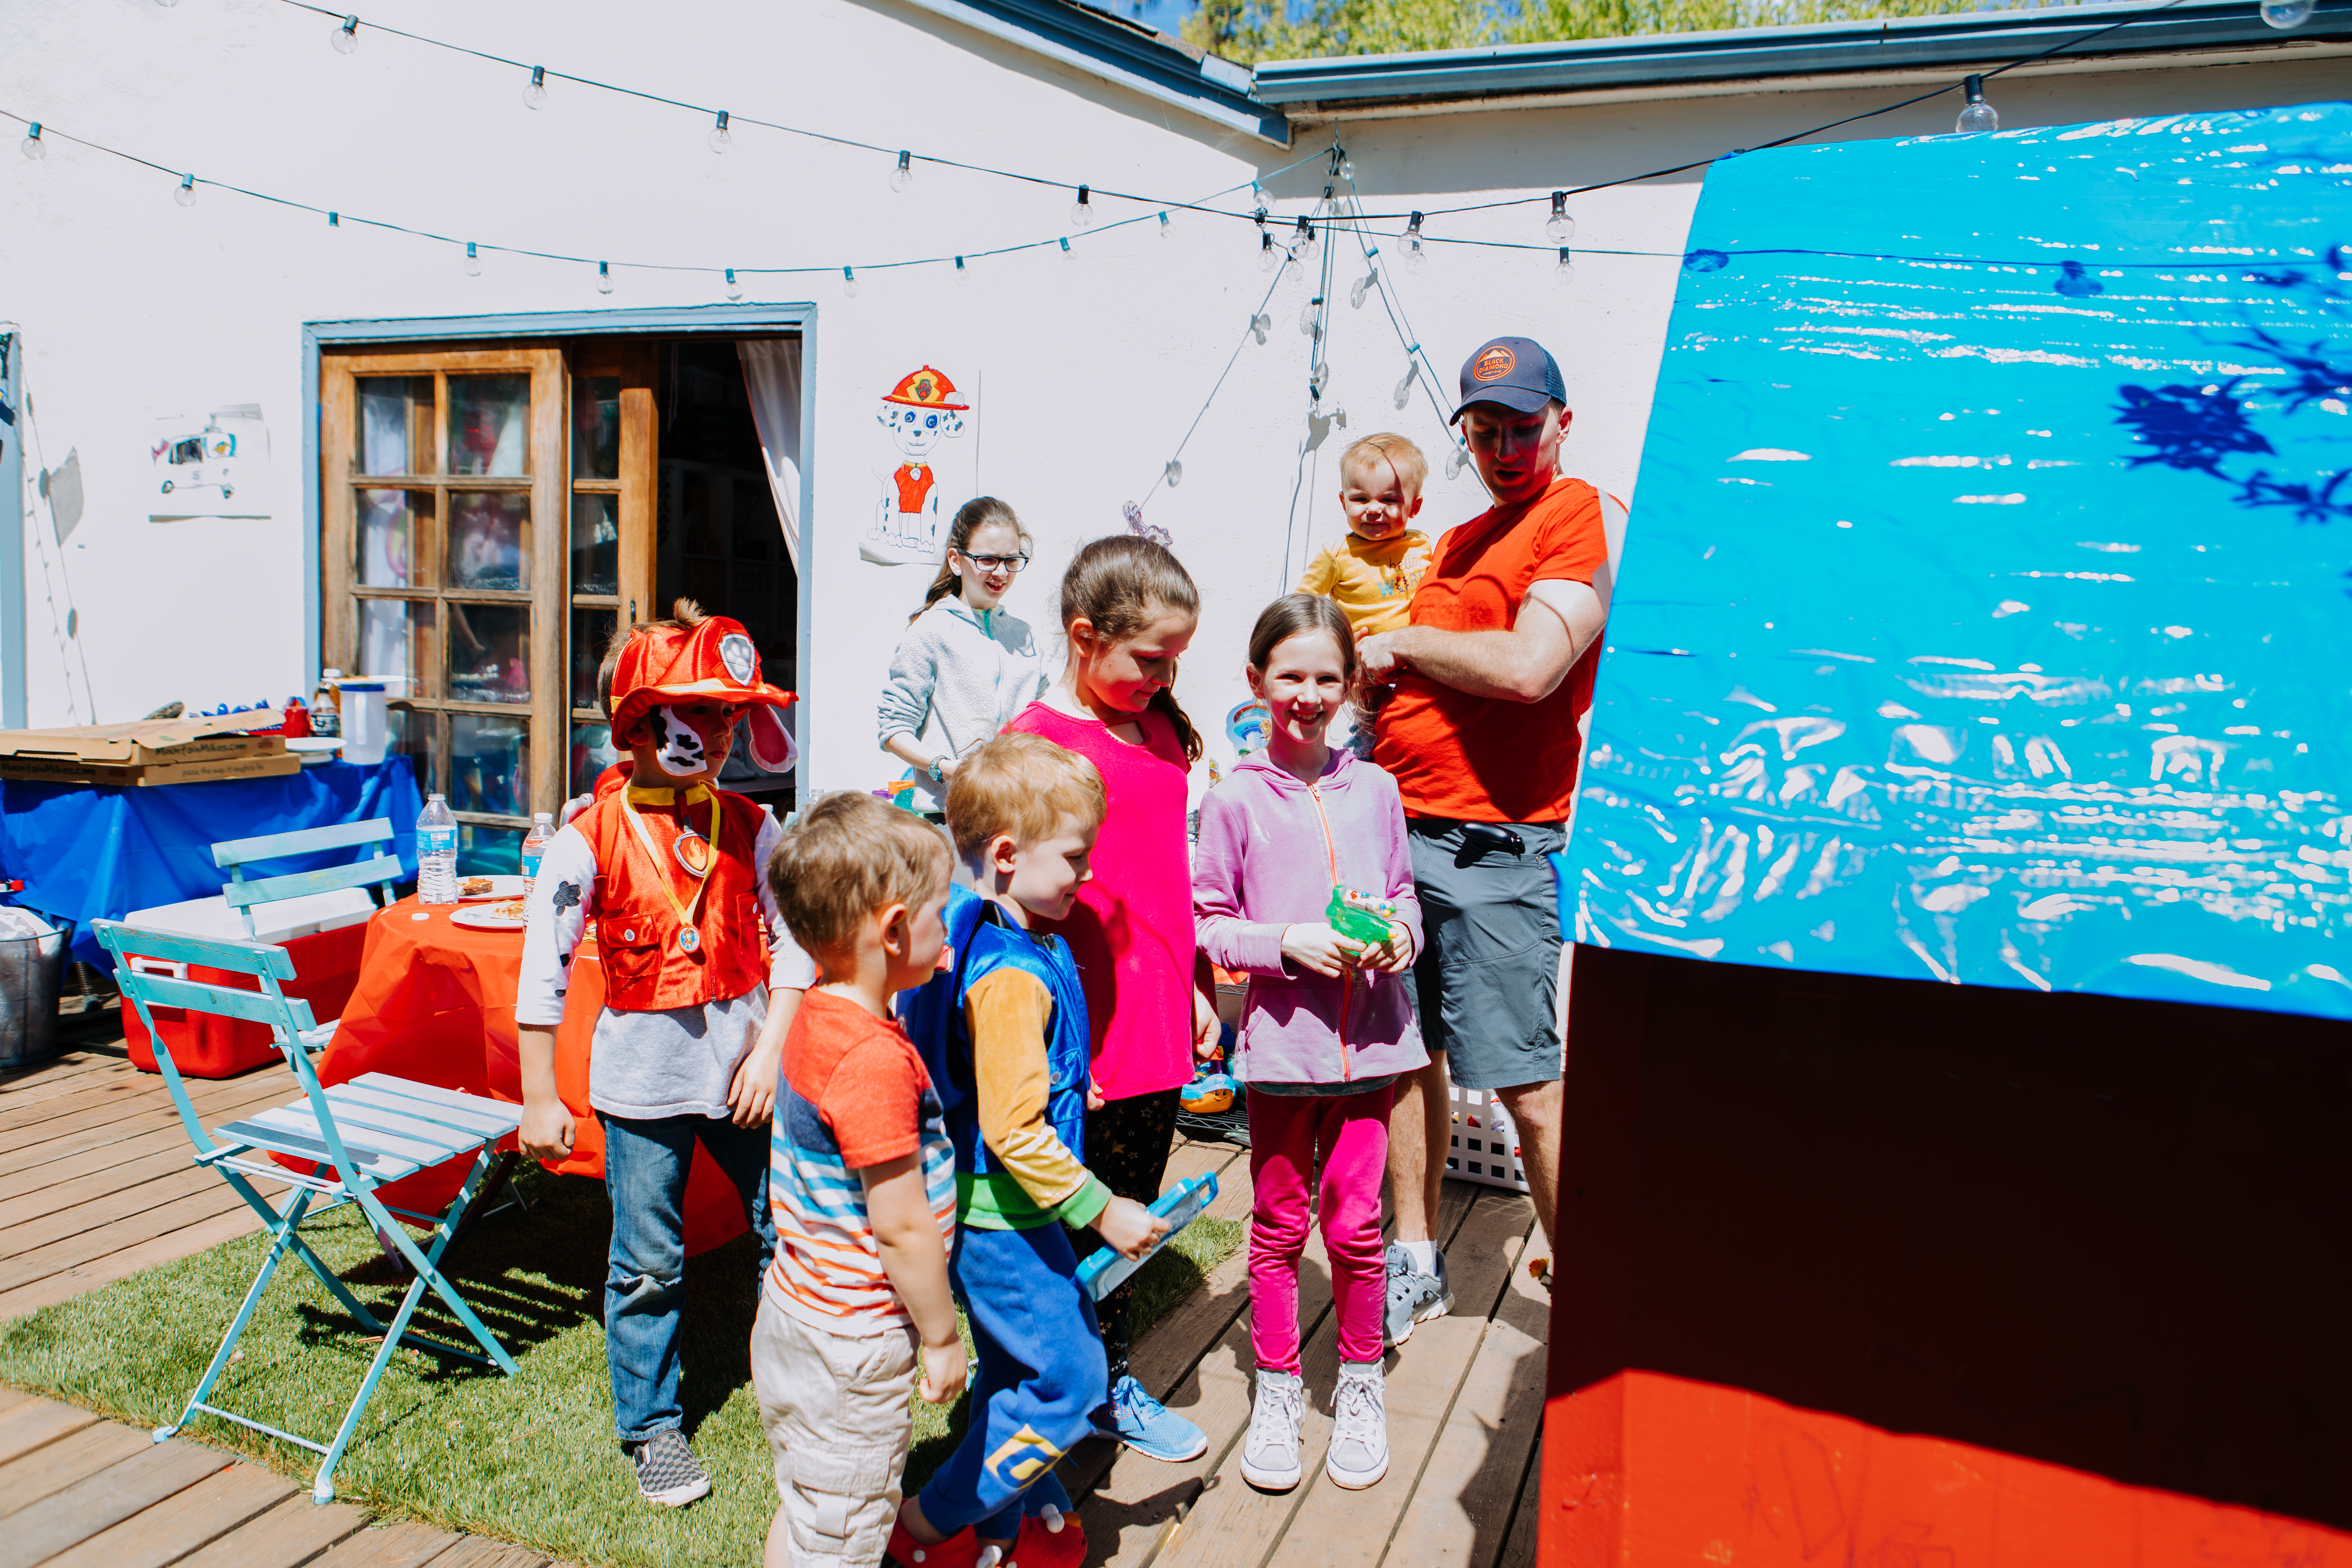
- Obstacle Course. My husband played ‘Ryder’ and we called in the new recruits! Acted like a friendly drill sergeant/ coach and had the birthday boy demonstrate how to do the obstacle course. Then as each kid did it, they received a badge at the end, got into costumes if they were not already and went off to eat pizza.
-
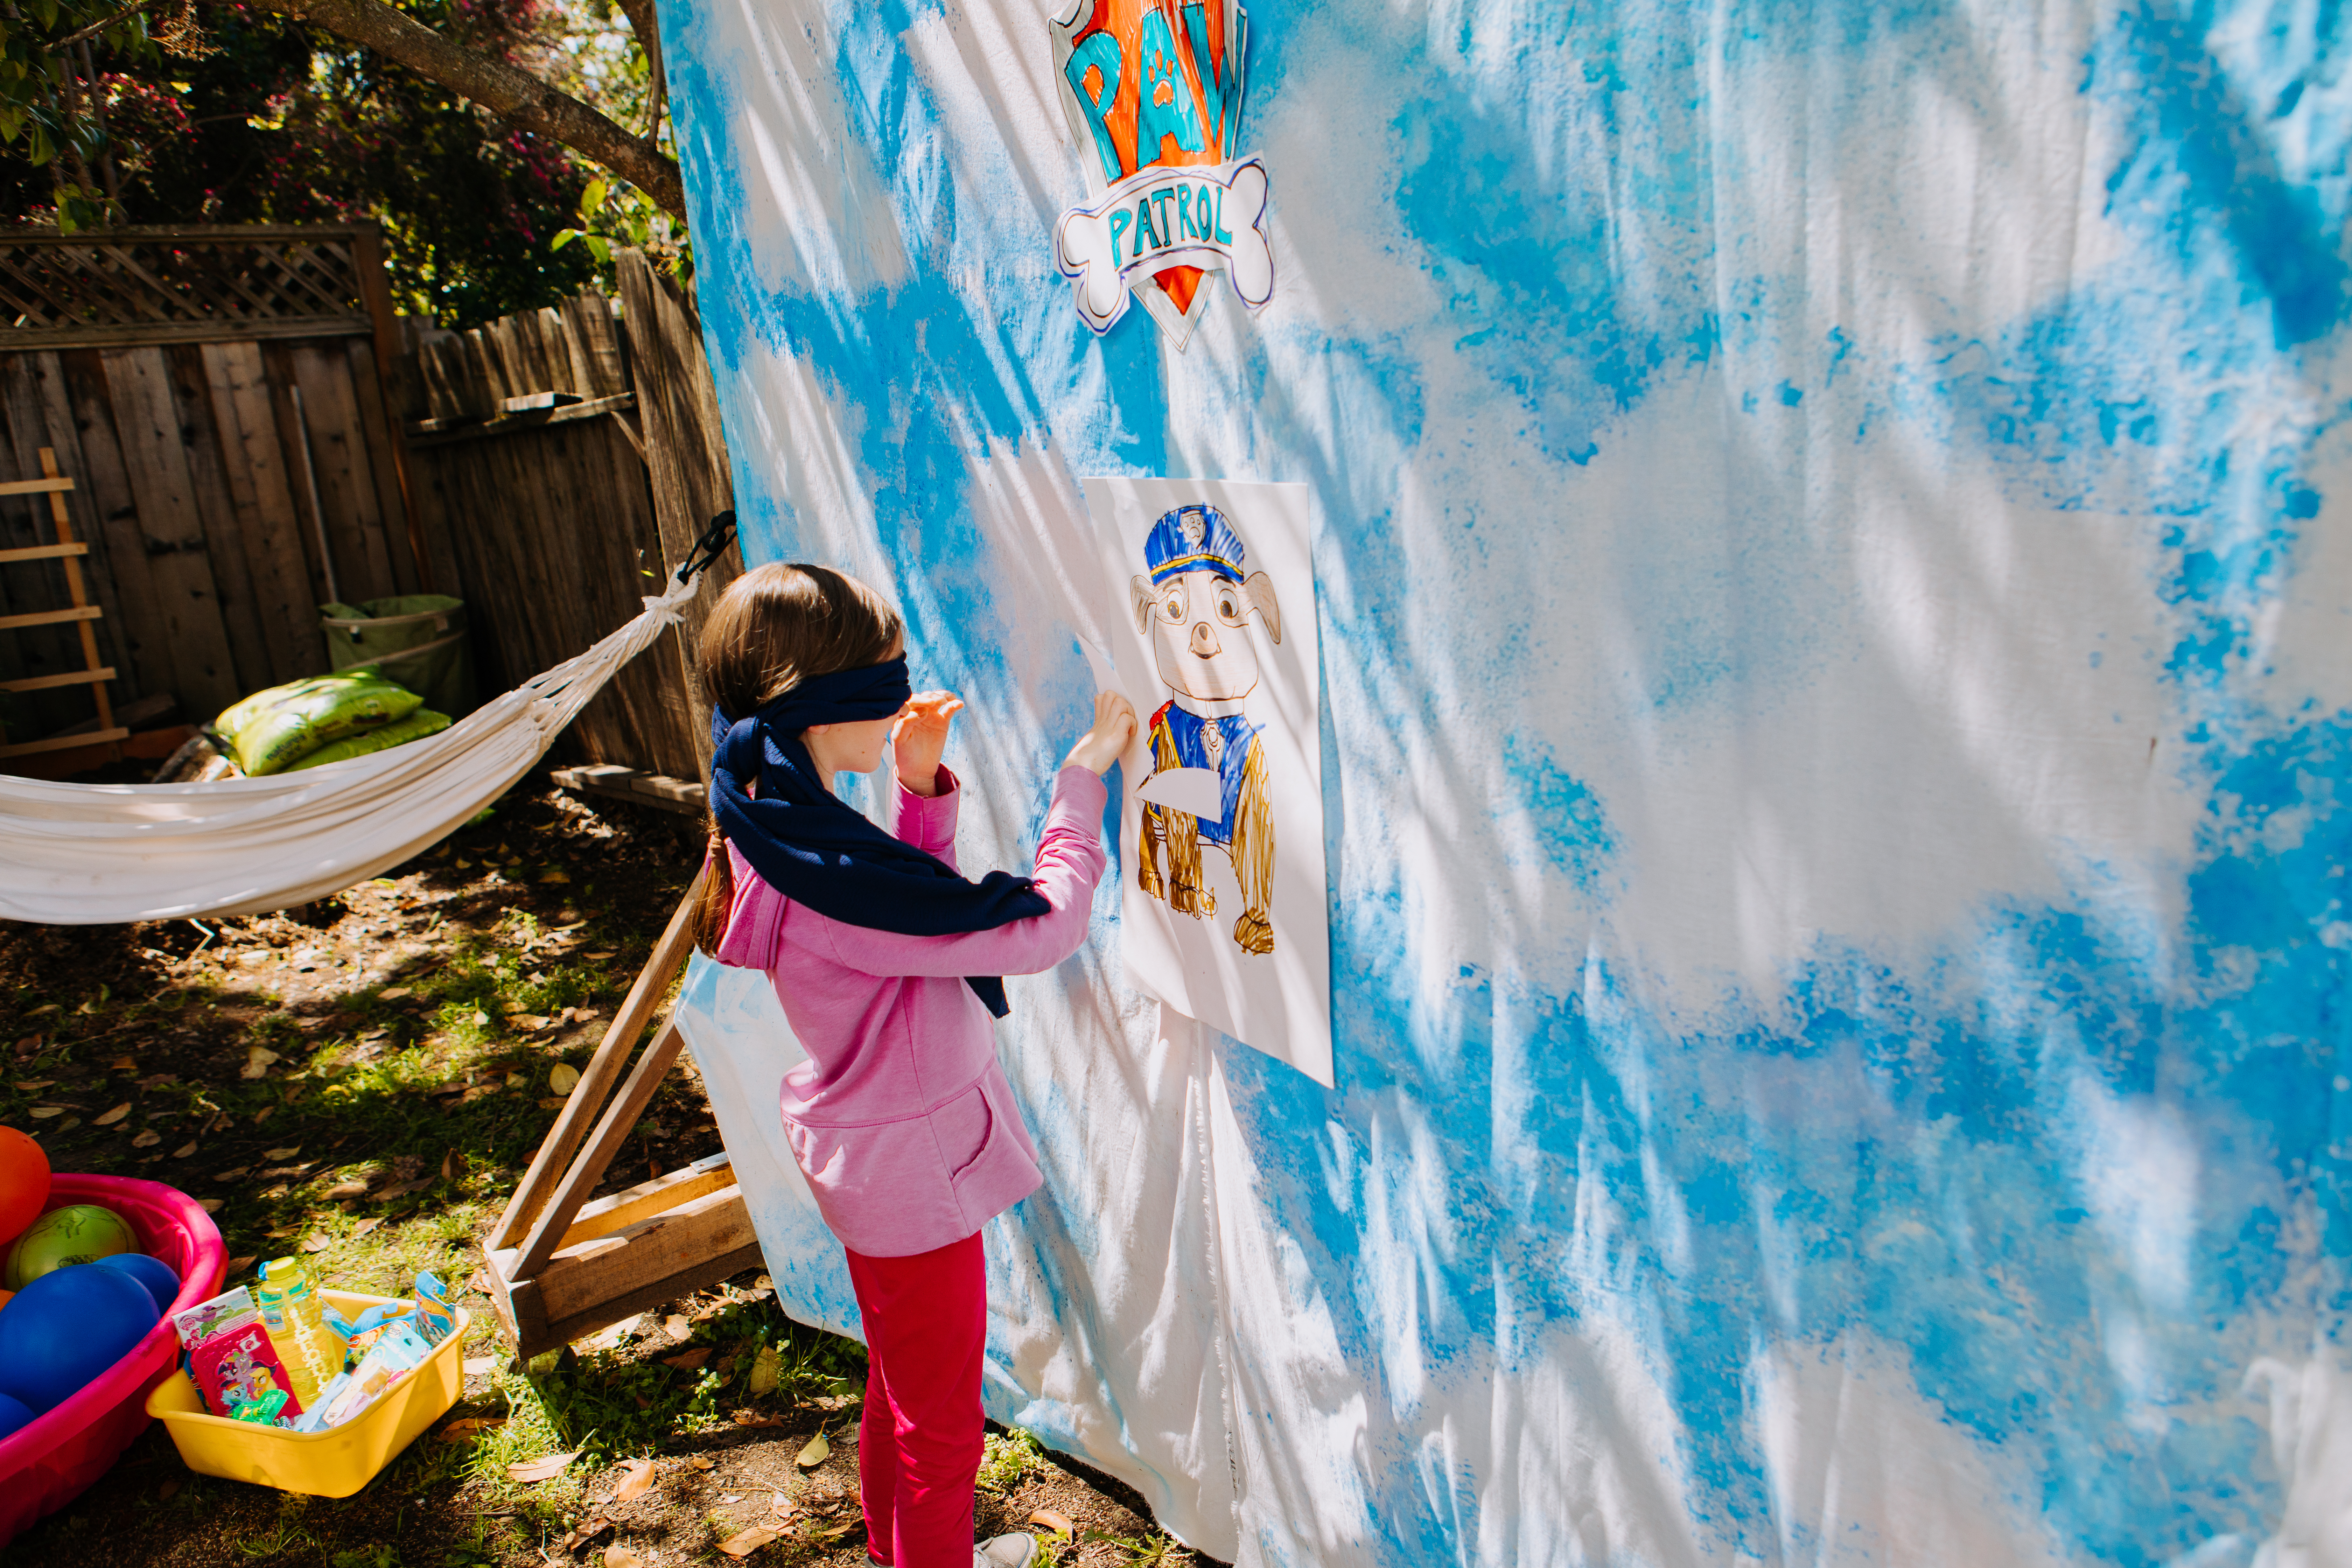
- Pin the Tail on the Dog. Part of the excitement leading up to getting ready for the party is preparing the decorations for the party. Milo LOVES to color right now, so we just made our own posters and colored them that had bigger images of some of the Paw Patrol characters for the party.
-
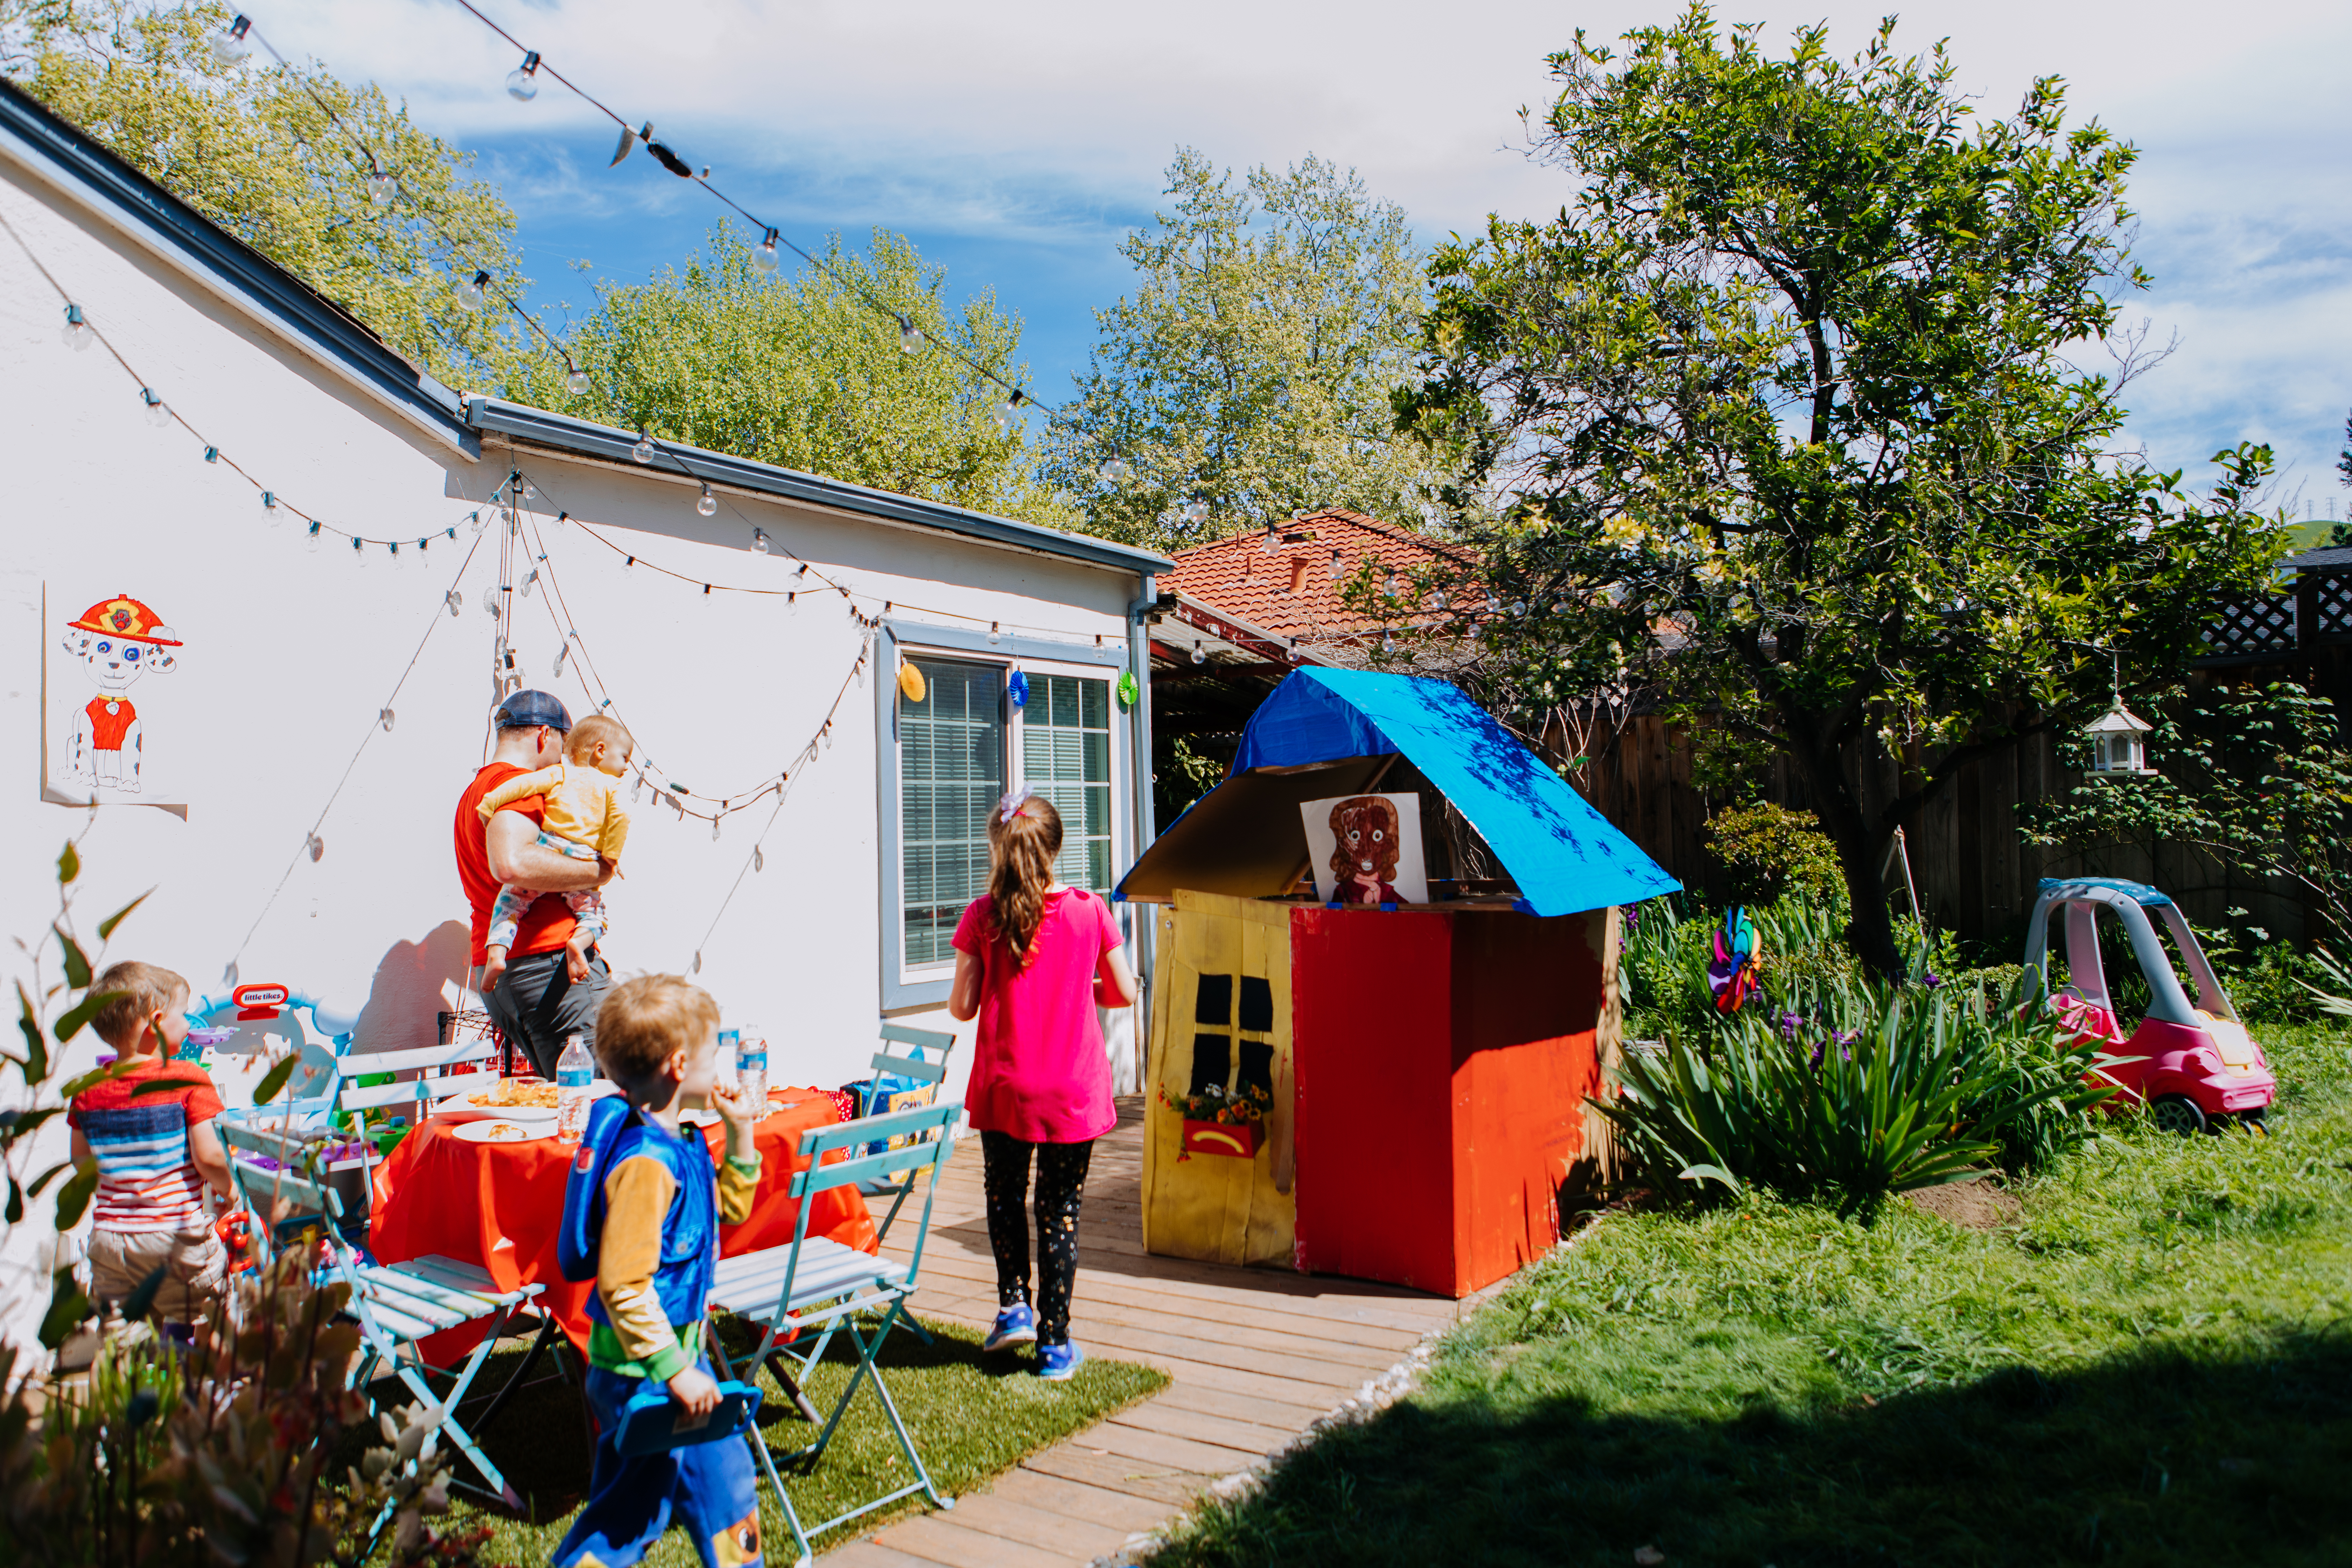
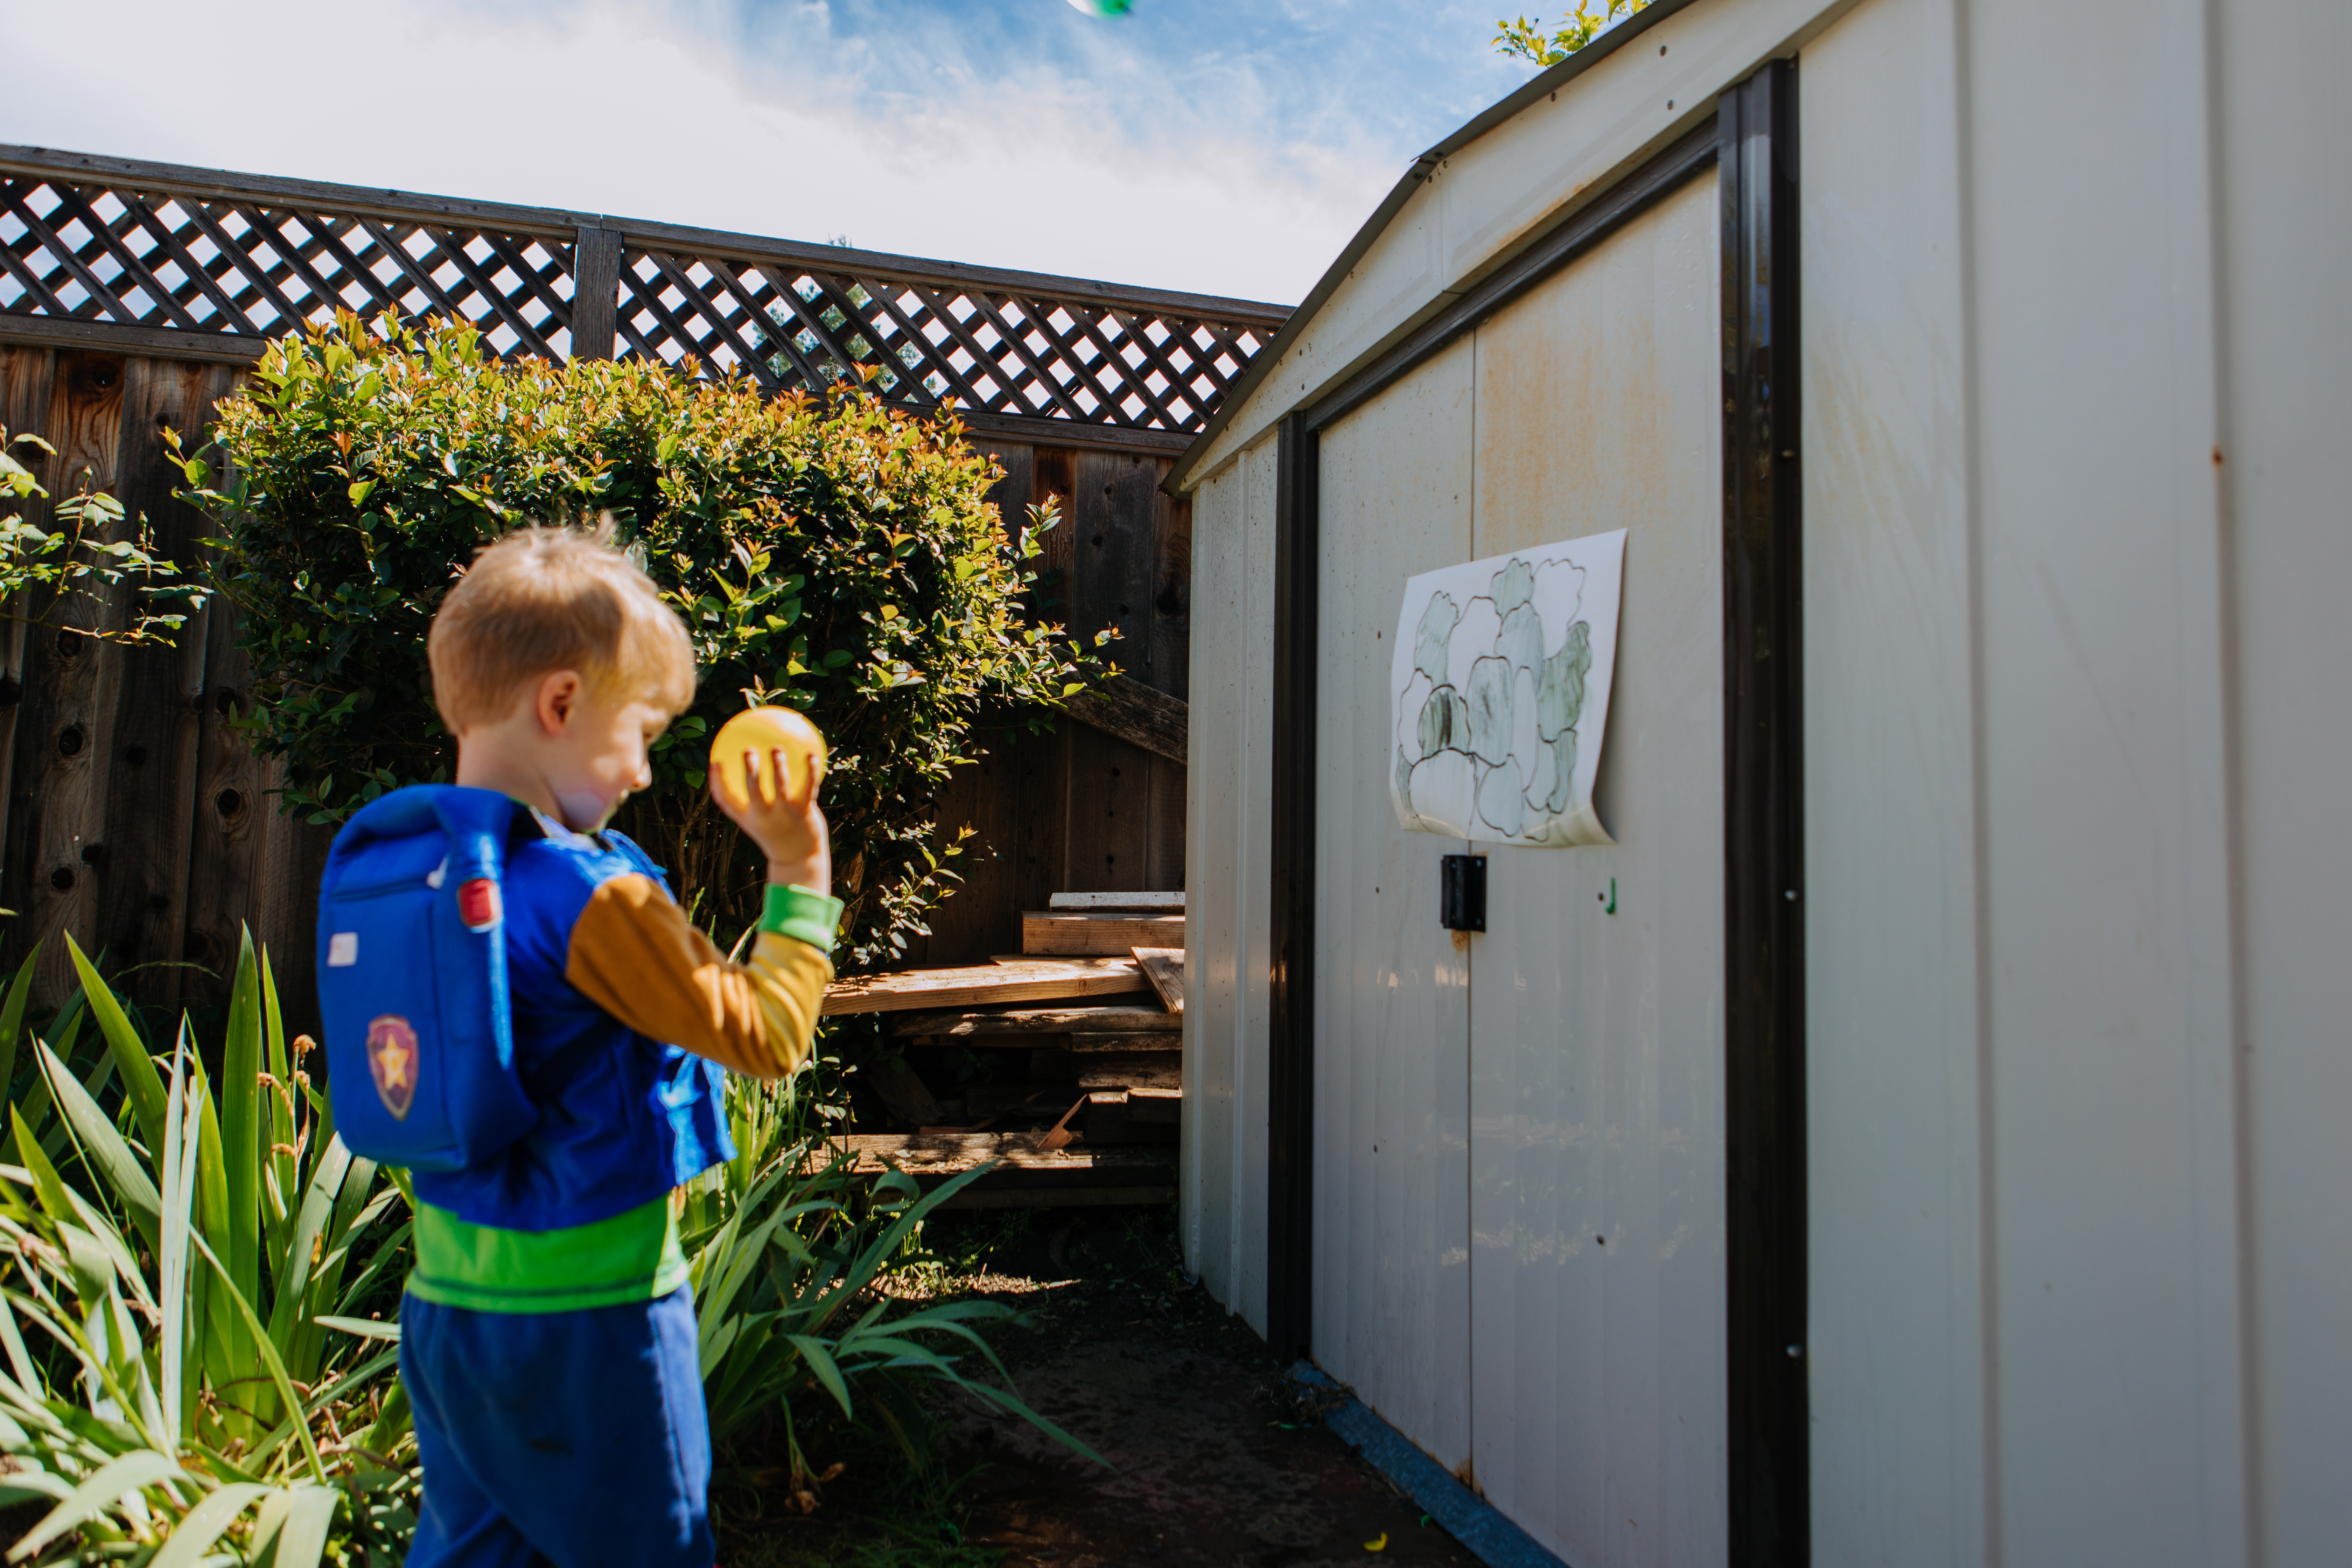
- Paw Patrol Mission. Once the kids had eaten and pinned the tail on the dog, it was time to start our Mission. We basically asked Milo what he wanted to incorporate into the story and naturally, Chickeltta had to be saved for Mayor Goodways sake. It started with me squatting in a cardboard playhouse holding up Mayor Goodway begging the Paw Patrol to save Chickeletta, my pet chicken who had run away and she needed their help. High pitched voice and all. Then Ryder led the Paw Patrol around the yard. They had to get in their vehicles and try to find her. Then Ryder pulled out his location detector device (an X-Box Remote) attached to Chickelleta’s ankle to locate her inside of a mountain! The ‘mountain’ was our shed. We drew rocks on a poster that the kids had to use water balloons to hit and ‘break away’ the rocks. Then after the kids have had a turn, they opened up the shed to reveal chickeletta. BTW, this whole time that they were busy with their vehicles I went over behind the shed and shook it and made Chickelletta distressed noises. When they opened the shed, Ryder informs the crew that it is really a volcano that was going to explode! And I had silly string that I sprayed up and over the shed all over the kids for a finale surprise.
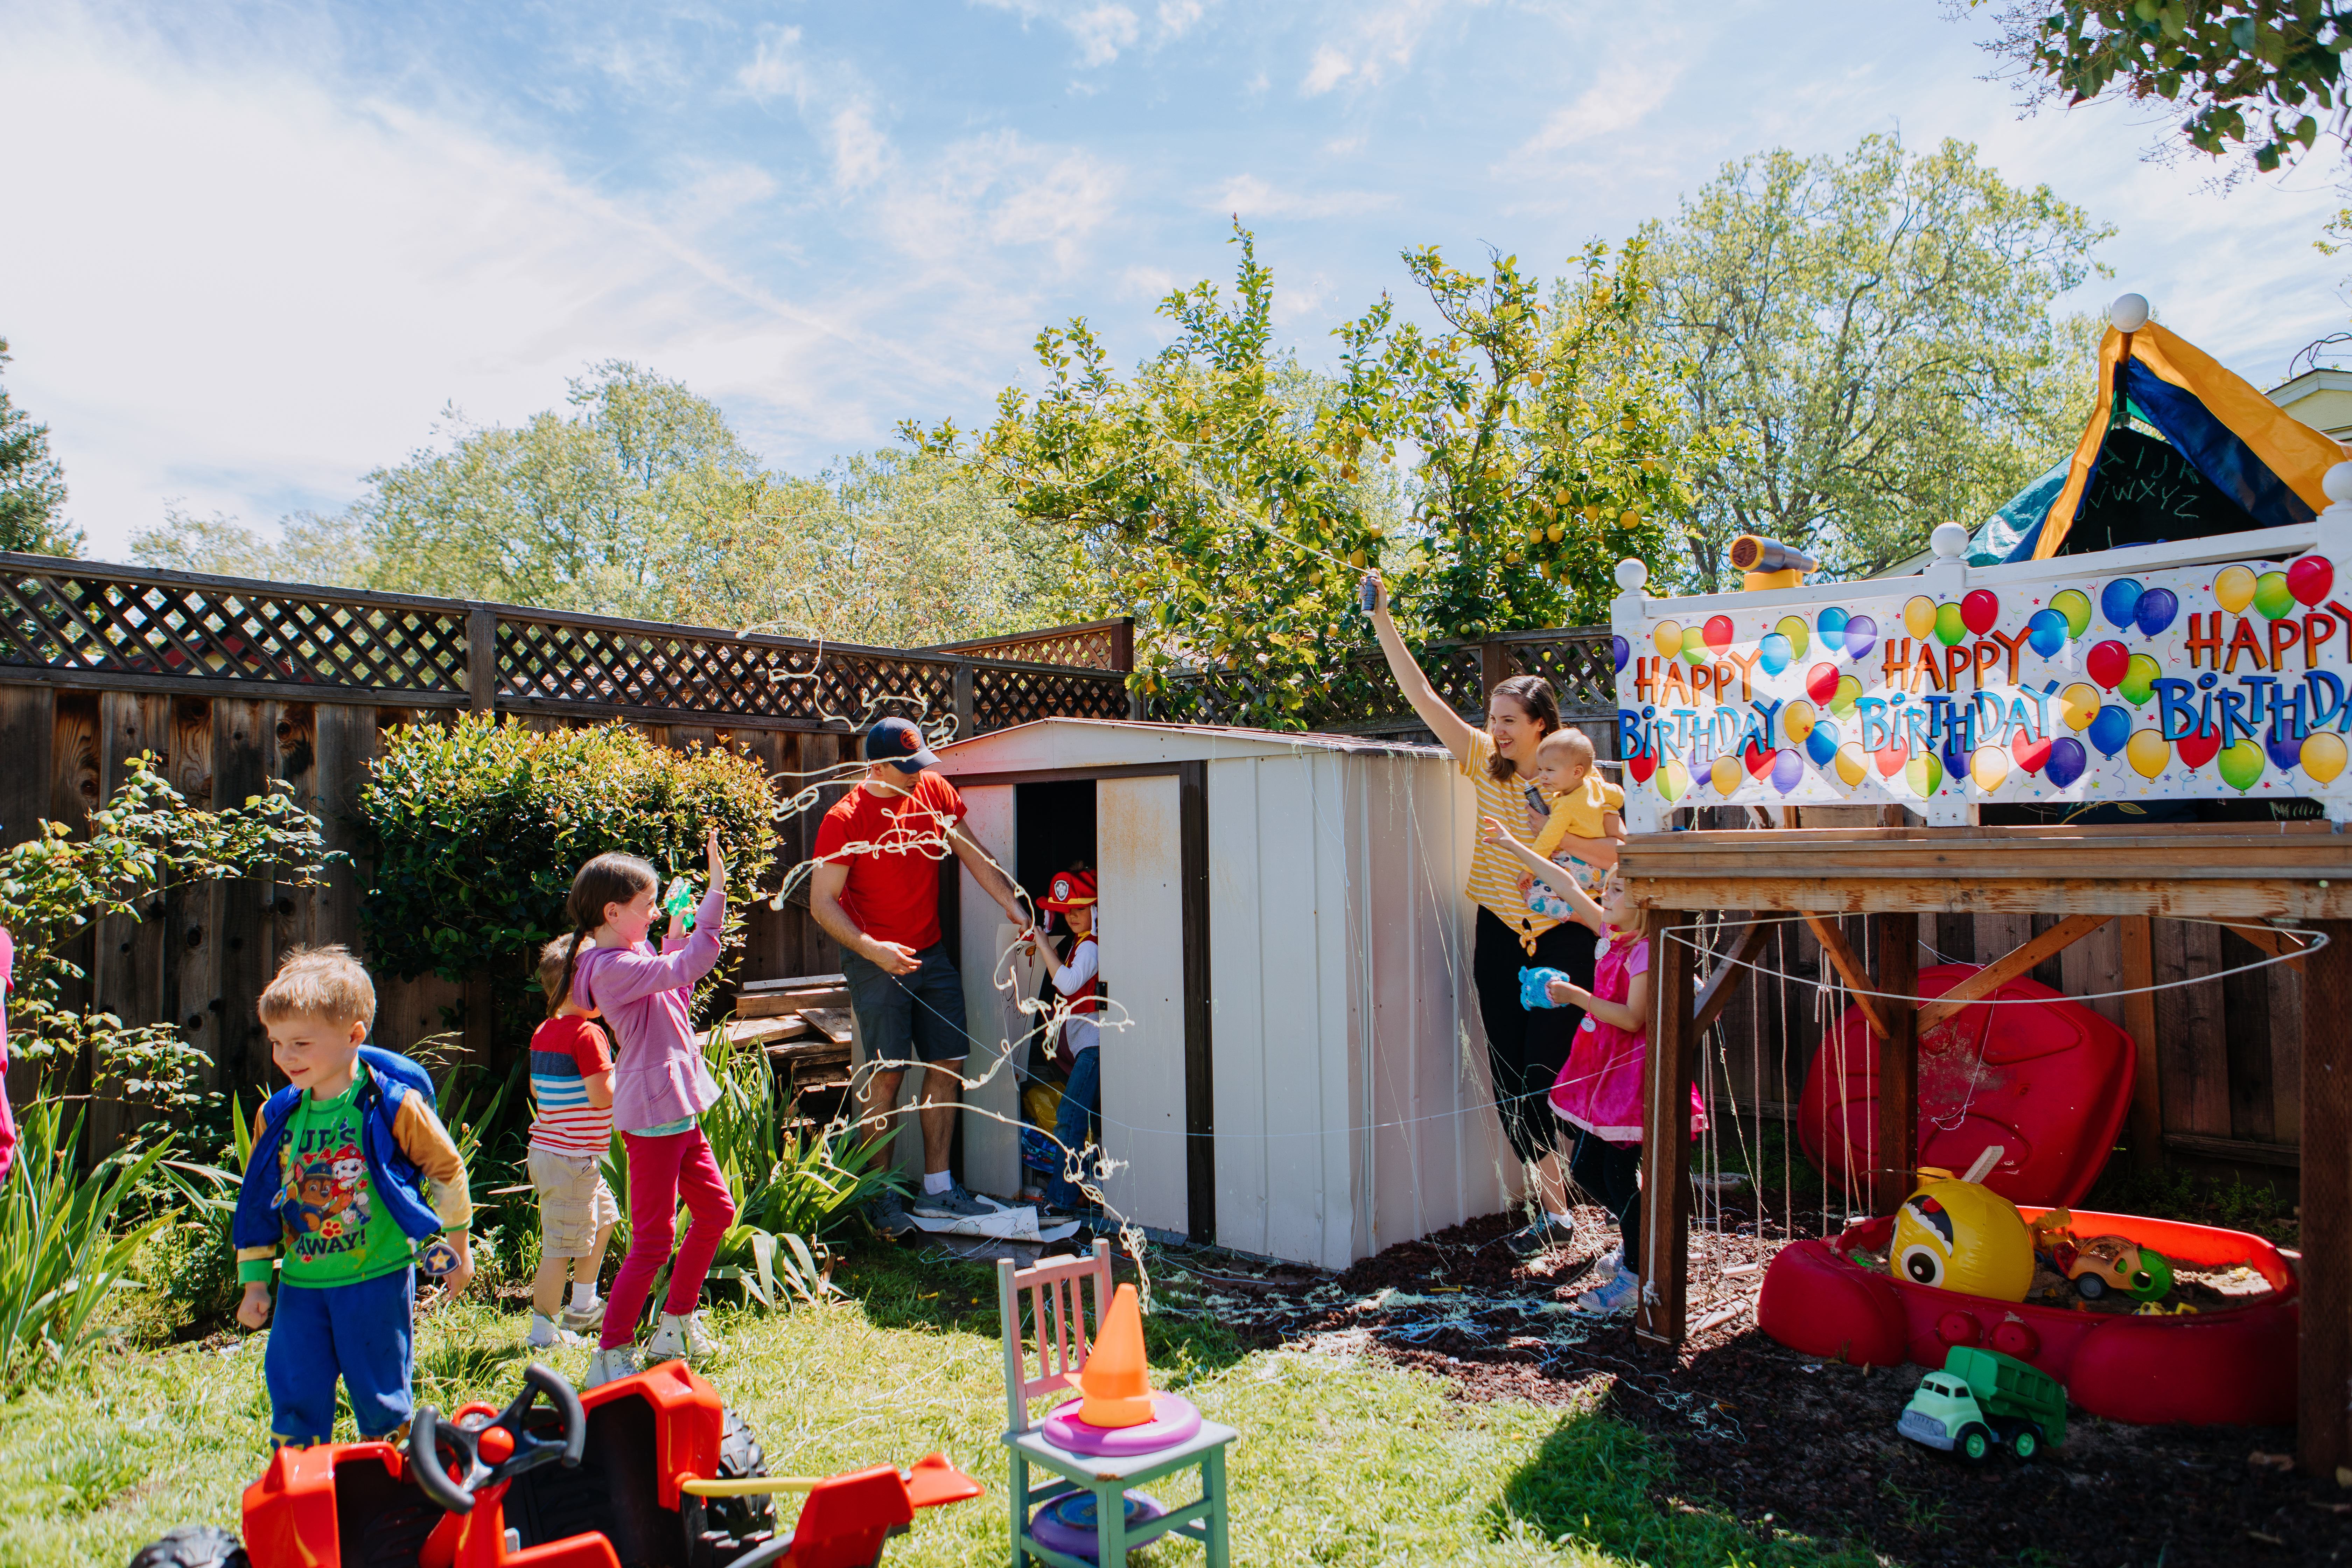
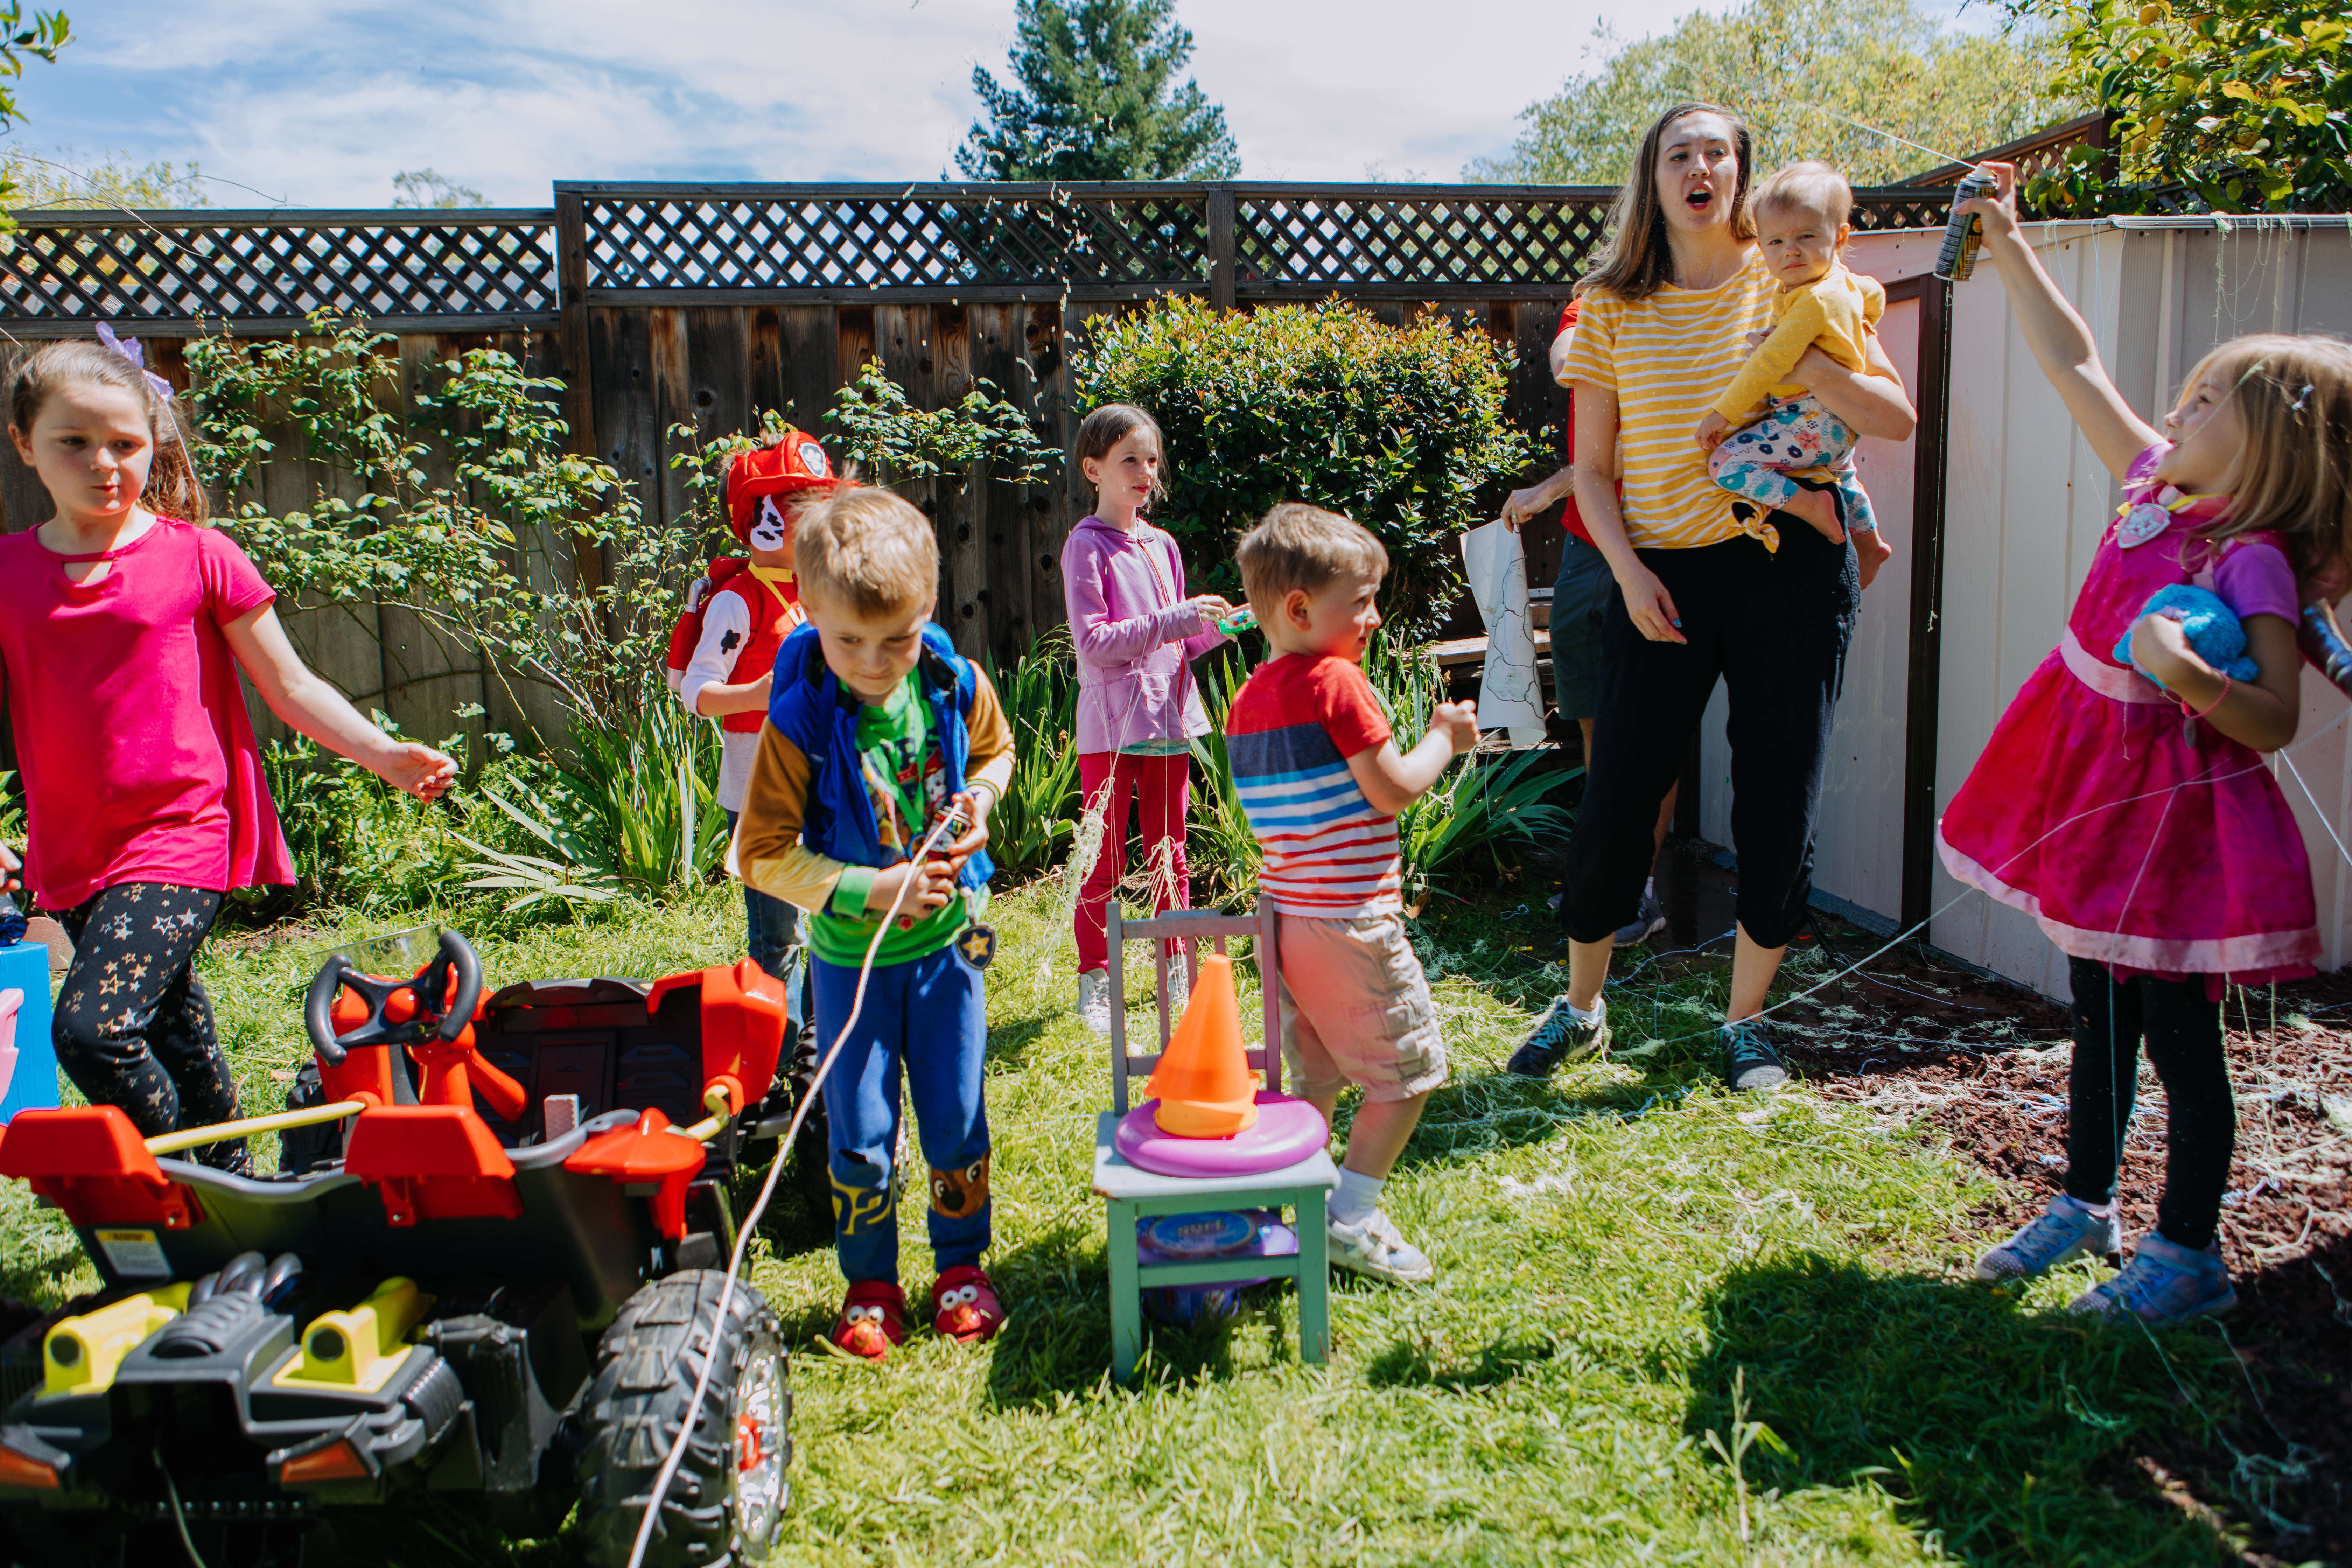
- Pinata. We made our pinata this year. A basic one. They can be expensive and making a basic shaped one can be fairly simple!

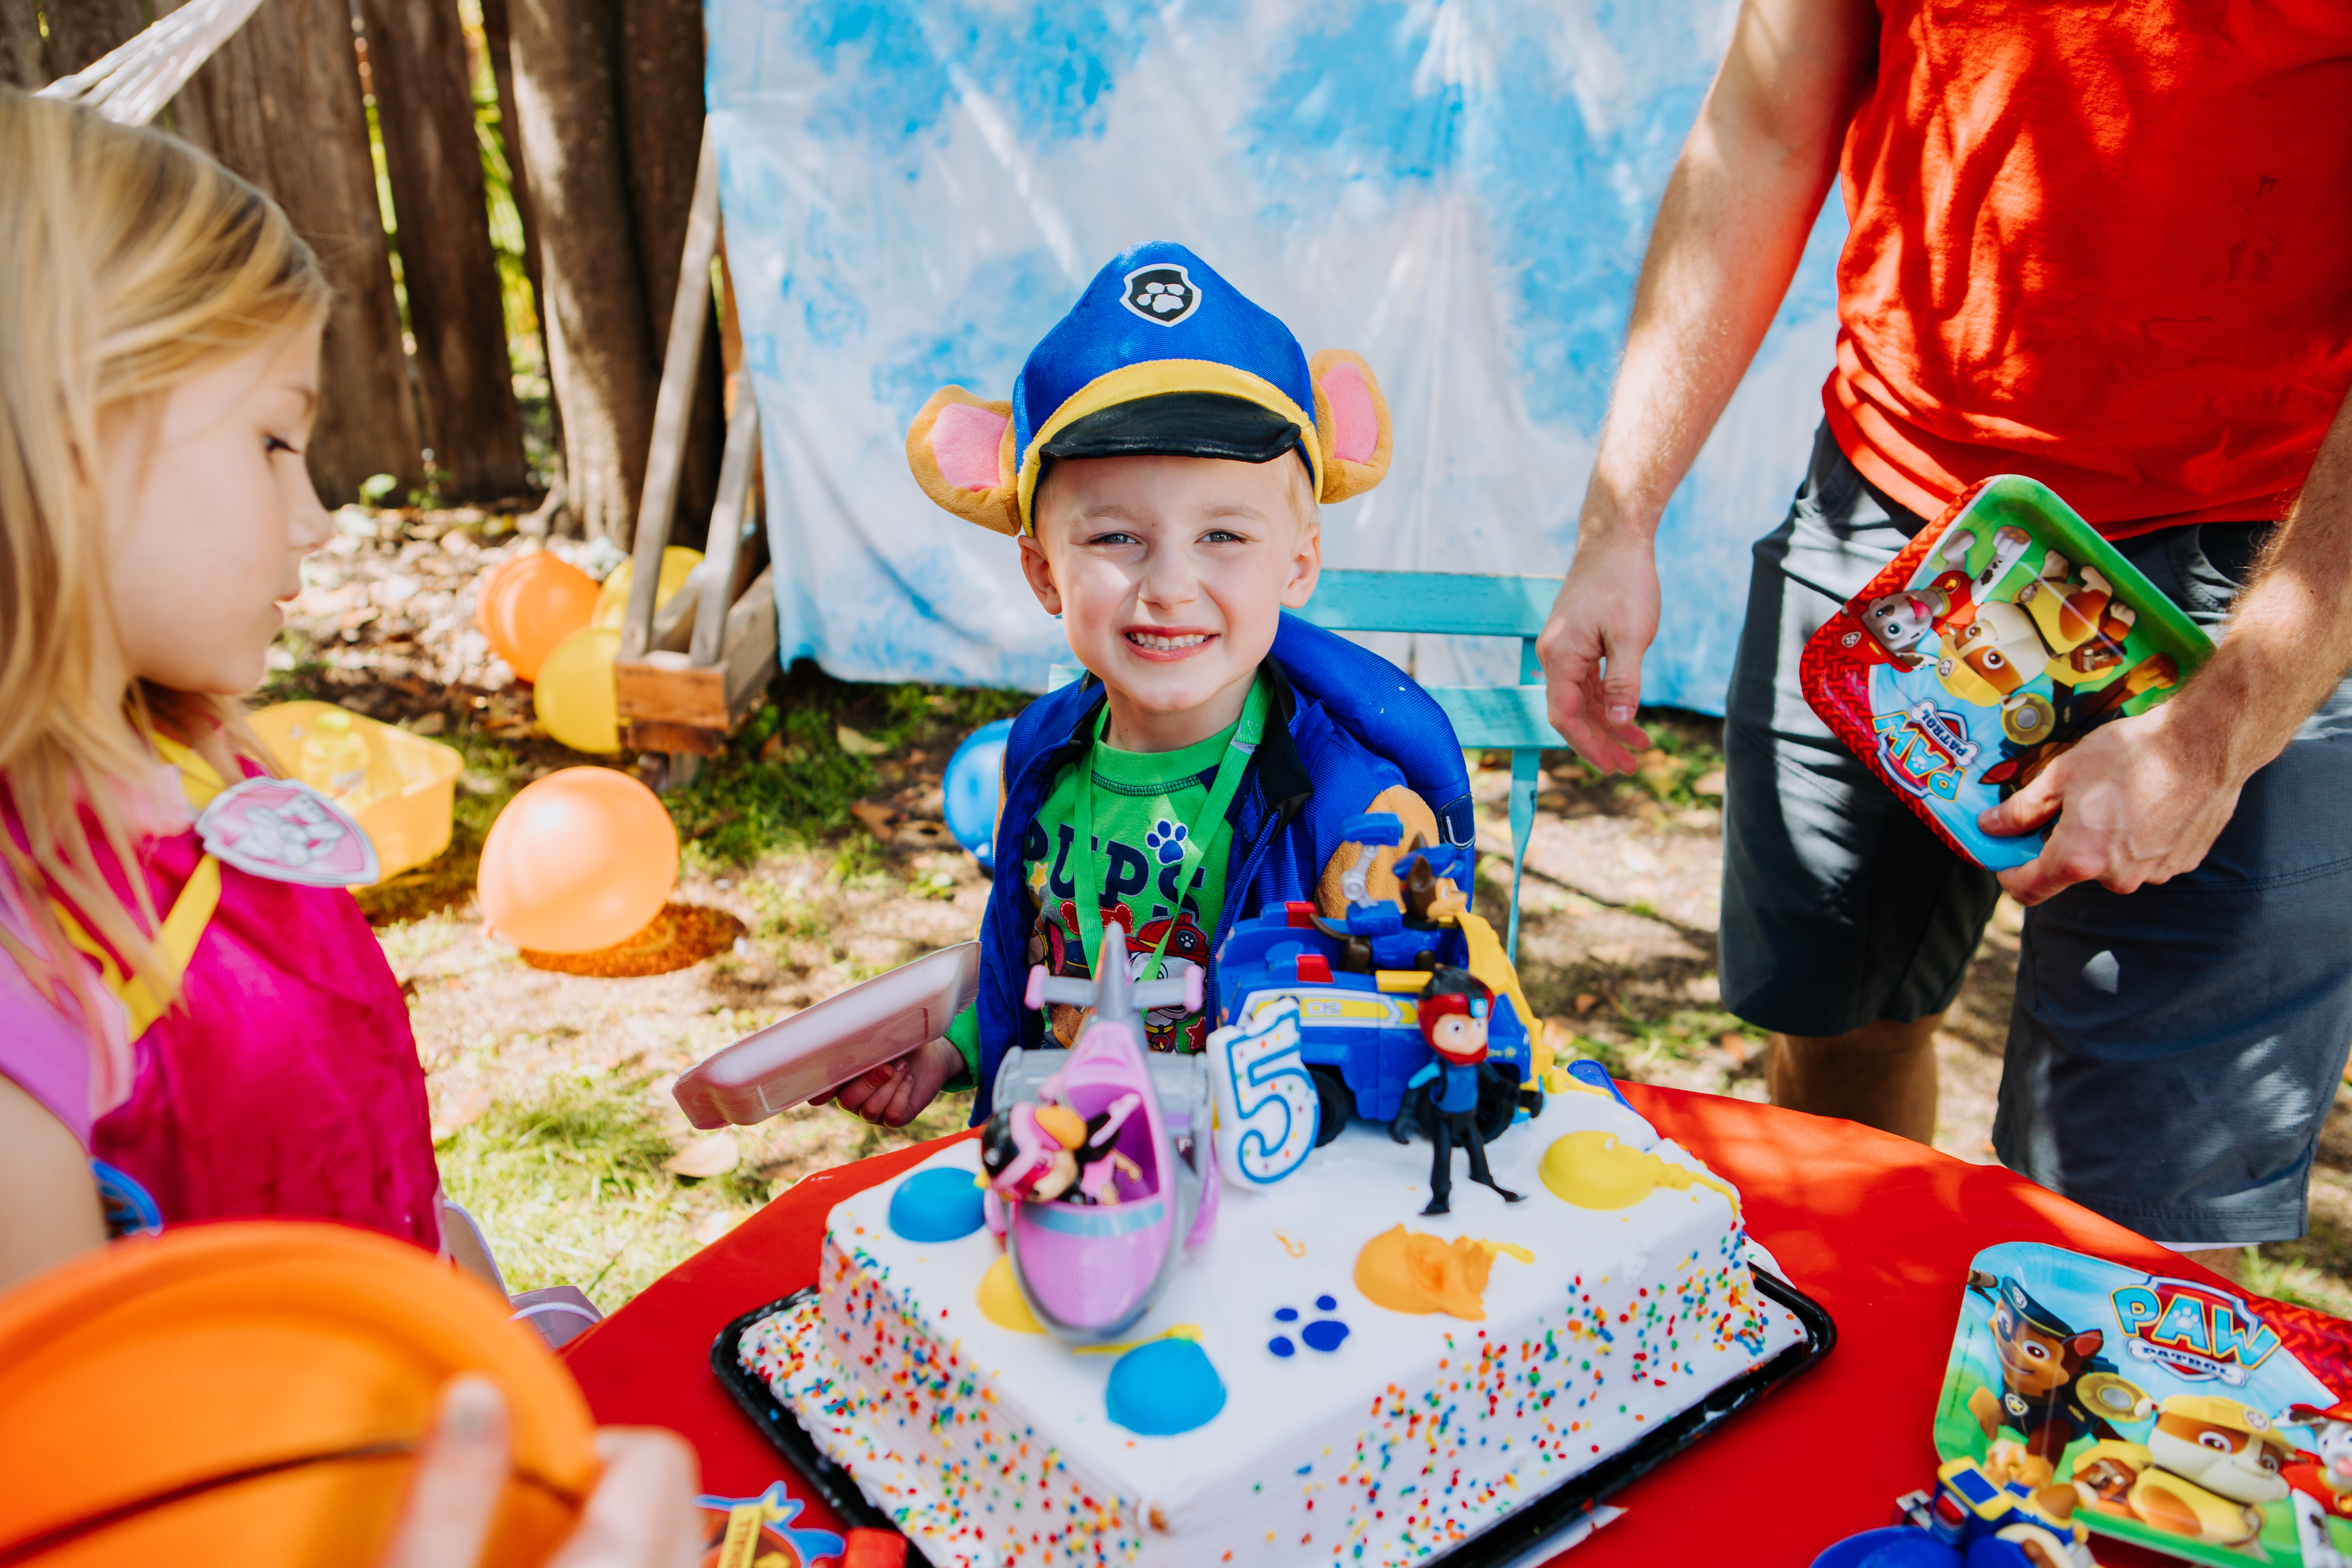
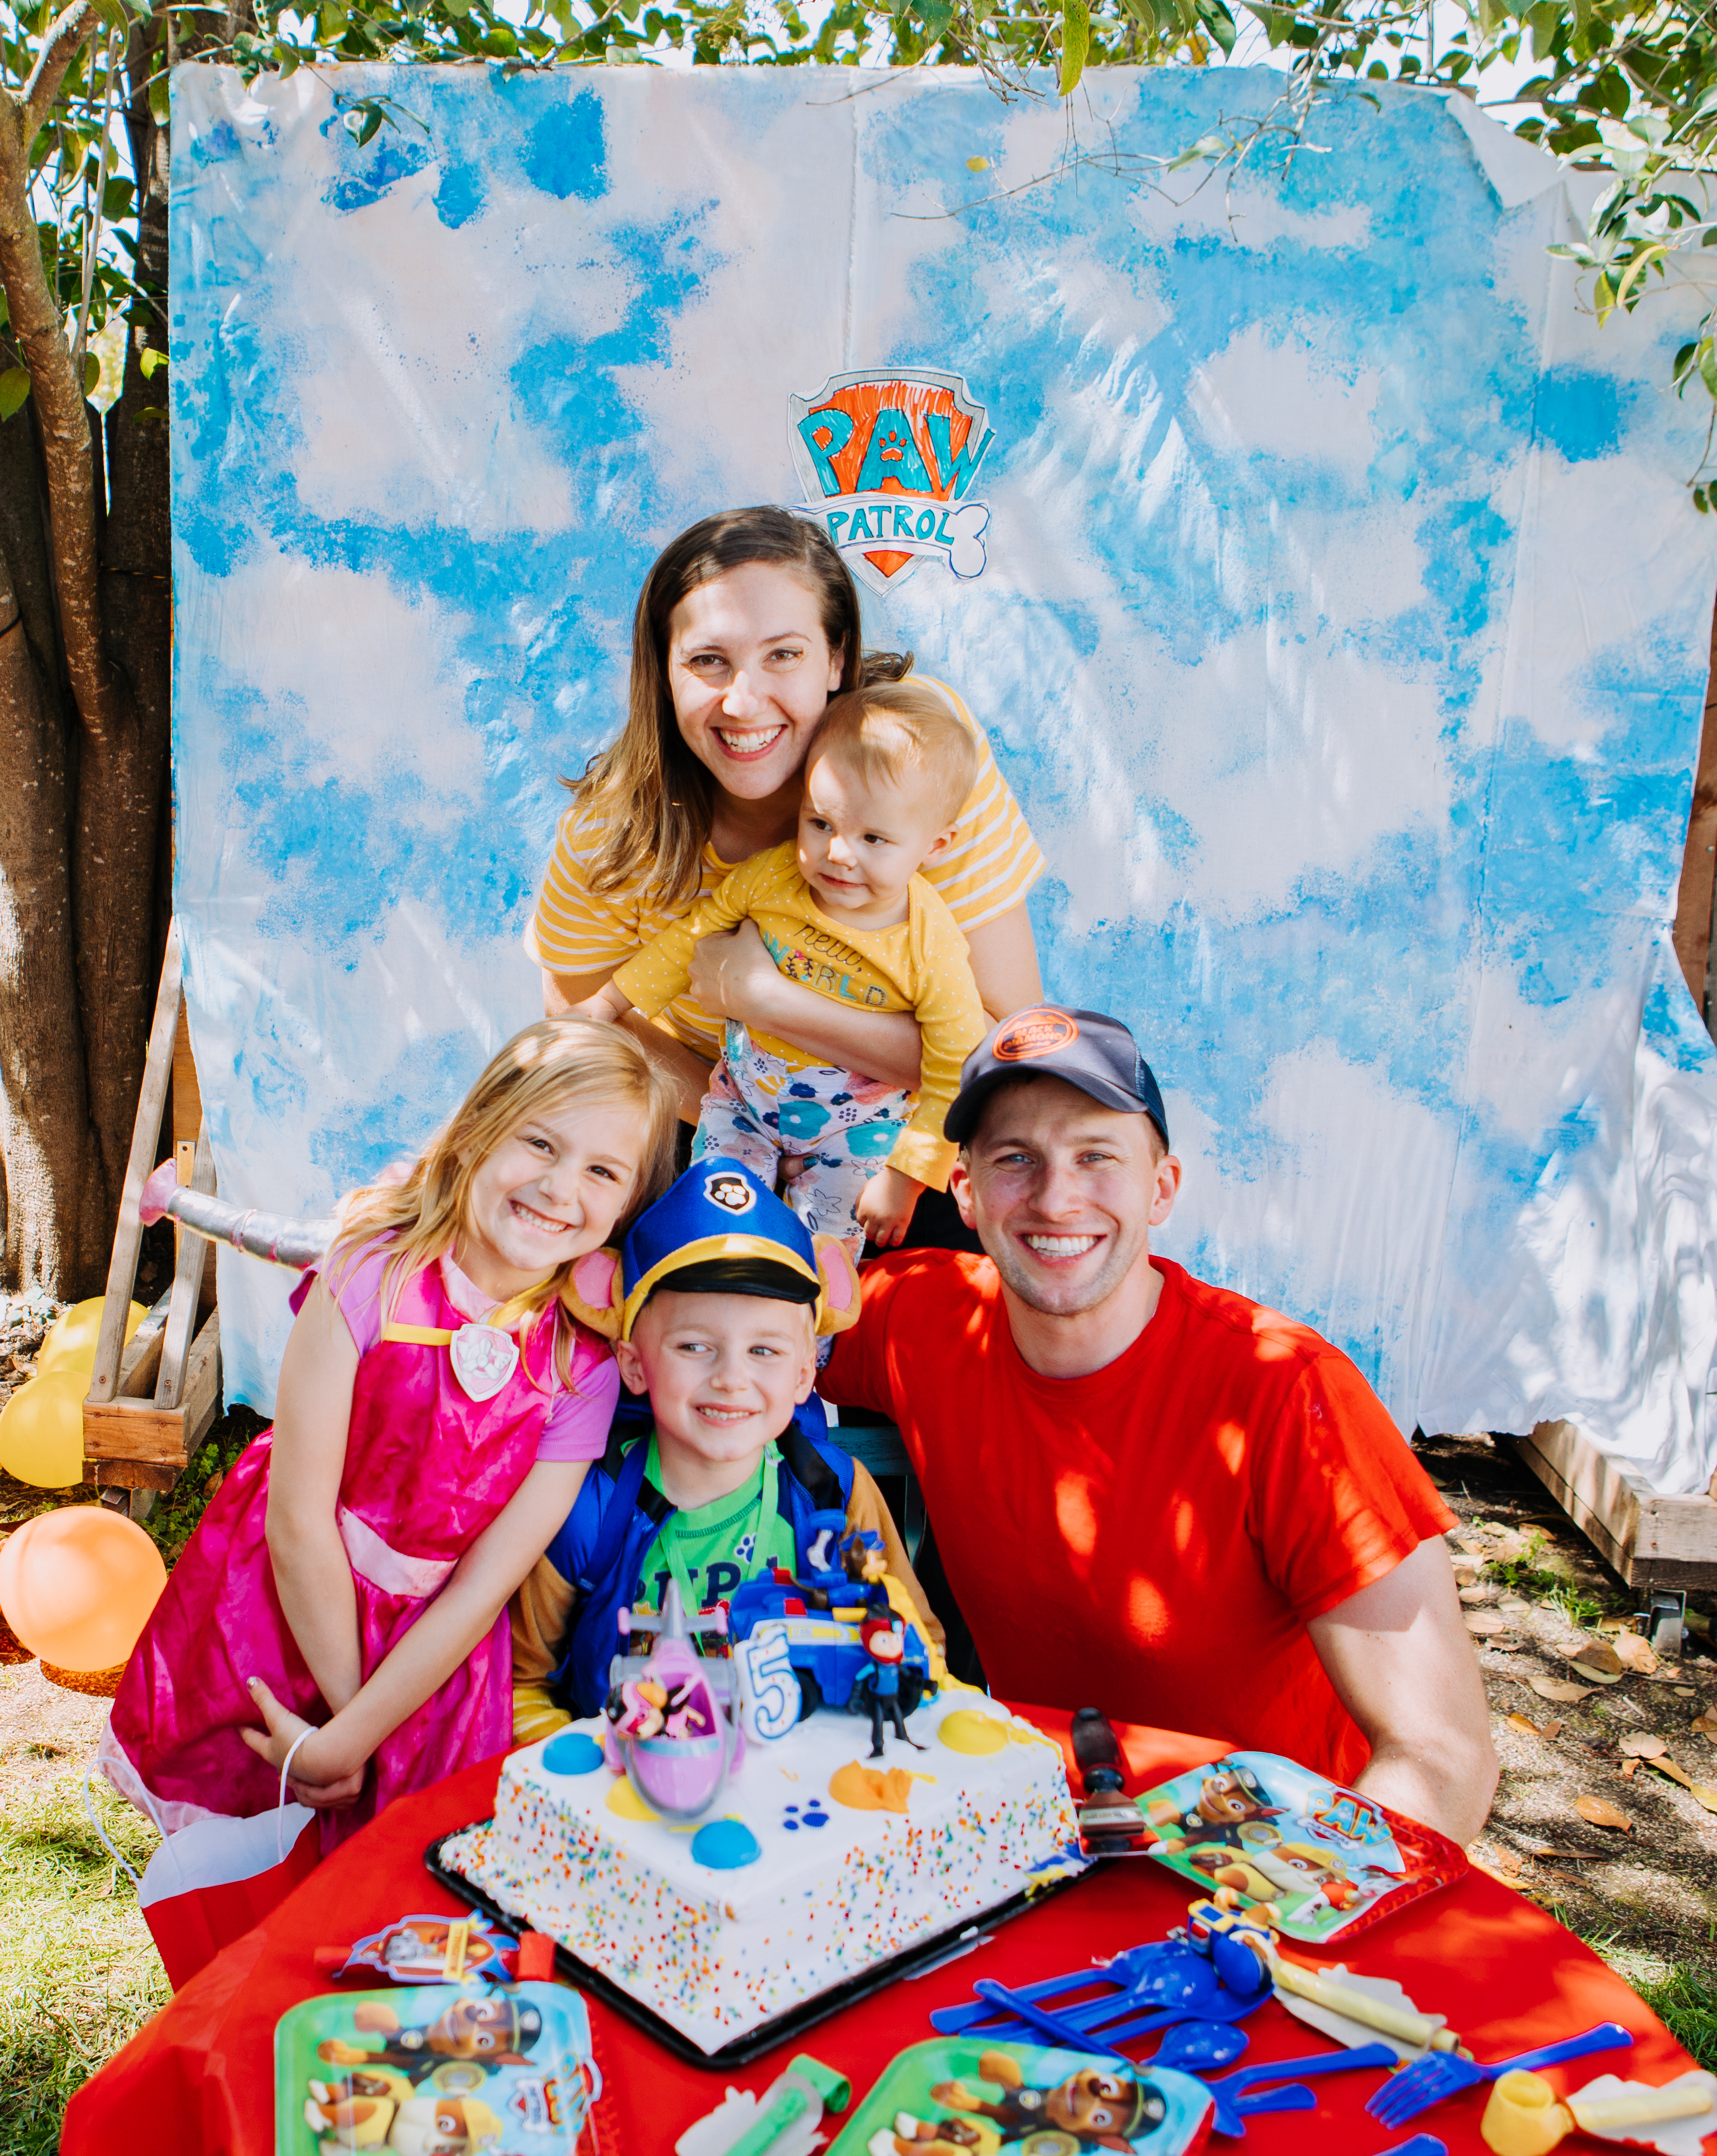
And after all of that we did Cake, Icecream and Presents. It was a grand time. And my little man was in Paw Patrol paradise.


It’s that time of year we have either started succeeding or given up and failed at whatever said ‘resolutions’ we made for ourselves. And that inner voice may start to creep in and be anything but good for our personal development.
This morning I spoke with both grandmothers. We chatted on the phone on speaker and my 4-year-old and squealy baby interrupted from time to time.
I enjoyed catching up with them and listening to them share what they were up to. After I got off the phone with each of them I was pondering back on our conversations. Both grandmothers did the same thing! Both expressed slowing down more and more each day and both expressed frustration on not being able to ‘keep up’.
“Ah! The never-ending to do list” I thought to myself. The never-ending comparison game of seeing what the person next to us is capable of doing and letting it get us down. The ultimate killer of productivity if you ask me.
As one of my grandmothers was expressing her frustration, I could only relate! Not being able to complete a simple task because of certain obstacles. The only difference, the obstacles! And I thought, “This woman has raised 8 children! She has worked so hard, of course getting older and slowing down have to be hard on anyone who is a get things done girl” And my other grandmother I thought much the same of how hard she has worked as a single mother in many of her years and balancing all that.
The thing is. When I was thinking about how both women shared their overwhelm, part of me thought, “How silly! You have done so much and needn’t feel these expectations you put on yourself..”
I continued to think about how amazing both of them were and how if only they focused on what they have achieved instead of all they unable to it would be better.
Better for their peace of mind, self-esteem, just better!

So let us all take a moment for ourselves and throw our own confetti! And remark on all the things that we HAVE accomplished instead of focusing on all we have not.
When I pondered on my grandmother’s words, I thought about how we are years apart and still in a similar boat. For them, at this point in their life, it is physical limitations, for me, it is little ones that seem to have an acute talent for finding and dumping any and everything in this house.
As I am sure you may very well relate, as I express my daily stresses, my grandmother reminds me to love those moments anyway.

I am a big todo list maker. Partly for helping me to just organize my mind. And also, as my husband tells me, “one of the most Optimistic people he knows” meaning I like to make a LOT of big, realistically not achievable plans. And when I can’t accomplish all that I set out to do, I hit a low.
Lately, I have been sorting through old paperwork and old todo lists. And you know what? I look back on some of those lists and see a whole lot of little things I have spent too much energy fretting over! Funny little things. There is something about putting distance in time and looking back to remind yourself of the things that really matter.
So here is my happy challenge to you. You mama’s who may be getting bogged down on all the things you are not accomplishing.
Focus in the moment on what you CAN do in any one moment.
“Right now I CAN change this diaper”
“Right now I CAN send a quick happy birthday text to a friend”
“Right now I CAN settle these kids argument”
Pat yourself on the back for your accomplishments and the overwhelm will begin to look a little sillier.
Let us go easy on the expectations and instead celebrate our individual successes. Even if that might just mean putting on real pants for the day!
We had so much fun putting together this fun birthday party for my little Sister in Law.
It was a carnival-themed with lots of color and vintage vibes.
We had a lot of colorful triangle flags hanging across the room most of which were made with colored paper cut into an even isosceles triangle and folded over the yarn with a little glue. The extra ends needed folded in. Other string can be used but I recommend using only ribbon or yarn that does not fray easily. To keep it from fraying, try putting a little piece of tape over the end. These are a fairly versatile decoration that can be used for years to come.

A lily pad pond (above). I just cut out colored yellow and green foam into circles or lily pad shapes. Then the children could attempt to throw coins to land on them.
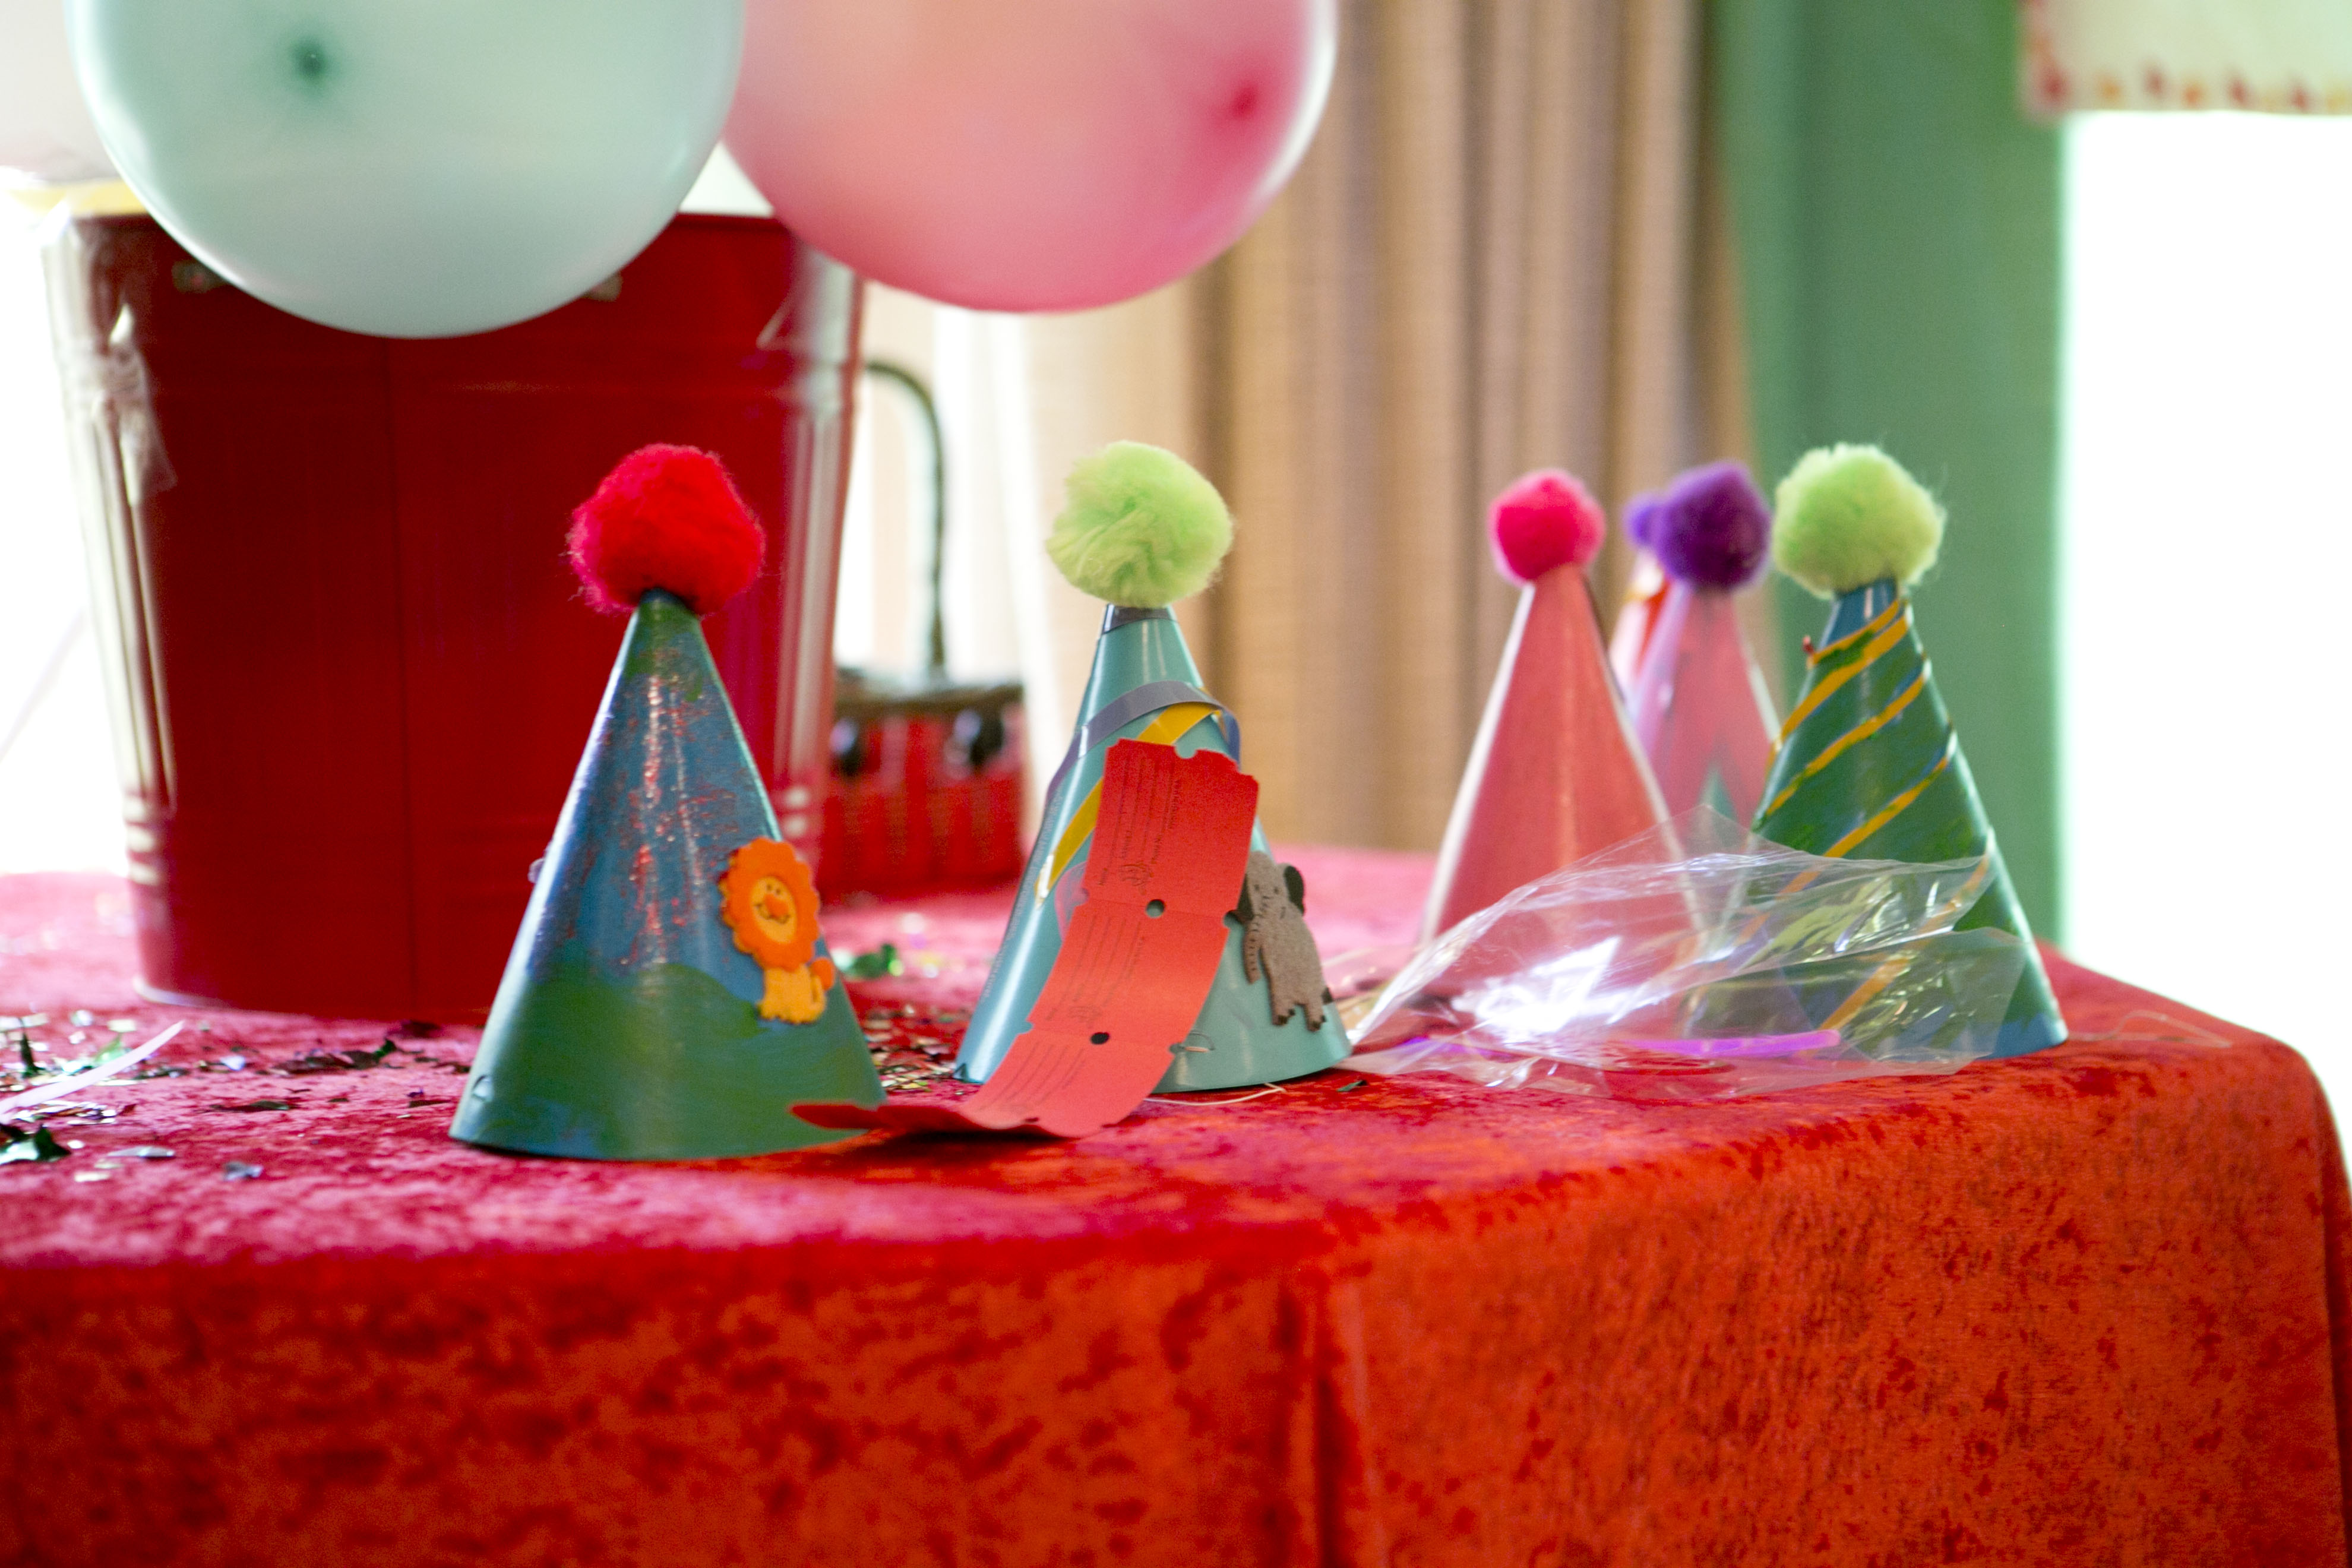
Decorative Party hats. My sis in law Megan prepared this one. We had the kids decorate their own hats to wear. This is a great activity to do as you wait for everyone to arrive. pom poms, glitter glue, stickers, paint etc.
This triangle flag banner has been used a lot. As props for engagement photos, party decor etc. But as you can see it is starting to fray which is why I recommend taping the ends and picking a ribbon that is sturdy, like cotton. Then it can be used again and again.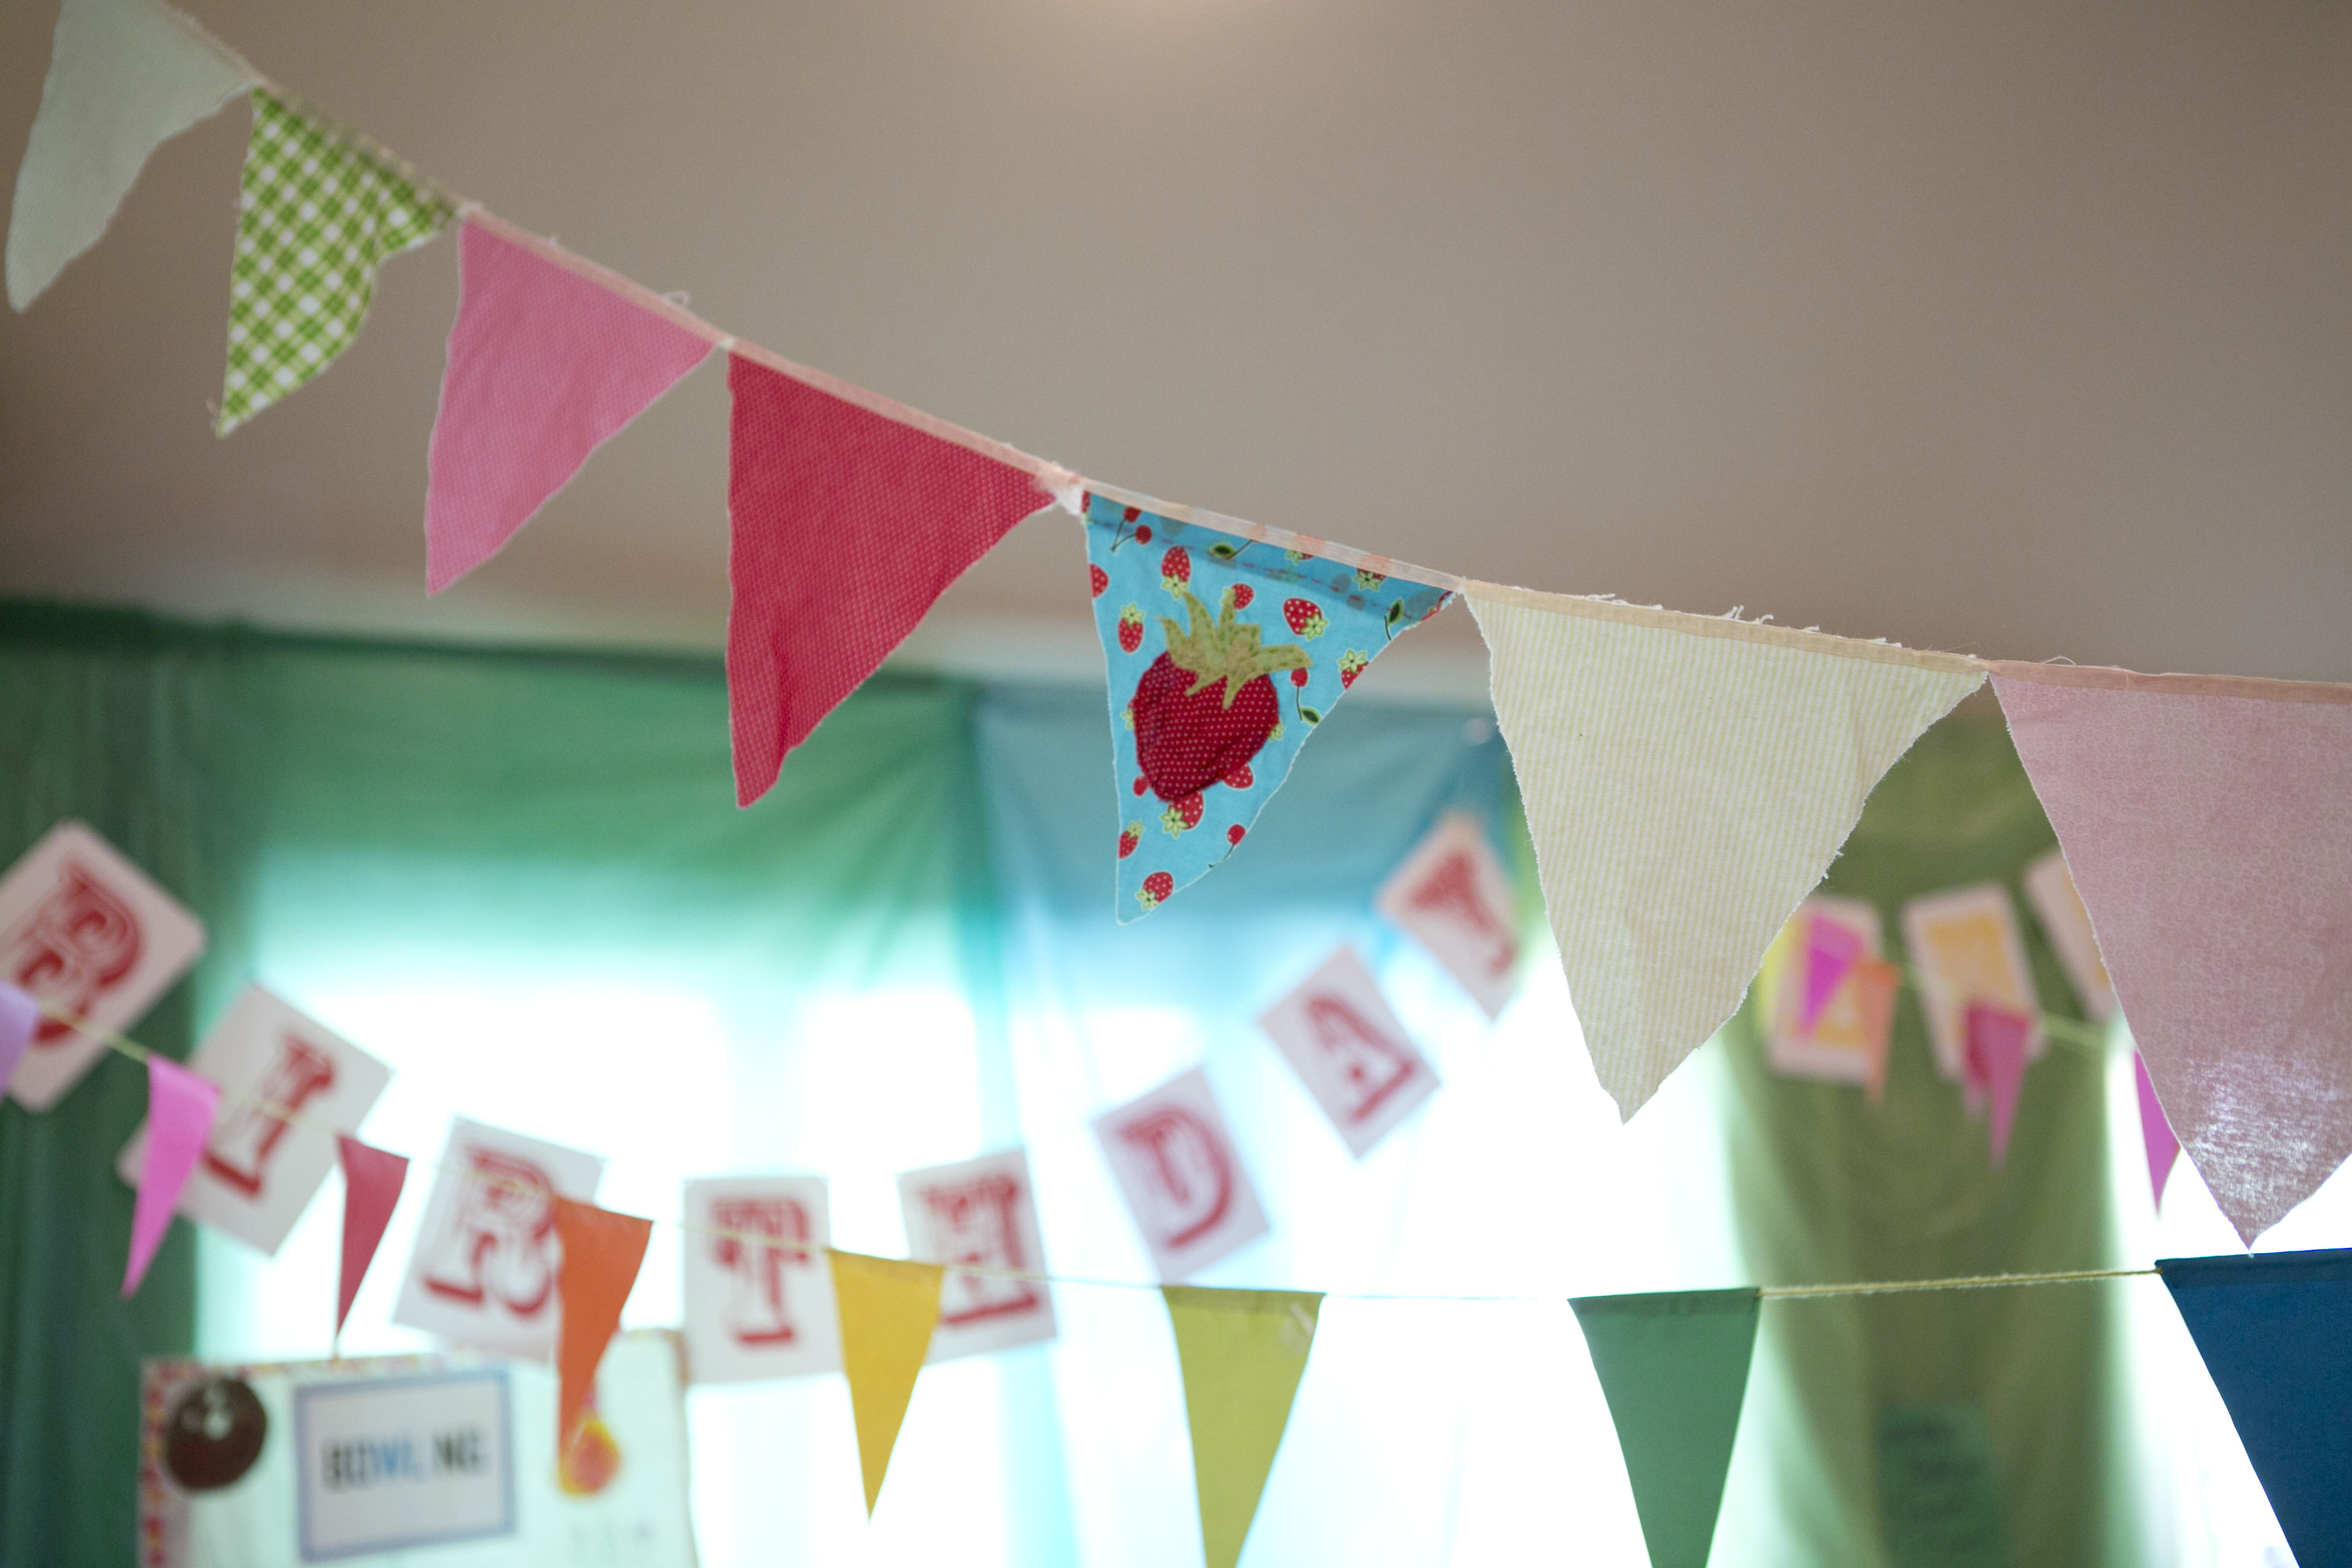
(Below) the Happy Birthday banner was printed out on card stock. Get your FREE PRINTABLE for this Happy Birthday Banner here. (And please subscribe!) Then we just hole punched them and attached them together.
We had access to some great little TV dinner tables that were the perfect size for stacking cups. The little red and white checkered print went perfectly with our cute vintage theme. The cups were semi study plastic cups. Then you will also see here, is a bowling set that we found in the toys.
To make the booths feel a bit more like booths since this was all inside, we used colorful plastic table clothes (the cheap disposable kind) This really dressed up the room and was easy to tape up.

The stairs made for a perfect Prize zone. We could layer them up based on number of tokens required. Each child received tickets upon arrival but was able to win tokens, which were just wooden chips about 2.5 inches big and painted.
The sisters and mom put together this fun personalized poster. We put it near the entrance where the bags for their prizes were. They basically could make their own goodie bags to take home based on the prizes them won. Gumballs in a mason jar made for a fun centerpiece. I loved the pinwheels sticking out. But beware, if you are doing your party outside, be sure to consider sticky heat that could melt them!
This is a chalk board that I have used for countless activities and carnival themed parties. We just found a vintage design online to style after with chalk. BTW, if you do not want your chalk to get smudged than chalk pens will help with that! Or to create smooth chalk lines, try soaking your chalk for a few minutes in water. (that was a trick we used when I use to work at a restaurant as a hostess) My sister in law drew up this cute board to welcome the guests.
The ticket booth was fun fun! We again used a TV food table as it was the perfect size and then I had a piece of stretchy red and white striped fabric that I just clamped to the back. The ticket sign was a tag board yellow piece painted and hung with yarn. The red roll of tickets has lasted through about 6 carnival parties so far and was very worth the purchase. I just found those as a Party City store.
You can tell that some of my decorative pieces have already seen their share of parties! I think when redoing this piece it will use red and white study cotton and take the time to sew it together for prolonged use. This has lasted about 4 parties. It is red and white tag board and cut and glued together with the bottom rounded.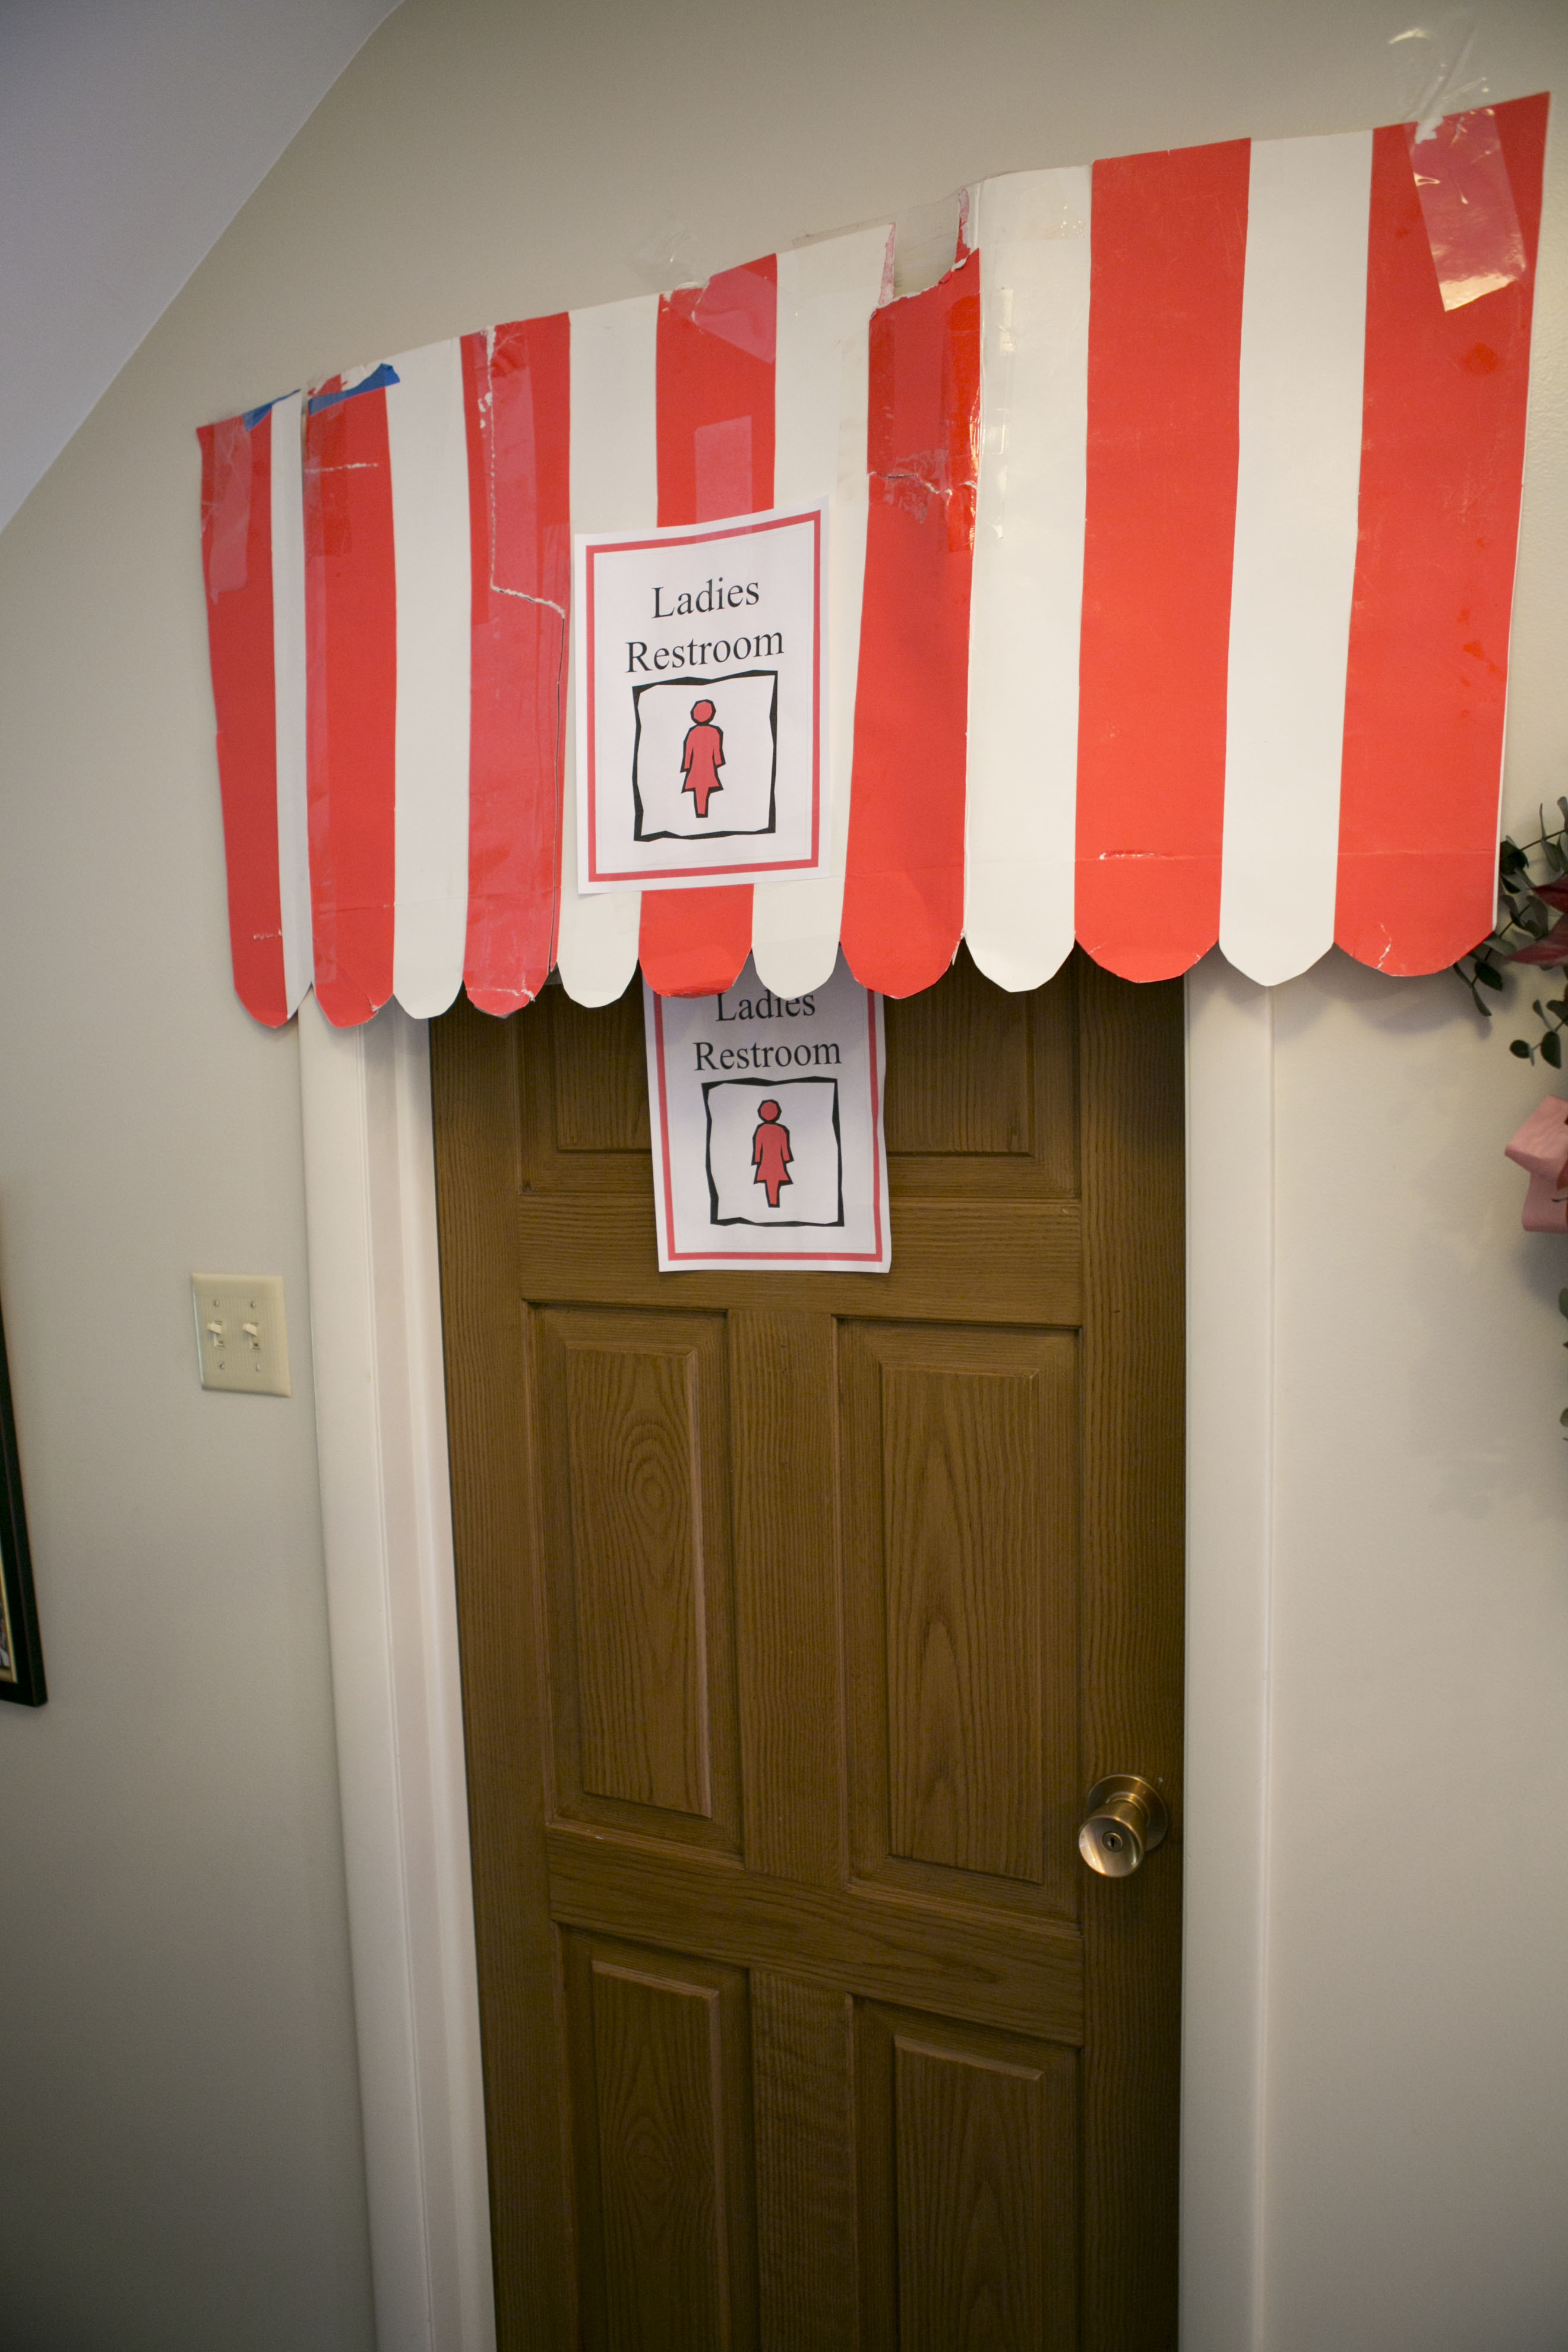


The birthday girl! And her sisters love her to pieces to put together such a fun party:)

We did very “professional” face painting:) For the props I used Femo clay for molding to the slick into fun shapes like lips and mustaches, then baked it and once cooled glued it to the stick.

Megan with her awesome party hat!
Our fishing pond was made with:
– Colorful draw fish, cut out and lamented. (I have found that lamenting something like this is well worth it! I have used these for dozens of things, like lessons at church, preschool and parties with relevant themes)
– Tape to tape on the sign and fish
– I created a fish setting on a piece of tag board with paint. In the future I might buy a cheap blue sheet and then get some fabric paints to decorate a background)
-A 1.5 inch rod
-About 3 feet of string taped at the end
-A clothes pin tied to the other end of the stick for clamping the prizes to
To operate the fishing booth, we folded up a ping pong table which needed to happen anyway to make space for the party, but you can tie a rope to two sturdy anchor points or use a long stick or light weight wood beam to rest over two semi high surfaces such as two ladders.
Part of what makes a party fun was to make it feel just condensed enough that it feels lively and fun. This same principle is used for city planning in effective city lay outs where the parking is put at the back to the store fronts can come right up to the street. So anyway, we were condensed as is in our space, but you want to find that even ground of spreading out enough for the games but having everything close enough that there is a fun energy present that they can all share.
For the other side of the room I used my photo backdrop stand with clamps to hang backdrops and plastic tables clothes. Back porch poles with ropes tied in between or two ladders with wood safely clamped across in place are another route. Also in the picture, another game that was fun was cups for tossing little balls into.
You can’t full see it in this picture, so I will hunt for a better one, but behind all this we had a theater area, where while the kids ate pizza and cake they watched a movie that we had actually made. They had to of course pay with a ‘ticket’ to get into the movie.
All in all this party was a huge success!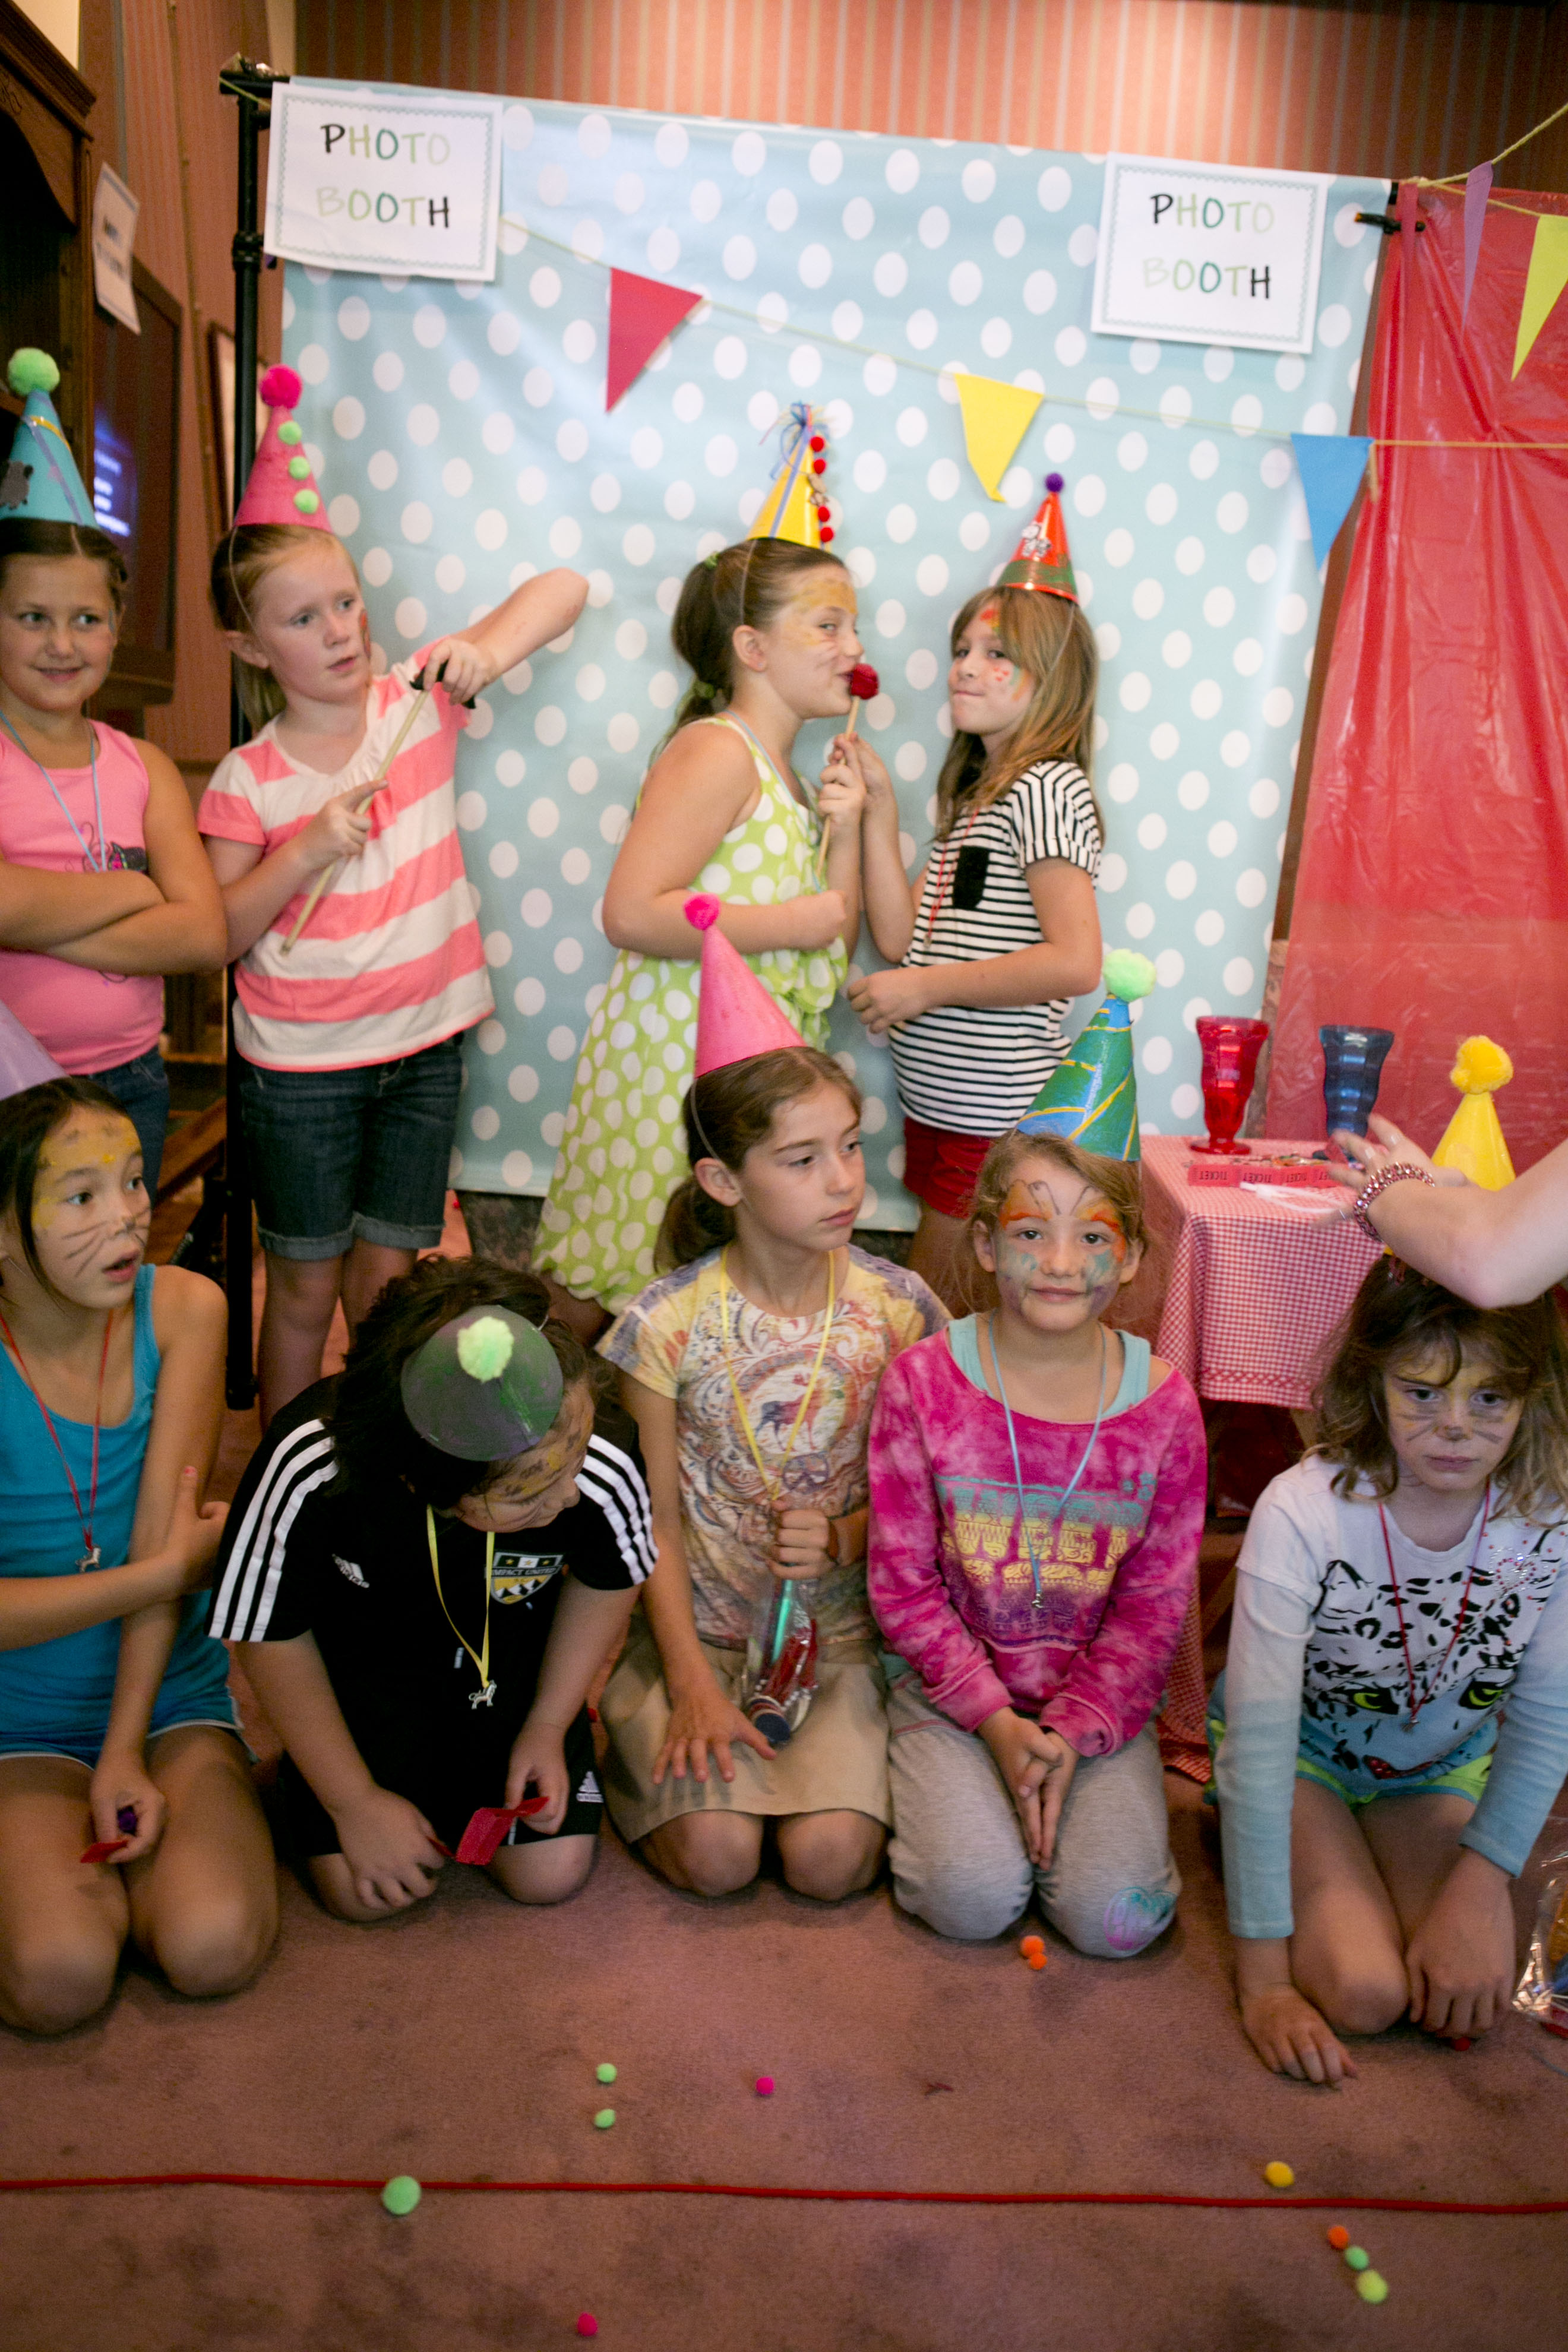
What party themes have you tried? Share your party adventures in a comment below! What worked or didn’t work for your little crew?
Don’t forget to subscribe for many more of our fun and festive adventures in travel, parties, parenting, crafting and more!
Ok you guys. If you are making your way through Indianapolis with the family, you have GOT to put this museum on the list! It is ranked #1 in the country and was so much fun! We could have gone several days in a row if we were there for longer. We just visited my hubby while he was doing his internship there over the summer so while he was working we went to go play. Anyway, there is so much here! We were there for half the day but barely made it through 1/2 of it if that.

Bumblebee from Transformers

Every once in a while when we are at a museum, there will be that occasional exhibit that brings out the “kid” in me. You know what I mean? I just am so passionate about miniature things. I love the art of it. So when I saw these dollhouse miniatures at the Children’s museum my heart skipped a beat. This would be a hobby I wouldn’t mind perusing one day. In a way we are already doing so on our own with our miniature dollhouse creations and fairy house building. But note, I do have the help of toddlers. They love it though. We have built one for each season for our family room table of decor. 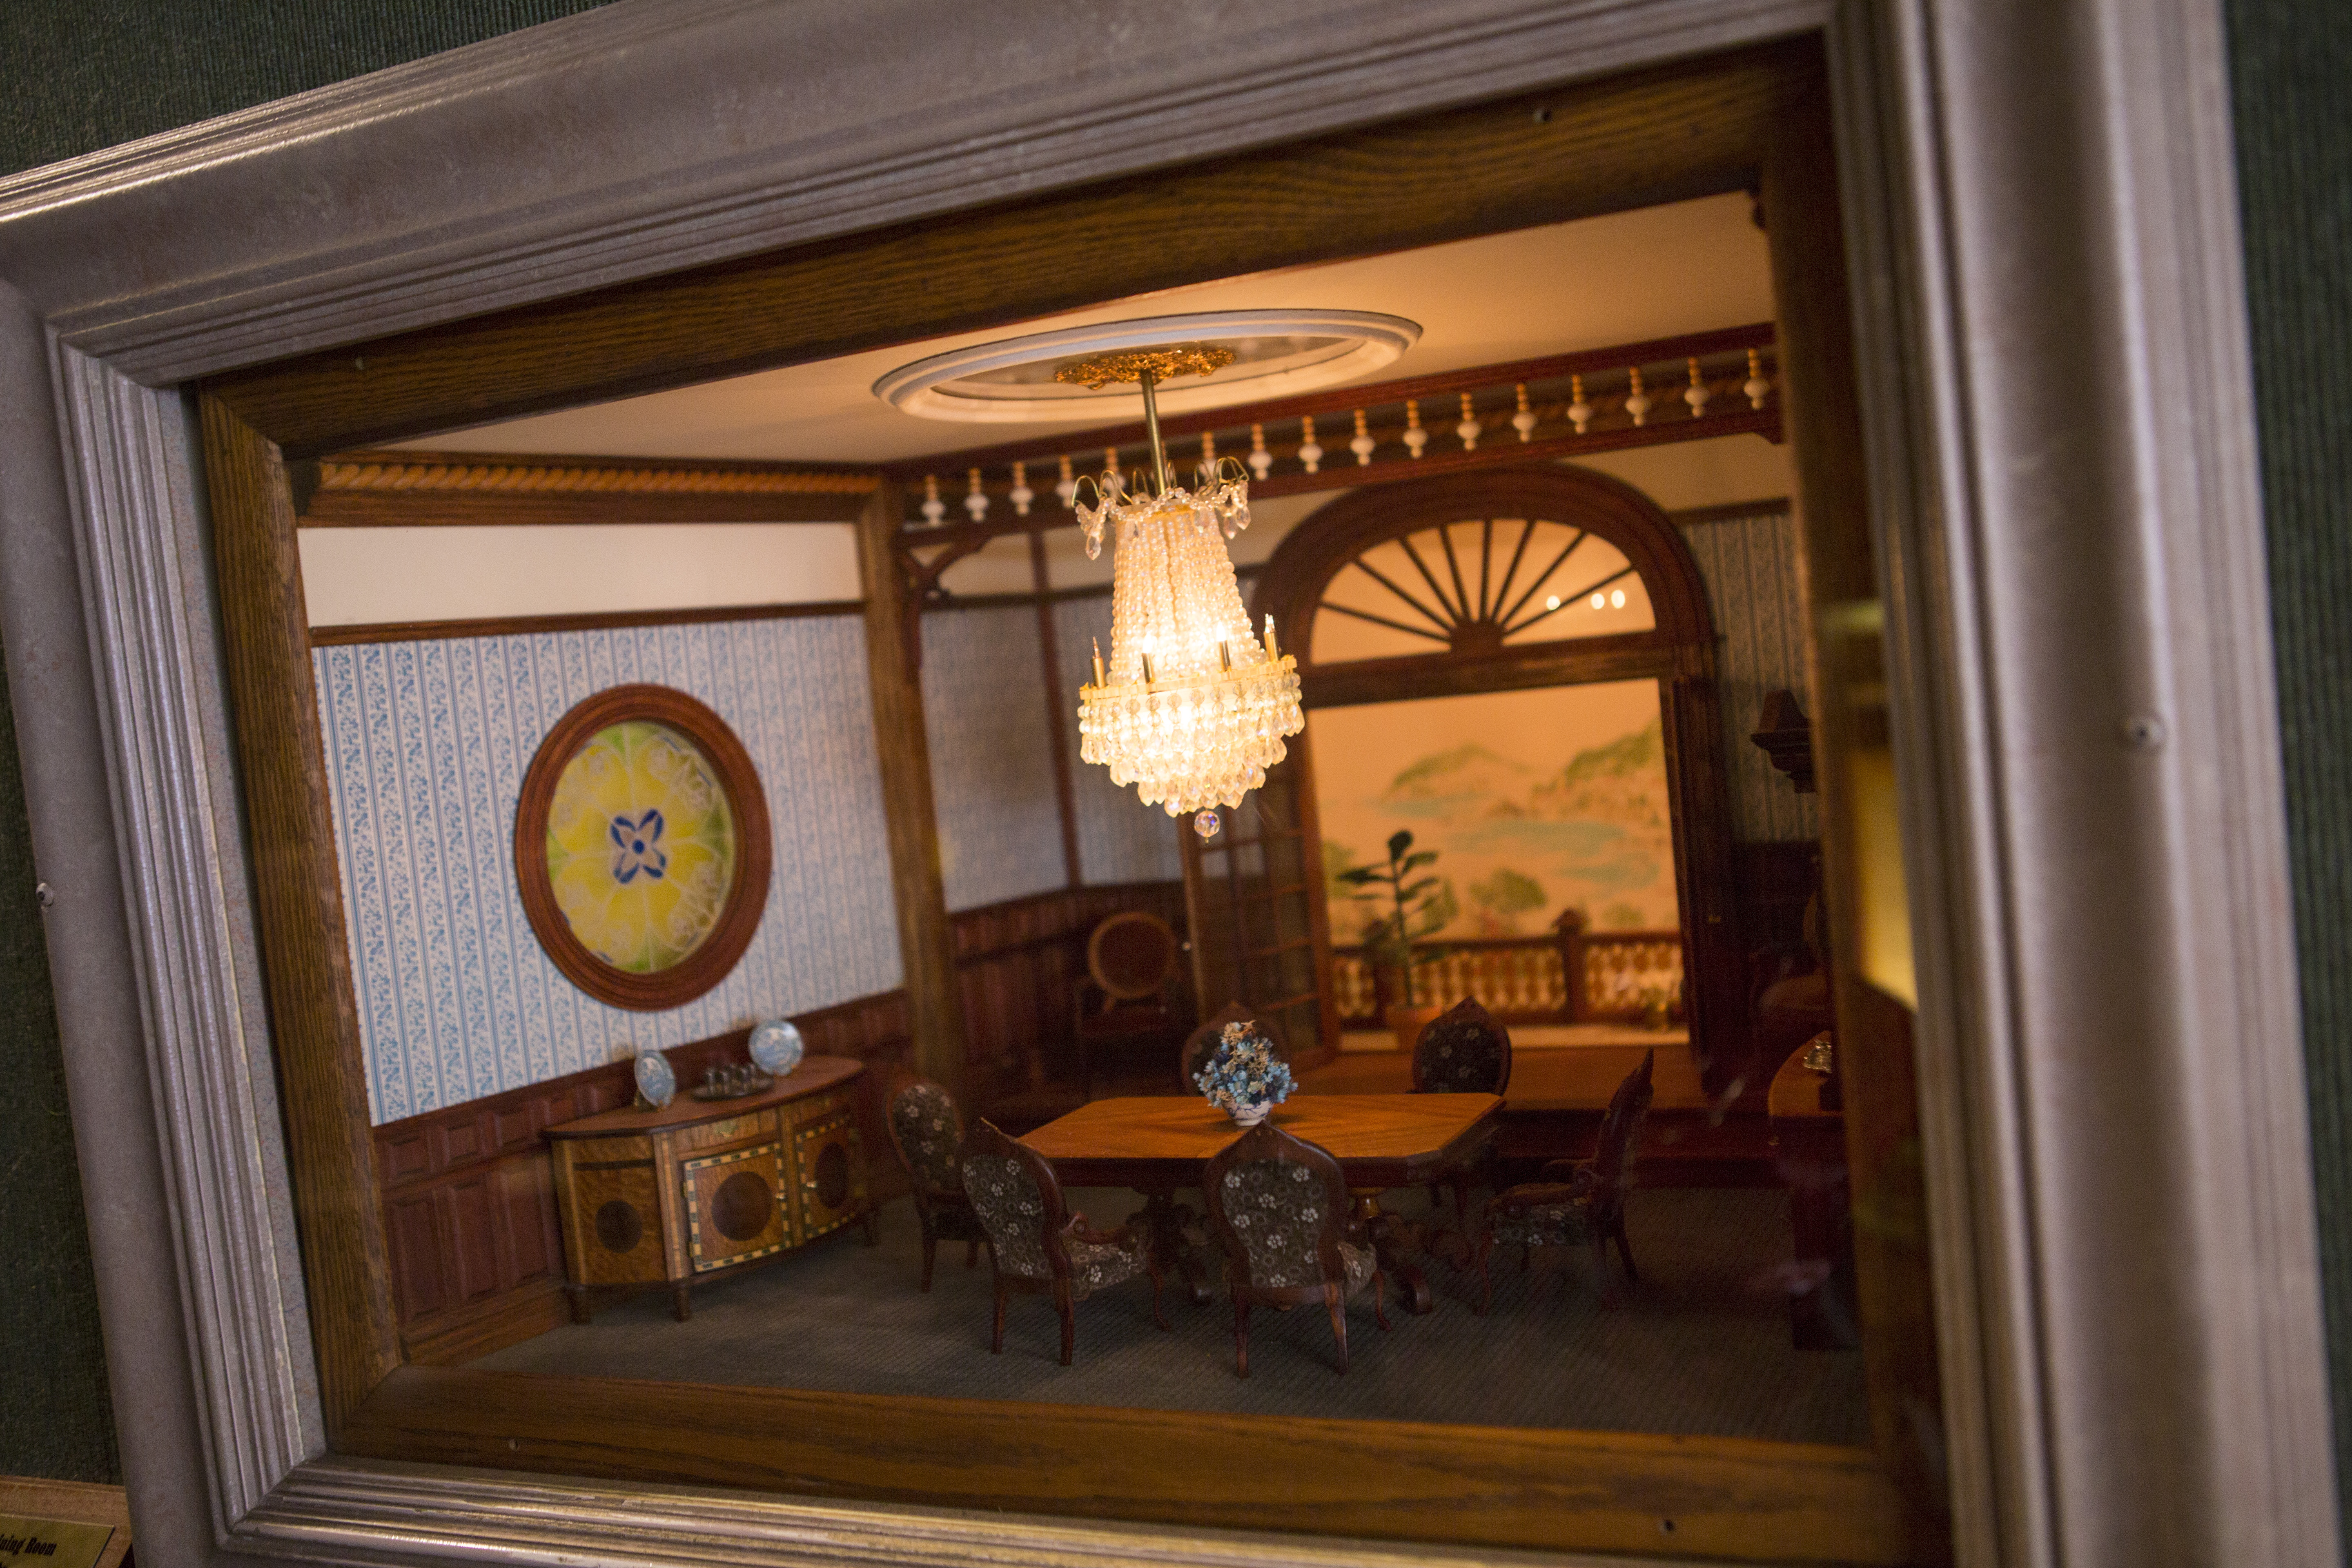


Would you have the patience and delicate hand required to pursue such an art? Tell me in the comments below!

I love this little colonial setup. One of these days we might try to my our way to Colonial Williamsburg before leaving the east coast.


When I was about 11, a best friend of mine had a full dollhouse like this one. It was complete with electricity… the works. I remember her telling me about how her grandparents has started making it for the oldest sister, but it didn’t get completed until the last sister was about 8 or 9. Such a time consuming art I guess, but I think there is certainly a reason why!


When we were in Seattle, we got a chance to go to the Chihuly glass museum featuring amazing work like this one displayed in the center of the winding stairs at the childrens museum and it was stunning. The artist was is so devoted to his art, that even when he lost one eye in glass making and now wears an eye patch, he continues on. If I lost an eye as a photographer… well I guess that would work out ok as I close one eye anyway to look through the shutter.

Chihuly glass art exhibit
Mister Milo was sooo focused on being the racecar driver, I really couldn’t get his attention 😉 Pretty much he is at, “Whatever mom! I am busy drivin a car here!”
In Salt Lake City at the Gateway Children’s museum there, The Discovery Gateway they have an amazing room devoted to balls where you can pop them in the tubes and send them about. They has a similar setup here with balls and scarfs and other fun floating things you could send up flying.
And .. the splash pad! They do have splash protection gear but my kids are too cool for that:) JK. 
Madeline ready with her goggles to play in the wind tunnel and send scarves and papers flying up.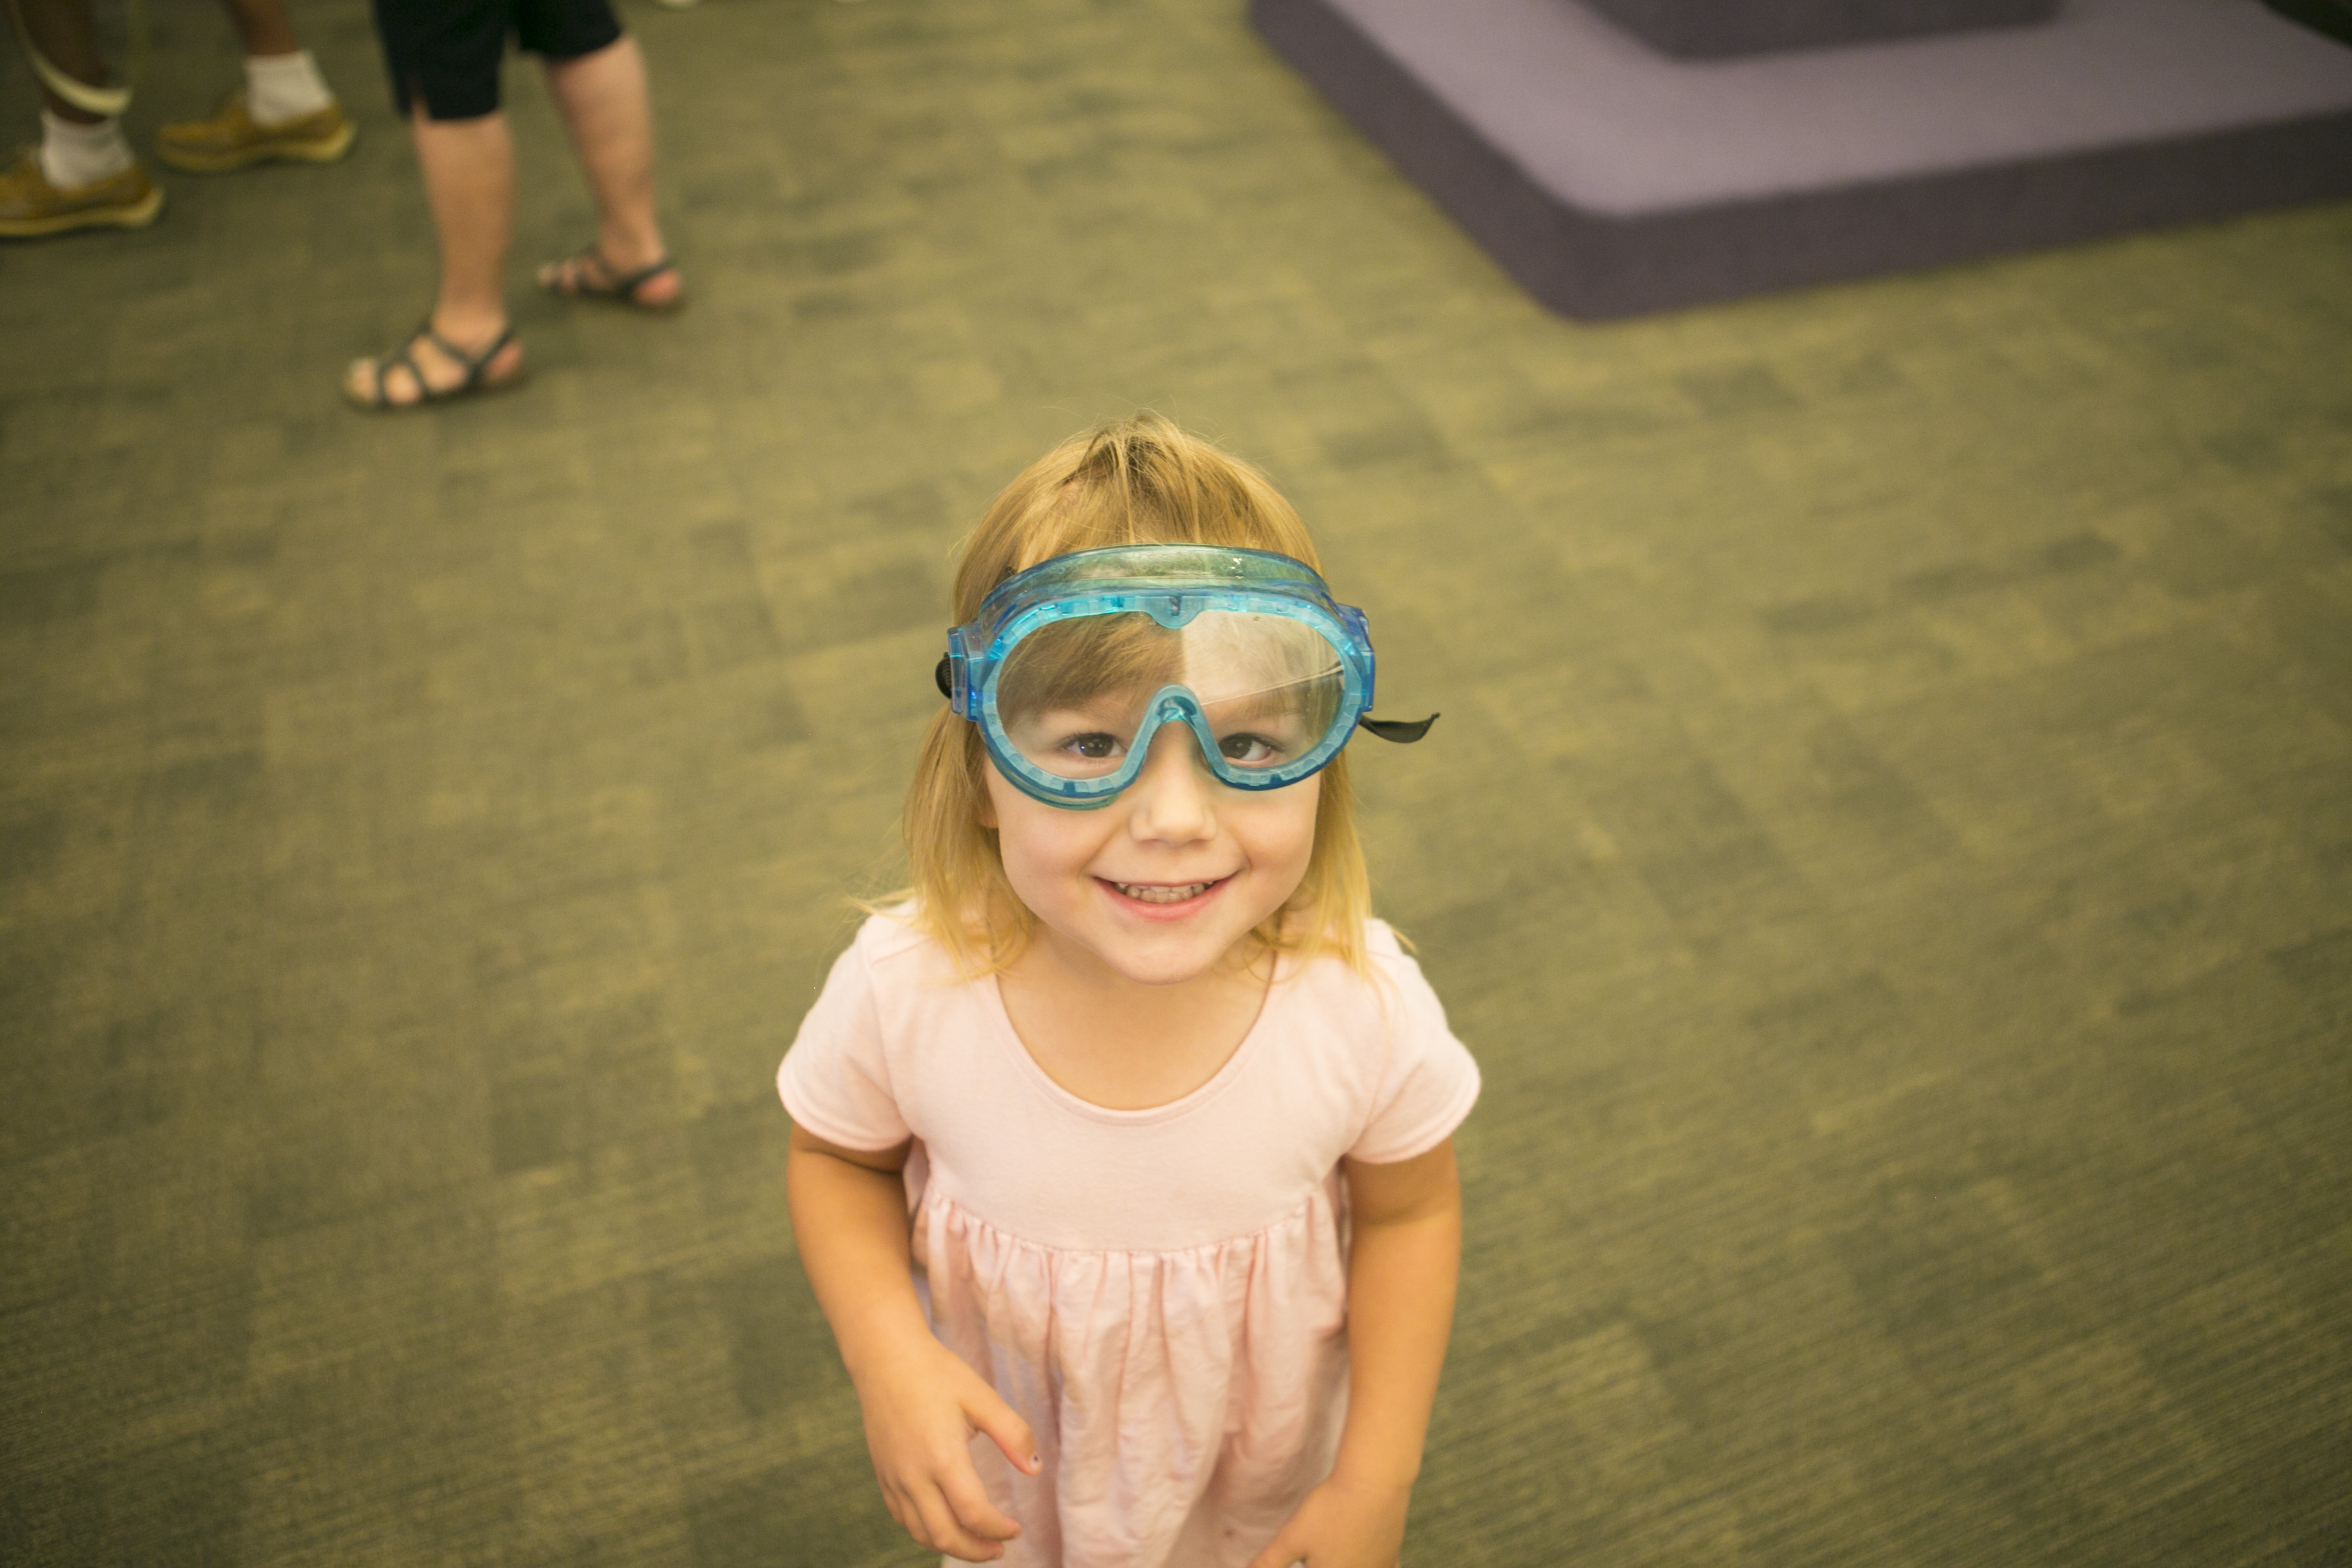
This was part of the creatures in the forest area. As a mom, I couldn’t stop thinking… how often do these furry guys get washed? And that is what good hand sanitize is for. It is when your 3 year old tries to come at you and give you snuggly kisses with the shared furry friend that you kindly pass.


And this was one of our favorites! Art corner! They started out this little class with a teacher giving a short lesson on expression and art talking about butterfly wings, then we got to make one out of coffee filters and watercolor paint.
The kids used eye droppers to put their paint on their picture. It was beautiful and proud mama art. But unfortunately only lasted a few days with our upcoming travels.

Next we explored the archaeological digs where kids could reconstruct duplicates of the Emperor’s Silent Army and similar figures.


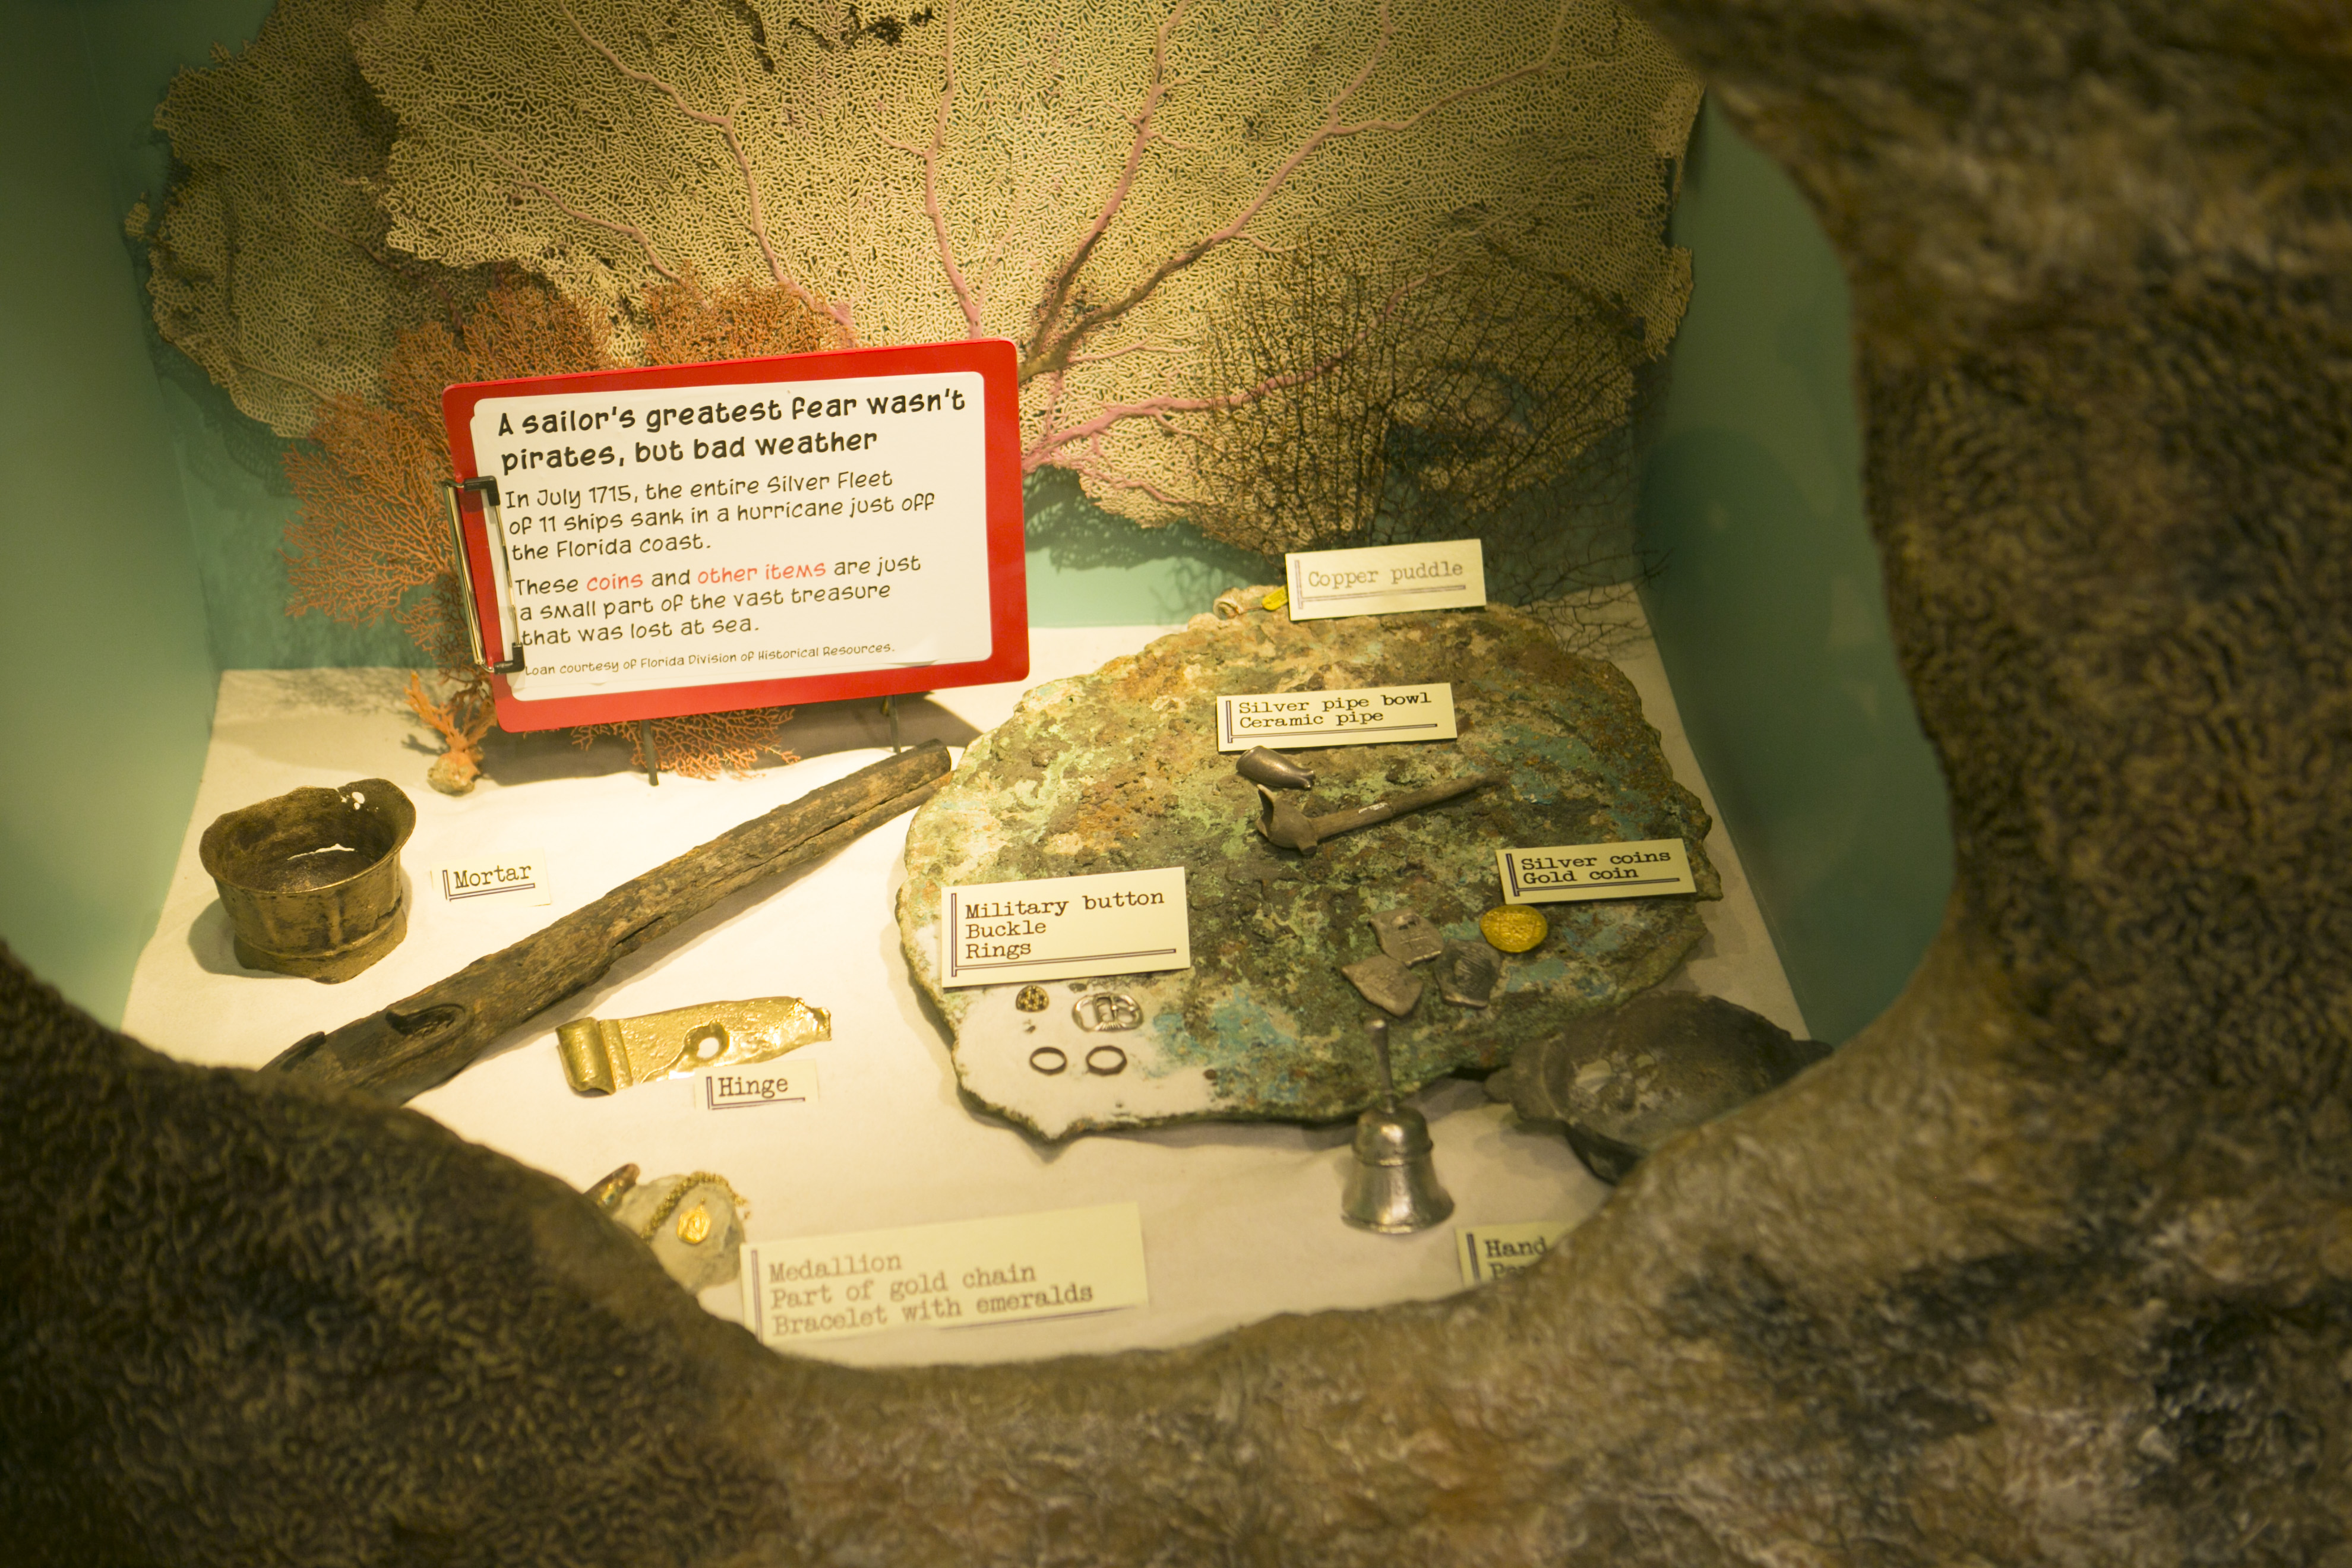

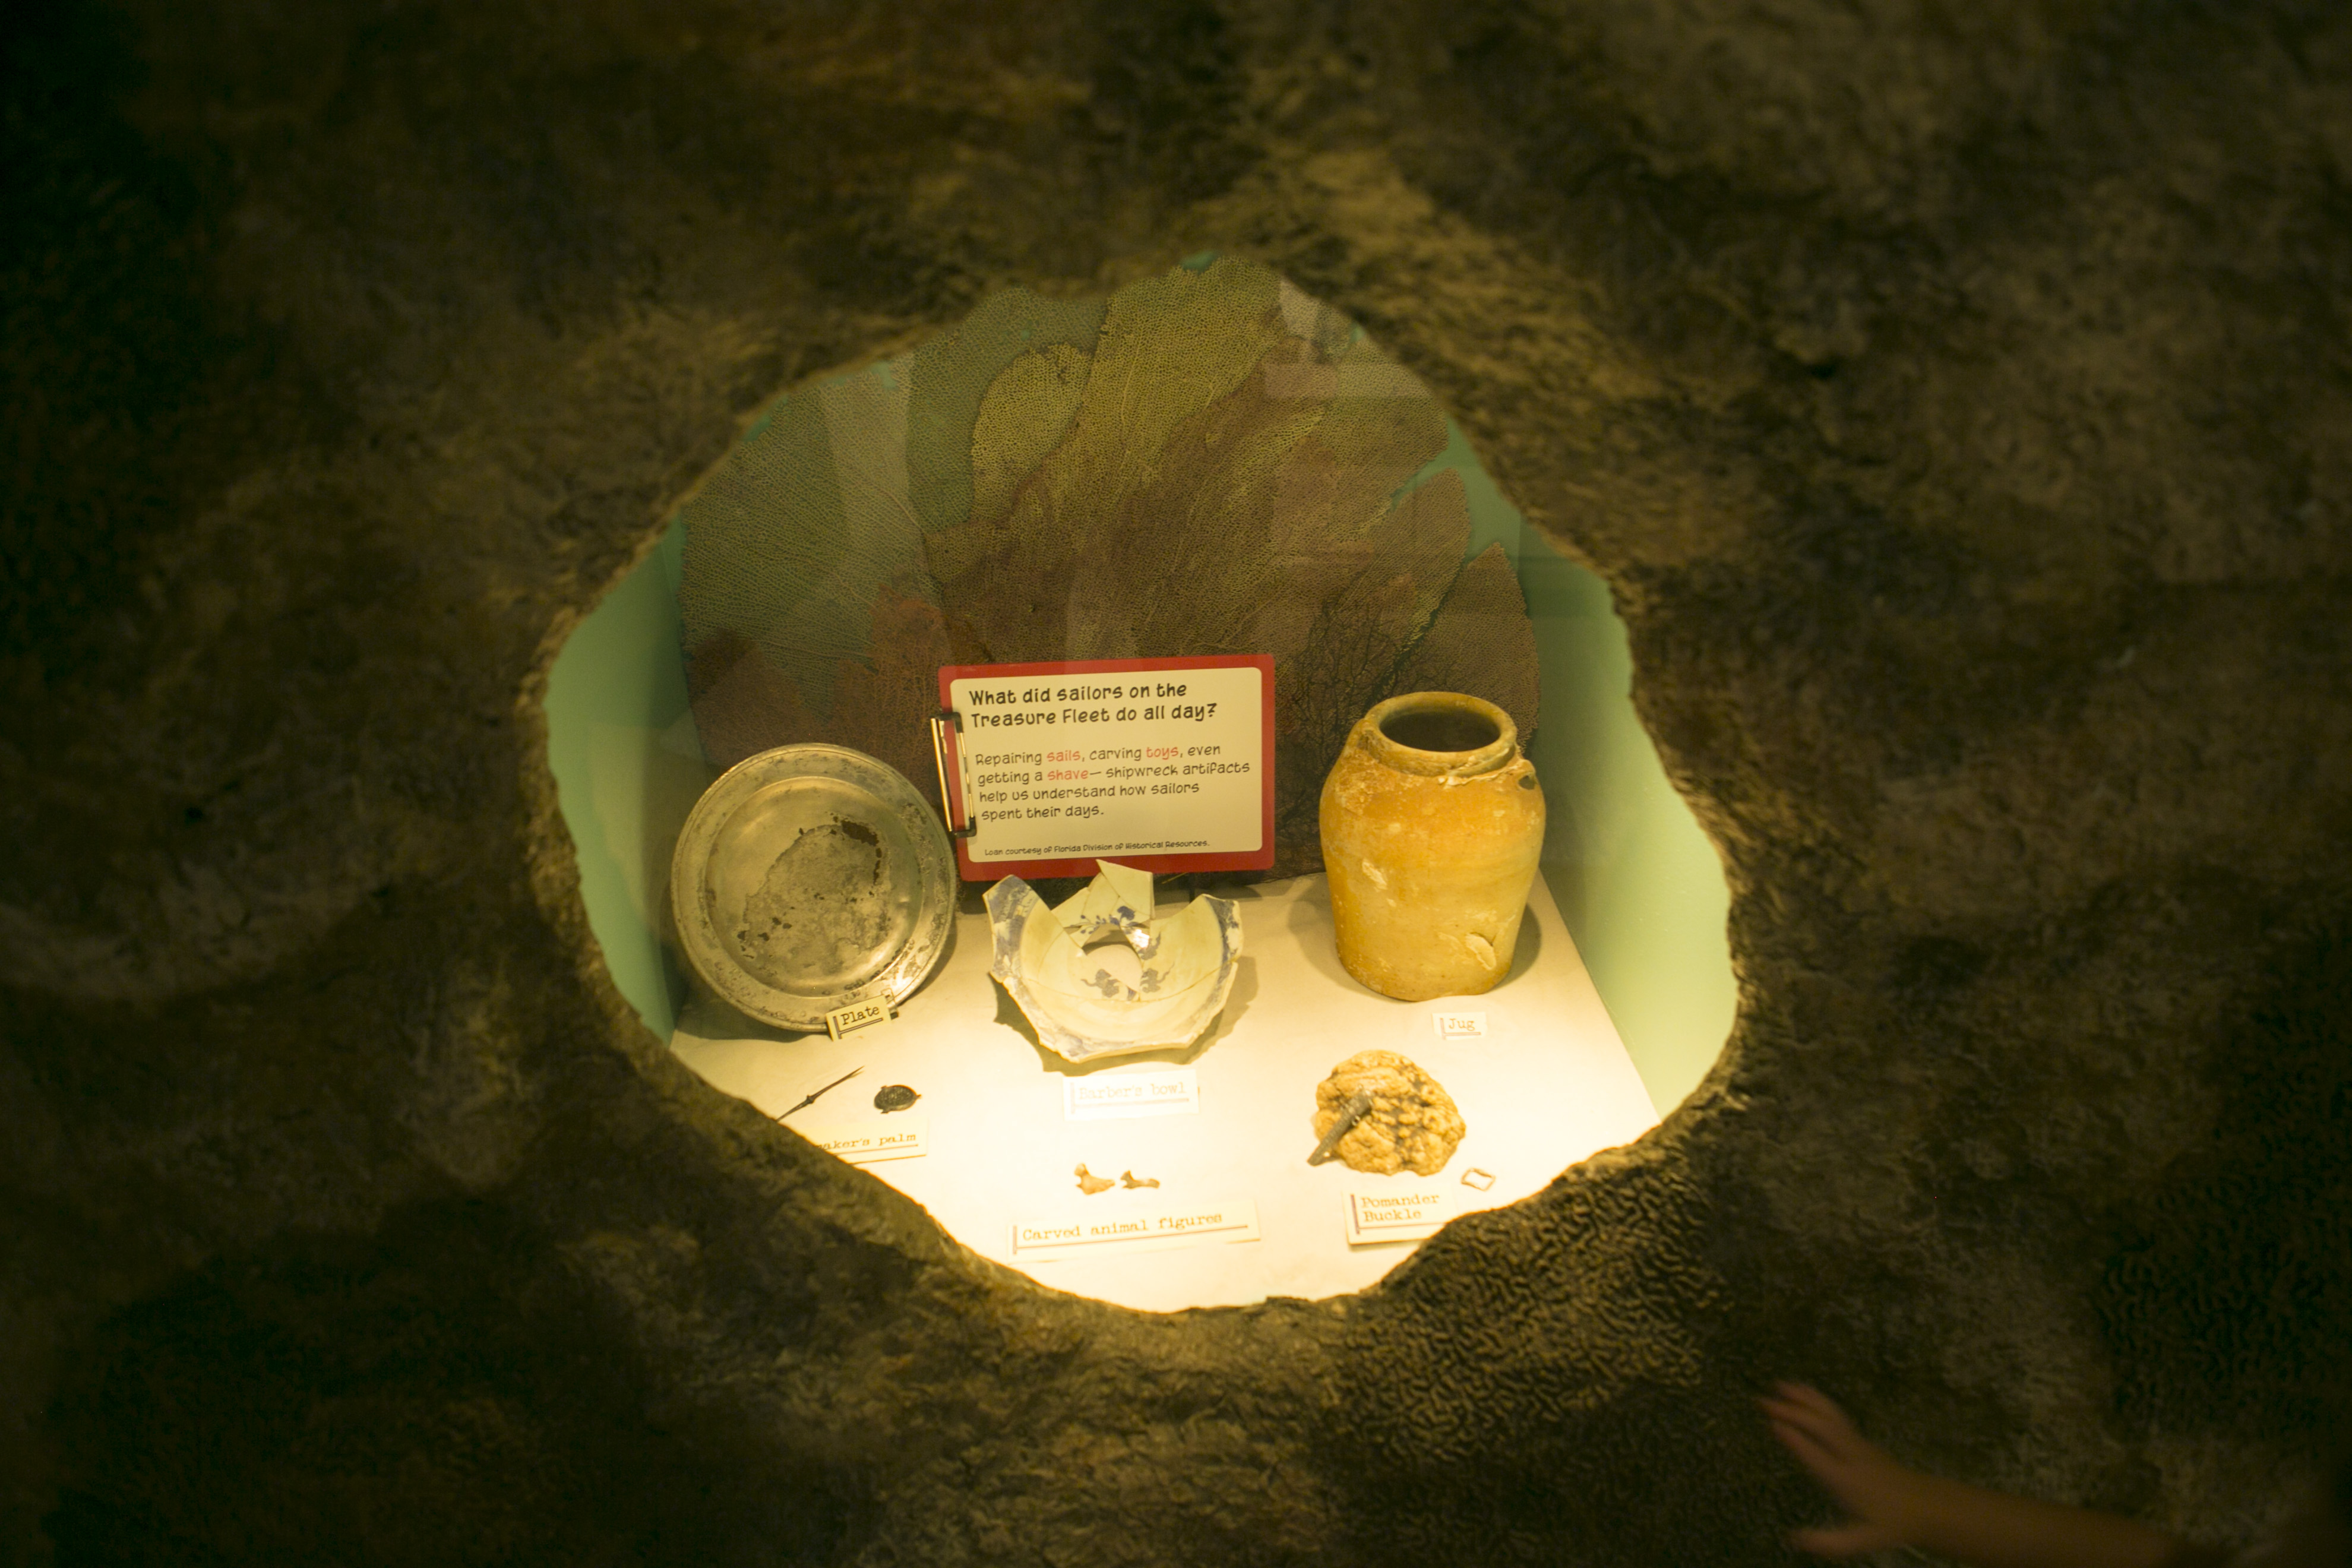

And a fun under the sea “treasure hunters” exhibit


A giant plastic mummy kids could reconstruct. This was of course too old for my kids but perfect for all those school groups coming in learning about mummies.
It felt a bit like we were in Universal Studios or something. With all the lights and effects.


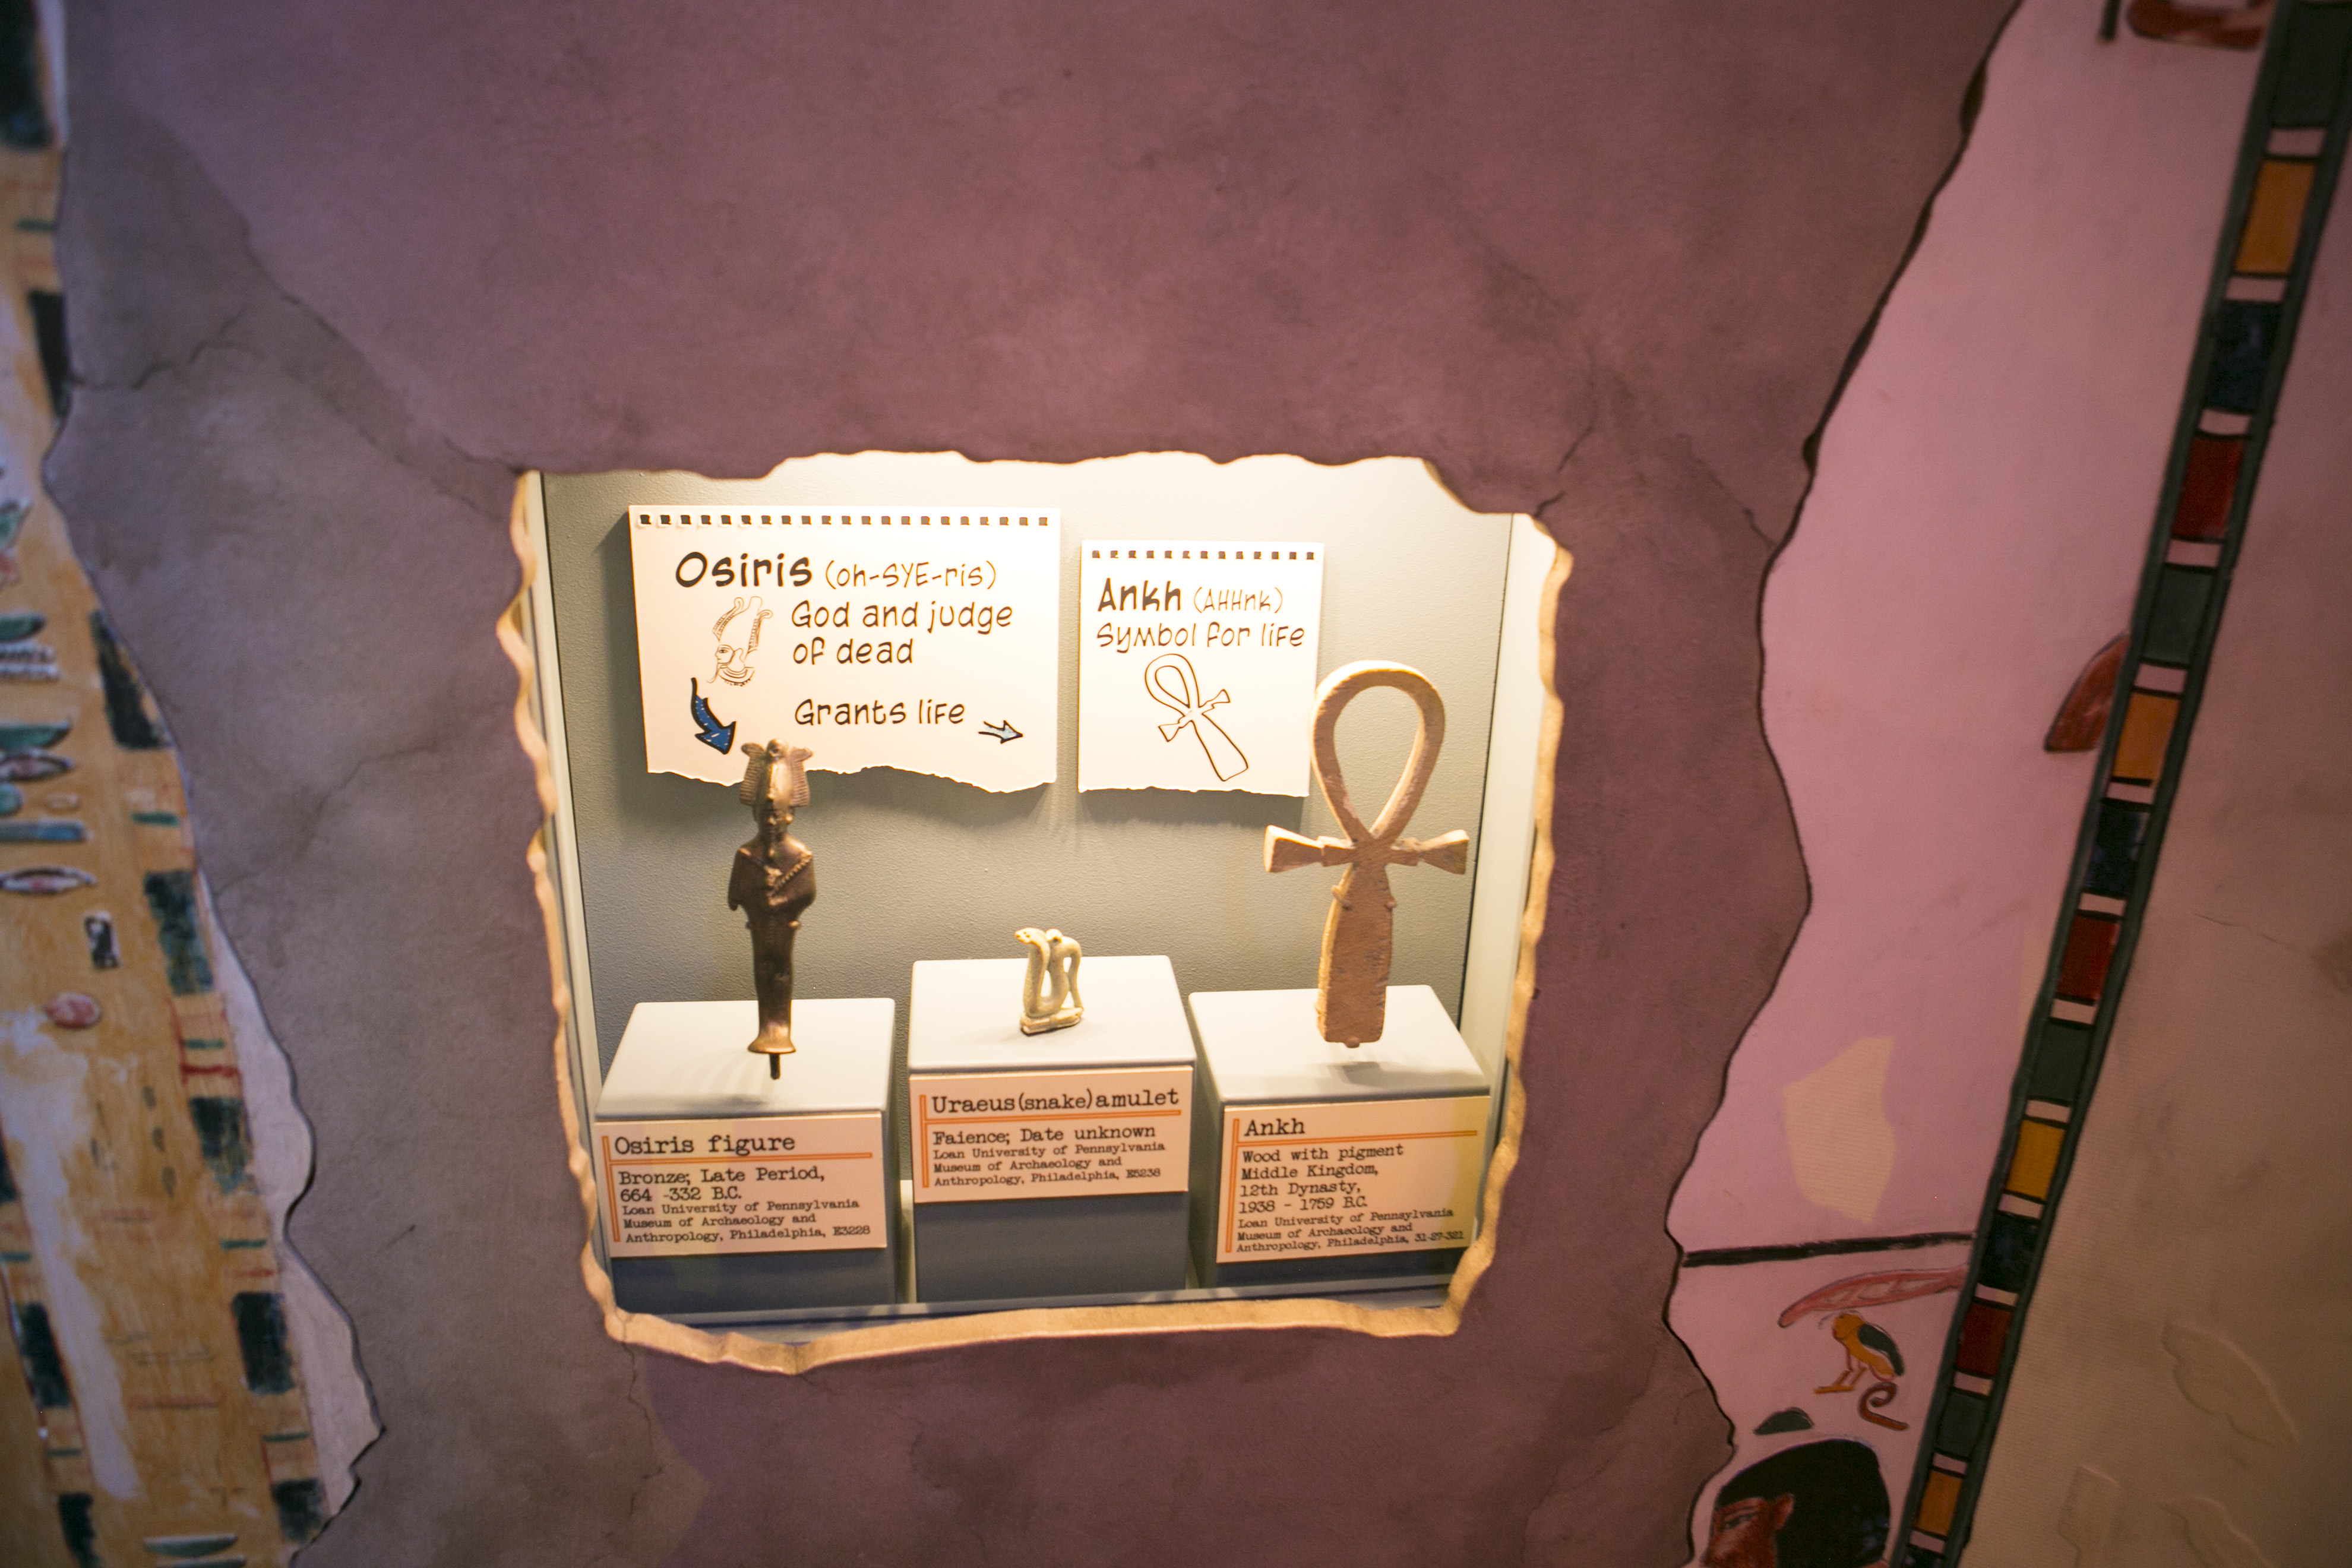
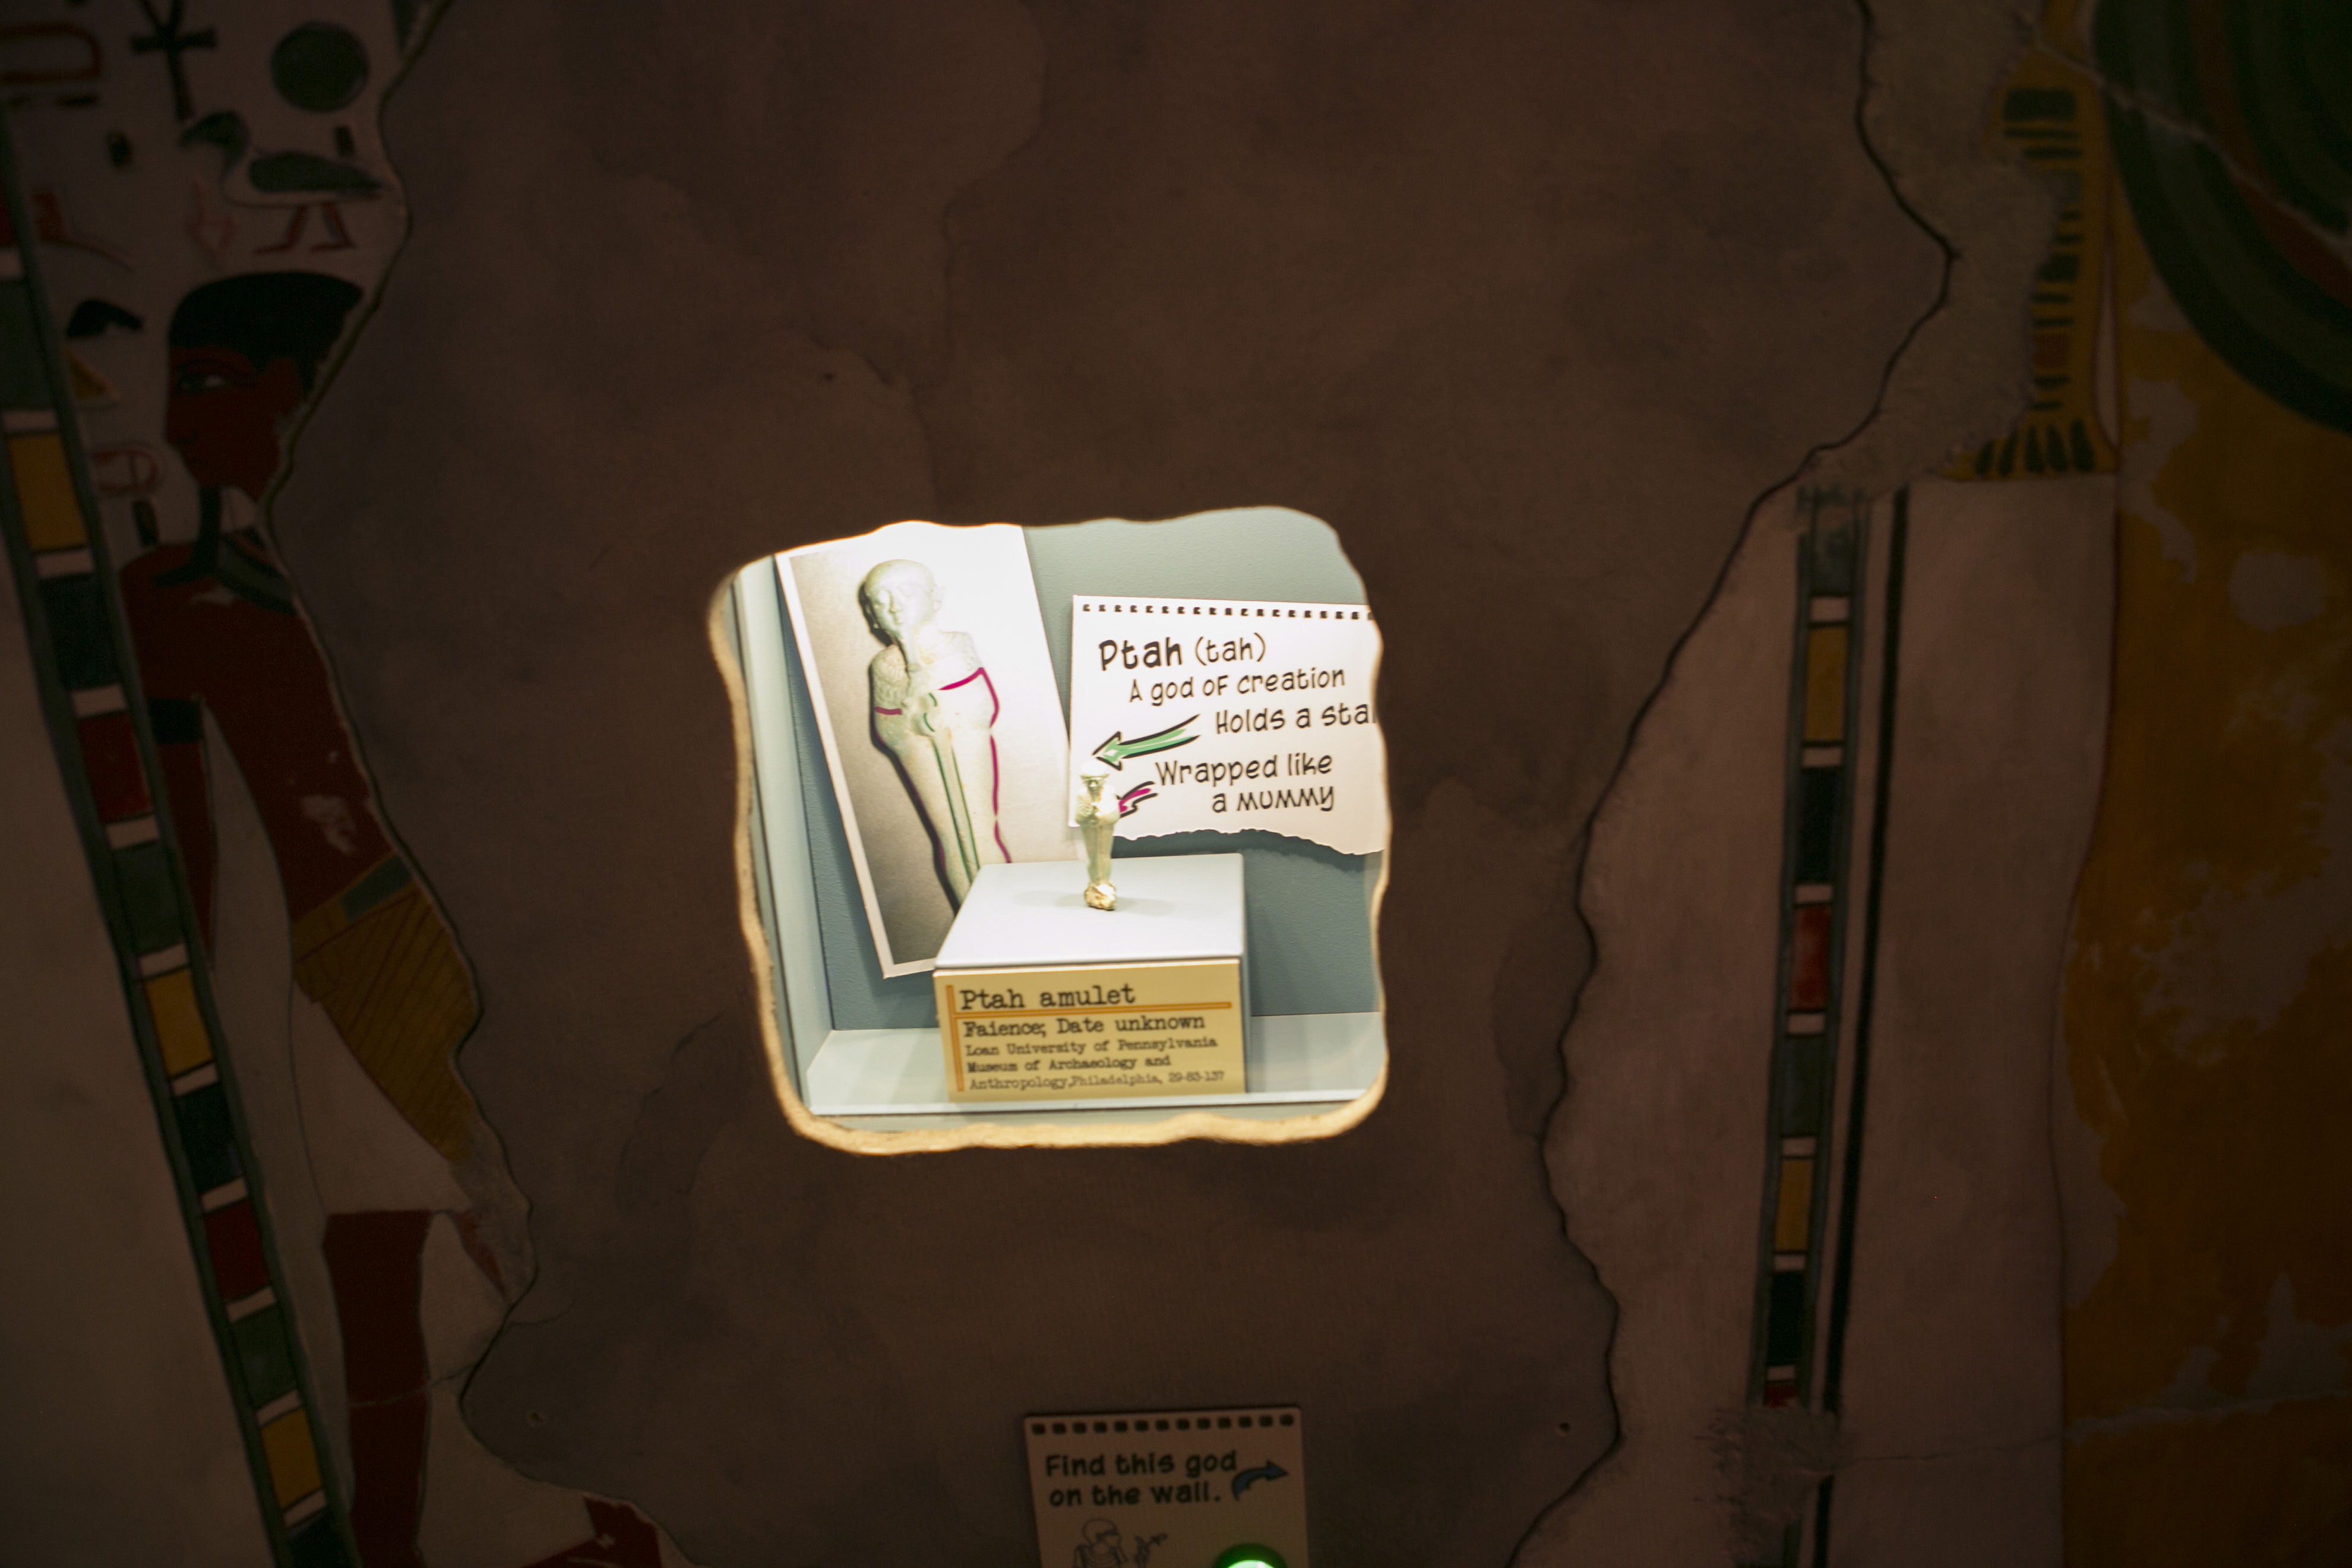
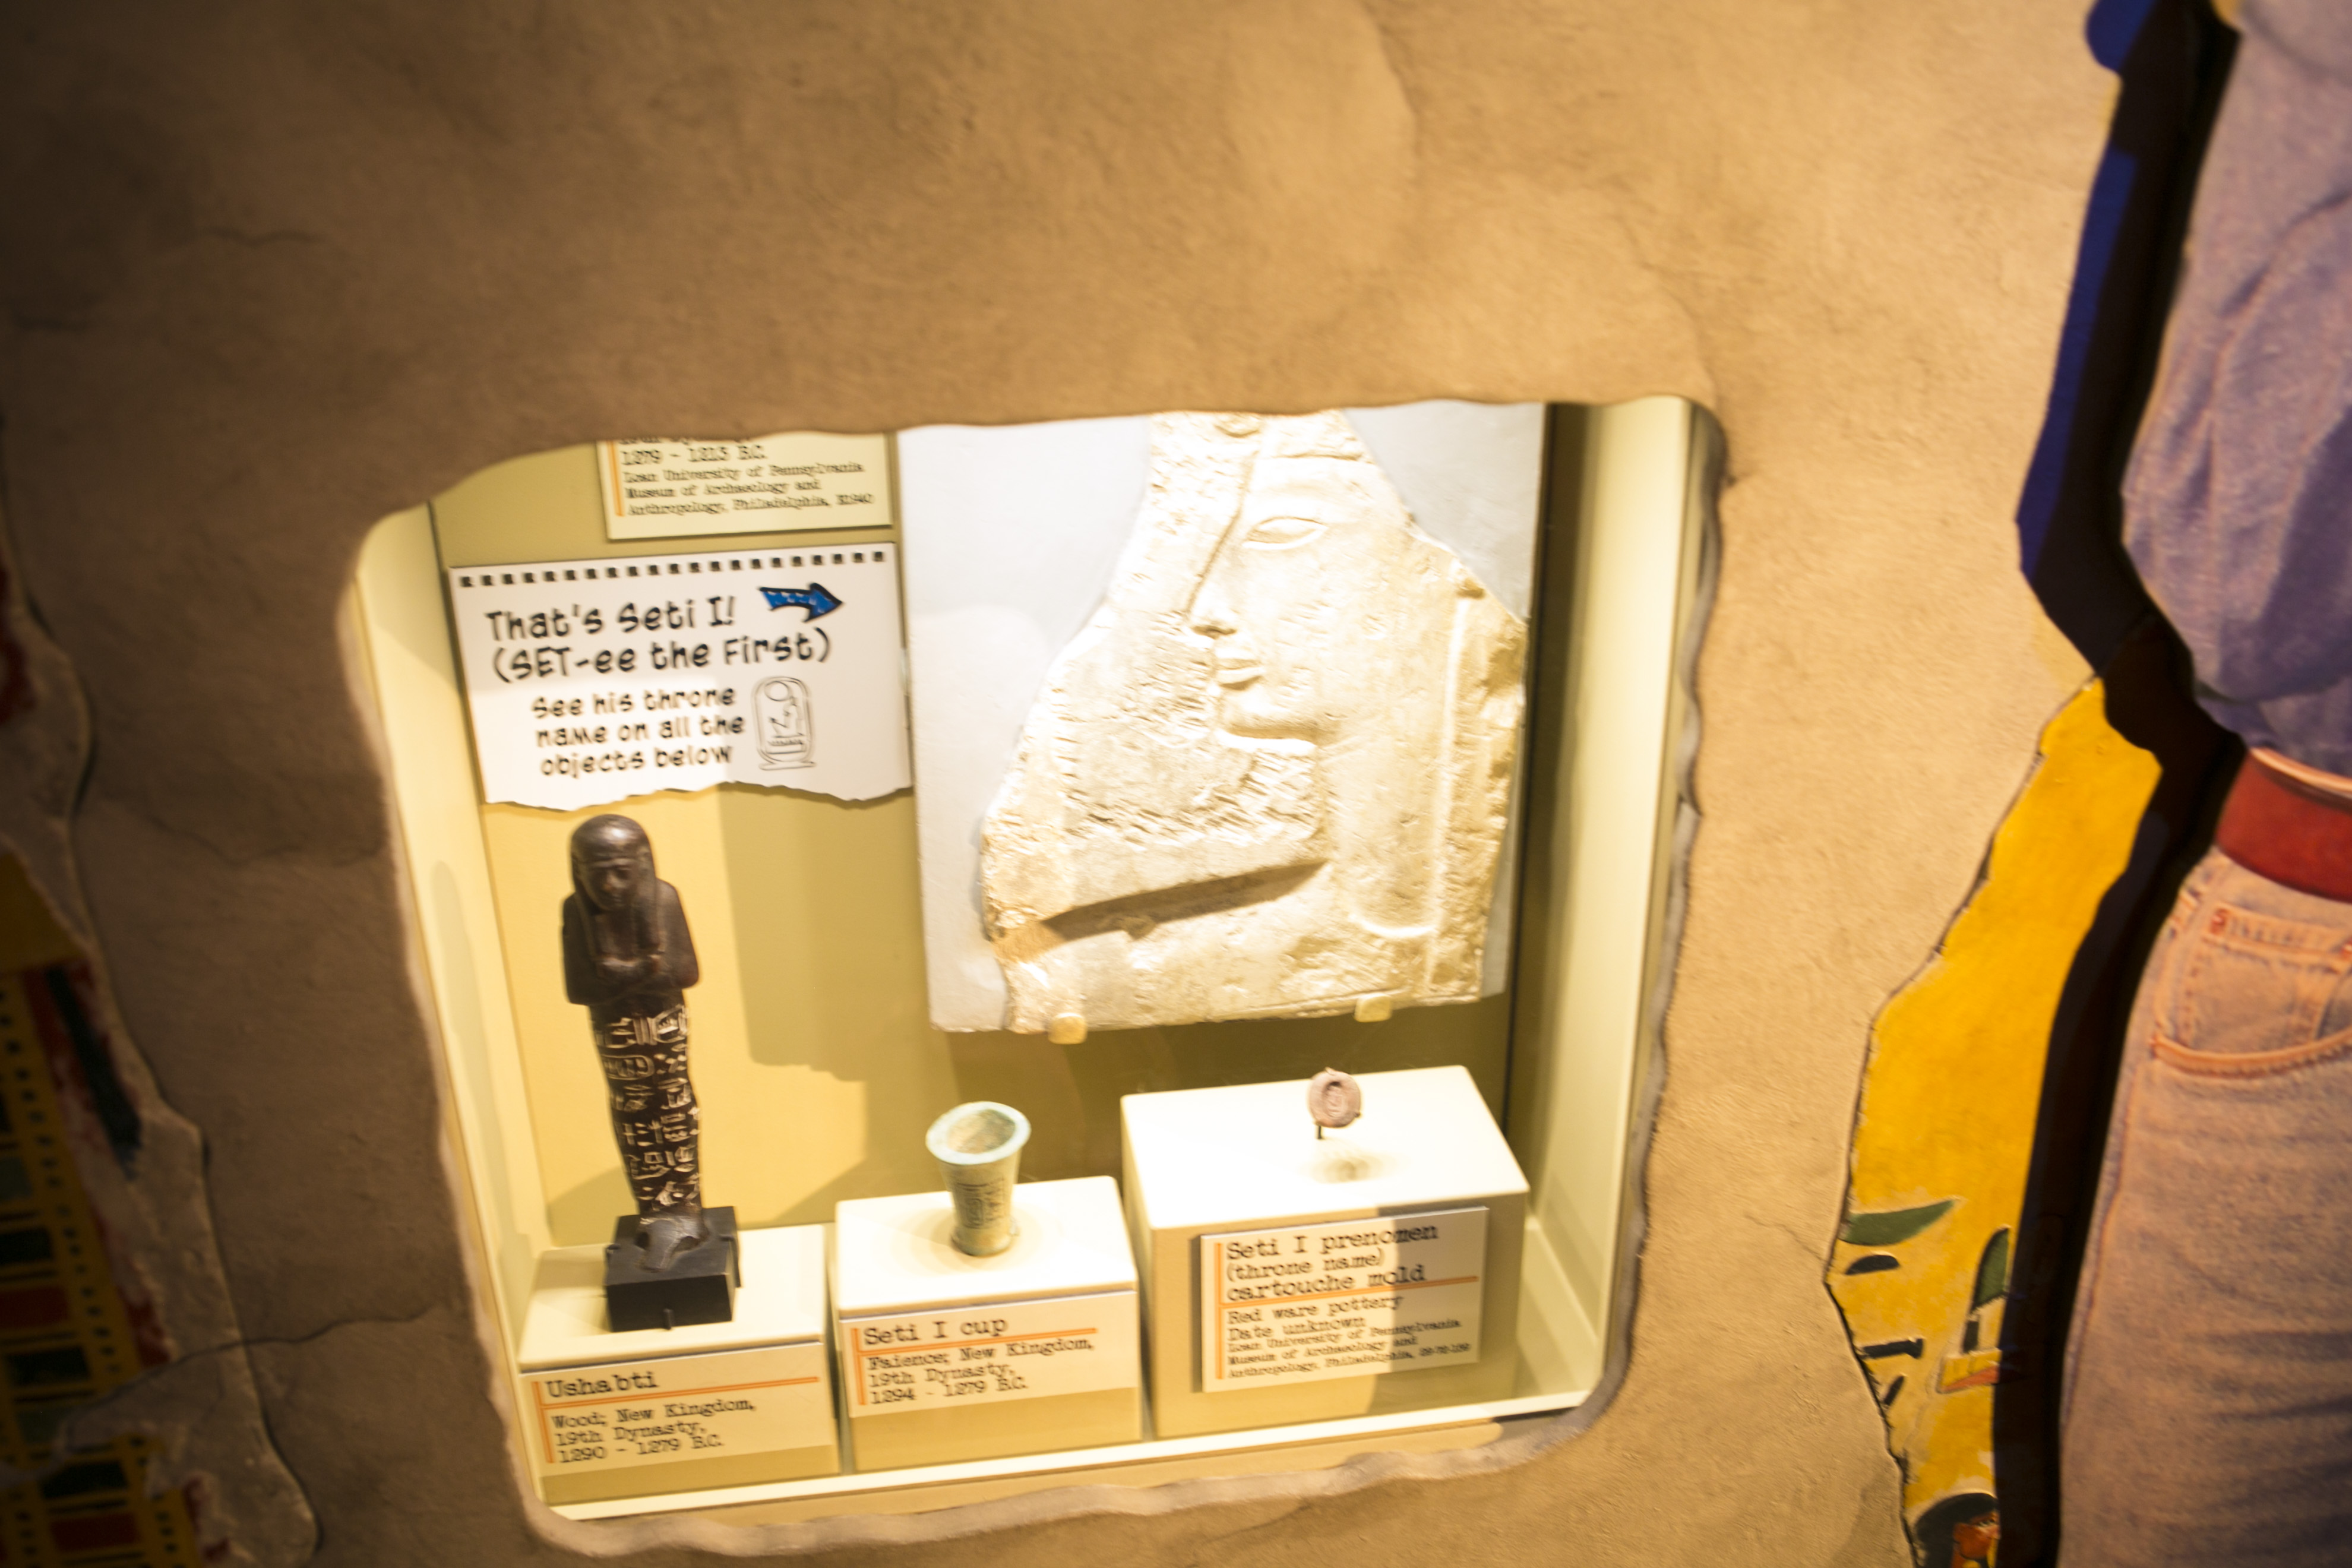
How Egyptian Priests prepared mummies for the tomb


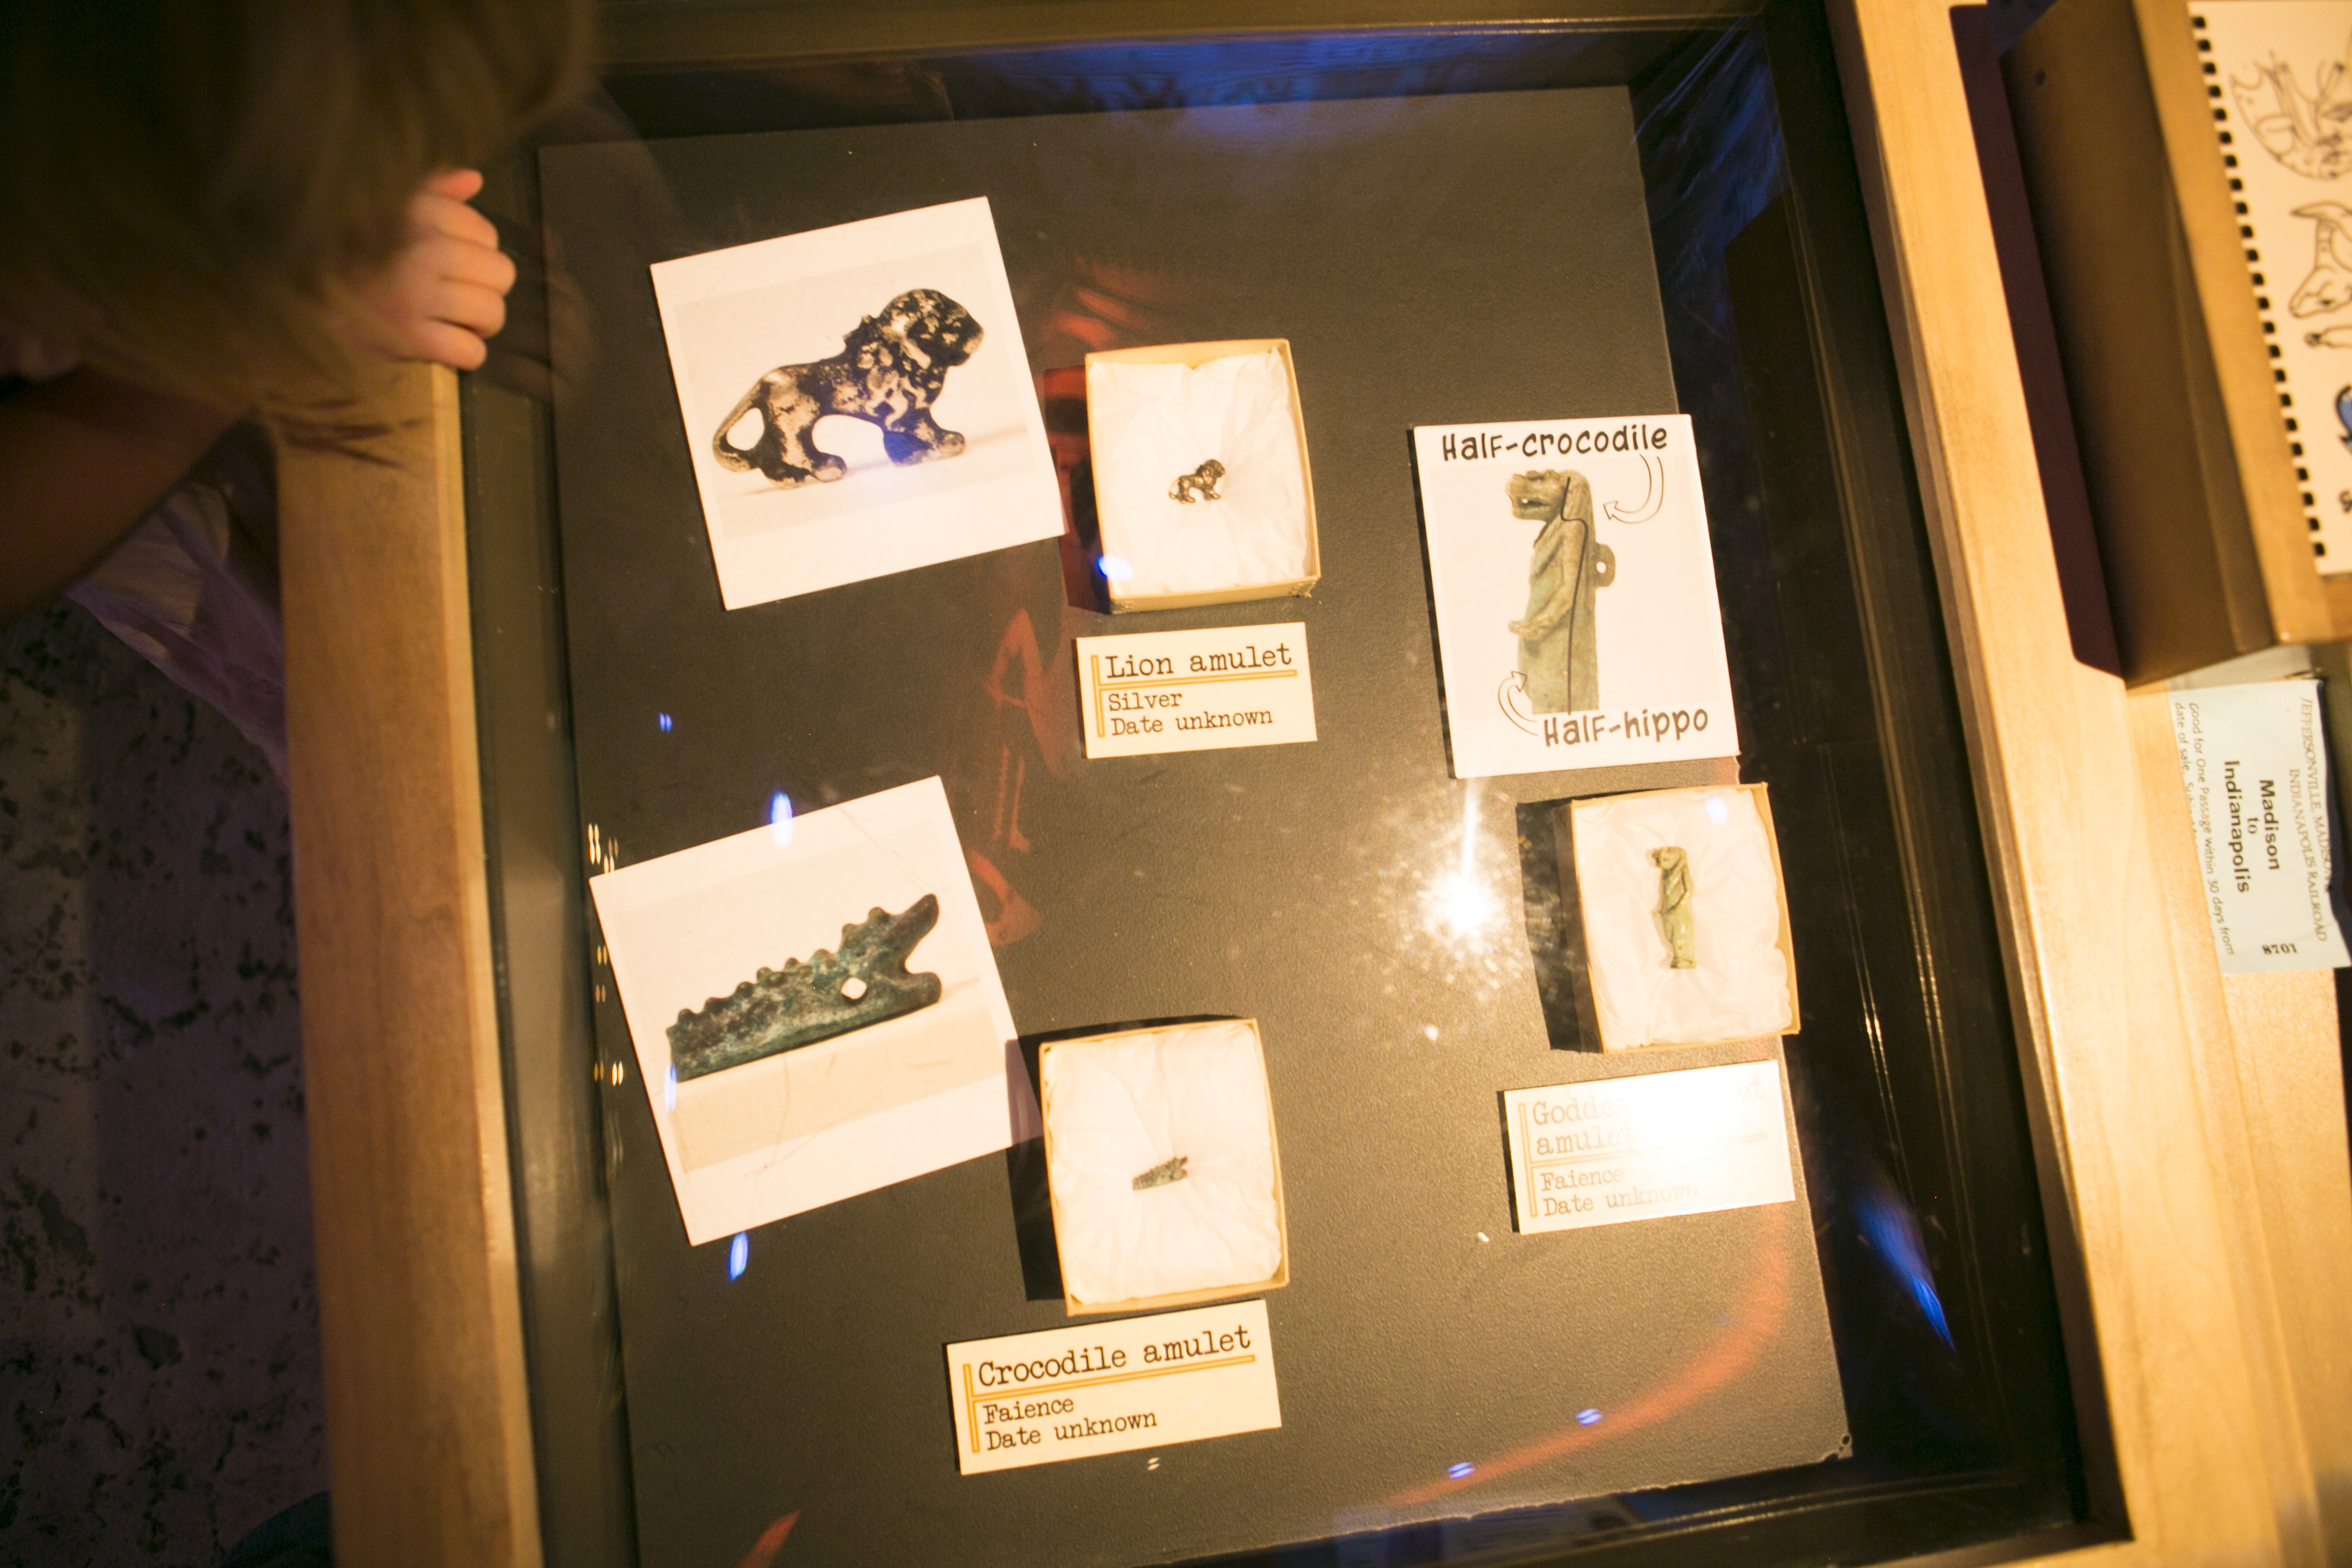
Egyptian Amulet

The train exhibit was Milo’s FAVORITE! Though he was pretty tired by this point. They loved the tunnels that you could crawl under and see trains down there and the trains that went above.
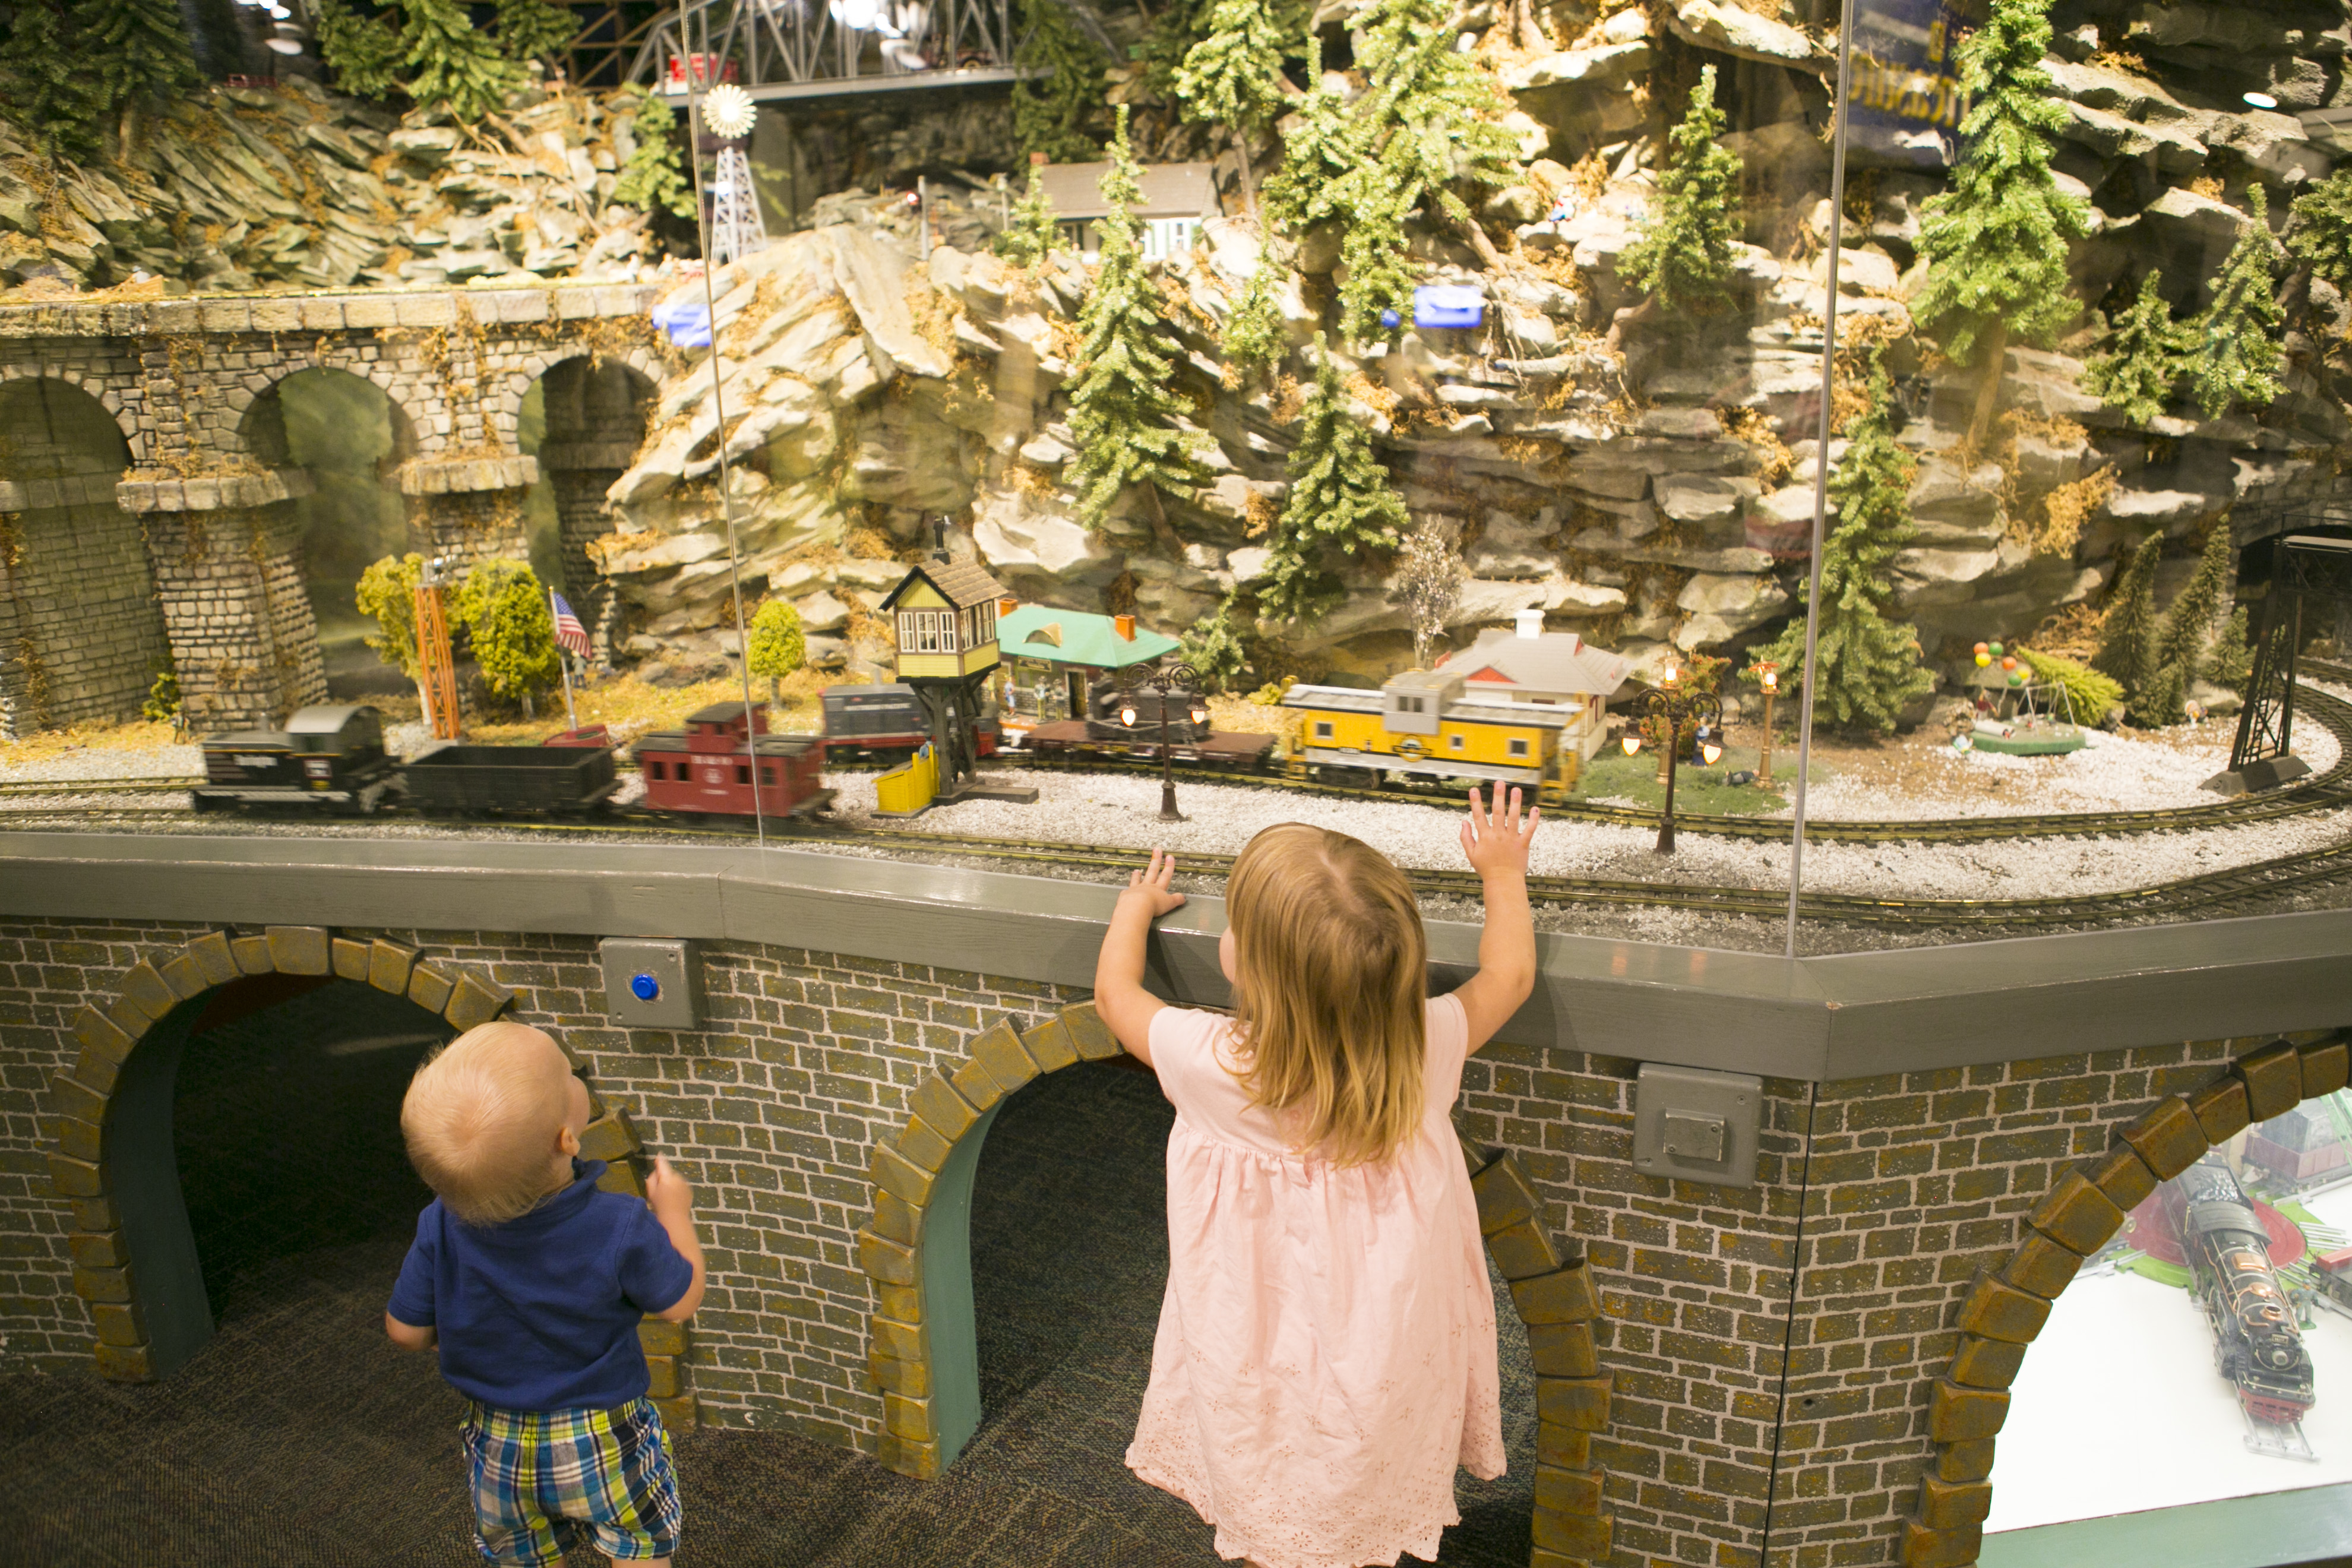
Train Exhibit
I had a hard time peeling him away from this one. Fortunately one distraction sits next to another which makes the transitions easier.
For another career, I don’t think I would mind perusing miniature building. How cute is this boho/ hobbit styled train station? Reminds me of Harry Potter.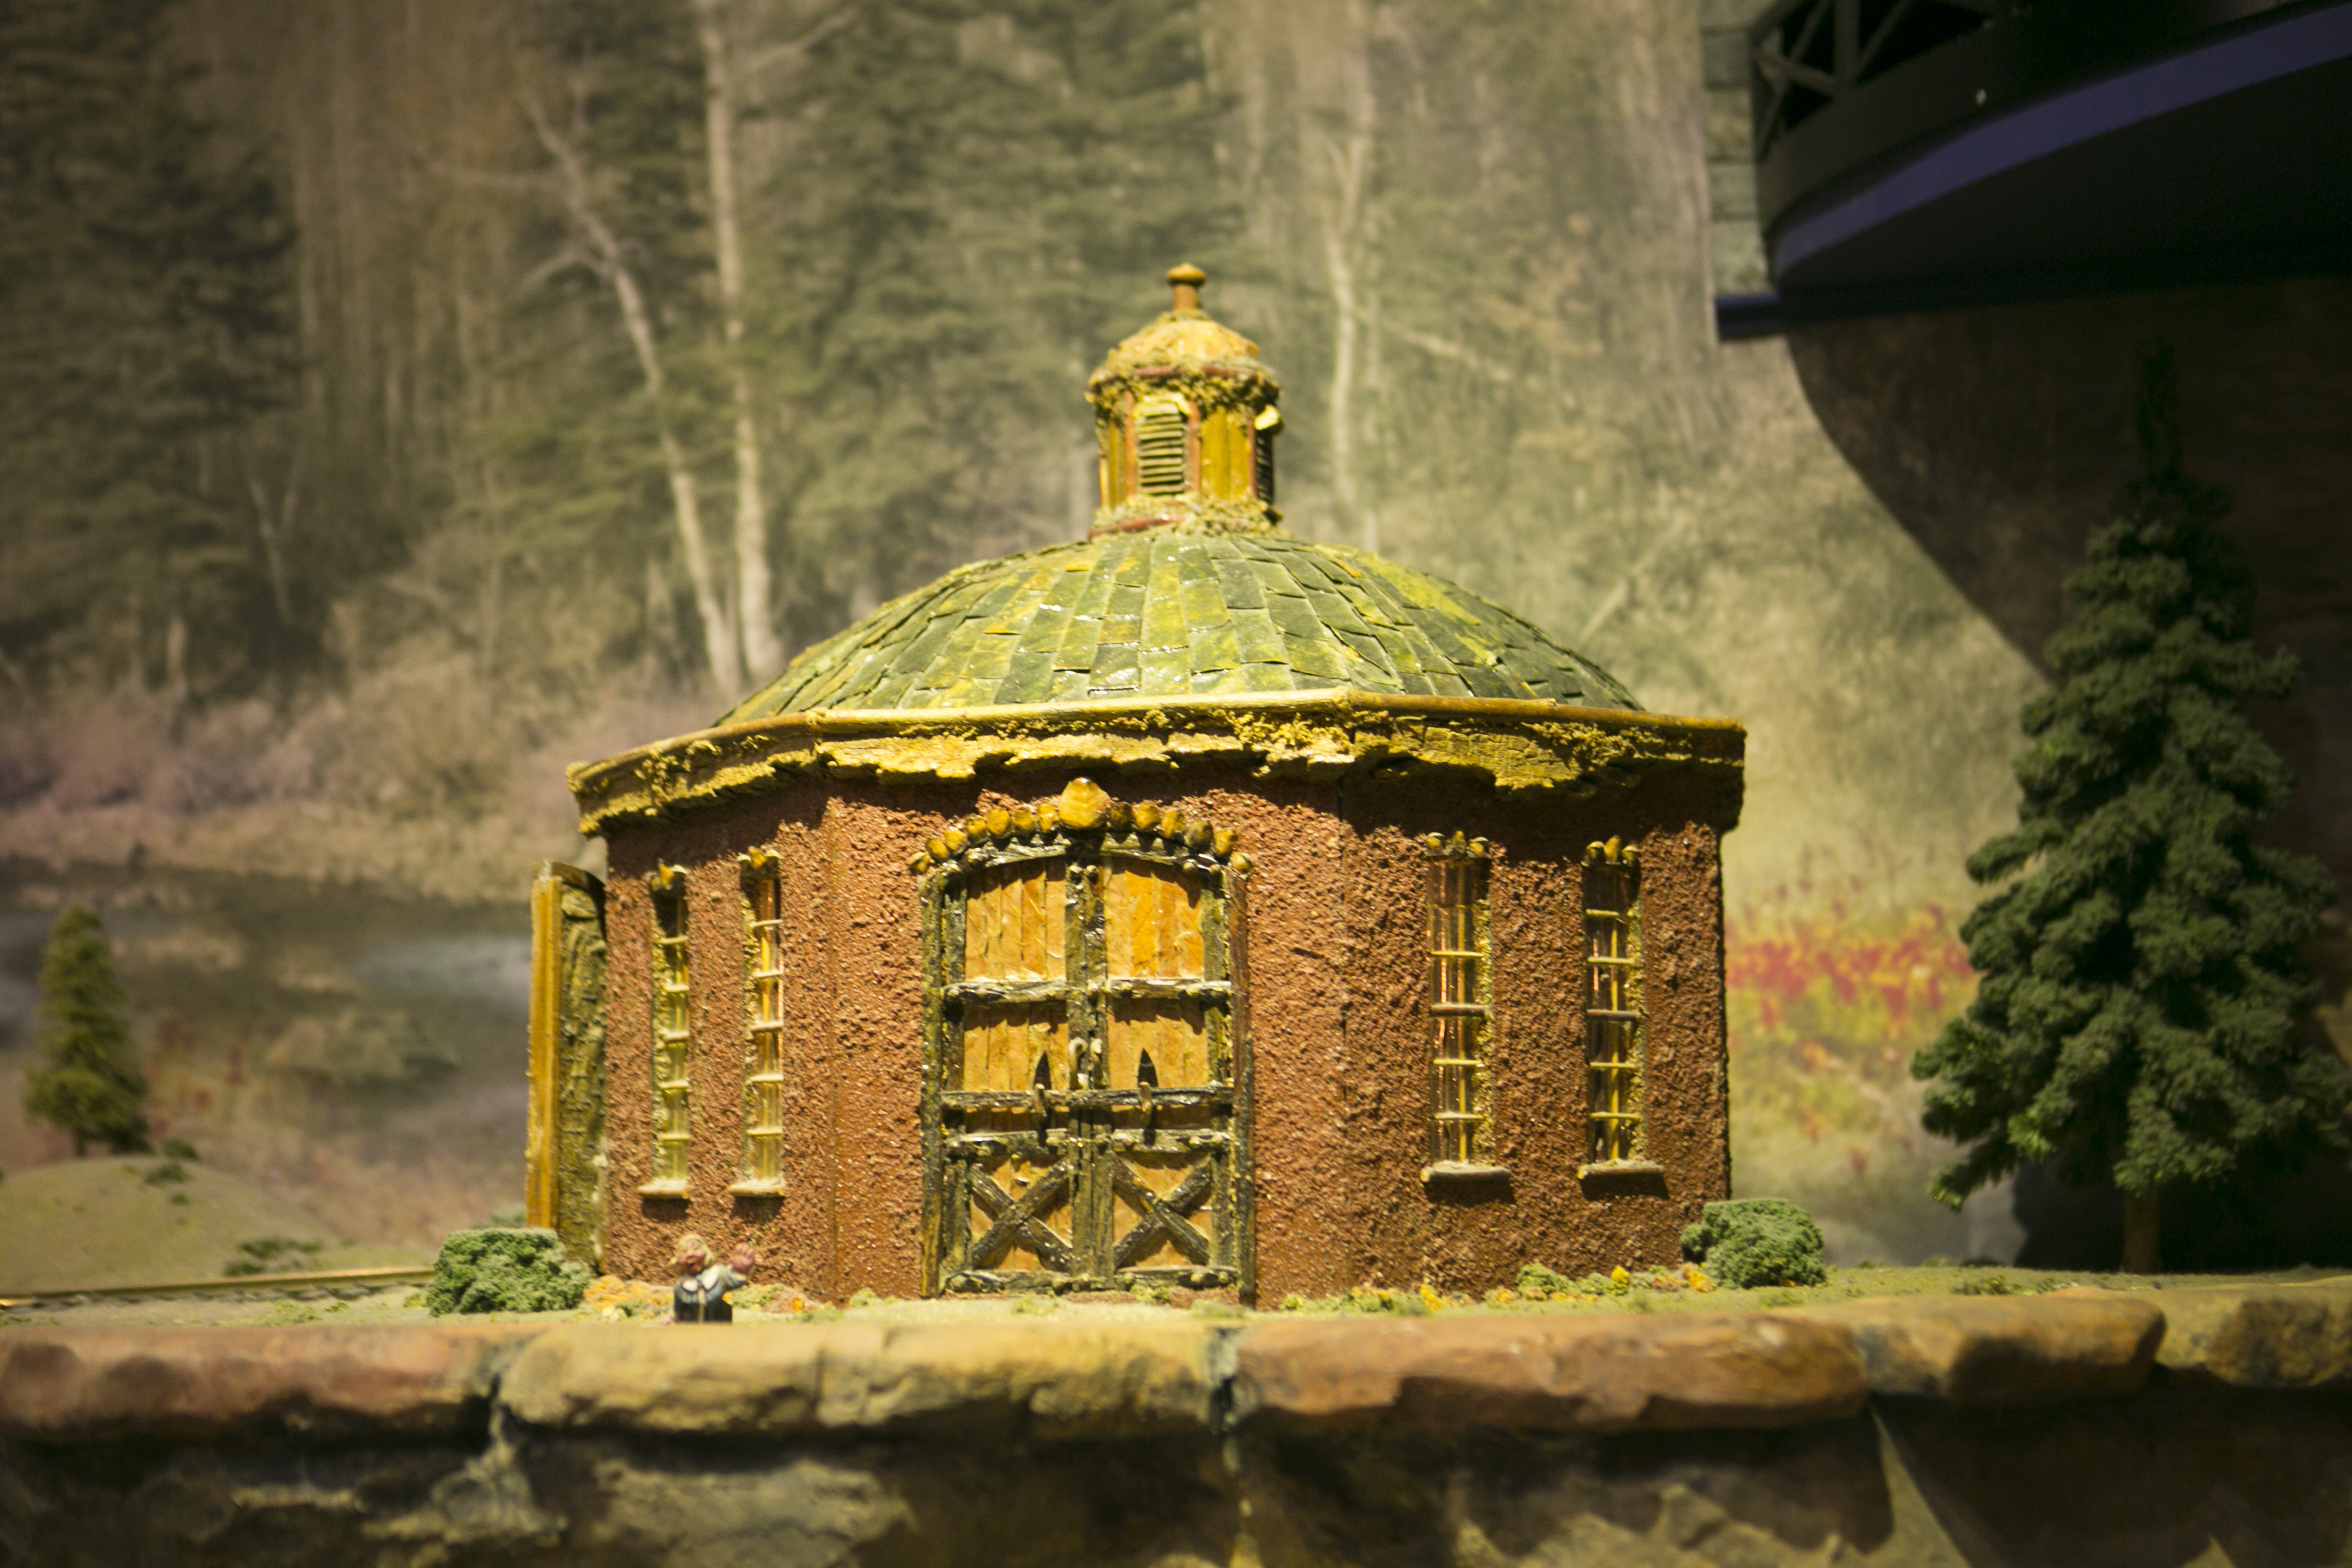
A completely amazing full stream locomotive. Milo was ecstatic.

Steam Locomotive
An assortment of metal vintage trains. Love these! Reminds me of the grandparents fun tradition of a train going around the Christmas tree. Smaller versions though. These ones were pretty big!
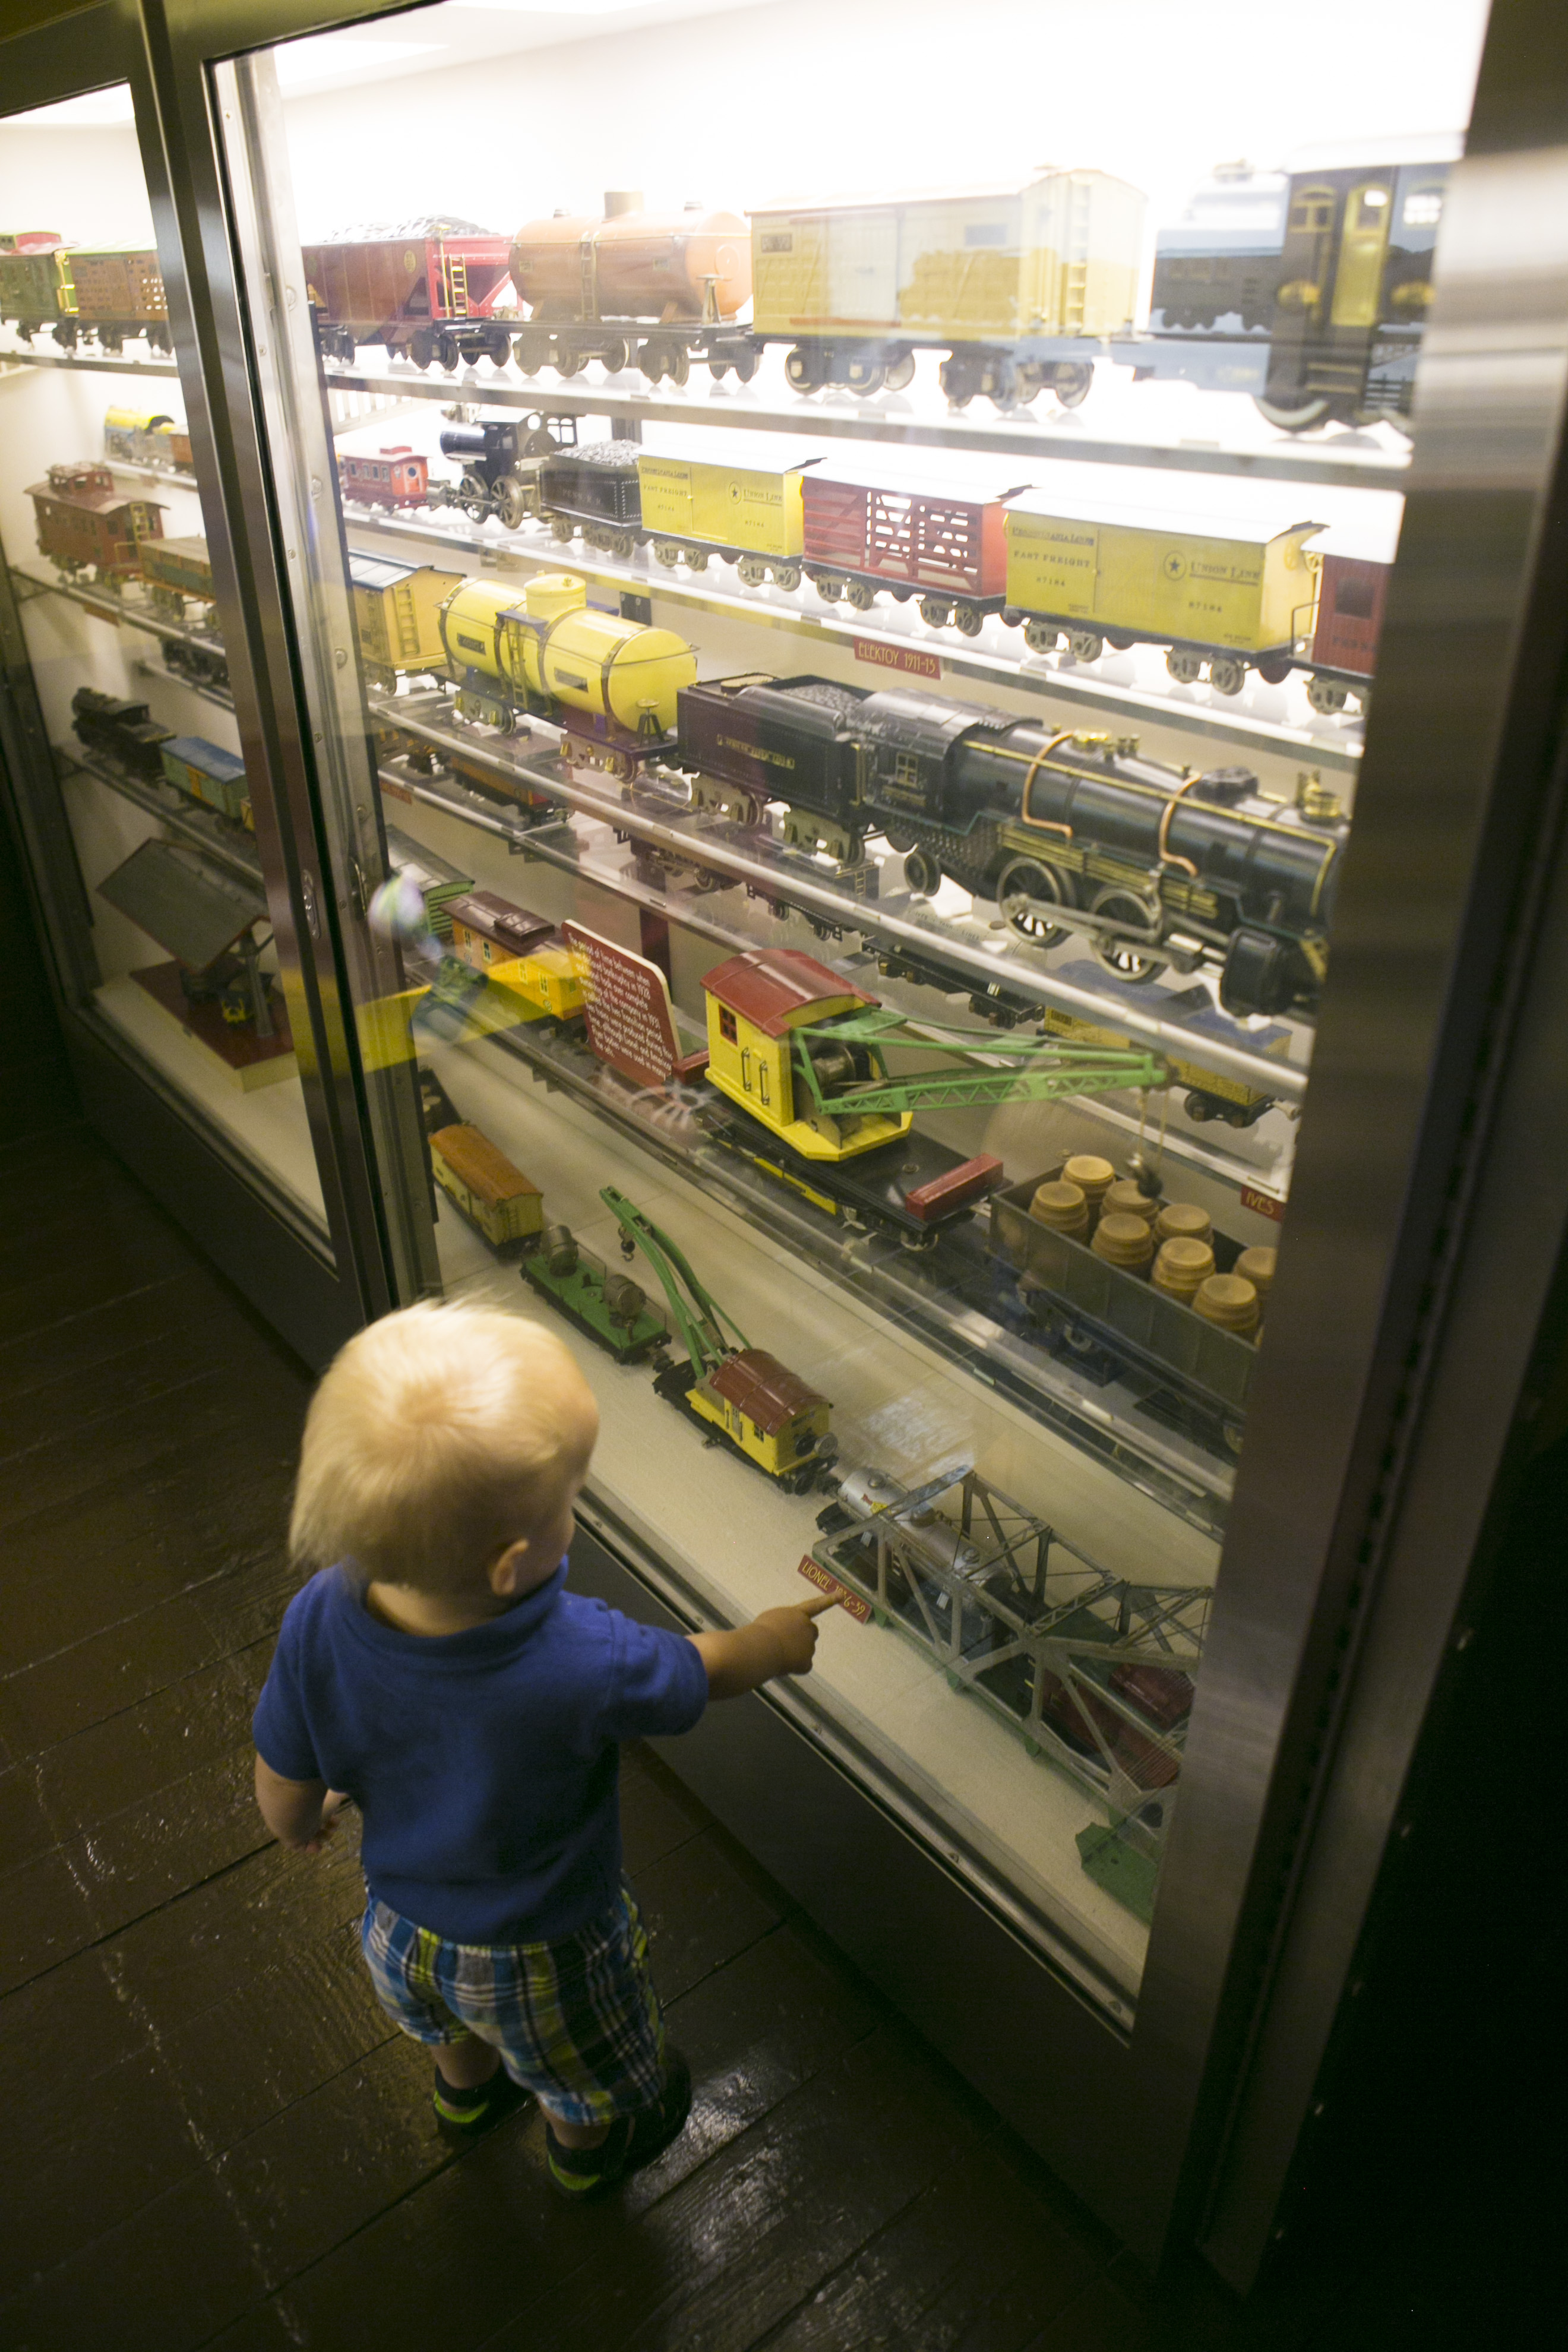
Collection of Vintage Train models
Outside this windows were rolling tape of the countryside and such as you went on a pretend journey.

Inside the staged steamed locomotive for a ride
More vintage trains! And me… 
Loved this train table and how you could stand in the middle of it if you wanted to. I think that only other place I had seen this before was at the Raleigh Children’s museum.

In the basement of the Museum was an assortment of plastic Chihuly art pieces that the children could poke into the holes and make a masterpiece. Also, there was a pretty legit rotating chair that leaned back so you could observe the art on the ceiling. I would have loved to linger longer on it but somehow Milo still had a LOT of energy and was running about. I will post a video here shortly. 
Getting to know our Asian neighbors! Madeline played house inside as setup of a Chinese home. Play food, the works.
We could go to a play market place, learn calligraphy, watch a show (which we missed) and Madeline has fun dressing up in traditional Opera attire.

Traditional Chinese Opera Attire

And last but not least, shadow puppets! Can I just say that this is a developing passion of mine! We have pursued that as a Christmas holiday tradition telling the Nativity story and make puppets each year for it. I will make a separate post all about that shortly!
What were your favorite exhibits? What was your favorite to visit and why? Tell me in the comments below and don’t forget to subscribe!
Photography by: http://effervescentmediaworks.com

Be the first to comment